---
title: "Konfiguracja równoważenia obciążenia w NSX (EN)"
description: "Learn how to configure Load Balancing"
url: https://docs.ovhcloud.com/pl/guides/hosted-private-cloud/powered-by-vmware/nsx-configure-loadbalancing
lang: pl
lastUpdated: 2023-02-27
---
# Konfiguracja równoważenia obciążenia w NSX (EN)
## Objective
NSX allows load balancing on a level 4 (TCP or UDP) layer or level 7 (HTTP or HTTPS) layer.
**Learn how to set up load balancing in NSX**
:::warning
OVHcloud provides services for which you are responsible, with regard to their configuration and management. It is therefore your responsibility to ensure that they work properly.
This guide is designed to assist you as much as possible with common tasks. However, we recommend contacting a [specialist provider](https://partner.ovhcloud.com/pl/directory/) if you experience any difficulties or doubts when it comes to managing, using or setting up a service on a server.
:::
## Requirements
- Being an administrative contact of your [Hosted Private Cloud infrastructure](https://www.ovhcloud.com/pl/enterprise/products/hosted-private-cloud/) to receive login credentials.
- A user account with access to the OVHcloud Control Panel.
- Having **NSX** deployed with two segments configured in your NSX configuration, you can use this guide [Segment management in NSX](/pl/guides/hosted-private-cloud/powered-by-vmware/nsx-segment-management.md).
- Two virtual machines with NGINX enabled on one segment.
## Instructions
We will :
- Enable Load Balancing on the gateway **ovh-T1-gw**.
- Create a server pool from two virtual machines that use a web server running on port 80.
- Add a virtual server in the Load Balancer configuration which contains our server pool.
- Set a NAT rule to redirect to the virtual server.
### Creating the tag on both virtual machines.
To simplify the administration of the Load Balancer, we will use a tag on the two virtual machines in the future server pool.
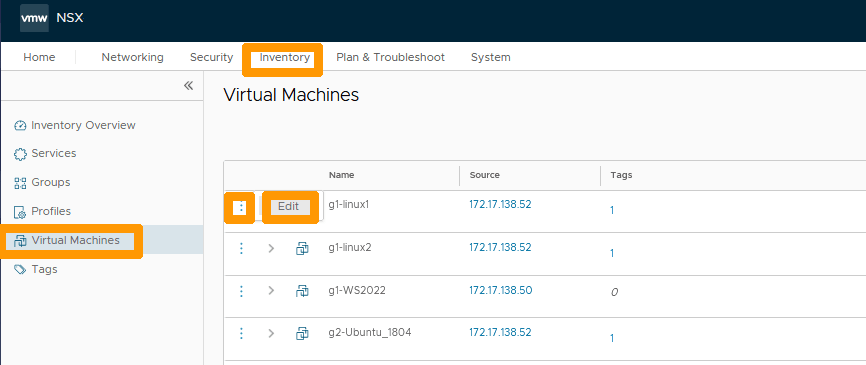
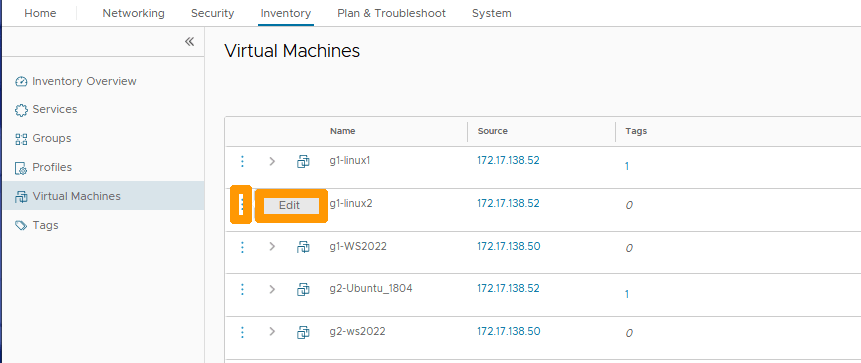
In the NSX interface go to the `Inventory
` tab and click on `Virtual Machines
` on the left.
Then click on the `three vertical dots
` to the left of the first virtual machine and choose `Edit
` from the menu.
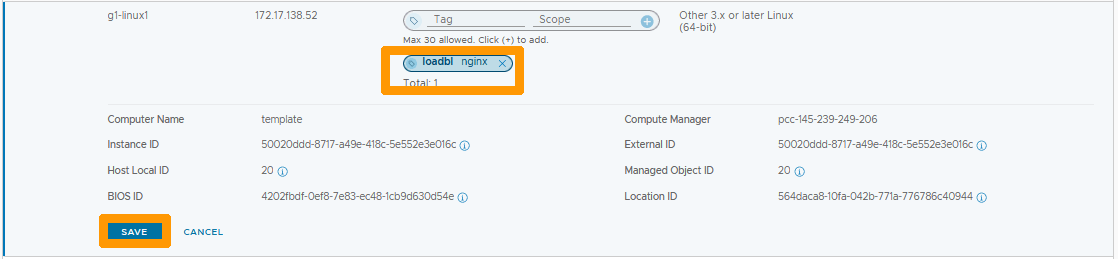
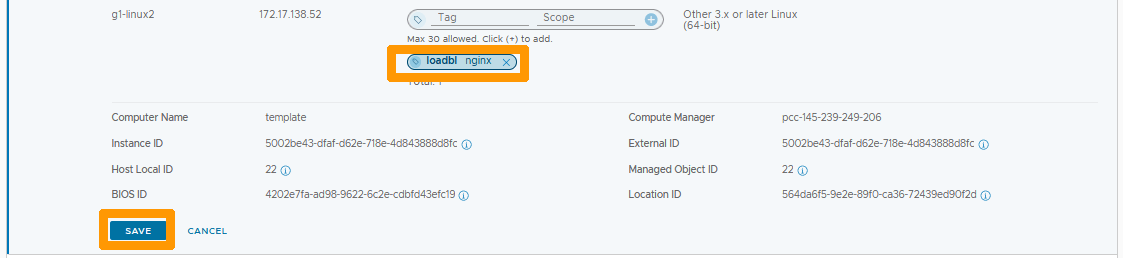
Replace **Tag**
with `loadbl`
, then click `Add Item(s) loadbl
` below.
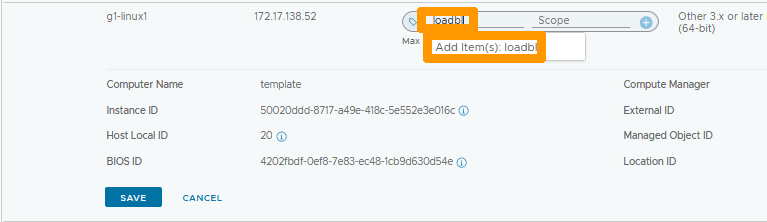
Change **Scope**
to `nginx
`, then click `Add Item(s) nginx
` below.
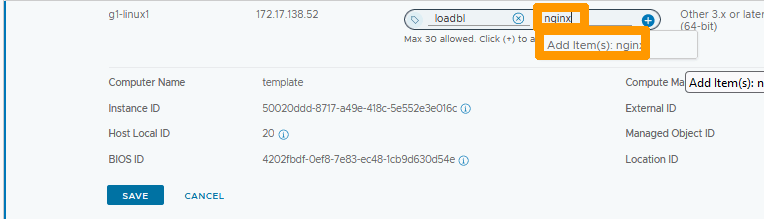
Click the `\+
` sign next to your tag to add it to your virtual machine.
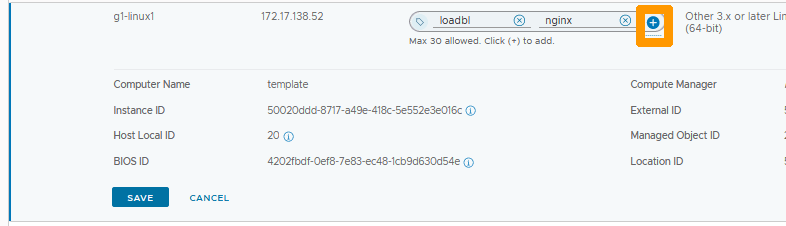
The tag appears, click `SAVE
`.
Click the `three vertical dots
` to the left of the second virtual machine and choose `Edit
` from the menu.
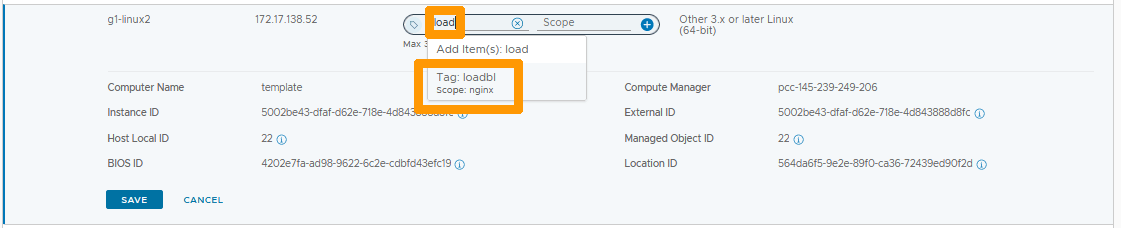
Replace **Tag**
with `load
` and select the `Tag: loadbl Scope: nginx
` that just appeared below.
Click the `\+
` sign next to your tag to add it to your second virtual machine.
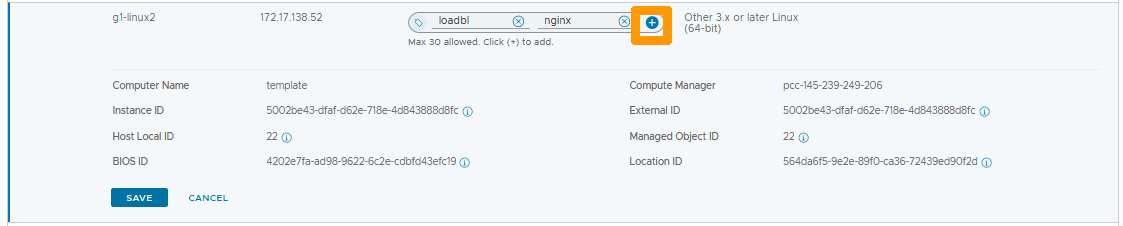
Click `SAVE
` to add the tag to your virtual machine.
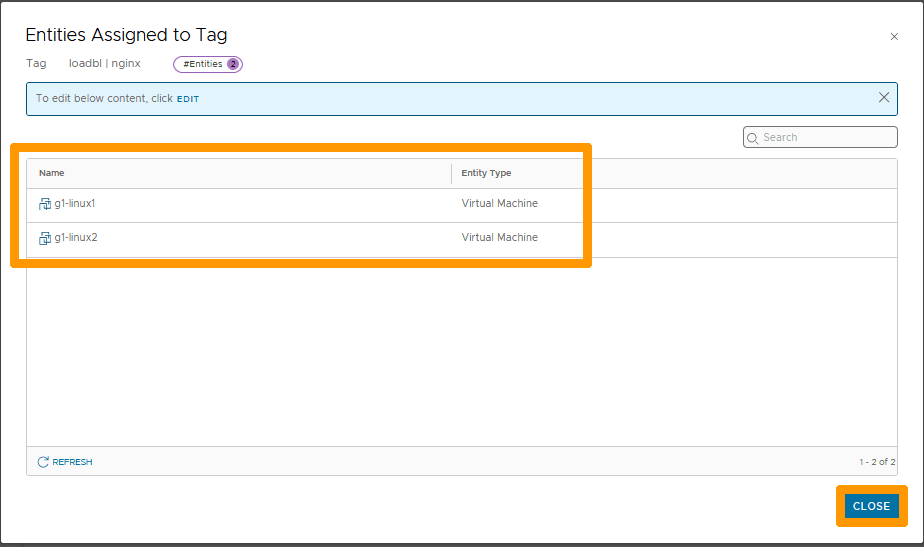
Stay on **Inventory**
, click `Tags
` and click on the `number
` to the right of the marker you created.
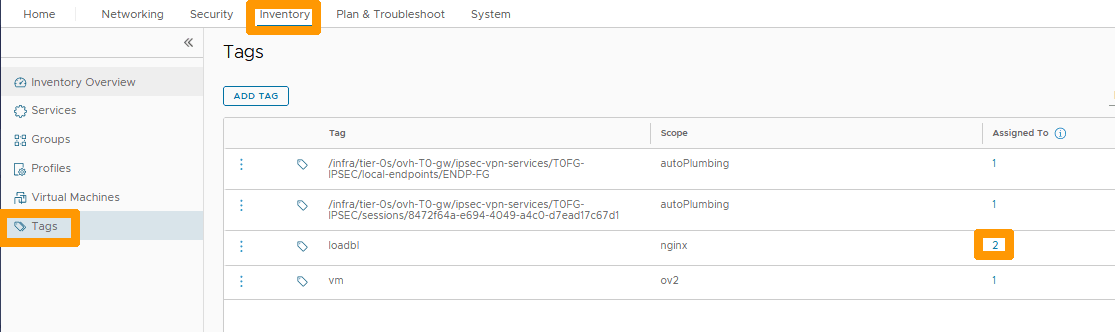
You can see your two virtual machines using the same tag.
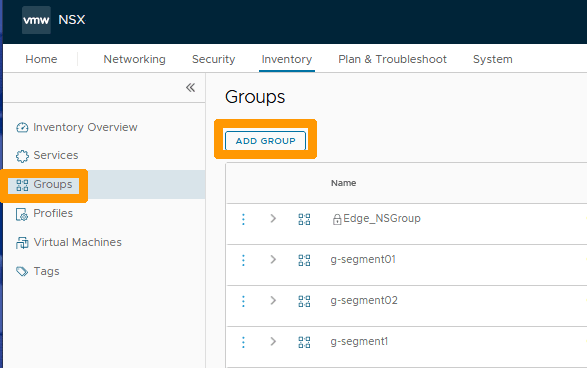
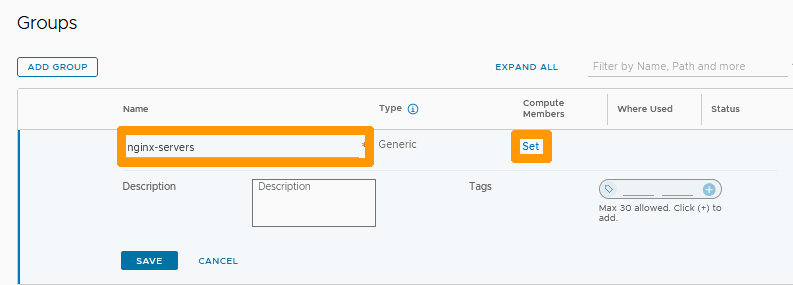
### Add group with created tag
Select `Groups
` on the left and click `ADD GROUP
`.
Enter `nginx-server`
below **Name**
and click `SET
` under **Compute Members**
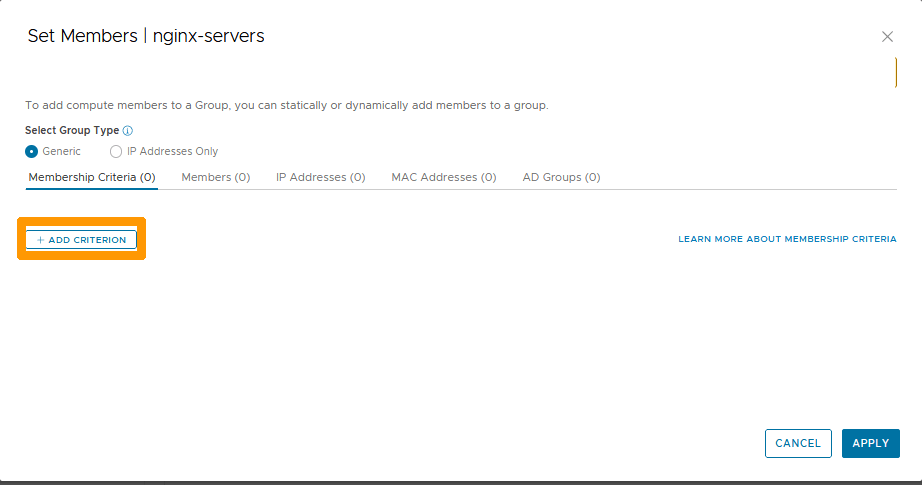
.
Click `\+ ADD CRITERION
`.
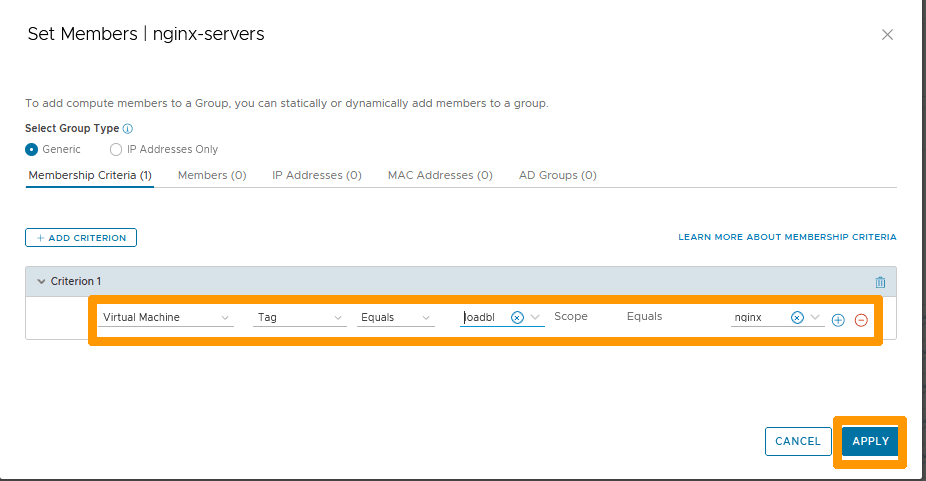
Keep **Virtual Machine Tag Equals**
and select your `loadbl
` tag with its `nginx
` scope and click `APPLY
`.
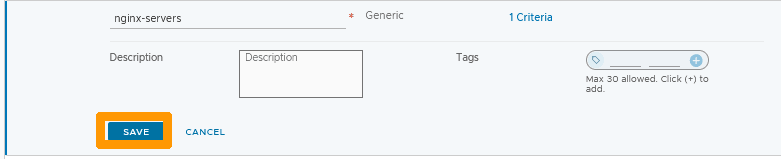
Click `SAVE
`.
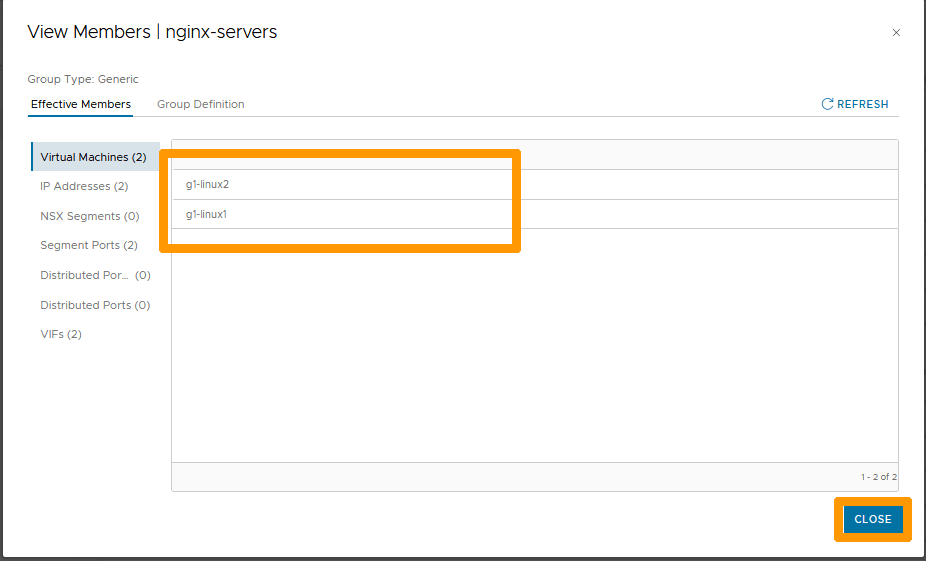
Click `View Members
` to the right of the group.
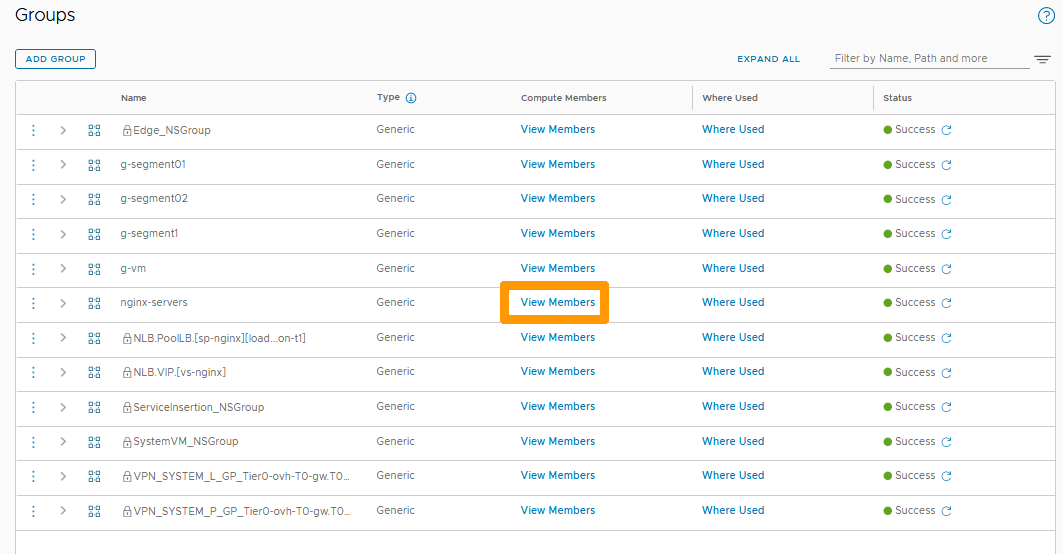
The list of virtual machines is automatically added to the group based on the criteria in your tag.
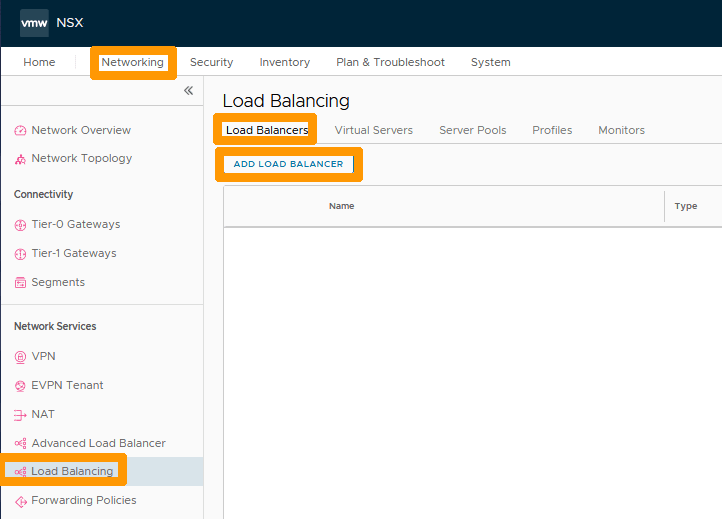
### Activating the Load Balancer
Go to the `Networking
` tab and click on `Load Balancing
` in the **Network Services**
section on the left.
Then go to the `Load Balancers
` tab and click `ADD LOAD BALANCER
`.
Enter `loadbalancer-on-t1`
below **Name**
, select `ovh-T1-gw
` under **Attachment**
and click `SAVE
`.

Click `NO
`.

The Load Balancer is created and activated on the **ovh-T1-gw** gateway.

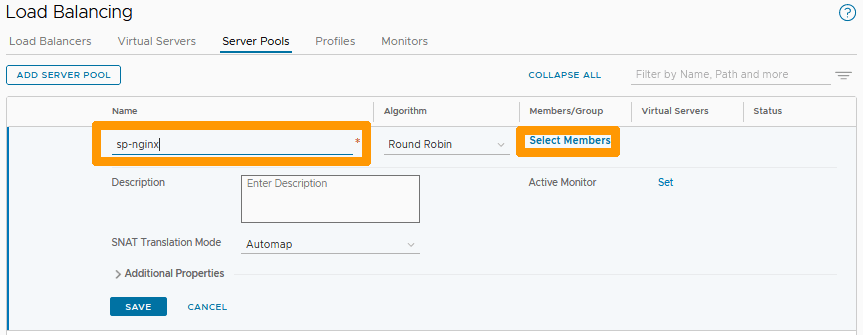
### Server pool creation
Go to the `Server Pools
` tab and click `ADD SERVER POOL
`.
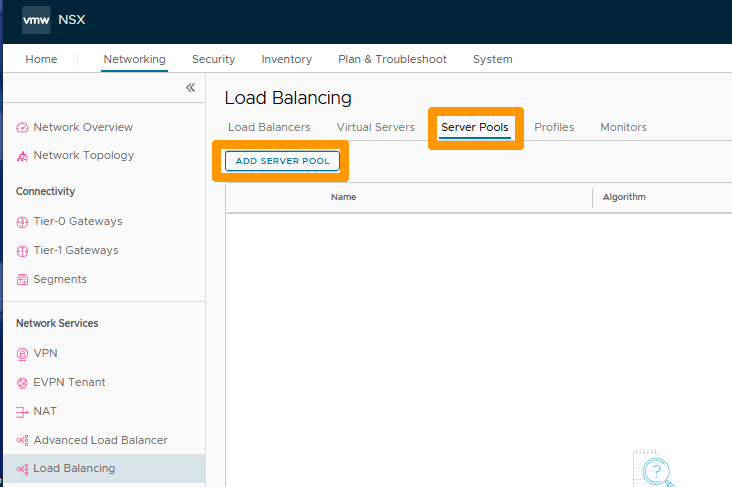
Enter `sp-nginx`
below **Name**
and click `Select Members
` under **Members/Group**
.
Click `Select a group
` and choose the `nginx-servers
` group you created then click `APPLY
`.
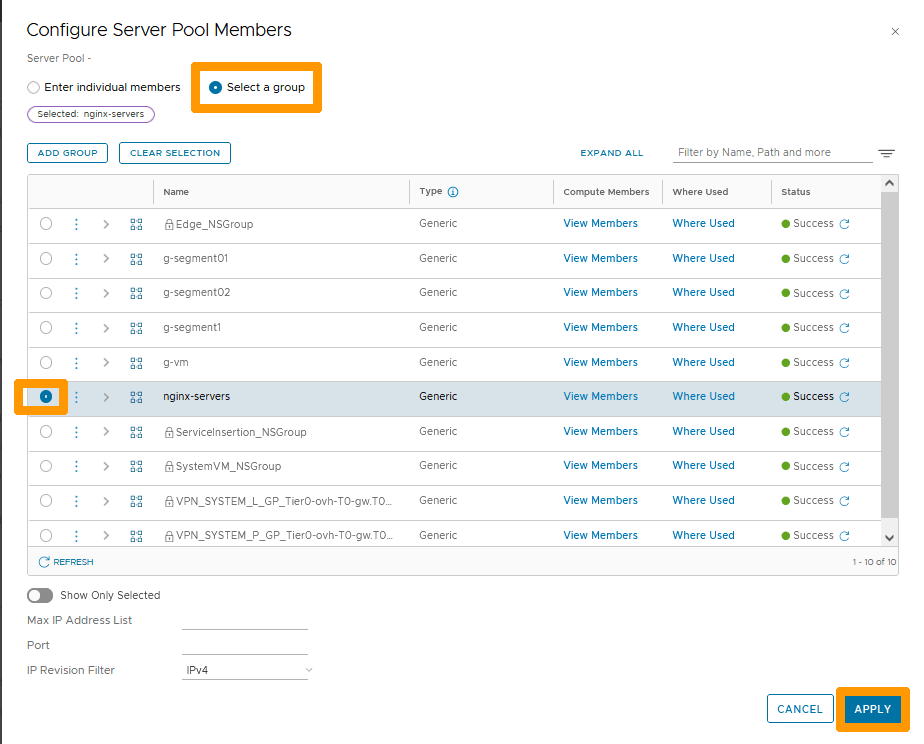
Click `SAVE
` to apply your changes.
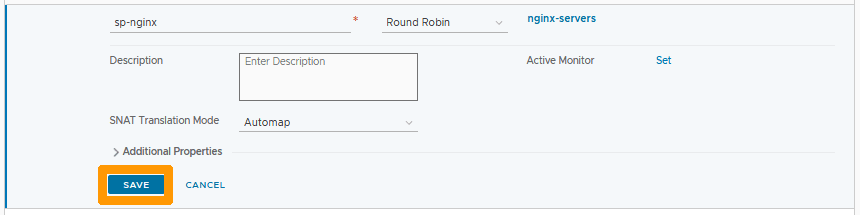
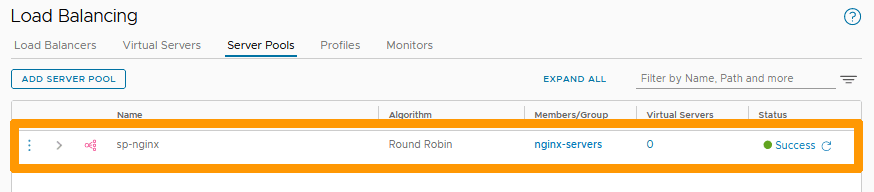
Your server pool is created with your two virtual machines that are members of the group.
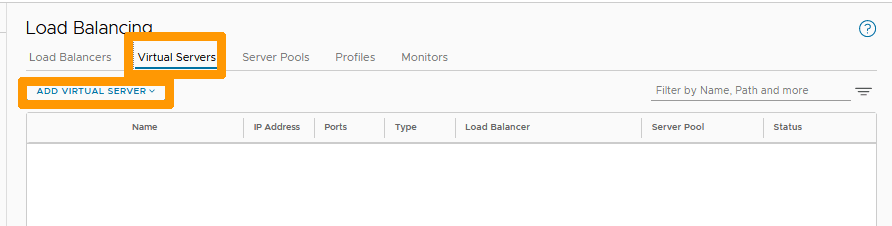
### Virtual server creation
Your server pool is created with your two virtual machines which are members of the group. Go to the `Virtual Servers
` tab and click on `ADD VIRTUAL SERVER
`.
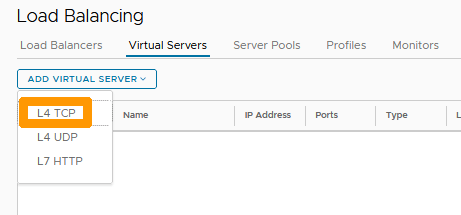
Select `L4 TCP
`.
Fill in this information :
- **Name** : Name of your virtual server `vs-nginx`.
- **IP Address**: Front-end IP address of your virtual server on the same network as your NGINX virtual machines `192.168.102.3`.
- **Port** : Port 80.
- **Load Balancer**: Your load balancer loadbalancer-on-t1.
- **Server Pool**: Your server pool sp-nginx.
Then click `SAVE
`.

Your virtual server is active. If you connect from a machine that uses a segment on a gateway of type **Tier-1 Gateways** with this URL `http://192.168.102.3`, the Load Balancer will connect to one of the two virtual machines configured in your group.
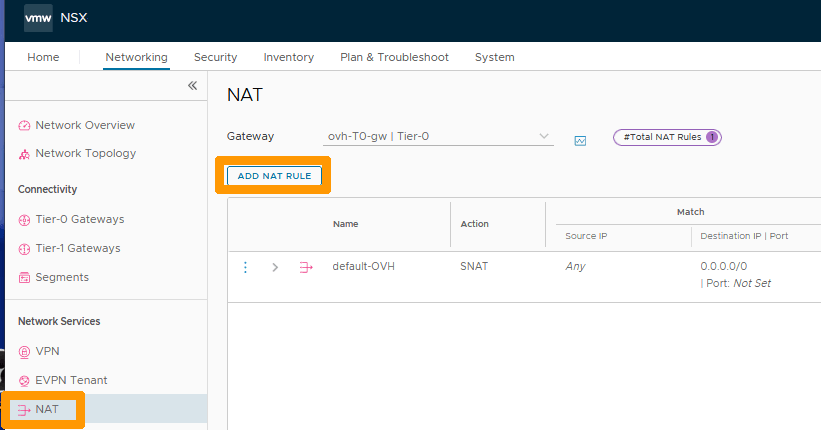
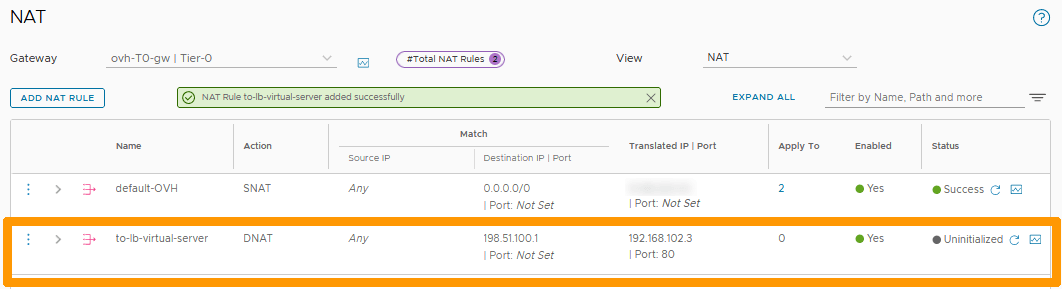
### Adding a NAT rule
Go to `NAT
` in the **Network Services**
section on the left and click `ADD NAT RULE
`.
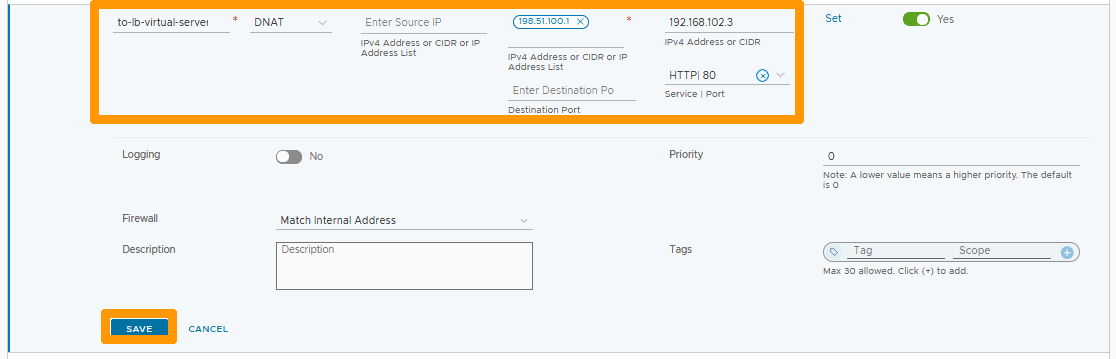
Enter `to-lb-virtual-server
` in your rule **Name**
with these options :
- **Action** : DNAT.
- **Destination IP** : A virtual IP address of your T0 such as `198.51.100.1`.
- **Translated IP** : IP address of your virtual server `192.168.102.3`.
- **Service PORT** : Choose the predefined port HTTP| 80.
Then click `SAVE
`.
Your rule is active. If you click on `http://virtual-ip-address-on-T0` you will be connected to your virtual server which will redirect the flow to one of the servers in your group.
## Go further [](#)
[Getting started with NSX](/pl/guides/hosted-private-cloud/powered-by-vmware/nsx-first-steps.md)
[Segment management in NSX](/pl/guides/hosted-private-cloud/powered-by-vmware/nsx-segment-management.md)
[Implementing NAT for port redirections in NSX](/pl/guides/hosted-private-cloud/powered-by-vmware/nsx-configure-nat-redirection.md)
[VMware NSX Load Balancer documentation](https://docs.vmware.com/en/VMware-NSX-T-Data-Center/3.2/administration/GUID-D39660D9-278B-4D08-89DF-B42C5400FEB2.html)
If you need training or technical assistance to implement our solutions, contact your sales representative or click on [this link](https://www.ovhcloud.com/pl/professional-services/) to get a quote and ask our Professional Services experts for a custom analysis of your project.
Join our community of users on [https://community.ovh.com/en/](https://community.ovh.com/en/).