---
title: "Build a Strapi app connected to Public Cloud Databases for PostgreSQL"
description: "Find out how to build a Strapi application connected to an OVHcloud Managed PostgreSQL service"
url: https://docs.ovhcloud.com/es/guides/public-cloud/databases/postgresql-tuto-connect-strapi-to-managed-postgresql
lang: es
lastUpdated: 2021-01-11
---
# Build a Strapi app connected to Public Cloud Databases for PostgreSQL
## Objective
In this tutorial, we are going to show you how to build a [Strapi](https://strapi.io/) application using the OVHcloud managed [PostgreSQL](https://www.postgresql.org/) database [service](https://www.ovhcloud.com/es-es/public-cloud/postgresql/).
:::warning
OVHcloud provides services for which you are responsible for their configuration and management. You are therefore responsible for their proper functioning.
This tutorial is designed to help you as much as possible with common tasks. If you are having difficulty performing these actions, please contact a specialized service provider and/or discuss it with our community of users on [https://community.ovh.com/en/](https://community.ovh.com/en/). OVHcloud can't provide you with technical support in this regard.
:::
## Before you begin
You need to be able to order a database solution in the OVHcloud Control Panel, as explained in our [Getting started with Public Cloud Databases](/es/guides/public-cloud/databases/getting-started.md) guide.
As [Strapi](https://strapi.io/) is written in Javascript, packages like [nodejs](https://nodejs.org/), [nvm](https://github.com/nvm-sh/nvm) and [yarn](https://classic.yarnpkg.com/en/) are necessary for this tutorial.
***
### OVHcloud Control Panel Access
- **Direct link:** Public Cloud Projects
- **Navigation path:** Public Cloud > Select your project
***
## Instructions
### Create a PostgreSQL database
#### Subscribing to the service
Click on `Databases
` in the left-hand navigation bar under **Storage**
.
Click on the `Create a database instance
` button. (`Create a service
` if your project already contains databases.)
#### Step 1: Select PostgreSQL database
Click on the PostgreSQL database and then select the version to install from the drop-down menu.
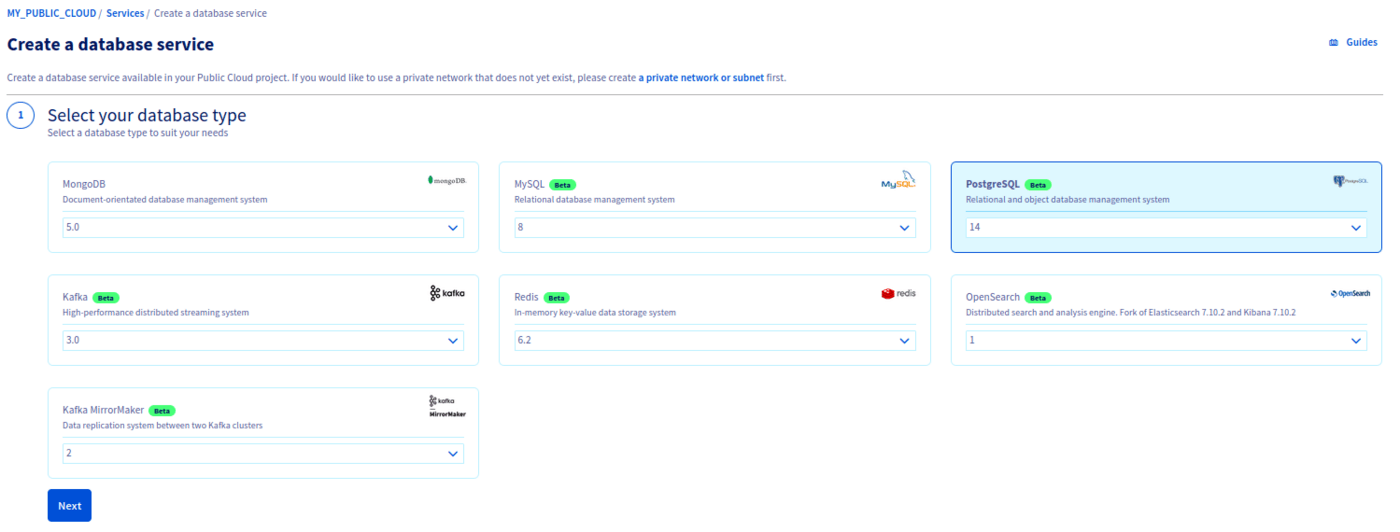
Click `Next
` to continue.
#### Step 2: Select a solution
In this step, choose an appropriate service plan. You will be able to upgrade the plan after creation.

Please visit the [capabilities page](/es/guides/public-cloud/databases/postgresql-capabilities.md) for detailed information on each plan's properties.
Click `Next
` to continue.
#### Step 3: Select a location
Choose the geographical region of the data center in which your database will be hosted.
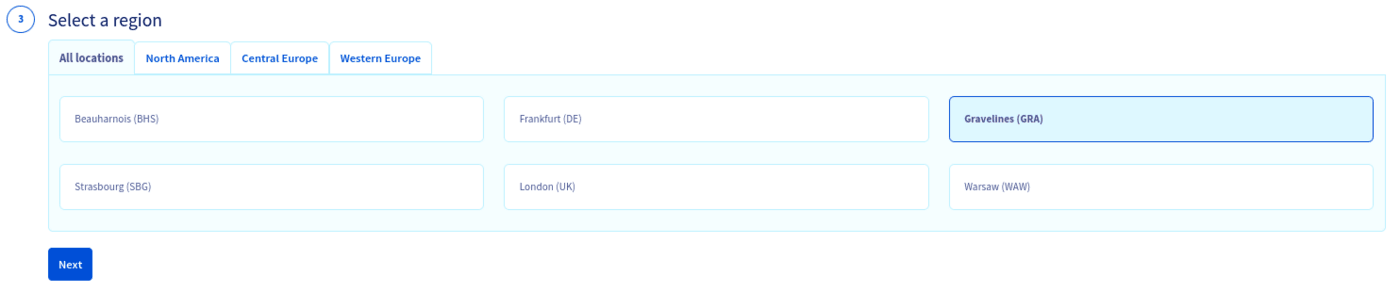
Click `Next
` to continue.
#### Step 4: Configure database nodes
You can choose the node model in this step. The initial and maximum numbers of nodes depend on the chosen solution in step 2.
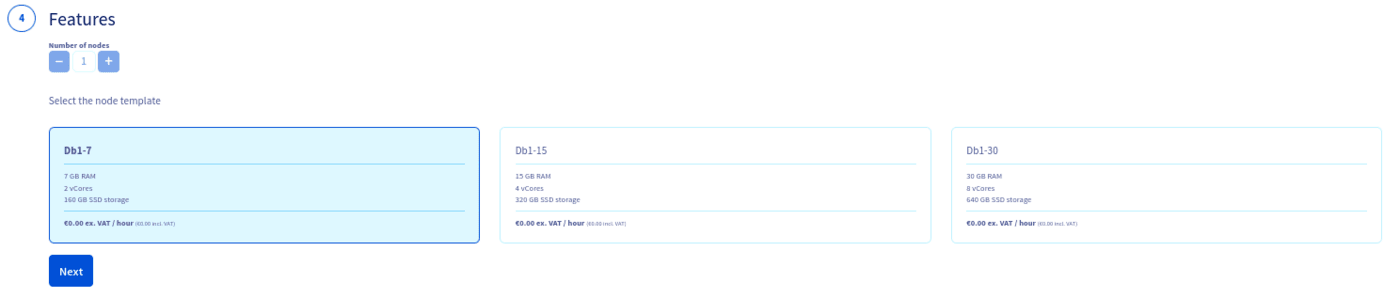
Please visit the [capabilities page](/es/guides/public-cloud/databases/postgresql-capabilities.md) for detailed information on the hardware resources and other properties of the MySQL database installation.
Take note of the pricing information and click `Next
` to continue.
#### Step 5: Configure your options
You can name your database in this step.

Click `Next
` to continue.
#### Step 6: Summary and confirmation
The last section will show a summary of your order as well as the API equivalent of creating this database instance with the [OVHcloud API](/es/guides/manage-and-operate/api/first-steps.md).

Click `Create a database service
` to continue.
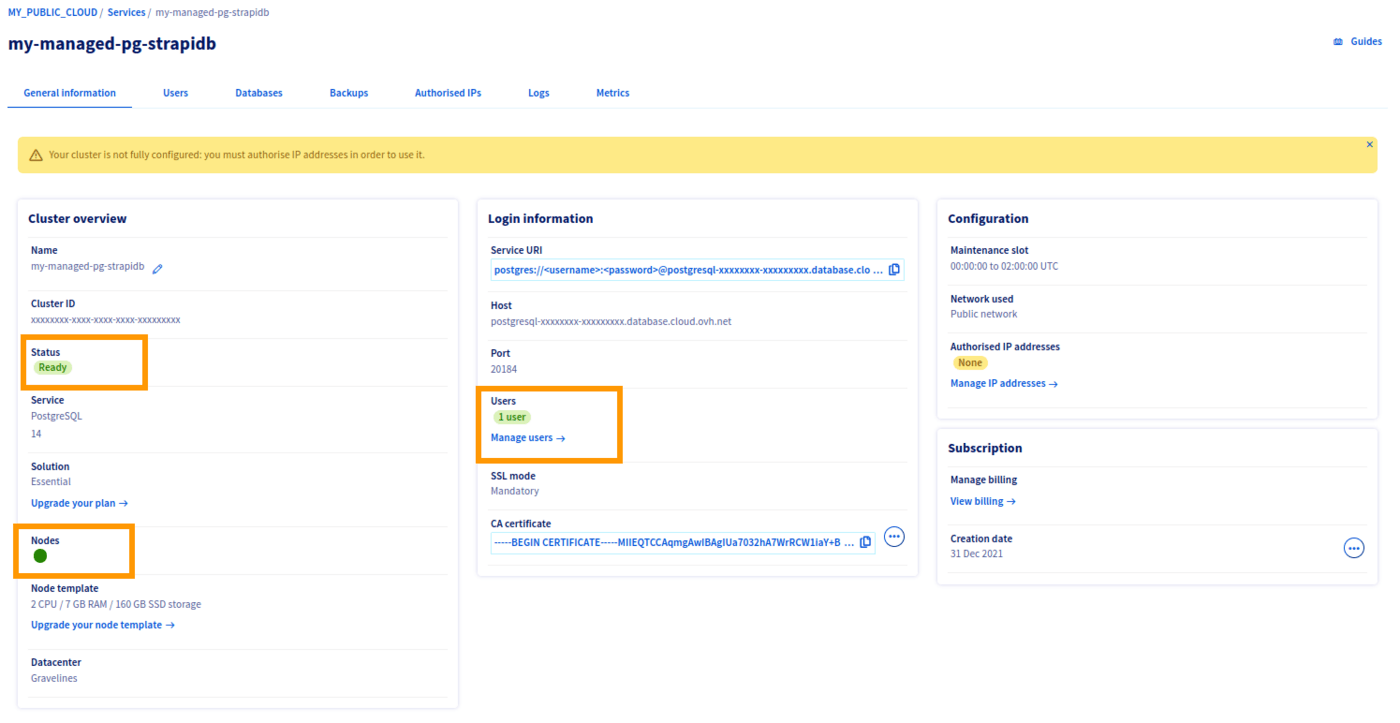
Within a few minutes your new database service will be deployed. Messages in the OVHcloud Control Panel will inform you when the database is ready to use.
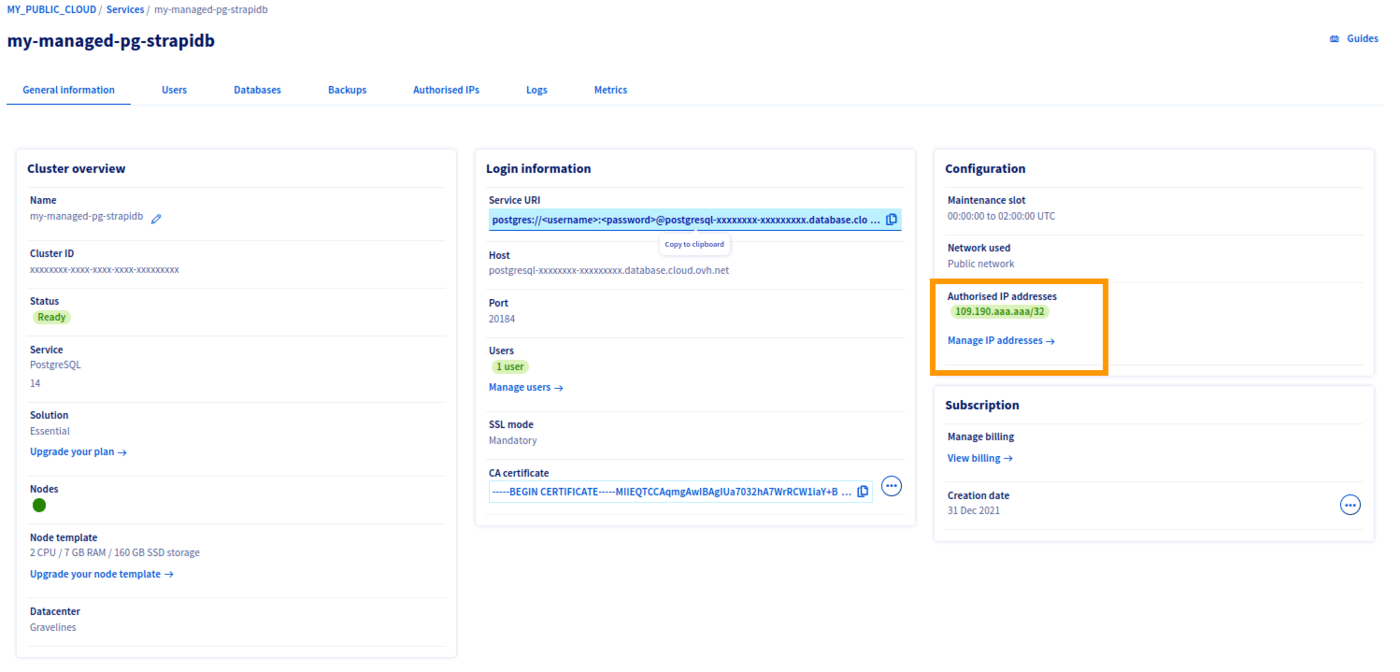
Your database is ready when cluster status is "Ready", node status is green, and number of users is set to "1 user".
### Authorize your IP address
:::warning
For security reasons the default network configuration doesn't allow any incoming connections.
To allow access from your application or development environment to your PostgreSQL database service, you must add your IP addresses to the service authorized list.
:::
#### Add your IPs to the DB authorized list
Following the related documentation on how to [authorize the suitable IP addresses](/es/guides/public-cloud/databases/mongodb-manage-control-panel.md#configuring-authorized-ips), add your IPs to the authorized list.
### Test connection to the PostgreSQL DataBase
A quick and easy way to test the connection is to use the Postgre Command Line Interface (CLI) [psql](https://docs.postgresql.fr/14/app-psql.html).
> 💡 Tip : If you are familiar with [Docker](https://www.docker.com/) or [Kubernetes](https://kubernetes.io/), you can use the psql tool inside a postgres Docker [image](https://hub.docker.com/_/postgres) instead of installing the tool locally.
>
> Examples :
>
> ```
> kubectl run postgres-client --image=postgres:latest -it --rm --restart=Never -- /bin/bash
> ```
>
> or
>
> ```
> docker run -it --rm postgres /bin/bash
> ```
#### Connect to the database
The useful parameters are:
- The db Host, the db Port
- Get them from the "General Information tab"
- The db Name
- Get it from the "Databases" tab, usually "defaultdb"
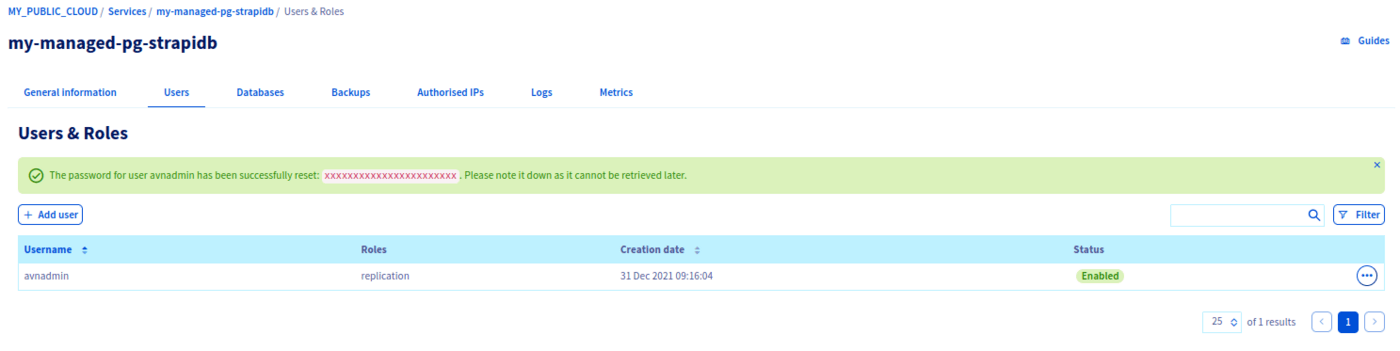
- The db User
- Get it from the "Users" tab, usually "avnadmin"
- The db Password
- Get it after you reset it.
Now connect to the database with the following command
```sh
psql --dbname=defaultdb --host=postgresql-ab1cd2ef-gh1ij2kl3.database.cloud.ovh.net --port=20184 --username=avnadmin --password
```
Enter the password and press `Enter
`.
```console
$ psql --dbname=defaultdb --host=postgresql-ab1cd2ef-gh1ij2kl3.database.cloud.ovh.net --port=20184 --username=avnadmin --password
Password:
psql (14.1 (Debian 14.1-1.pgdg110+1))
SSL connection (protocol: TLSv1.3, cipher: TLS_AES_256_GCM_SHA384, bits: 256, compression: off)
Type "help" for help.
defaultdb=>
```
Setup is done, your Managed PostgreSQL database is fully operational, let's go further and use it with [Strapi](https://strapi.io/).
### Before you begin, prepare your environment
What you need here is to check your `nodejs` and `yarn` versions.
According to the official documention on [GitHub](https://github.com/strapi/strapi), check that your existent nodejs installation matches with "NodeJS >= 12 \<= 16".
:::warning
No specific version of yarn is specified, this tutorial was made with the 1.22.17 one.
:::
You can follow these different tutorials if you need to install some of the tools:
- [nodejs](https://nodejs.org/en/download/package-manager/)
- [nvm](https://github.com/nvm-sh/nvm)
- [yarn](https://classic.yarnpkg.com/lang/en/docs/install/)
### Declare the nodejs version
We want to use the latest LTS version of nodejs, so inside your development environment, use this command:
```sh
nvm use 16.13.1
```
```console
$ nvm use 16.13.1
Now using node v16.13.1 (npm v8.1.2)
```
### Setup a new instance of Strapi
Strapi offers a simple way to install its product, with yarn.
Run the following command in a terminal:
```sh
yarn create strapi-app my-strapi
```
You will be prompted to choose between the Quickstart or Custom method, select `Custom
` and press `Enter
`.
If you choose the Quickstart one, default parameters will be applied and a server will automatically start.
```console
$ yarn create strapi-app my-strapi
yarn create v1.22.17
warning package.json: No license field
[1/4] Resolving packages...
[2/4] Fetching packages...
[3/4] Linking dependencies...
[4/4] Building fresh packages...
success Installed "create-strapi-app@4.0.2" with binaries:
- create-strapi-app
? Choose your installation type
Quickstart (recommended)
❯ Custom (manual settings)
```
On the next step, select `postgres`
and press `Enter
`.
```console
? Choose your installation type Custom (manual settings)
? Choose your default database client
sqlite
❯ postgres
mysql
```
Then, enter your PostgreSQL database parameters, and select `Yes
` when prompted for enabling SSL connection.
```console
? Choose your installation type Custom (manual settings)
? Choose your default database client postgres
? Database name: defaultdb
? Host: postgresql-ab1cd2ef-gh1ij2kl3.database.cloud.ovh.net
? Port: 20184
? Username: avnadmin
? Password: ********************
? Enable SSL connection: Yes
Creating a project with custom database options.
Creating a new Strapi application at /home/my/app/path/my-strapi.
Creating files.
Dependencies installed successfully.
Your application was created at /home/my/app/path/my-strapi.
Available commands in your project:
yarn develop
Start Strapi in watch mode. (Changes in Strapi project files will trigger a server restart)
yarn start
Start Strapi without watch mode.
yarn build
Build Strapi admin panel.
yarn strapi
Display all available commands.
You can start by doing:
cd /home/my/app/path/my-strapi
yarn develop
Done in 662.54s.
```
If you prefer to choose `No` when prompted to enable SSL connection, this is what happens:
```console
$ yarn develop
yarn run v1.22.17
warning ../../../package.json: No license field
$ strapi develop
Building your admin UI with development configuration ...
Admin UI built successfully
[2021-12-31 13:16:32.632] debug: ⛔️ Server wasn't able to start properly.
[2021-12-31 13:16:32.633] error: no pg_hba.conf entry for host "109.190.xxx.xxx", user "avnadmin", database "defaultdb", no encryption
error: no pg_hba.conf entry for host "109.190.xxxx.xxxx", user "avnadmin", database "defaultdb", no encryption
at Parser.parseErrorMessage (/home/my/app/path/my-strapi/node_modules/pg-protocol/dist/parser.js:287:98)
at Parser.handlePacket (/home/my/app/path/my-strapi/node_modules/pg-protocol/dist/parser.js:126:29)
at Parser.parse (/home/my/app/path/my-strapi/node_modules/pg-protocol/dist/parser.js:39:38)
at Socket. (/home/my/app/path/my-strapi/node_modules/pg-protocol/dist/index.js:11:42)
at Socket.emit (node:events:390:28)
at Socket.emit (node:domain:475:12)
at addChunk (node:internal/streams/readable:315:12)
at readableAddChunk (node:internal/streams/readable:289:9)
at Socket.Readable.push (node:internal/streams/readable:228:10)
at TCP.onStreamRead (node:internal/stream_base_commons:199:23)
error Command failed with exit code 1.
info Visit https://yarnpkg.com/en/docs/cli/run for documentation about this command.
```
This is a known bug, you can follow the issue here: [https://github.com/strapi/strapi/issues/12058](https://github.com/strapi/strapi/issues/12058).
We can fix it by manually modifying the database configuration file.
Open the `config/database.js`
file.
It should be similar to that:
```console
module.exports = ({ env }) => ({
connection: {
client: 'postgres',
connection: {
host: env('DATABASE_HOST', 'postgresql-ab1cd2ef-gh1ij2kl3.database.cloud.ovh.net'),
port: env.int('DATABASE_PORT', 20184),
database: env('DATABASE_NAME', 'defaultdb'),
user: env('DATABASE_USERNAME', 'avnadmin'),
password: env('DATABASE_PASSWORD', 'MyStrongPassword'),
ssl: env.bool('DATABASE_SSL', false),
},
},
});
```
Replace the line:
```console
ssl: env.bool('DATABASE_SSL', false),
```
with this line:
```console
ssl: { rejectUnauthorized: env.bool('DATABASE_SSL_SELF', false), },
```
Save and exit the file.
Now, if you choose `Yes` when prompted to enable SSL connection, get the CA certificate from the OVHcloud Control Panel:
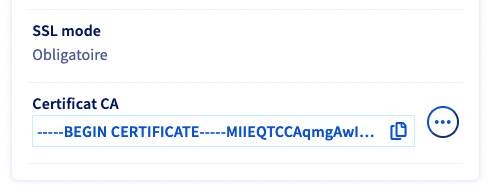
Save the generated file into the `config` folder, just beside the `database.js` file, and rename it as `ca-certificate.crt`
Now open the `config/database.js` file and modify the `ssl` block as follows:
```console
const fs = require('fs');
module.exports = ({ env }) => ({
connection: {
client: 'postgres',
connection: {
host: env('DATABASE_HOST', 'postgresql-ab1cd2ef-gh1ij2kl3.database.cloud.ovh.net'),
port: env.int('DATABASE_PORT', 20184),
database: env('DATABASE_NAME', 'defaultdb'),
user: env('DATABASE_USERNAME', 'avnadmin'),
password: env('DATABASE_PASSWORD', 'MyStrongPassword'),
ssl: {
ca: fs.readFileSync(`${__dirname}/ca-certificate.crt`).toString(),
}
},
},
});
```
where `${__dirname}` is the `config` folder location.
Save and exit the file, the configuration is done!
### Start Strapi
Launch the strapi application with the yarn command:
```sh
yarn develop
```
```console
$ yarn develop
yarn run v1.22.17
warning ../../../package.json: No license field
$ strapi develop
Building your admin UI with development configuration ...
Admin UI built successfully
Project information
┌────────────────────┬──────────────────────────────────────────────────┐
│ Time │ Fri Dec 31 2021 13:26:35 GMT+0100 (Central Euro… │
│ Launched in │ 13253 ms │
│ Environment │ development │
│ Process PID │ 1861833 │
│ Version │ 4.0.2 (node v16.13.1) │
│ Edition │ Community │
└────────────────────┴──────────────────────────────────────────────────┘
Actions available
One more thing...
Create your first administrator 💻 by going to the administration panel at:
┌─────────────────────────────┐
│ http://localhost:1337/admin │
└─────────────────────────────┘
[2021-12-31 13:26:35.437] http: GET /admin (24 ms) 200
[2021-12-31 13:26:35.497] http: GET /admin/runtime~main.2d8596f7.js (7 ms) 200
[2021-12-31 13:26:35.498] http: GET /admin/main.dfa22c7a.js (3 ms) 200
[2021-12-31 13:26:35.775] http: GET /admin/project-type (1 ms) 200
[2021-12-31 13:26:35.808] http: GET /admin/497.726adbfa.chunk.js (2 ms) 200
[2021-12-31 13:26:35.813] http: GET /admin/2664.f33f619d.chunk.js (1 ms) 200
[2021-12-31 13:26:35.822] http: GET /admin/4362.c65ab24b.chunk.js (1 ms) 200
[2021-12-31 13:26:35.855] http: GET /admin/fontawesome-css.32df0f91.chunk.js (1 ms) 200
[2021-12-31 13:26:35.860] http: GET /admin/en-json.4c3c1c95.chunk.js (4 ms) 200
[2021-12-31 13:26:35.861] http: GET /admin/fr-json.c75e1a2e.chunk.js (2 ms) 200
[2021-12-31 13:26:35.870] http: GET /admin/fontawesome-css-all.90be2358.chunk.js (1 ms) 200
[2021-12-31 13:26:35.878] http: GET /admin/content-type-builder-translation-en-json.81257d0d.chunk.js (2 ms) 200
[2021-12-31 13:26:35.881] http: GET /admin/content-type-builder-translation-fr-json.2156f48c.chunk.js (4 ms) 200
[2021-12-31 13:26:35.885] http: GET /admin/email-translation-en-json.ef8208e3.chunk.js (5 ms) 200
[2021-12-31 13:26:35.886] http: GET /admin/email-translation-fr-json.76afb1c3.chunk.js (3 ms) 200
[2021-12-31 13:26:35.893] http: GET /admin/i18n-translation-en-json.a90b9dc5.chunk.js (5 ms) 200
[2021-12-31 13:26:35.894] http: GET /admin/upload-translation-en-json.d205cecd.chunk.js (5 ms) 200
[2021-12-31 13:26:35.897] http: GET /admin/i18n-translation-fr-json.482f6933.chunk.js (6 ms) 200
[2021-12-31 13:26:35.898] http: GET /admin/upload-translation-fr-json.0f4b3839.chunk.js (6 ms) 200
[2021-12-31 13:26:35.902] http: GET /admin/users-permissions-translation-en-json.3e650c44.chunk.js (7 ms) 200
[2021-12-31 13:26:35.904] http: GET /admin/users-permissions-translation-fr-json.12f3c930.chunk.js (4 ms) 200
[2021-12-31 13:26:35.906] http: GET /admin/fontawesome-js.2639263c.chunk.js (1 ms) 200
[2021-12-31 13:26:35.989] http: GET /admin/cropper-css.b71d1229.chunk.js (3 ms) 200
[2021-12-31 13:26:36.006] http: GET /admin/init (40 ms) 200
[2021-12-31 13:26:36.173] http: GET /admin/fde9b1ad0670d29a2516.png (1 ms) 200
```
Congratulations! You have just finished the setup, the server starts end open your browser on the admin login creation page `http://localhost:1337/admin/auth/register-admin`.
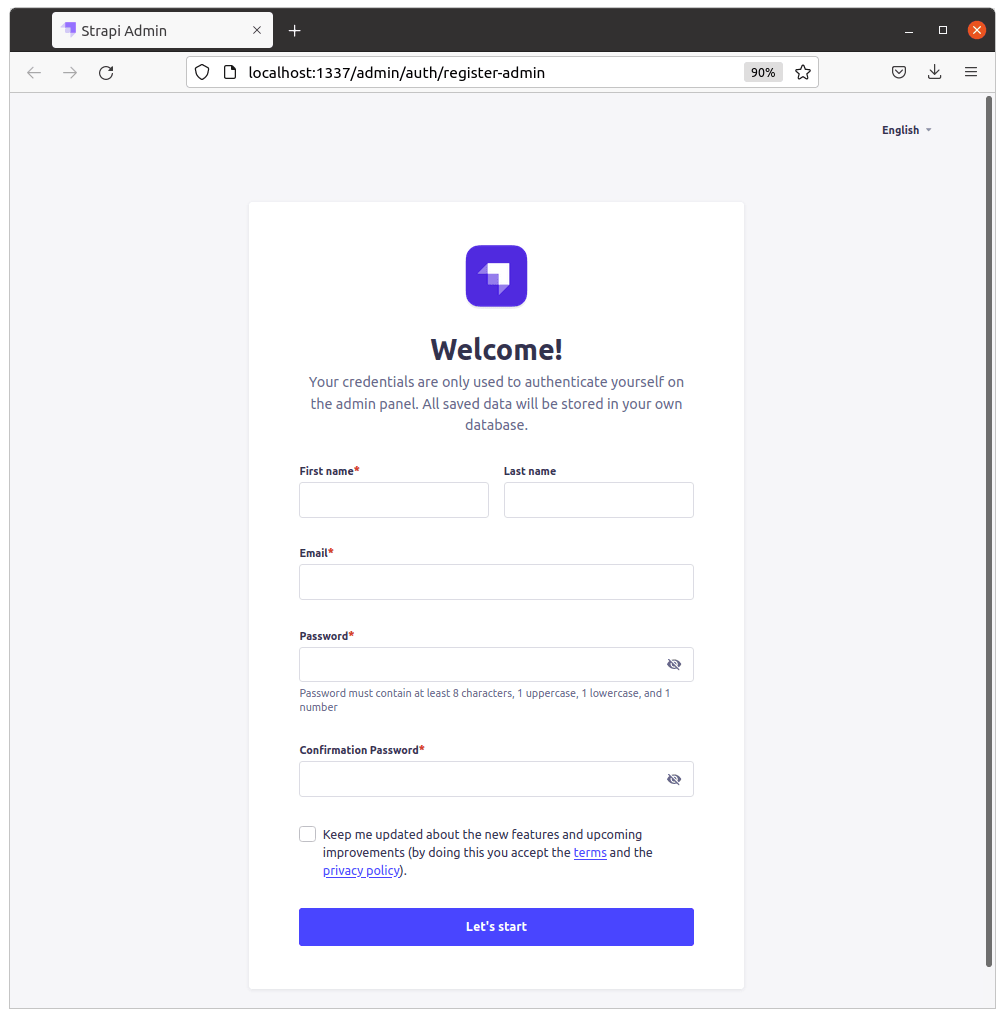
Fill the form fields as requested, and press the `Let's start
` button.
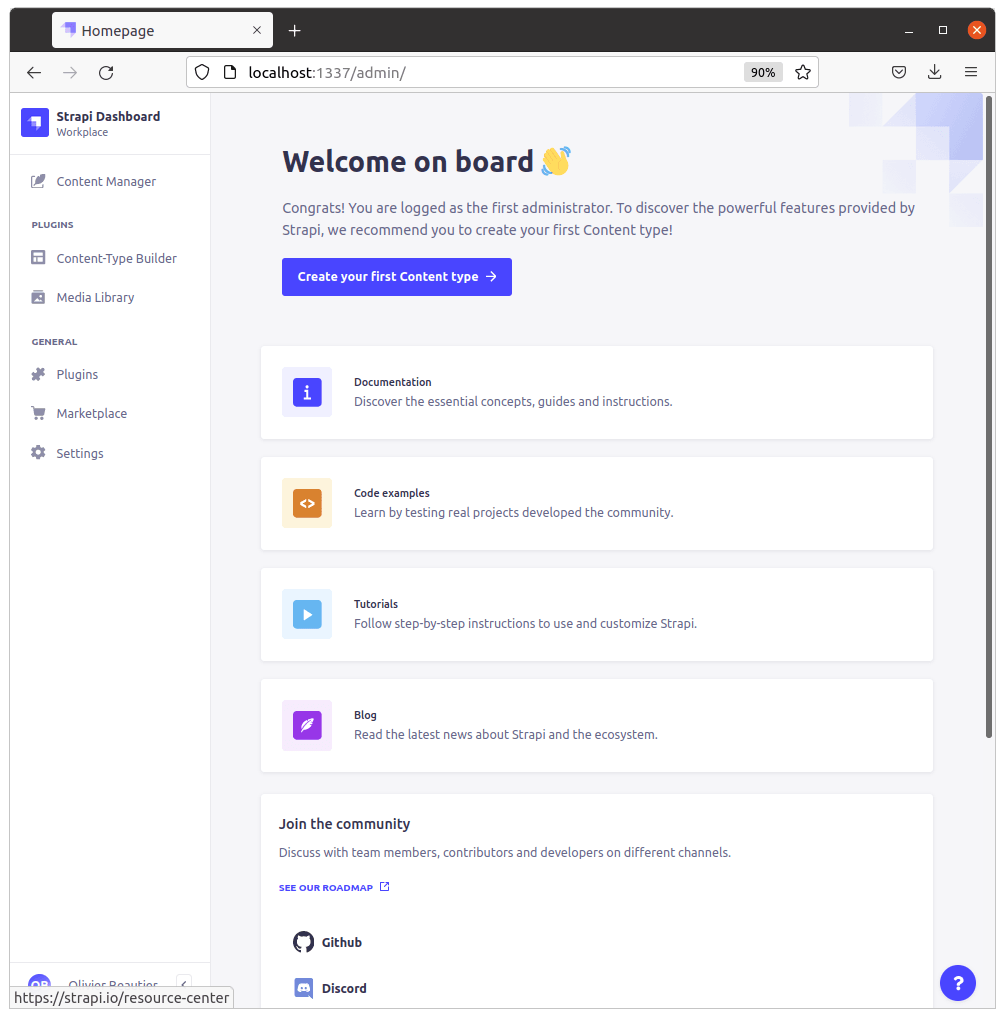
You are now using a Strapi app connected to an OVHcloud managed PostgreSQL database.
### Controls
#### Add an entry to Strapi
Using the admin interface, click on the `Content Manager
` menu, and add a user, such as:
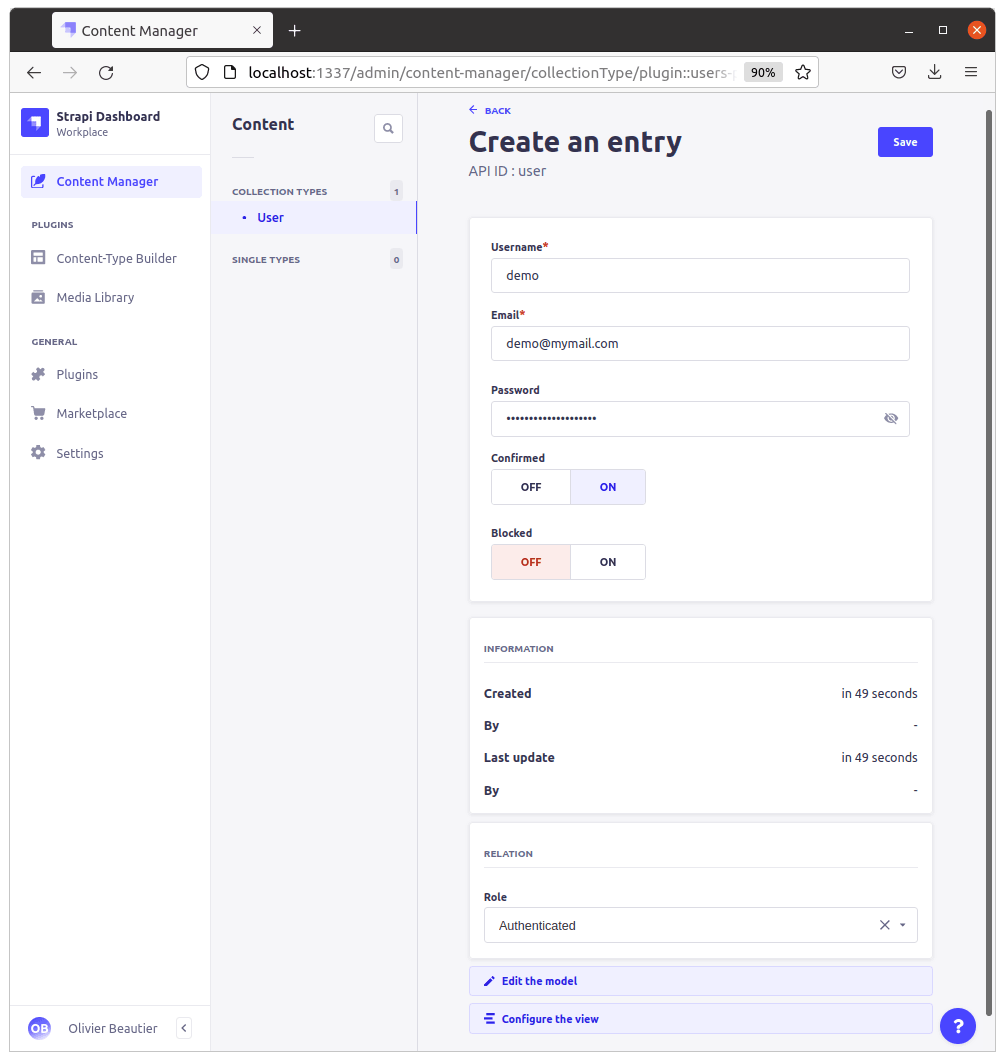
Then press the `Save
` button.
#### Check the database
As described above, connect to the PosgreSQL database with `psql` command line interface.
```sh
$ psql --dbname=defaultdb --host=postgresql-ab1cd2ef-gh1ij2kl3.database.cloud.ovh.net --port=20184 --username=avnadmin --password
```
Then find, in the `up_users` table, our previously created entry. Here the user is named "demo":
```console
defaultdb=> SELECT id,username,email,created_at FROM public.up_users WHERE username='demo';
id | username | email | created_at
----+----------+-----------------+------------------------
1 | demo | demo@mymail.com | 2021-12-31 13:46:08.04
(1 row)
```
### Cleaning up
To clean your Strapi, make sure it is closed by pressing `CTRL+C
` in the terminal you used to launch it, then delete your installation folder.
```sh
rm -rf /home/my/app/path/my-strapi/
```
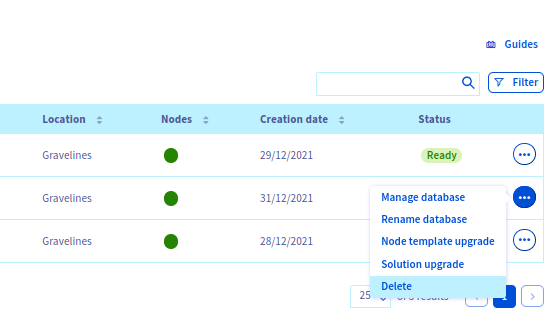
To clean your PostgreSQL, use the OVHcloud Control Panel to delete your managed PostgreSQL service:
## We want your feedback!
We would love to help answer questions and appreciate any feedback you may have.
If you need training or technical assistance to implement our solutions, contact your sales representative or click on [this link](https://www.ovhcloud.com/es-es/professional-services/) to get a quote and ask our Professional Services experts for a custom analysis of your project.
Are you on Discord? Connect to our channel at [https://discord.gg/ovhcloud](https://discord.gg/ovhcloud) and interact directly with the team that builds our databases service!