---
title: "Web hosting - My database is full, what should I do?"
description: "Find out what to do when your database is saturated"
url: https://docs.ovhcloud.com/en/guides/web-cloud/web-hosting/sql-overquota-database
lang: en
lastUpdated: 2025-02-19
---
# Web hosting - My database is full, what should I do?
## Objective
A database can, for example, store data related to a website and its functionalities. This information is structured so that your website can easily access it, allowing for optimal and customised access for users/visitors to your website.
During its use, a database can acquire, modify or delete information (connection data, user data, display data, data necessary for your website to work properly, etc.).
In some cases, the database stores such a large amount of information that it will saturate its allocated storage space. When a database is full, this state is called **overquota**.
This tutorial will show you the actions you can take when your OVHcloud shared database is close to saturation, or is already in **overquota**.
**This guide explains possible actions when your database is full.**
## Requirements
- An [OVHcloud web hosting plan](https://www.ovhcloud.com/en-gb/web-hosting/) with an associated OVHcloud shared database
***
### OVHcloud Control Panel Access
- **Direct link:** Hosting plans
- **Navigation path:** Web Cloud > Hosting plans > Select your web hosting plan
***
## Instructions
:::warning
OVHcloud provides services which you are responsible for with regard to their configuration and management. You are therefore responsible for ensuring they function correctly.
If you experience any difficulties following the steps in this tutorial, we recommend contacting a [specialist provider](https://partner.ovhcloud.com/en-gb/directory/) or reach out to the OVHcloud community. We will not be able to assist you. You can find more information in the [Go further](#go-further) section of this guide.
:::
When your OVHcloud shared database reaches a certain saturation level (**overquota**), our robots will send a notification to the email address of the database’s [administrator contact](/en/guides/account-and-service-management/account-information/managing-contacts.md).
The first email will be sent when your database has consumed more than **80%** of its storage capacity. A second email is sent when **90%** of this storage capacity is reached.
When your database is in **overquota**, you will be sent a third warning email. Your database will then switch to _READ ONLY_. You can no longer add or modify your database entries, but they are still accessible to **read** and **delete**.
### Step 1: Identify large tables
A database is made up of one or more **tables**, themselves consisting of one or more **rows** organised using predetermined **columns**.
The first step is to identify the large table or tables in your database.
:::info
All the following actions described in this tutorial will be performed from the **phpMyAdmin** interface.
[phpMyAdmin](https://www.phpmyadmin.net/) is available on all OVHcloud shared databases.
This database management application makes it easy to perform the manual actions you can perform with your database.
If your database is hosted on a [Web Cloud Databases](https://www.ovhcloud.com/en-gb/web-cloud/databases/) solution, please refer to our guide on “[Web Cloud Databases - Logging in to your database](/en/guides/web-cloud/databases/db-connecting-database-server.md)”, then skip to [step 1.2](#step1.2) of this guide.
:::
#### 1.1 - Connect to the database via phpMyAdmin
Retrieve your database access data directly from your website’s configuration file. Perform this action using **step 1** in our guide to [changing a database password](/en/guides/web-cloud/web-hosting/sql-change-password.md).
To connect to the database via phpMyAdmin, click on the tabs below to view each of the **4** steps.
**Step 1**
Go to the Hosting plans page, then select the web hosting plan concerned.
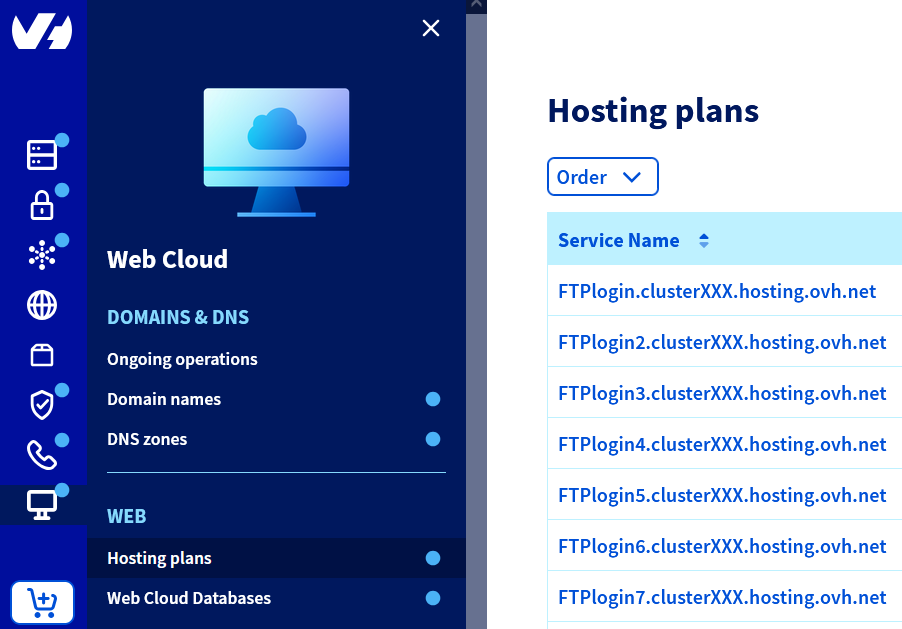
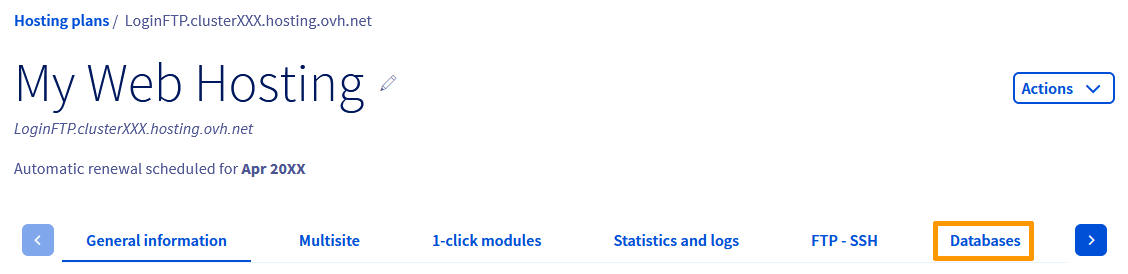
**Step 2**
On the page that pops up, click on the Databases tab.
**Step 3**
On the new page, a table will appear containing the databases you have created.
Note the `Username` and the `Server address` **of your database that is full**. You can view this information in the table listing your databases.
To the right of the database concerned, click the ... button, then Go to phpMyAdmin.
**Step 4**
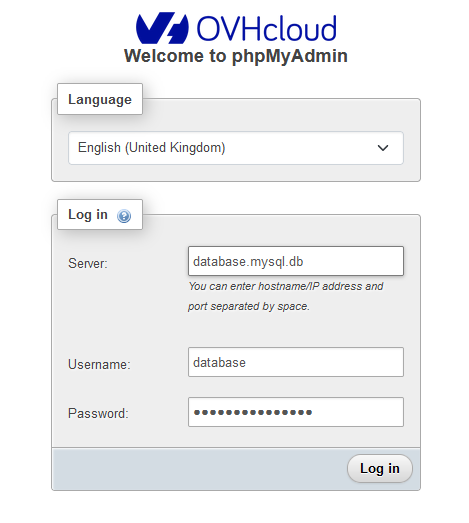Enter the login information for your database, then click Login.
#### 1.2 - Find the largest tables [](#)
:::danger
From here on, your actions affect the content of your database. The changes you make in **phpMyAdmin** can have irreversible consequences if they are not carried out correctly.
Be sure about each command you execute on the database. If you experience any difficulties, we recommend contacting a [specialist provider](https://partner.ovhcloud.com/en-gb/directory/). OVHcloud cannot assist you with the content of your database.
:::
Once connected, the following page is displayed:
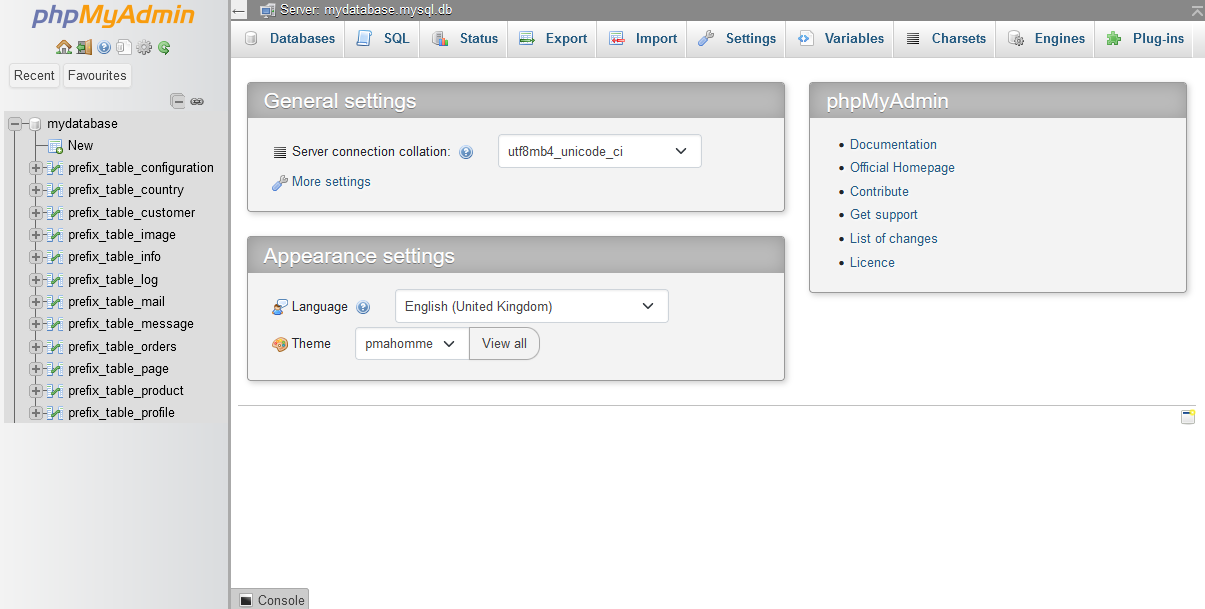
Click on `"Your database name"
` in the left-hand column, then on `Size
` in the top right-hand corner of the table that appears:
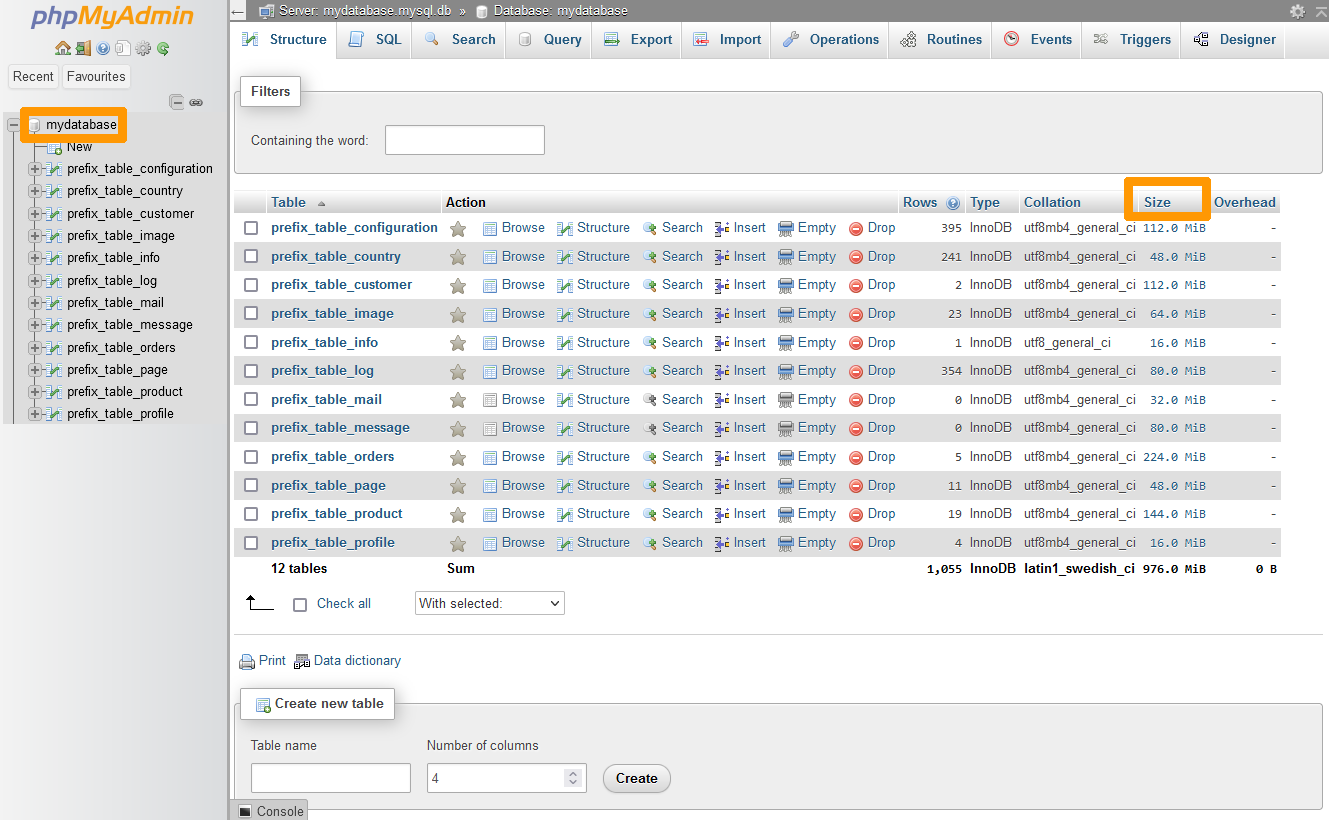
The largest tables appear at the top of the sorted list. Identify them, then go to **Step 2**.
### Step 2: Determine the usefulness of the content in the large table(s)
Once you have identified the large tables, determine whether all of their content is required for your site to work.
:::info
If you are using a Content Management System (CMS) such as WordPress, Joomla!, PrestaShop or Drupal, make sure that your large tables are not linked to a recently installed or updated plugin/theme.
In this case, contact the developer of the plugin/theme to determine appropriate actions to take on your CMS.
:::
For other CMS types, we recommend that you contact your CMS publisher before you perform the following actions.
Below are links to the official CMS websites for the OVHcloud 1-click modules:
- [WordPress](https://wordpress.org/)
- [Joomla!](https://www.joomla.org)
- [PrestaShop](https://www.prestashop.com/)
- [Drupal](https://drupal.org)
:::info
If your website is a **customised** software, developed by a specialist provider, we recommend that you contact them for support.
:::
### Step 3: Take corrective action
Once you have determined whether or not the contents of your tables are necessary for your site to work, you have several options:
#### Case 1 - All of the contents of the large table are required for your website to work properly
You will need to upgrade your database service to one that includes more space for databases.
:::info
To increase the size allocated to your database, you will need to create a new, larger database, and copy the contents of the old database into the new one. You cannot directly increase the size of a database linked to a web hosting plan.
:::
Consult our [Web Cloud Databasess](https://www.ovhcloud.com/en-gb/web-cloud/databases/) offer to choose your new database service.
We recommend this solution for large databases.
You can duplicate the content of your OVHcloud database directly to another of your OVHcloud databases, using a feature in your OVHcloud Control Panel
. To do this, please refer to our guide "[Duplicating the contents of one database to another](/en/guides/web-cloud/web-hosting/copy-database.md)
".
If you are migrating to a database outside of the [Start SQL](https://www.ovhcloud.com/en-gb/web-hosting/options/start-sql/) and [Web Cloud Databases](https://www.ovhcloud.com/en-gb/web-cloud/databases/) solutions, you can manually move the content from your old database to a new one using our guides:
- [Export your existing database](/en/guides/web-cloud/web-hosting/sql-database-export.md)
- [First steps with Web Cloud Databasess](/en/guides/web-cloud/databases/db-getting-started.md)
- [Import your old database into your Web Cloud Databasess solution](/en/guides/web-cloud/databases/db-restore-import-database.md)
#### Case 2 - Some or all of the contents of the large table are not necessary for your site to work
Before you do the following, check if the data in the large table corresponds to items that can be deleted from your CMS admin panel.
**Examples**:
- Old comments/posts
- Items in your CMS's `Trash` menu
- Data related to an old theme and/or plugin
:::danger
The rest of this tutorial will show you how to delete data stored in your database. Be sure of the actions you need to take or contact a [specialist provider](https://partner.ovhcloud.com/en-gb/directory/) if in doubt.
:::
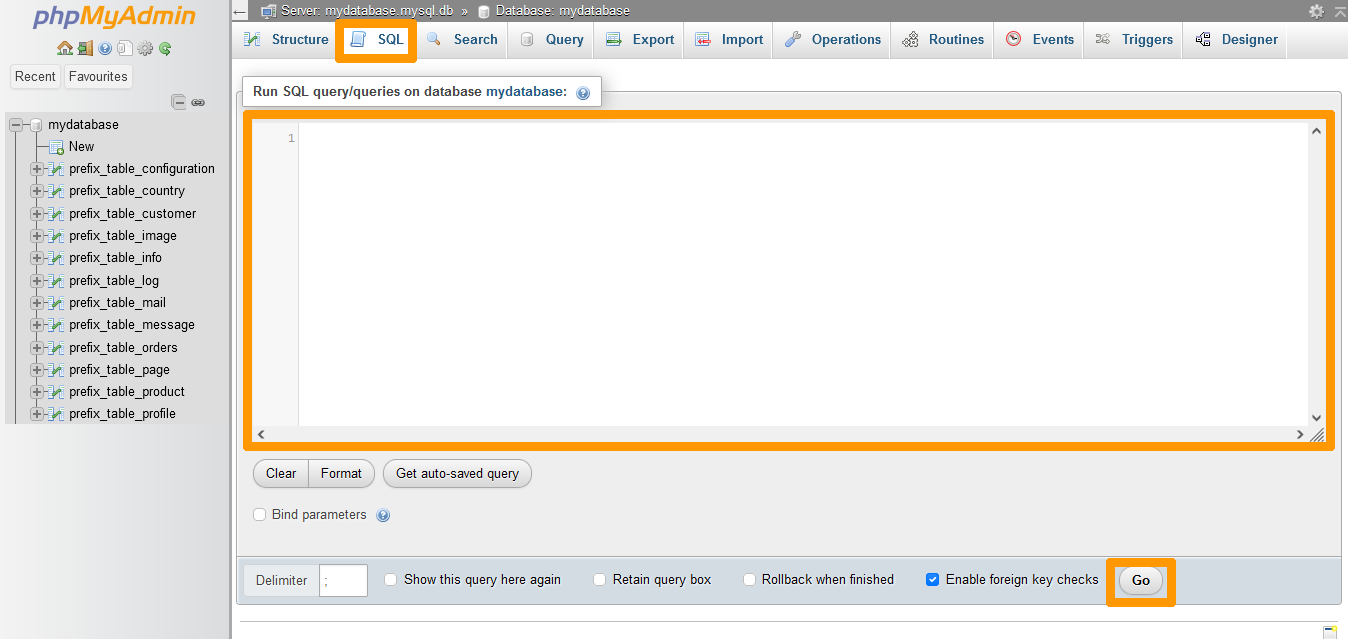
OVHcloud shared databases have several SQL commands to influence their content.
In the case of an overquota or large table, **three commands** are available.
You can perform these requests from the **phpMyAdmin**
interface, via the `SQL
` tab:
- The **DELETE** command
You can use it to remove **one or more rows** from a given table. This command is useful if part of the table content is required for your website to work properly.
**Example**:
```sql
DELETE FROM `table_1` WHERE `id` = 1
```
> In this example, the command deletes the row or rows in the **table\_1** whose value in the **id** column is **1**.
- The **TRUNCATE** command
This command deletes **all rows** from a given table.
**Example**:
```sql
TRUNCATE TABLE `table_1`
```
> In this example, the command deletes all rows from the **table\_1** without exception.
- The **DROP** command
It allows you to completely remove **a table and all the rows it contains**. This command should not be used if the table is still required.
**Example**:
```sql
DROP TABLE `table_1`
```
> In this example, the command deletes the table **table\_1** and all rows in it.
### Step 4: Release the database from the "READ ONLY" status
Our robots in charge of quota checks pass very regularly on our infrastructure.\
If they find that your database is no longer in **overquota** when they visit your services, they will automatically remove the “READ ONLY” status.
Once you have carried out the necessary operations on your database, you just need to wait for our robots to pass on to your services.
However, you can force them through your services to speed up the process. To do this, you will need to ask our robots to recalculate your service/database quota.
#### Recalculate the quota for a database included with your web hosting plan
Click on the tabs below to view each of the **4** steps.
**Step 1**
Go to the Hosting plans page, then select the web hosting plan concerned.

**Step 2**
On the page that pops up, click on the Databases tab.

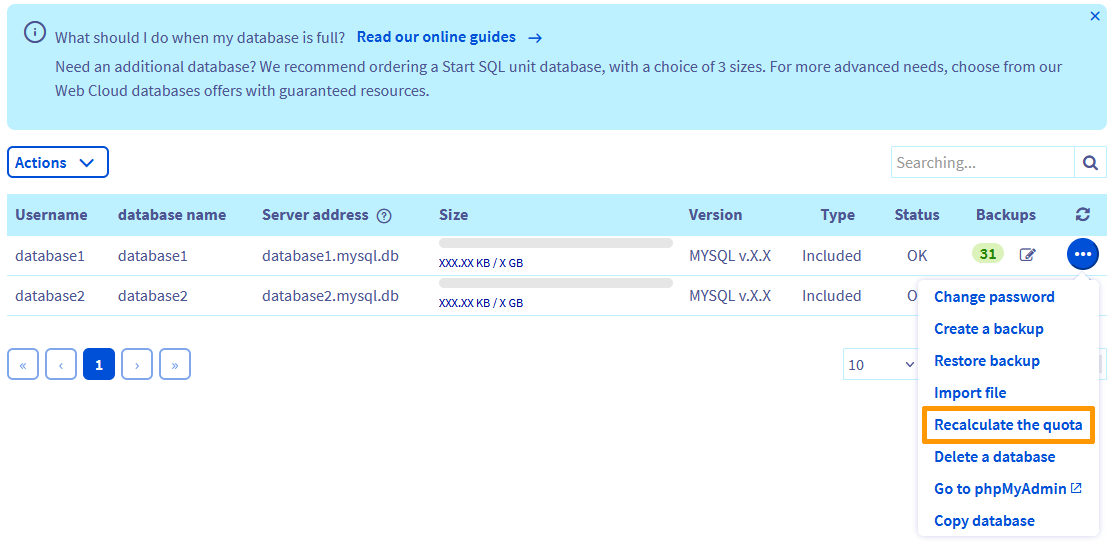
**Step 3**
On the new page, a table will appear containing the databases you have created. To the right of the database concerned, click the ... button, then Recalculate the quota.
**Step 4**
In the window that pops up, click the Confirm button directly.
Once launched, the operation may take several minutes. When it ends, the "READ ONLY" status of your database disappears.\
Your database is now fully operational again.
#### Recalculate the quota for a database hosted on a Web Cloud Databases solution
Click on the tabs below to view each of the **3** steps.
**Step 1**
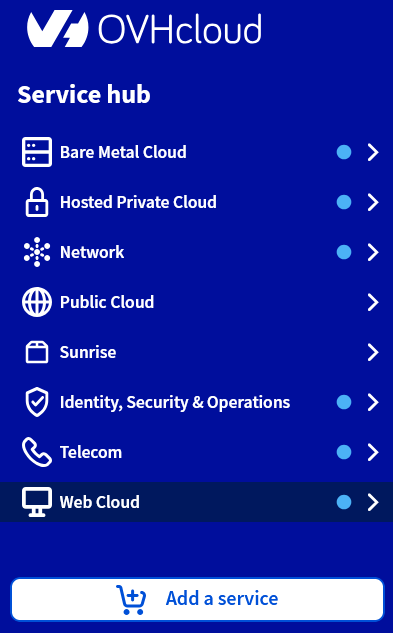
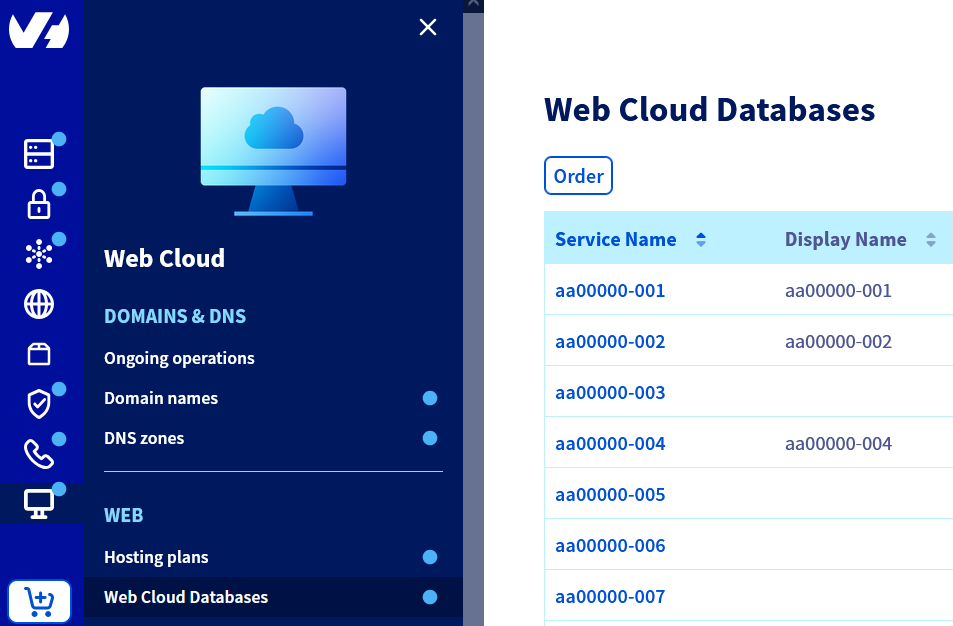
Log in to the OVHcloud Control Panel, then go to the Web Cloud section.
**Step 2**
Click the Web Cloud Databases menu, then choose the Web Cloud Databases solution concerned.
**Step 3**
In the **General information** box, you will see **Used space**. Click the ... button on the right, then Refresh your database quota.
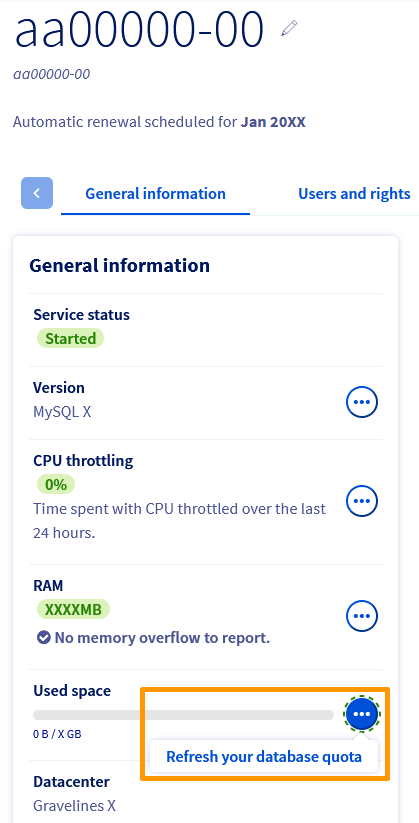Once launched, the operation may take several minutes. When it ends, the "READ ONLY" status of your database disappears.
Your database is now fully operational again.
## Go further [](#)
[Duplicating the contents of one database to another](/en/guides/web-cloud/web-hosting/copy-database.md)
For specialised services (SEO, development, etc.), contact [OVHcloud partners](https://partner.ovhcloud.com/en-gb/directory/).
If you would like assistance using and configuring your OVHcloud solutions, please refer to our [support offers](https://www.ovhcloud.com/en-gb/support-levels/).
Join our [community of users](https://community.ovhcloud.com/).