---
title: "Monitoring and managing automated emails in your web hosting plan"
description: "Find out how to monitor and manage automated emails sent from your OVHcloud web hosting plan"
url: https://docs.ovhcloud.com/en/guides/web-cloud/web-hosting/mail-function-script-records
lang: en
lastUpdated: 2026-06-03
---
# Monitoring and managing automated emails in your web hosting plan
## Objective
Automated emails are messages sent via scripts, commonly done with PHP's "mail()" function. For example, they are used for your website's contact form, allowing your visitors to send you messages.
:::info
This guide mainly applies to emails sent from scripts located on your [OVHcloud web hosting plan](https://www.ovhcloud.com/en-gb/web-hosting/) using the PHP "mail()" function.
If you would like to manage the email accounts included in your MX Plan service or in your [OVHcloud web hosting plan](https://www.ovhcloud.com/en-gb/web-hosting/), please refer to our [MX Plan documentation](/en/guides/web-cloud/email-and-collaborative-solutions/mx-plan/landing-page-mx-plan.md).
:::
:::tip
Although we strongly recommend using PHP's "mail()" function, you can also send emails from your shared hosting by going through a script using [Simple Mail Transfer Protocol (SMTP)](#SMTP).
:::
**This guide explains how to monitor and manage automated emails sent from your OVHcloud web hosting plan.**
## Requirements
- An [OVHcloud web hosting plan](https://www.ovhcloud.com/en-gb/web-hosting/)
***
### OVHcloud Control Panel Access
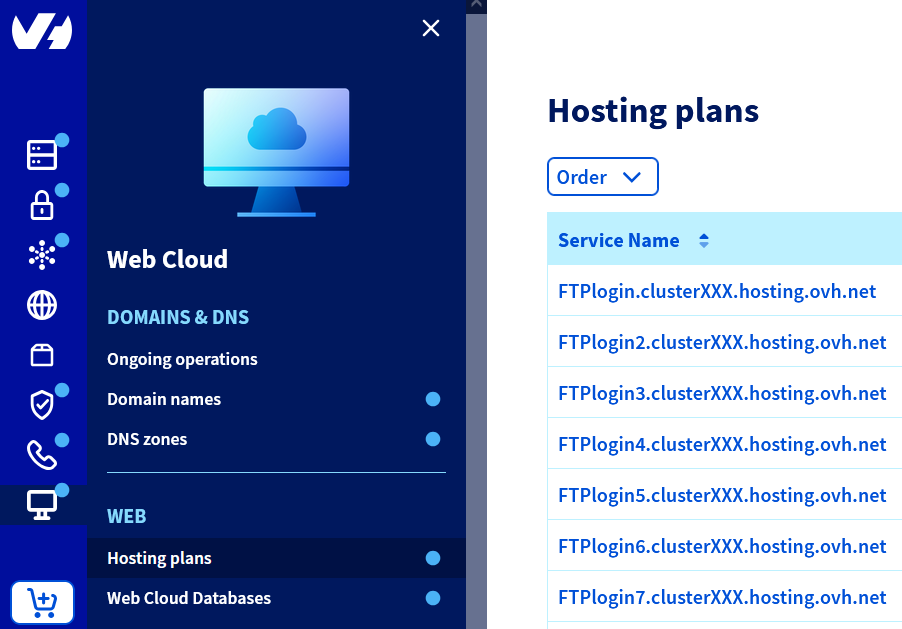
- **Direct link:** Hosting plans
- **Navigation path:** Web Cloud > Hosting plans > Select your web hosting plan
***
## Instructions
### Overview of the "Email scripts" section
To access the "Email scripts" section, click on the tabs below to view each of the **3** steps.
**Step 1**
Go to the Hosting plans page, then select the web hosting plan concerned.
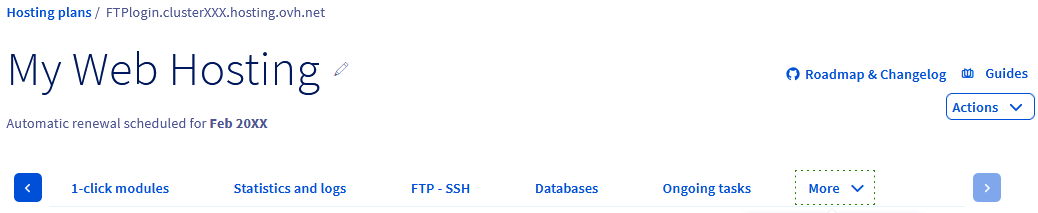
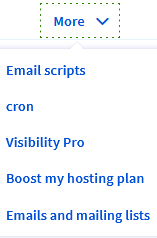
**Step 2**
On the page that pops up, click on the More tab, then click Email scripts.
**Step 3**
This page enables you to monitor and manage automated emails sent from your [OVHcloud web hosting plan](https://www.ovhcloud.com/en-gb/web-hosting/).
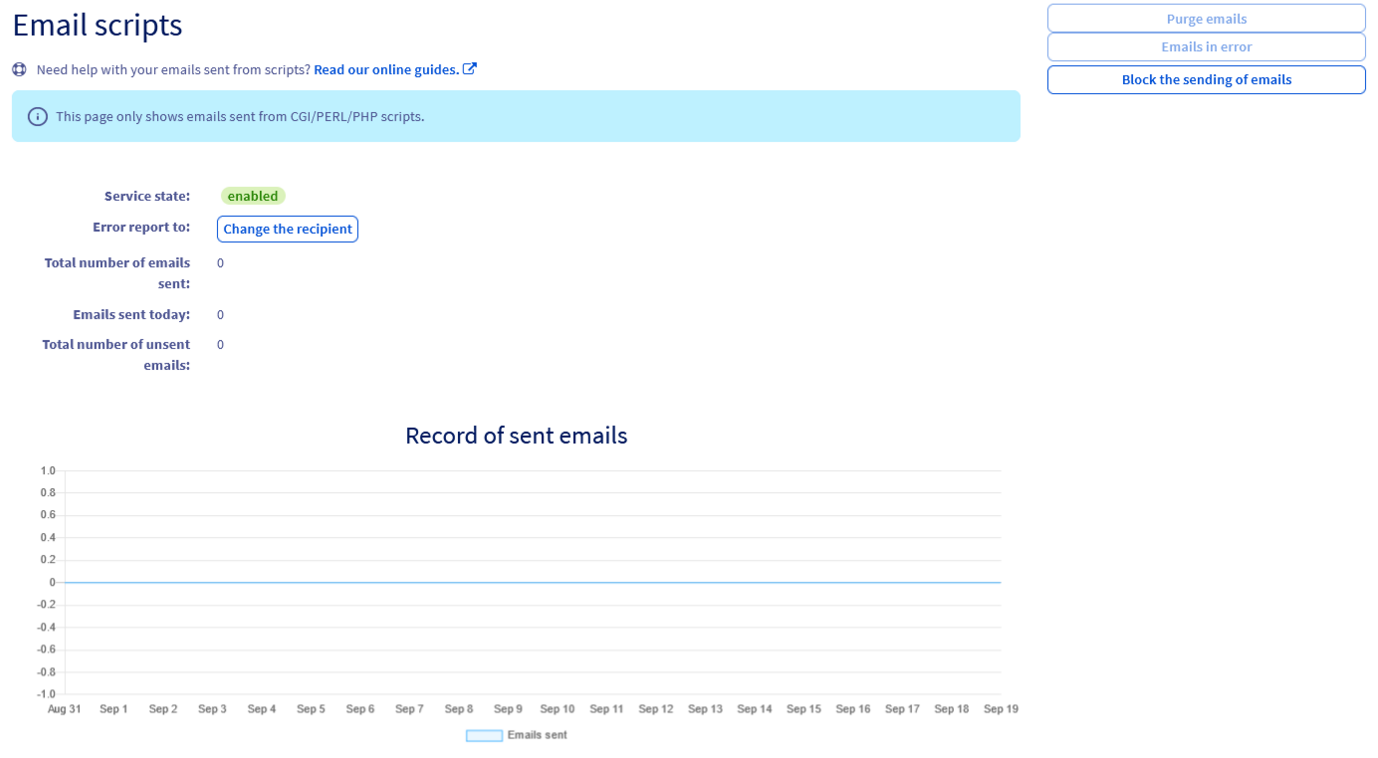The page displays several pieces of information that you can use to view automated email activity generated by your scripts:
- **Service status**: The current status of the service sending automated emails from your web hosting plan:
- If it is green (_"Enabled"_ or _"Force"_), it means that outgoing messages are operational.
- If it is red (_"Disabled"_, _"Bounce"_ or _"spam"_), the sending has stopped.
Depending on this status, the outgoing process will be different.
- **Error report to**: This setting allows you to receive a daily report to the email address of your choice. Activate it by clicking the Change the recipient button. The report will include emails sent from your web hosting plan that bounced back with an error at OVHcloud. You can also view these reports at any time via the Emails in error button on the right of the Email scripts page.
- **Total number of emails sent**: Refers to the number of automated emails sent since you created your OVHcloud web hosting plan.
- **Emails sent today**: The total number of automated emails sent on the current day.
- **Total number of unsent emails**: The number of automated emails sent since you created your web hosting plan that returned an error to OVHcloud.
- **Record of sent emails**: This graph displays the number of emails sent from your web hosting plan over the previous days.
On the right, there are several buttons you can use to manage automated emails sent from your web hosting plan. Depending on the service status, some options may not be available.
- **Purge emails**: Clears the emails in the queue and unblocks the sending of emails. For confidentiality reasons, the emails in the queue are inaccessible from OVHcloud. You can only view these emails if they have been saved in your website's database before being sent.
- **Emails in error**: Allows access to logs of the latest emails that have failed to send. Here, you will find the email addresses concerned, with the associated error. Warning: this log will not be reset, even if you decide to Purge emails or Unblock the sending of emails.
- **Block the sending of emails**: Blocks the distribution of automated emails from your web hosting plan. The emails generated by your scripts after the blocking will not be sent, but will be stored in a queue for a maximum of 72 hours.
- **Unblock the sending of emails**: Unblocks the sending of automated emails from your web hosting plan. The emails in the queue will also be sent out to recipients.
To perform the desired action, click the corresponding button, then click Confirm. In some cases, the execution may take several minutes to be fully effective.
:::info
To avoid unwanted use of automated emails from your web hosting plan, we strongly recommend setting up a security system, such as including a "Captcha" in the forms on your website that can send emails (a contact form, for example).
:::
If you notice that the emails generated from your scripts are no longer sent, but the service status still allows the emails to be sent (_"Enabled"_ or _"Force"_), we recommend the following checks:
- **Check the scripts sending the email**: The scripts may not be able to send the emails due to a syntax error. Check the content of your scripts, correct them if necessary, then try again.
- **Check email sending via test script**: Create a test script that sends an email to your personal email address using the following code:
```bash
\r\nReply-To: SendingEmail@address.tld";
if (mail($to, $subject, $content, $headers))
echo "The email has been sent successfully!";
else
echo "Email sending failed!";
?>
```
For `$headers`, enter the same sending email address twice.
If you receive the message _The email has been sent successfully!_ on the email address you have defined in the line for `$to`, this indicates that the scripts sending your emails contain errors.
- **Make sure that your outgoing messages do not use an SMTP server**: Do not specify an SMTP server in your script parameters when using the PHP "mail()" function. If you have an interface for managing emails from your website, change this setting in your website's configuration.
- **Check the total size of your email**: The email sent must not exceed the total size of **10 MB** (encapsulation and header included). The content of your email must not exceed **7/8 MB**.
### Managing the "Disabled", "Bounce" and "spam" states [](#)
In this section, you will find details on each status that has blocked your email function.
:::warning
Before detailing each of these statuses, it is important to understand the points that can degrade your domain name's reputation or prevent your emails from being received.
Verify the following upstream:
- The configuration of [the SPF record](/en/guides/web-cloud/domains/dns-zone-spf.md) in the domain name's DNS zone.
- The configuration of [the DMARC record](/en/guides/web-cloud/domains/dns-zone-dmarc.md) in the DNS zone of the domain name, **only if the destination server requires it**.
- Check the reputation of the IP address that sent the email ([here the IP of your web hosting plan](/en/guides/web-cloud/web-hosting/clusters-and-shared-hosting-ip.md), using tools such as [MXtoolbox](https://mxtoolbox.com/) or [Spamhaus](https://check.spamhaus.org/).
- The email does not contain any elements that could be interpreted as spam. You can find a non-exhaustive list of these elements in the "[Case 3: Sending legitimate emails classified as spam](#elements-list-spam)" section of this guide.
- If there is no blockage on the OVHcloud side, and if the email has not been received or rejected by the recipient, contact the recipient to have them check if the email has been blocked on the receiving server.
:::
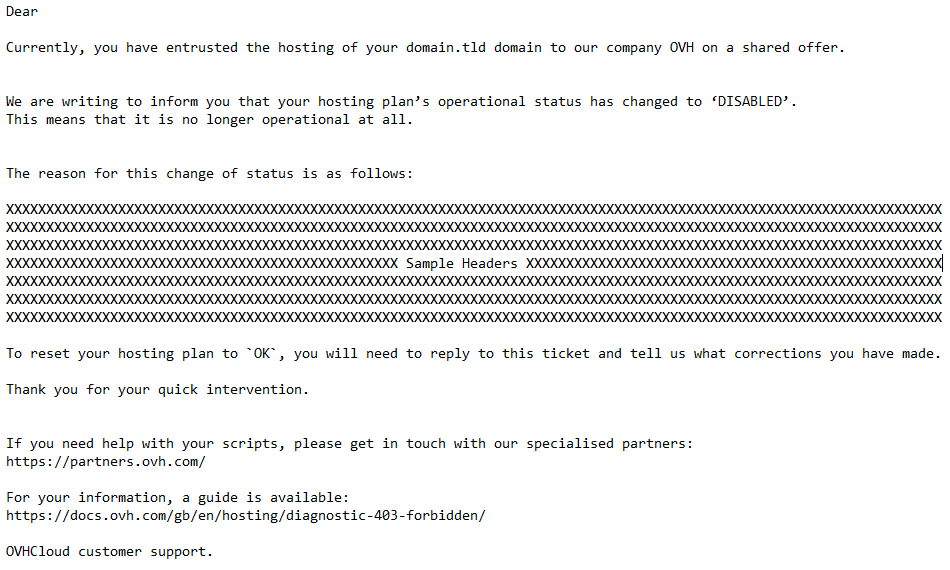
#### The "Disabled" status
This state occurs when:
- Too many emails were sent in quick succession.
- Too many emails are returned in error.
- You have disabled the feature in your OVHcloud Control Panel.
To resolve this, click on the tabs below to view each of the **3** steps.
**Step 1**
Go to the Hosting plans page, then select the web hosting plan concerned.
**Step 2**
On the page that pops up, click on the More tab, then click Email scripts.
**Step 3**
Click Unblock the sending of emails, and wait a few minutes for the sending service to become active again.
#### The "Bounce" status
This state occurs when a certain percentage of your emails are automatically returned with an error state.
To resolve this, click on the tabs below to view each of the **3** steps.
**Step 1**
Go to the Hosting plans page, then select the web hosting plan concerned.
**Step 2**
On the page that pops up, click on the More tab, then click Email scripts.
**Step 3**
There are two options:
- If you click on Unblock the sending of emails, the service status will change to _"Force"_. The ratio of **returned emails to the total number of sent emails** authorised before a block will be doubled. The sending will be operational again a few minutes after the unblocking.
- If you click on Purge emails, this will erase all emails from the queue and the service status will change back to _"Enabled"_ without doubling the ratio.
#### The "spam" status
This state occurs when spam emails are sent from your hosting.
Generally, this block is accompanied by the sending of an email titled **"Abuse with your domain.tld hosting"**, generated automatically by our security robots.
There are three possible scenarios for this situation:
- **Case 1: Robot operation on a contact form**:
To resolve this issue, you will need to secure all scripts that can send emails from your hosting plan, using a "Captcha" type system.
Then go to the "Email scripts" section of your hosting plan. To do so, click on the tabs below to view each of the **3** steps.
**Step 1**
Go to the Hosting plans page, then select the web hosting plan concerned.
**Step 2**
On the page that pops up, click on the More tab, then click Email scripts.
**Step 3**
Click on Purge emails to erase all emails from the queue and the service status will change back to _"Enabled"_. In this case, a purge is required to delete the spam that is waiting to be sent.
- **Case 2: Malicious file injected into your hosting system**:
To correct this, you must do at least the following:
- Analyse [your hosting logs](/en/guides/web-cloud/web-hosting/logs-and-statistics.md) to identify security vulnerabilities and infected files.
- Delete or correct the malicious file(s)/module(s).
- For CMSs (WordPress, Joomla!, PrestaShop, Drupal, etc.), update the CMS, plugin(s) and associated theme.
- Secure your contact forms with a Captcha.
If you are using a CMS, install only "official" plugins and themes.
Update the CMS, plugins and associated theme as regularly as possible to avoid this happening again.
Once you have secured your hosting plan, click on the tabs below to view each of the **3** steps.
**Step 1**
Go to the Hosting plans page, then select the web hosting plan concerned.
**Step 2**
On the page that pops up, click on the More tab, then click Email scripts.
**Step 3**
Click on Purge emails, this will erase all emails from the queue and the service status will change back to _"Enabled"_.
In this case, a purge is required to delete the spam that is waiting to be sent.
- **Case 3: Sending of legitimate emails considered as spam**
If you are the originator of the emails that caused the block, below are some examples of **practices to avoid** when sending an email (so that it is not immediately considered spam):
- 3 or more words in upper case in the subject of the email.
- Email with empty subject/body.
- The email only contains an image larger than 1 MB and very little text.
- The subject of the email starts with: Hi, FREE, BUY, BUYING, or similar phrasing.
- The email contains more than 70% "white space" (abuse of the "SPACE" or "ENTER" key on the keyboard).
- The font size used to write the email is extremely large.
- The text colour and the background colour are the same.
- The sender IP address (IP of your Internet access point for example) has a negative reputation with spam protection services.
- The header of the sent email does not respect the RFC email standards.
- Links in the email are incorrect.
- A URL in the email is not secure (example: a URL written as `https://`, while the actual URL only exists as `http://`).
- The email contains terms of a pornographic nature or similar.
- The email contains an executable (EXE, BAT, PIF, XML, XLSX or documents with macros); this applies even if the file is inside a compressed archive (.zip, .rar etc.).
If your service is still in a _"spam"_ state, reply to the automatic email you received, specifying that you have taken the necessary measures.
Our antispam service will analyse the situation, and our support team will get back to you to explain the unblock procedure.
### Sending emails using an "SMTP" script [](#)
:::warning
OVHcloud provides services that you are responsible for with regard to their configuration and management. It is therefore your responsibility to ensure that they function properly.
This guide is designed to help you with common tasks. However, we recommend contacting a [specialist provider](https://partner.ovhcloud.com/en-gb/directory/) if you encounter any difficulties. We will not be able to assist you. You can find more information in the [Go further](#go-further) section of this guide.
:::
Although we strongly recommend using PHP's "mail()" function, shared hosting allows you to send emails via a script that uses Simple Mail Transfer Protocol (SMTP). The total size of your email can not exceed **10 MB** (i.e. **7/8 MB excluding encapsulation**).
:::warning
Emails sent with a script that uses an SMTP configuration cannot be managed and tracked from your OVHcloud Control Panel
.
:::
:::info
If you use an OVHcloud email account, you can also use `SMTPSecure` with _"startls"_ or _"tls"_ and the `Port` **587**. However, using `SMTPSecure` with _"ssl"_ and **465** as the `Port` is the preferred configuration on our infrastructure.
:::
## Go further [](#)
[View your hosting logs](/en/guides/web-cloud/web-hosting/logs-and-statistics.md)
[Fix the 403 Forbidden page on your website](/en/guides/web-cloud/web-hosting/diagnostic-403-forbidden.md)
[Restore your web hosting plan's FTP storage space](/en/guides/web-cloud/web-hosting/ftp-save-and-backup.md)
For specialised services (SEO, development, etc.), contact [OVHcloud partners](https://partner.ovhcloud.com/en-gb/directory/).
If you would like assistance using and configuring your OVHcloud solutions, please refer to our [support offers](https://www.ovhcloud.com/en-gb/support-levels/).
Join our [community of users](https://community.ovhcloud.com/).