---
title: "Getting started with a Cloud Web hosting plan"
description: "Find out how to get started with a Cloud Web hosting plan"
url: https://docs.ovhcloud.com/en/guides/web-cloud/web-hosting/getting-started-cloud-web
lang: en
lastUpdated: 2026-03-31
---
# Getting started with a Cloud Web hosting plan
## Objective
For our new [Cloud Web](https://www.ovhcloud.com/en-gb/web-hosting/cloud-web-offer/) solution, we have combined 20 years of experience in web hosting with the power of our Public Cloud. Like our standard hosting plans, your websites are hosted on a service that is managed 24/7. However, [Cloud Web](https://www.ovhcloud.com/en-gb/web-hosting/cloud-web-offer/) offers an even wider range of features, and higher performance levels for hardware such as SSD disks.
**Find out how to get started with a Cloud Web hosting plan.**
## Requirements
- a [Cloud Web hosting plan](https://www.ovhcloud.com/en-gb/web-hosting/cloud-web-offer/)
- an email confirming that your hosting plan has been set up
- a [domain name](https://www.ovhcloud.com/en-gb/domains/) for your website
***
### OVHcloud Control Panel Access
- **Lien direct :** Hébergements
- **Pour accéder à vos services :** Web Cloud > Hébergements > Sélectionnez votre hébergement web
***
## Instructions
### 1 - Define your project
OVHcloud [Cloud Web](https://www.ovhcloud.com/en-gb/web-hosting/cloud-web-offer/) hosting offers a wider range of configuration options than standard web hosting plans, so that you can tailor your plan to suit your project. To ensure that your project is a success, it is important to have a clear idea of your objective. To do this, you should:
- **Define what you want to set up.** Are you creating a blog, or an online store? Do you want to share your passion, or boost your company's online profile? It is best to define your project clearly before you get started.
- **Research the technical requirements for setting up your project.** Your project may have specific technical requirements. Make sure you are aware of them in advance.
- **Ensure that your project is technically compatible with Cloud Web hosting.** Need a particular runtime software type or SQL? If you have not already done so, check that what you need is available with your [Cloud Web](https://www.ovhcloud.com/en-gb/web-hosting/cloud-web-offer/) hosting plan.
Once you have explored the various options available and carefully defined your project, you can then start getting it online.
### 2 - Choose a runtime software application
With [Cloud Web](https://www.ovhcloud.com/en-gb/web-hosting/cloud-web-offer/), you can choose from a range of different coding languages to build your project. If you would like to use a language other than PHP, which is the default selection, you will need to select a runtime software application that corresponds to your coding language.
The languages currently available are:
- PHP
- Node.js
- Python
- Ruby
Pour accéder aux moteurs d'exécution de votre hébergement [Cloud Web](https://www.ovhcloud.com/fr/web-hosting/cloud-web-offer/)
, connectez-vous à votre espace client OVHcloud
. Cliquez sur `Web Cloud
` dans la barre de services à gauche, puis sur `Hébergements
`. Choisissez le nom de l'hébergement Cloud Web concerné et positionnez-vous sur l'onglet `Moteurs d'exécution
`.
**Step 1**
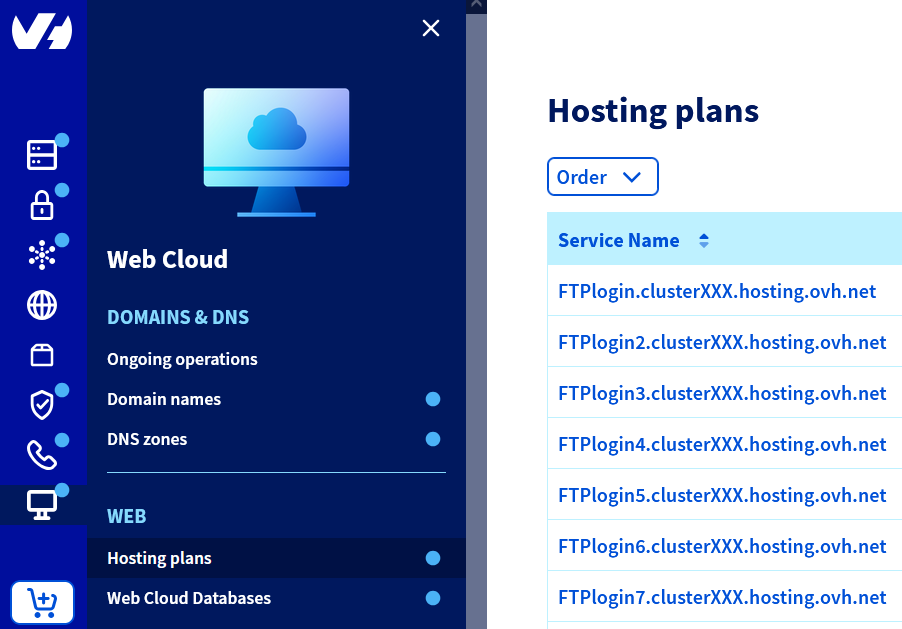
Go to the Hosting plans page, then select the Cloud Web hosting plan concerned.
**Step 2**
Click on the Runtime software applications tab. When you set up your hosting plan, a runtime software application is created automatically. It is listed as `Default choice` in the table that appears.
To modify a runtime software that has already been set, click on the ... button to the right, then Modify.
**Step 3**
If you have the [Cloud Web](https://www.ovhcloud.com/en-gb/web-hosting/cloud-web-offer/) offer with 2 vCores, you can add a second runtime environment (maximum 2 per plan) by clicking on the Actions button, then on Add a runtime software application.
Pour vérifier que vous disposez bien de 2 vCores avec votre hébergement Cloud Web, connectez-vous à votre espace client OVHcloud
, cliquez sur `Hébergements
` dans la barre de services à gauche, puis choisissez le nom de l'hébergement Cloud Web concerné. Sur la page qui s'affiche, dans l'encadré **Abonnement**
et sous la mention `Offre`
, vérifiez que la référence `Cloud Web 3
` y est indiquée.
To check that you have 2 vCores with your Cloud Web hosting plan, click on the tabs below to view each of the **2** steps.
**Step 1**
Go to the Hosting plans page, then select the Cloud Web hosting plan concerned.

**Step 2**
In the **Plan** box and under `Service plan`, check that the reference `Cloud Web 3` is present.
### 3 - Create environment variables (optional)
If you would like to deploy your project several times in different environments (e.g. development, test and production), you will need to provide variables in order for your code to run properly. To do this, [Cloud Web](https://www.ovhcloud.com/en-gb/web-hosting/cloud-web-offer/) prompts you to define environment variables that can be accessed by the code for your website or web application.
For example, this way you can leave out the .env file in the PHP Laravel framework, as described in this guide: [https://laravel.com/docs/master/configuration](https://laravel.com/docs/master/configuration).
To add an environment variable, click on the tabs below to view each of the **3** steps.
**Step 1**
Go to the Hosting plans page, then select the Cloud Web hosting plan concerned.

**Step 2**
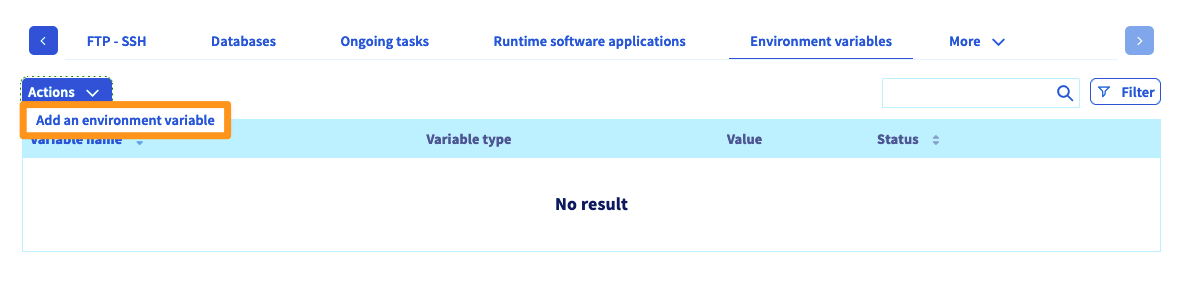
Click on the Environment variables tab. A table will display the environment variables created for your solution.
**Step 3**
To add a new one, click on the Actions button, then Add an environment variable. Follow the appropriate instructions for the variable you would like to create.
If you do not use a development framework that includes the environment variables, or would simply like to check that your variables are working properly, you can create a script to do this. Below are examples of two scripts that can help you with this process, although they are no substitute for the assistance of a webmaster:
- **for PHP**:
```php
```
- **for Node.js**:
```sh
var http = require('http');
http.createServer(function(request, response) {
response.writeHeader(200, {"Content-Type": "text/html"});
response.write( process.env.DB_DATABASE);
response.end();
}).listen(80);
```
Make sure you replace the generic information included in these scripts (e.g. DB\_DATABASE) with the environment variable concerned.
### 4 - Configure additional domains as multisites (optional)
Now that the technical environment of your [Cloud Web](https://www.ovhcloud.com/en-gb/web-hosting/cloud-web-offer/) hosting plan is ready, you can configure additional domain names on it as multisites. This way, you can partition your space in order to host several websites on it, for example. If you would like to do this for your project, click on the tabs below to view each of the **3** steps.
**Step 1**
Go to the Hosting plans page, then select the Cloud Web hosting plan concerned.

**Step 2**
Click on the Multisite tab. The table displayed will contain all of the domain names that have been added to your hosting plan. Some of these will have been created automatically, when your hosting plan was set up.
To add a new one, click on the Add a domain or sub-domain button, and follow the instructions that appear. The method may be different, depending on whether the domain name concerned is registered with OVHcloud.
**Step 3**
We strongly advise taking special care when you enter the following information:
- **Root directory**: the directory where the domain name entered must be hosted on the storage space for your Cloud Web hosting plan.
- **Runtime software application**: the runtime software application previously set, which will be used by the multisite you are currently configuring.
:::warning
If you have added a domain name that is considered to be external, you will need to add a TXT record called **ovhcontrol** to its DNS configuration. This way, OVHcloud can ensure that the domain addition is approved. If you skip this step, your domain will not be added.
:::
Repeat this step if you would like to add several domain names to your Cloud Web hosting plan. For more information on adding a domain name as a multisite, please read the following guide: [Hosting multiple websites on your Web Hosting plan](/en/guides/web-cloud/web-hosting/multisites-configure-multisite.md).
### 5 - Set up your project on the Cloud Web hosting plan
There are two ways of setting up your project. Once you have picked the technique that best suits you, please repeat the process as needed if you are putting several websites online.
#### 1. Use our 1-click modules
By using our 1-click modules, you will get a ready-to-use website template that you can customise with a variety of themes, texts, and much more. OVHcloud offers four structures with its 1-click modules. You can find out more about them by browsing our webpage on [Creating a website with 1-click modules](https://www.ovhcloud.com/en-gb/web-hosting/uc-website/).
If your choice of method involves using our 1-click modules, click on the tabs below to view each of the **3** steps.
**Step 1**
Go to the Hosting plans page, then select the Cloud Web hosting plan concerned.

**Step 2**
Click on the 1-click modules tab, then click Add a module.
**Step 3**
You can then choose whether to install it in 'basic' mode (non-customisable), or 'advanced' mode (customisable).
If you need more information on OVHcloud 1-click modules, please read our guide: [Setting up your website with 1-click modules](/en/guides/web-cloud/web-hosting/cms-install-1-click-modules.md).
:::info
In order to use these modules, you must use the PHP runtime software application.
:::
#### 2. Set up your project manually
Whether you are building a website from scratch or migrating an existing website, manual setup may require a much higher degree of technical skill, and you will need to rely on your own knowledge. We recommend contacting a [specialist provider](https://partner.ovhcloud.com/en-gb/directory/) and/or the service's software publisher if you encounter any difficulties.
If you have chosen to set up your website manually, you must have all of the website or application files that you would like to set up on your hosting plan. If you have created any databases on your Cloud Web hosting plan, you will also need to have their details and credentials to hand. If you are migrating a website, please ensure that you create a backup copy of all your website files.
There is no clear-cut, single approach to take since every project is different, but our guides to [Publishing a website on your Web Hosting space](/en/guides/web-cloud/web-hosting/hosting-how-to-get-my-website-online.md) and [Migrating your website and emails to OVHcloud](/en/guides/web-cloud/web-hosting/hosting-migrating-to-ovh.md) should be able to help you establish how to proceed.
### 6 - Modify your domain name's configuration
At this stage, your project must be set up on your OVHcloud Cloud Web hosting plan, and if applicable, your email addresses must be created. If your email addresses do not work, it may be because your domain name is not correctly configured. If this is the case, or you are unsure about where the error is, we would recommend following this step.
However, please note that if you are in the process of migrating your services to OVHcloud, the changes associated with the DNS may result in your services becoming unavailable if they are not completed at the right time. As described in our guide to [Migrating your website and emails to OVHcloud](/en/guides/web-cloud/web-hosting/hosting-migrating-to-ovh.md), please note that you must edit your domain's DNS servers as a final part of the process.
#### 1. Familiarise yourself with OVHcloud DNS records
There are several OVHcloud DNS records. We will focus on two particular records, which keep your website accessible and allow you to receive emails on your OVHcloud email addresses. Please follow the instructions below to find out where to find them:
| DNS record | Associated service | Where to find it |
| ---------- | --------------------- | ------------------------------------------------------------------------------------------------------------------------------------------------------------------------------------------------------------------------------------------------------------------------------------------------------------------ |
| A | Pour le site internet | Dans votre espace client OVHcloud, positionné dans la section Hébergements sur l'hébergement Cloud Web concerné. Récupérez l'adresse IP qui apparaît à côté de « IPv4 » depuis l'onglet Informations générales. |
| MX | Pour les e-mails | Dans votre espace client OVHcloud, positionné dans la section Emails sur le nom de domaine concerné. Récupérez les informations qui apparaissent à côté de « Champs MX » depuis l'onglet Informations générales. |
#### 2. Check and/or modify the DNS records
Now that you are more familiar with the OVHcloud DNS records for your [Cloud Web](https://www.ovhcloud.com/en-gb/web-hosting/cloud-web-offer/) hosting plan and your OVHcloud email solution, you can check if they have been configured properly, and edit them if required. These two changes must be made with the service provider managing your domain name's DNS configuration (DNS zone).
:::warning
- Si votre nom de domaine n'utilise pas la configuration DNS OVHcloud, vous devez réaliser la modification depuis l'interface du prestataire gérant cette dernière.
- Si votre nom de domaine est enregistré chez OVHcloud, vous pouvez vérifier si ce dernier utilise notre configuration DNS. Pour cela, rendez-vous dans votre espace client, onglet Serveurs DNS une fois positionné sur le nom de domaine concerné.
- If your domain name is registered with OVHcloud, you can check if the domain name is using our DNS configuration. To do this, refer to our guide [Modifying the DNS servers for an OVHcloud domain name](/en/guides/web-cloud/domains/dns-server-edit.md).
:::
Please read the instructions below to see where you should make the changes:
| DNS configuration used | Where to make the changes |
| ---------------------- | ------------------------------------------------------------------------------------------------------------------------------------------------------------------------------------------------------------------------------------------------------------------------------------------------------------------------------------------------------------------------------------ |
| OVHcloud | Depuis votre espace client OVHcloud, rendez-vous dans la partie Web Cloud. Cliquez sur le menu Zones DNS, puis choisissez le nom de domaine concerné. Consultez notre documentation «[Éditer une zone DNS OVHcloud](/en/guides/web-cloud/domains/dns-zone-edit.md)» si nécessaire. |
| Autre | Depuis l'interface du prestataire gérant la configuration DNS de votre nom de domaine. Nous vous invitons à prendre contact avec ce dernier si vous éprouvez des difficultés pour réaliser les manipulations. |
Once you have modified your domain name's DNS configuration, you will need to allow a maximum of 24 hours for the changes to fully propagate and take effect. If you have added several domain names to your Cloud Web hosting plan as a multisite, you will need to make these two changes for each individual domain name.
### 7 - Customise your website
This stage is optional if you have migrated an existing website that is already customised! However, if you have just set up a new website using our modules, you can customise it by editing the theme, and start publishing your content on it.
If you need help with your website's features, we would recommend that you go to the CMS publisher's official website, which will contain documentation to support you in this regard.
### 8 - Use your email addresses
Now, you just need to use your email addresses. To do this, OVHcloud offers an online application (webmail): RoundCube. RoundCube is available at the following address: [https://www.ovh.co.uk/mail/](https://www.ovh.co.uk/mail/). You will need to enter the credentials for the email address that you created with OVHcloud.
If you would like to configure your email address on an email client or device (e.g. a smartphone or tablet), please refer to our documentation via this portal: [MX Plan documentation](/en/guides/web-cloud/email-and-collaborative-solutions/mx-plan/landing-page-mx-plan.md).
## Go further
[Migrating your website and emails to OVHcloud](/en/guides/web-cloud/web-hosting/hosting-migrating-to-ovh.md)
[Publishing a website on your Web Hosting space](/en/guides/web-cloud/web-hosting/hosting-how-to-get-my-website-online.md)
[Setting up your website with 1-click modules](/en/guides/web-cloud/web-hosting/cms-install-1-click-modules.md)
[Hosting multiple websites on your Web Hosting plan](/en/guides/web-cloud/web-hosting/multisites-configure-multisite.md)
For specialised services (SEO, development, etc.), contact [OVHcloud partners](https://partner.ovhcloud.com/en-gb/directory/).
If you would like assistance using and configuring your OVHcloud solutions, please refer to our [support offers](https://www.ovhcloud.com/en-gb/support-levels/).
Join our [community of users](https://community.ovhcloud.com/).