---
title: "Web Hosting - Environment, PHP version, .ovhconfig"
description: "Find out how to modify a web hosting plan’s runtime environment, PHP version, application firewall, engine, mode and .ovhconfig"
url: https://docs.ovhcloud.com/en/guides/web-cloud/web-hosting/configure-your-web-hosting
lang: en
lastUpdated: 2026-06-16
---
# Web Hosting - Environment, PHP version, .ovhconfig
## Objective
The [OVHcloud Web Hosting](https://www.ovhcloud.com/en-gb/web-hosting/) offers allow you to host your websites, provided they are compatible with the [configuration of our shared infrastructure](https://webhosting-infos.hosting.ovh.net).
Editing the **php.ini** file is not available on Web Hosting plans. This is because the PHP configuration is global to the entire shared infrastructure.
However, on our shared infrastructure, you can modify the following settings for your web hosting plan:
- [Runtime environment](#runtime-environment)
- [PHP version](#php-versions)
- [PHP runtime environment](#php-runtime)
- [Application firewall](#firewall)
- [Runtime mode](#runtime-mod)
These configuration settings can be modified in two ways:
- In your OVHcloud Control Panel
- In the FTP storage space of your OVHcloud web hosting plan using a file named ".ovhconfig"
:::info
.ovhconfig files are server configuration files and are automatically recognised as such by the shared hosting infrastructure.
They are present natively and by default in the "FTP root" of your web hosting plan’s FTP storage space.
They contain the values of the elements mentioned above.
:::
In short, changing your Web Hosting plan’s configuration from the OVHcloud Control Panel
, or changing the values in the .ovhconfig file amounts to the same thing.
### Summary
- [1 - Description of configuration settings available on OVHcloud web hosting plans](#all-parameters)
- [2 - Method 1: Modify the web hosting plan configuration in the OVHcloud Control Panel](#setting-ovh-manager)
- [3 - Method 2: Modify the web hosting plan configuration in the ".ovhconfig" file](#setting-ovhconfig)
- [4 - Advanced use of .ovhconfig files](#ovhconfig-more)
**Find out how to modify a web hosting plan’s runtime environment, PHP version, application firewall, engine, mode and .ovhconfig file.**
## Requirements
- An [OVHcloud web hosting plan](https://www.ovhcloud.com/en-gb/web-hosting/), with the exception of a Cloud Web hosting plan
***
### OVHcloud Control Panel Access
- **Direct link:** Hosting plans
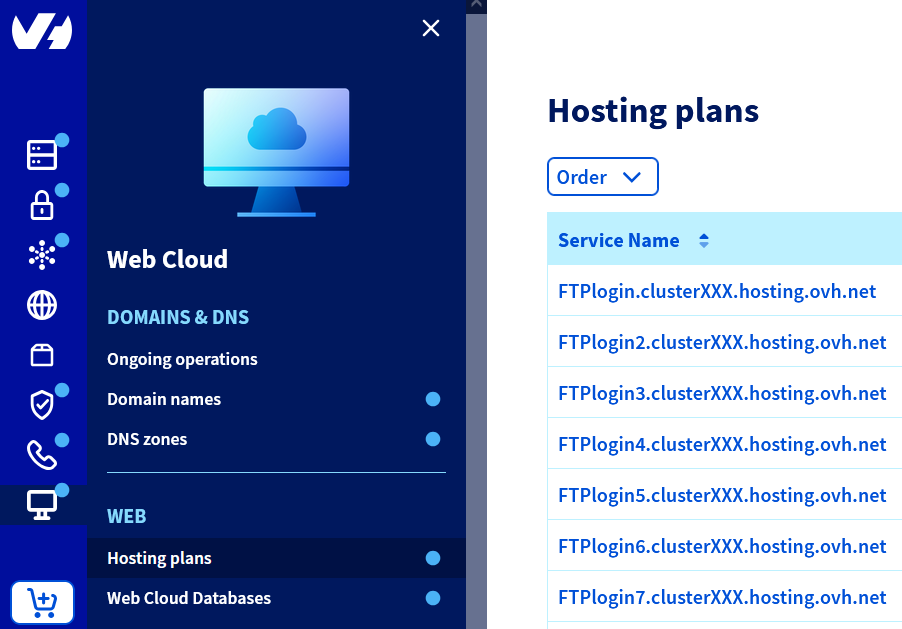
- **Navigation path:** Web Cloud > Hosting plans > Select your web hosting plan
***
## Instructions
### 1 - Description of the configuration settings available on OVHcloud web hosting plans [](#)
Below is a technical description of each setting you can modify on OVHcloud web hosting plans.
:::warning
Modifying at least one of these elements may affect the display or the proper functioning of your website. **Please ensure that your website is compatible with the changes you want to make to your web hosting plan’s configuration**. Contact a [specialist provider](https://partner.ovhcloud.com/en-gb/directory/) if you have any doubts or encounter any difficulties.
:::
#### 1.1 - Runtime environments [](#)
Runtime environments contain a set of programming languages. Depending on the chosen runtime environment, the languages are available in more or less advanced versions. The purpose of these environments is to allow you to correctly run the files that make up your website, in line with your technical needs.
OVHcloud web hosting plans offer **3** runtime environments: _Legacy_, _Stable_ and _Stable64_.
Below are the elements contained in our different runtime environments:
| Environment | Legacy | Stable | Stable64 |
| ------------------- | ----------- | ----------- | ----------- |
| Architecture | 32-bit | 32-bit | 64-bit |
| Minimum PHP version | 5.4 | 5.4 | 7.4 |
| OpenSSL | 1.0.1t | 1.0.1t | 1.1.1n |
| Python | 2.7 and 3.4 | 2.7 and 3.7 | 2.7 and 3.7 |
| Ruby | 2.1 | 2.1 | 2.5 |
| Rails | 4.1 | 4.1 | 5.2 |
| Perl | 5.20 | 5.20 | 5.28 |
| git | 2.1 | 2.1 | 2.20 |
:::info
The _Legacy_ environment can be useful for older websites that still use old PHP versions. However, we strongly recommend using the _Stable64_ environment, which has the latest updates. **Please ensure that your website is compatible before you make any changes.**
:::
#### 1.2 - PHP versions [](#)
PHP is a dynamic programming language used to build websites. For your website, depending on its age, the updates made, and certain variables required for it to work properly, you may need to change the PHP version it uses.
There are several versions of the PHP programming language. Version upgrades provide various patches and add or remove features. OVHcloud offers the latest major versions of PHP, a list of which can be found [here](https://www.ovhcloud.com/en-gb/web-hosting/uc-programming-language/).
Some PHP versions only work with certain runtime environments. Below are the PHP versions available on OVHcloud web hosting plans and compatible [runtime environments](#runtime-environment):
| PHP Versions | Compatible runtime environments |
| ------------------------------------ | ------------------------------- |
| 5.4, 5.5, 5.6, and 7.0 | Legacy, Stable |
| 7.1, 7.2, and 7.3 | Stable |
| 7.4, 8.0, 8.1, 8.2, 8.3, 8.4 and 8.5 | Stable64 |
:::info
Since some features may not be maintained with newer versions, **please ensure that the new PHP version you want is compatible with your website before you start making any changes.**
:::
Although OVHcloud manages the installation of the latest PHP versions on its servers, you are responsible for ensuring that your website is **always up-to-date** and compatible with the latest PHP versions. There are two ways of doing this, depending on which website you are using:
**Case 1: You are using a Content Management System (CMS)** such as _WordPress_, _Joomla!_, _PrestaShop_ or _Drupal_:
- Consult the official documentation created by the publisher of the CMS you are using.
- Take note of the information concerning the technical requirements for your CMS to work, as well as the steps needed to update it.
- If necessary, update your CMS by ensuring that the new version is compatible with OVHcloud web hostings.
**Case 2: You are using a website based on a custom solution**:
- Contact the webmaster who created the website.
- Use the [official PHP documentation](https://php.net/manual/en/appendices.php), which provides more information on version migrations.
- If necessary, update your website’s code, ensuring that it remains compatible with OVHcloud web hostings.
You can find out which PHP version is currently used by your web hosting plan in two ways.
**Click on the 2 headings below to display the content.**
In the OVHcloud Control Panel
Click on the tabs below to view each of the **2** steps.
**Step 1**
Go to the Hosting plans page, then select the web hosting plan concerned.
**Step 2**
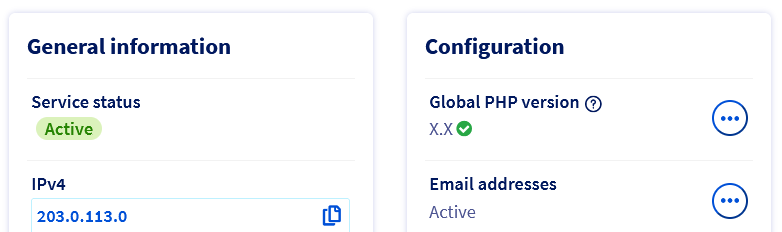
In the General information tab, find the version below _Global PHP version_.
:::info
If a blue round symbol is present, wait a few minutes for the version to update.
:::
Via a script
Create a **.php** script containing only the following code:
```php
```
Put it online by placing it in your [FTP storage space](/en/guides/web-cloud/web-hosting/ftp-connection.md), then call it by accessing its full address/URL.
:::warning
You can no longer modify the PHP version via a .htaccess file on the latest [OVHcloud Web Hosting](https://www.ovhcloud.com/en-gb/web-hosting/) solutions.
The command to change the PHP version in the .htaccess file does not allow us to use recent PHP versions on our infrastructure.
You must use the .ovhconfig file.
:::
#### 1.3 - PHP runtime environments [](#)
PHP runtime software applications are programs that allow you to perform actions on the web server in a given way. Generally, this setting is modified to influence the speed at which requests generated by visitors to your website are executed.
On OVHcloud web hosting plans, we offer **2** PHP runtime environments: _php_ (PHP-FPM) and _phpcgi_.
By choosing the _php_ engine, you can enable or disable the PHP accelerator (PHP-FPM). This has been adapted to suit our infrastructure, with the aim of speeding up the execution speed of PHP scripts.
The _phpcgi_ engine executes requests “in series”, unlike the _php_ (PHP-FPM) engine, which executes them “in parallel”.
The PHP accelerator (PHP-FPM) is up to seven times faster than the _phpcgi_ engine.
#### 1.4 - Application firewall [](#)
A firewall is a security tool that filters incoming requests to your web hosting. On our web hosting plans, this configuration option can only be **enabled** or **disabled**. Changing the firewall rules is not possible.
Please refer to our guide “[Activating the application firewall](/en/guides/web-cloud/web-hosting/multisites-activating-application-firewall.md)” for more details on this topic.
:::warning
If you use payment modules, enabling the application firewall can sometimes cause communication disruptions between the payment module and the payment service provider. If this is the case, disable the option.
:::
#### 1.5 - Execution modes [](#)
The execution modes allow you to manage the cache behaviour of your website's static files (images, for example) as well as the processing of PHP errors (generally useful, for example when your website displays a blank page).
There are **2** modes that you can enable: _Production_ and _Development_.
| Mode | Static File Cache | Processing PHP Errors |
| ------------- | -------------------------------------------------- | ----------------------------------------- |
| _Production_ | Maximizes caching of static files on web browsers. | PHP errors do not appear on your website. |
| _Development_ | No cache is applied. | PHP errors will appear on your website. |
:::info
For PHP versions 7.1 and later, errors will appear on the website, regardless of the mode used.
:::
Now that you know the different editable settings for your OVHcloud Web Hosting plan, learn about the two methods for changing these settings.
### 2 - Method 1: Modify the web hosting plan configuration via the OVHcloud Control Panel [](#)
:::warning
As a reminder, changing at least one of these elements may affect the display or the proper functioning of your website. **Please ensure that your website is compatible with the changes you want to make to your web hosting plan’s configuration.** If you have any doubts or encounter any difficulties, please contact a [specialist provider](https://partner.ovhcloud.com/en-gb/directory/).
:::
Click on the tabs below to view each of the **3** steps.
**Step 1**
Go to the Hosting plans page, then select the web hosting plan concerned.

**Step 2**
In the **Configuration** box, you will see the address under **Global PHP version**.
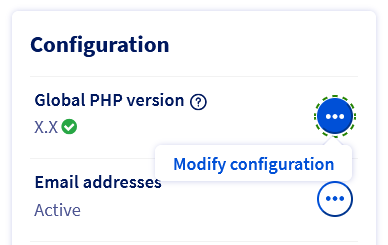On the right-hand side of Global PHP version located almost in the center of the page, click the ... button, then Modify configuration.
:::info
If the Modify configuration button is greyed out, it may be that the **Global PHP version** is being verified. If this is the case, a blue round symbol will appear next to the version, indicating that a check is in progress. Wait a few minutes for the Modify configuration button to become accessible again.
If the **Global PHP version** option does not appear in your OVHcloud Control Panel, check that the _.ovhconfig_ file exists in the FTP root of your OVHcloud web hosting plan.
Find all the information about the _.ovhconfig_ file in the third part “[Method 2: Modify your Web Hosting plan’s configuration with the “.ovhconfig” file](#setting-ovhconfig)” of this guide.
:::
**Step 3**
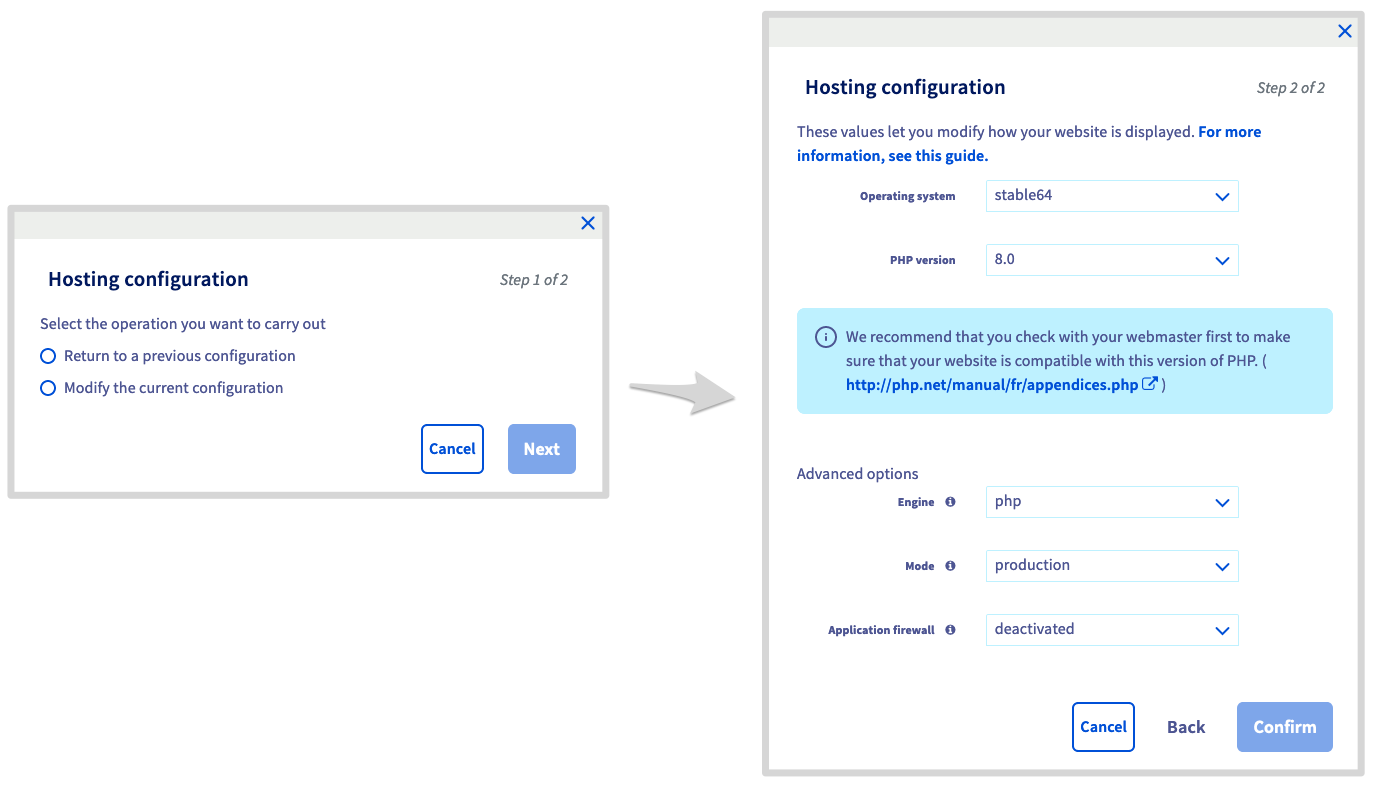
In the window that pops up, you can choose between two options. Select the one that corresponds to the action you want to carry out, then click Next.
| Choice | Detail |
| ------------------------------------ | ----------------------------------------------------------------------------------------------------------------------------------------------------------------------------------------------------------------------------------------------------------------------------------- |
| `Return to a previous configuration` | After selecting this option, choose the configuration to restore next to `Historical choice`. This option may not be available if you have not made any changes in the past. |
| `Modify the current configuration` | After selecting this option, choose the modifications you want to make to the configuration from the fields provided. If necessary, go back to the first part “[Description of the configuration settings available on OVHcloud web hosting plans](#all-parameters)” of this guide. |
:::info
Changing the runtime environment of your web hosting plan automatically resets PHP sessions.
:::
Once you are ready, click Confirm to apply the modification. Wait a few moments for the process to complete.
### 3 - Method 2: Modify the web hosting plan configuration with the ".ovhconfig" file [](#)
#### 3.1 - Log in to your web hosting plan’s FTP storage space
You will need your primary FTP username, its password, and the FTP server address.
Click on the tabs below to view each of the **3** steps.
**Step 1**
Go to the Hosting plans page, then select the web hosting plan concerned.

**Step 2**
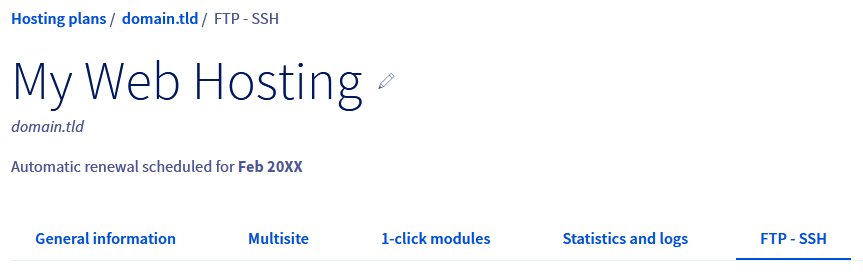
On the page that pops up, click on the FTP - SSH tab.
**Step 3**
Here, you will find the information you need to log in.
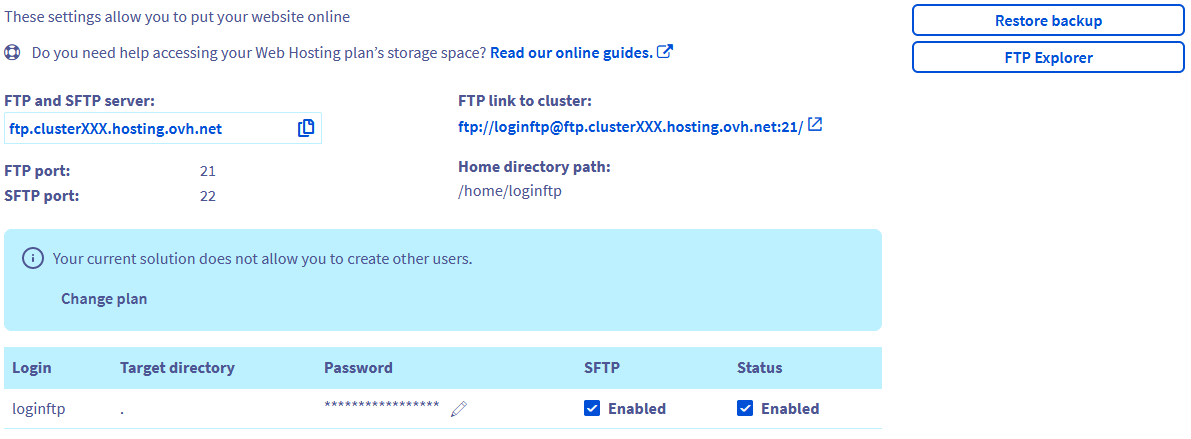For the FTP user password, please refer to our guide on [Modifying an FTP user password](/en/guides/web-cloud/web-hosting/ftp-change-password.md) if necessary.
#### 3.2 - Create or open the .ovhconfig file
Once you have logged in to your [FTP storage space](/en/guides/web-cloud/web-hosting/ftp-connection.md), you can view all of the files currently hosted on it. Inside the root directory of your hosting (which is indicated by a `/`) you should find the .ovhconfig file.
There are two ways of doing this:
- **The .ovhconfig file is there**: Download it to your device. Make a copy of it before editing it. This will allow you to restore the original file if necessary.
- **The .ovhconfig file does not exist**: Create a file on your own device and name it ".ovhconfig".
#### 3.3 - Edit the contents of the ".ovhconfig" file [](#)
You can open and edit the .ovhconfig file with any common text editor. The content of your ".ovhconfig" file must have a code format as in the following example:
```php
app.engine=php
app.engine.version=8.0
http.firewall=none
environment=production
container.image=stable64
```
:::tip
If you have created a new .ovhconfig file, copy the code above into your file, then continue reading this guide.
:::
Customise the values of the variables depending on the configuration you want to use with your web hosting plan.
| Variables | Detail |
| ------------------ | ------------------------------------------------------------------------------------------------------------------------------------------------------------------------------------------------------------------------------------------------------------------------------------------------------- |
| app.engine | Allows you to modify [the PHP engine](#php-runtime) used by the hosting system. Enter **php** to enable the PHP-FPM accelerator, and **phpcgi** to disable it. |
| app.engine.version | Allows you to define [the PHP version](#php-versions) used by the hosting plan among [the ones OVHcloud offers](https://www.ovhcloud.com/en-gb/web-hosting/uc-programming-language/). Enter the version of your choice (appropriate for the runtime environment you have chosen to use). |
| http.firewall | Enables or disables the [firewall of your OVHcloud web hosting plan](https://www.ovhcloud.com/en-gb/web-hosting/options/). Enter **security** to enable it, or **none** to disable it. |
| environment | Allows you to manage the behaviour of your website's static file cache, as well as PHP error processing. This corresponds to [execution mode](#runtime-mod). Enter **production** to maximise caching and hide PHP errors, or **development** so that no cache is applied and PHP errors are displayed. |
| container.image | Allows you to modify the [runtime environment](#runtime-environment) used by the hosting. Enter the runtime environment (**legacy**, **stable** or **stable64**) of your choice. If you choose the **stable64** runtime environment, ensure that your site is compatible with 64-bit architecture. |
For detailed explanations of these settings, refer to the first part “[Description of the configuration settings available on OVHcloud web hosting plans](#all-parameters)” of this guide.
Here is the detailed technical description of the .ovhconfig file:
```php
; ovhconfig
;
; this file must be placed in $HOME/.ovhconfig or in $DOCUMENT_ROOT/.ovhconfig
; __app.engine__
;
; values: php (php engine + opcache accelerator)
; notice: if php, a phpcgi engine will be activated as fallback (if previous engine crash)
;
; php:
; IMPORTANT: register_globals and magic_quotes_gpc are off for security
; php optiones .htaccess (like php version) are ignored
; phpcgi:
; IMPORTANT this is a fallback to previous system
; in this case __app.engine.version__ will be considerated as AUTO and php version will be old system
; (meaning depending .htaccess or .phpX extension)
;
app.engine=php
; __app.engine.version__ specify version of your engine
;
; for php:
; default: 8.0
; for phpcgi:
; this options is ignored (= fallback in AUTO)
;
app.engine.version=8.0
; __http.firewall__ used to add application firewall (filter http requests)
;
; values: none | security
; default: none
;
http.firewall=none
; __environment__
;
; values: production | development
;
; production:
; apache will maximise local cache
; mod_expires will grow up TTL of js, css, pdf, images, video, audio
; you can override it changing expiration explicitly in your .htaccess
; feel free to look on our guide.
; development:
; no expiration is added, files are not locally in cache,
; will speed up tests but decrease performances
;
; choosen environment will also be available in your variable ENVIRONMENT unix env
;
; default: production
;
environment=production
; __container.image__
;
; values: legacy | stable | stable64
;
container.image=stable64
```
#### 3.4 - Upload the ".ovhconfig" file to the storage space
Once you have modified the .ovhconfig file, upload it to your [FTP storage space](/en/guides/web-cloud/web-hosting/ftp-connection.md). Connect to your [FTP storage space](/en/guides/web-cloud/web-hosting/ftp-connection.md) and go to the root of your [FTP storage space](/en/guides/web-cloud/web-hosting/ftp-connection.md) (which is indicated by a `/`). Upload the .ovhconfig file you have just edited to your [FTP storage space](/en/guides/web-cloud/web-hosting/ftp-connection.md). If the file already exists, replace it.
### 4 - Advanced use of .ovhconfig files [](#)
If you are using your web hosting to host multiple websites, there may be various reasons why you want to use a different PHP version for some of your websites.
Create a ".ovhconfig" file containing the desired PHP version for the relevant website or websites. Refer to the section "[3.3 - Modify the contents of the ".ovhconfig" file](#update-ovhconfig)" in this guide for assistance if needed. When you upload the ".ovhconfig" file to your [FTP storage space](/en/guides/web-cloud/web-hosting/ftp-connection.md), do so in the root folder where the files that make up the relevant website are located. Find the root folder of your website using our guide on how to [configure a website on a web hosting](/en/guides/web-cloud/web-hosting/multisites-configure-multisite.md) if needed.
:::warning
**You cannot specify a second [runtime environment](#runtime-environment), a second [runtime mode](#runtime-mod) and/or a second [PHP runtime environment](#php-runtime)** on the same web hosting plan. Only those entered in the .ovhconfig file located in the **root folder** of your [FTP storage space](/en/guides/web-cloud/web-hosting/ftp-connection.md) will be taken into account.
:::
## Go further
[Log in to your Web Hosting plan’s storage space](/en/guides/web-cloud/web-hosting/ftp-connection.md)
For specialised services (SEO, development, etc.), contact [OVHcloud partners](https://partner.ovhcloud.com/en-gb/directory/).
If you would like assistance using and configuring your OVHcloud solutions, please refer to our [support offers](https://www.ovhcloud.com/en-gb/support-levels/).
Join our [community of users](https://community.ovhcloud.com/).