---
title: "Configuring IPv6 for your website"
description: "Find out how to make your website available via an IPv6 address"
url: https://docs.ovhcloud.com/en/guides/web-cloud/web-hosting/configure-ipv6
lang: en
lastUpdated: 2026-05-22
---
# Configuring IPv6 for your website
## Objective
The Internet has been operating since the early 1990s, following the IPv4 standard. This standard provides IP addresses in the format X.X.X.X (in which "X" stands for numbers between 0 and 255) to each device connected to the public network (servers, computers, smartphones, tablets, etc.). However, this protocol limits the number of devices connected to the Internet to around 4 billion, which in 2022 was less than one connected device per two people on Earth.
For this reason, the **IPv6** protocol was introduced, allowing up to 340 sextillion devices to be connected to the Internet. The broad deployment of IPv6 takes time because the new standard has to be incorporated throughout the entire Internet.
Since less IPv4 addresses are available, it is more difficult to add new devices to the Internet using the IPv4 standard. However, connections with an IPv6 address are only useful if public resources, for example your website, are also available with this protocol. This means that the more websites IPv6 is enabled for, the more important it becomes for everyone concerned to migrate to this new protocol.
For more information, see [Wikipedia](https://en.wikipedia.org/wiki/IPv6)'s article on IPv6.
Our web hosting plans have been compatible with IPv6 since 2011. However, enabling this protocol remained optional for the configuration until recently.
**This guide explains how to verify if your website is available via IPv6 and how to configure your hosting's IPv6 address.**
## Requirements
- A [domain name](https://www.ovhcloud.com/en-gb/domains/)
- An [OVHcloud web hosting plan](https://www.ovhcloud.com/en-gb/web-hosting/)
***
### OVHcloud Control Panel Access
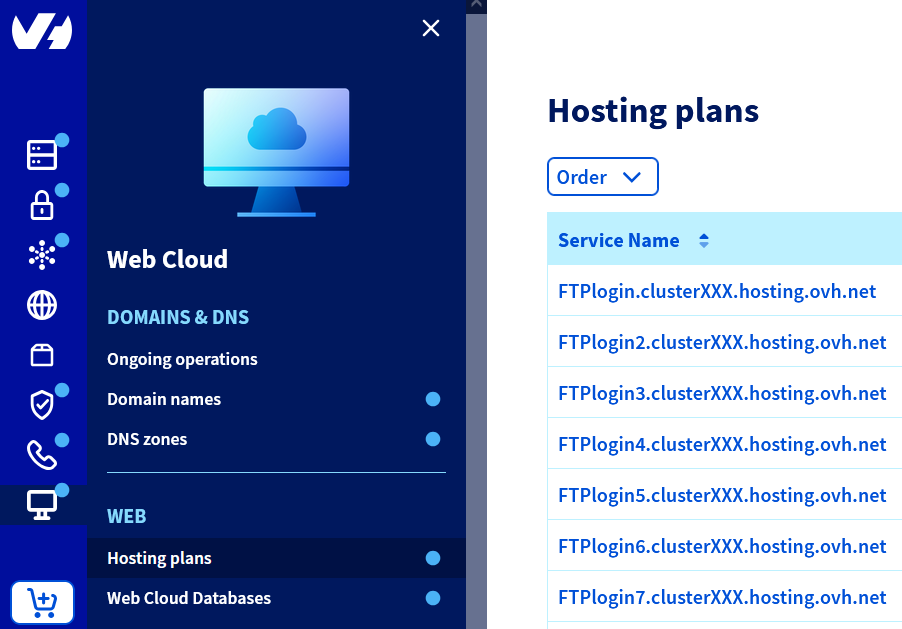
- **Direct link:** Hosting plans
- **Navigation path:** Web Cloud > Hosting plans > Select your web hosting plan
***
## Instructions
:::warning
OVHcloud provides services that you are responsible for with regard to their configuration and management. It is therefore your responsibility to ensure that they function properly.
This guide is designed to help you with common tasks. If you encounter any difficulties, we recommend contacting a [specialist provider](https://partner.ovhcloud.com/en-gb/directory/) and/or the service’s publisher. We will not be able to assist you. You can find more information in the [Go further](#go-further) section of this guide.
:::
If your website is not configured to work with an IPv6 address, you can add [the IPv6 address of your OVHcloud web hosting](/en/guides/web-cloud/web-hosting/clusters-and-shared-hosting-ip.md) in your domain name’s active DNS zone. The goal is for web browsers to find an IPv6 address associated with your website via your domain name.
### 1 - Check your website's IPv6 availability
To check if your website already uses an IPv6 address, use [test-ipv6.run](https://test-ipv6.run/domain-checker). It will show you whether your website responds to this IP protocol. If not, follow the steps below.
### 2 - Retrieve your web hosting plan’s IPv6 address
Click on the tabs below to view each of the **2** steps.
**Step 1**
Go to the Hosting plans page, then select the web hosting plan concerned.
**Step 2**
In the **General information** box, you will see the address under **IPv6**.
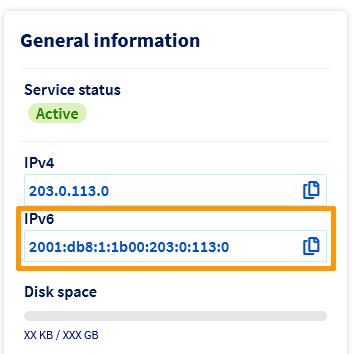Copy the IPv6 address, then continue reading the guide.
### 3 - Configure your domain name’s active DNS zone
:::warning
Our CDN options are currently incompatible with IPv6 addresses. If you configure an IPv6 address for your website, your visitors will not benefit from the CDN.
Bear in mind that adding, modifying or deleting a DNS record in a domain name’s active DNS zone will take between **4 and 24 hours** to propagate fully.
:::
In order for your web browser to find the IPv6 address with your domain name, you will need to modify your domain’s active DNS zone.
If your domain name’s active DNS zone is present at OVHcloud, use our guides “[Editing an OVHcloud DNS zone](/en/guides/web-cloud/domains/dns-zone-edit.md)”, then “[Everything you need to know about DNS records](/en/guides/web-cloud/domains/dns-zone-records.md)” to create a DNS record of type **AAAA**.
Otherwise, contact your DNS provider with the IPv6 address you retrieved earlier.
## Go further [](#)
[Editing an OVHcloud DNS zone](/en/guides/web-cloud/domains/dns-zone-edit.md)
For specialised services (SEO, development, etc.), contact [OVHcloud partners](https://partner.ovhcloud.com/en-gb/directory/).
If you would like assistance using and configuring your OVHcloud solutions, please refer to our [support offers](https://www.ovhcloud.com/en-gb/support-levels/).
Join our [community of users](https://community.ovhcloud.com/).