---
title: "Linking a domain name to your Managed Hosting for WordPress"
description: "Add, modify or remove domain names from your Managed Hosting WordPress — internal, external or to order — from the OVHcloud Control Panel."
url: https://docs.ovhcloud.com/en/guides/web-cloud/managed-hosting/wordpress-domain-link
lang: en
lastUpdated: 2026-05-26
---
# Linking a domain name to your Managed Hosting for WordPress
## Objective
**Managed Hosting for WordPress** is OVHcloud's managed WordPress hosting solution: technical maintenance (updates, security, backups) is handled automatically. The offer lets you manage domain names from the OVHcloud interface, without manual intervention. You can associate a domain name or subdomain with each of your WordPress websites, regardless of its origin.
Two flows are available depending on your situation:
- **Internal domain name**: the domain name is already in your OVHcloud account.
- **External domain name**: the domain name is managed by another registrar.
**Find out how to add, modify or remove domain names from your Managed Hosting WordPress from your OVHcloud Control Panel.**
## Requirements
- An active **Managed Hosting for WordPress** offer with at least one WordPress website created.
- For an external domain name: have access to the active DNS (Domain Name System) zone at your current provider.
***
### OVHcloud Control Panel Access
- **Direct link:** Managed hosting for WordPress
- **Navigation path:** Web Cloud > Managed hosting for WordPress
***
## Instructions
### 1 - Accessing the domain name management
Adding a domain name is done from the `My sites
` tab of your Managed Hosting for WordPress resource. Click the tabs below to view each of the **4**
steps.
**Step 1**
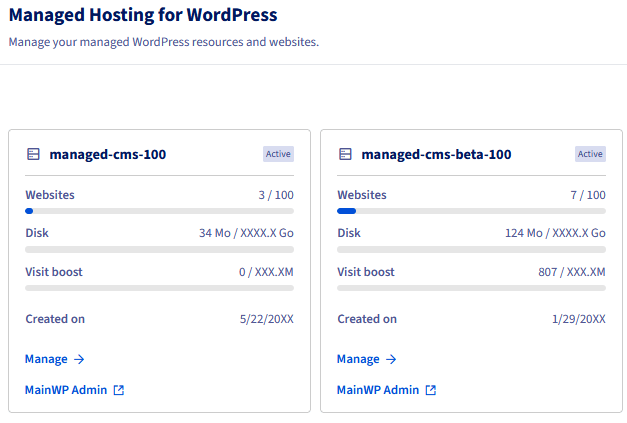
Go to the Managed hosting for WordPress page in your OVHcloud Control Panel.
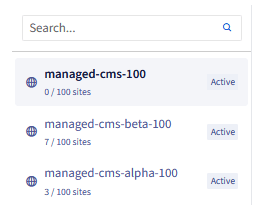
**Step 2**
Click Manage under the resource concerned.
**Step 3**
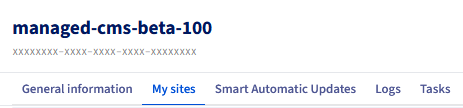
Click the My sites tab. The datagrid lists your WordPress websites with, for each site, the associated domain and the available actions.
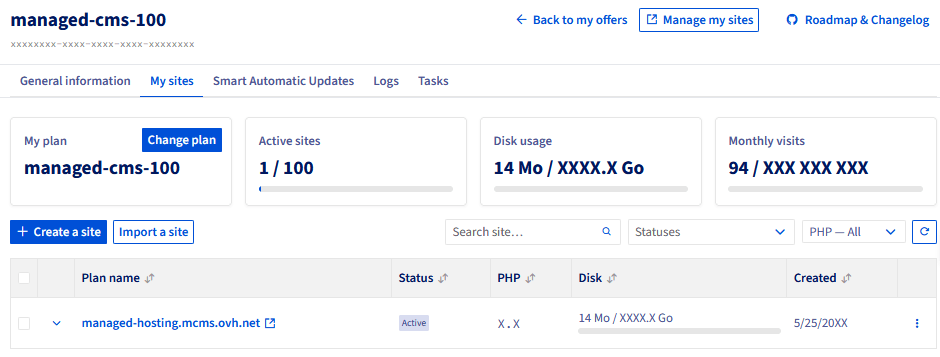
**Step 4**
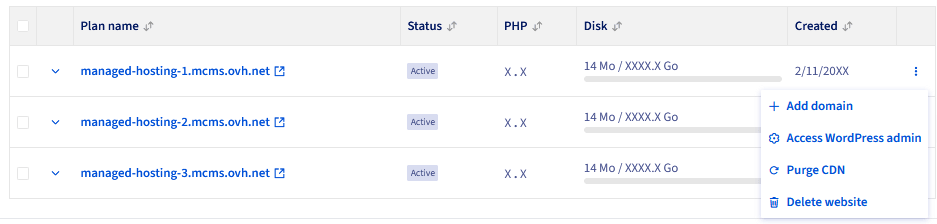
On the right of the WordPress website concerned, click the ⋮ button, then click Add a domain.
:::info
The **first domain name added** to a WordPress website automatically becomes the **primary domain name**. You can add more later (multi-domain) and change the primary domain name from the same menu.
:::
### 2 - Adding a domain name
**Click one of the situations below to view the content.**
Add an internal domain name
An **internal** domain name is a domain name already in your OVHcloud account (registered or transferred).
Once the add tunnel is open, select the internal flow to use a domain name already in your OVHcloud account. Click the tabs below to view each of the **3** steps.
**Step 1**
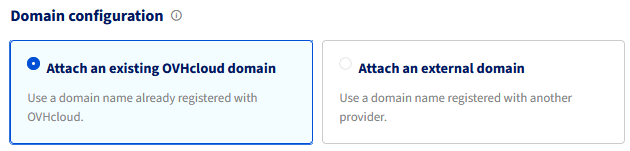
In the add tunnel, select Attach an existing OVHcloud domain.
**Step 2**
Select the desired domain name or subdomain from the list of domain names available in your OVHcloud account.

**Step 3**
Check the summary and click Add. The DNS configuration is handled automatically.
:::info
For an internal domain name, DNS propagation is automatic. Your site will be accessible via this domain name within a few minutes to a few hours.
:::
Add an external domain name
An **external** domain name is managed by another registrar (Gandi, Namecheap, Google Domains, etc.). You must modify your DNS zone manually.
Once the add tunnel is open, select the external flow to use a domain name managed by another registrar. Click the tabs below to view each of the **4** steps.
**Step 1**
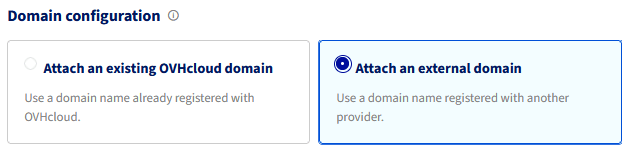
In the add tunnel, select Attach an external domain.
**Step 2**
Enter your domain name (for example: `domain.tld`) in the field provided.

**Step 3**
The interface displays the DNS records to add at your current provider. Log in to the DNS interface of your provider and add the indicated records (typically a DNS record of type **A** or **CNAME**: **C**anonical **NAME**).
**Step 4**
Once the DNS configuration is done at your provider, go back to the OVHcloud Control Panel and click Confirm.
:::warning
DNS propagation of an external domain name can take up to **24 to 48 hours** depending on your provider. Your WordPress website will not be accessible via this domain name during this period.
:::
:::info
The SSL (Secure Sockets Layer) certificate is generated automatically after DNS propagation has been validated. No manual intervention is needed on your side.
:::
### 3 - Managing the domain names of a WordPress site
**Click one of the questions below to view the content.**
How to change the primary domain name?
Changing the primary domain name is done from the My sites tab of your Managed Hosting for WordPress resource. Click the tabs below to view each of the **5** steps.
**Step 1**
Go to the Managed hosting for WordPress page in your OVHcloud Control Panel.

**Step 2**
Click Manage under the resource concerned.

**Step 3**
Click the My sites tab. The datagrid lists your WordPress websites with, for each site, the associated domain name or names.

**Step 4**
On the left of the WordPress website concerned, click the ⌄ icon to display the associated domain names.

**Step 5**
Select Set as primary and confirm.
:::info
The primary domain name is the one used by default to access your WordPress website. Changing the primary domain name may affect your SEO (Search Engine Optimization) ranking if your WordPress website is already indexed. Consider setting up a redirect from the old primary domain name if needed.
:::
How to remove a domain name?
:::warning
Removing a domain name **does not delete your WordPress website**. Only the link between the domain name and the WordPress website is broken. Your WordPress website remains accessible via its **permanent technical URL**.
:::
Removing a domain name is done from the My sites tab of your Managed Hosting for WordPress resource. Click the tabs below to view each of the **6** steps.
**Step 1**
Go to the Managed hosting for WordPress page in your OVHcloud Control Panel.

**Step 2**
Click Manage under the resource concerned.

**Step 3**
Click the My sites tab. The datagrid lists your WordPress websites with, for each site, the associated domain name or names.

**Step 4**
On the left of the WordPress website concerned, click the ⌄ icon to display the associated domain names.

**Step 5**
Click Delete.

**Step 6**
Read the warnings displayed in the modal and confirm the deletion.
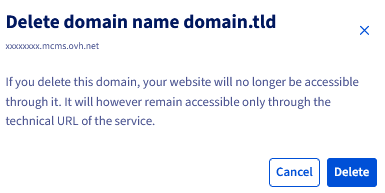
**Effects of deletion:**
- **Your WordPress website remains intact**: only the link with the domain name is broken, the site continues to work.
- **The permanent technical URL remains accessible**: your WordPress website is still reachable via this URL, even without a domain name.
- **The SSL certificate is revoked**: it no longer covers the deleted domain name.
- **SEO ranking may be impacted**: if the domain name was indexed by search engines, removing it affects positioning.
- **Remember to check your email services**: addresses linked to this domain name may be affected by the deletion.
:::info
**Special case — single primary domain name:** if you delete the only primary domain name of a WordPress website, your WordPress website automatically falls back to its **permanent technical URL**. This URL is always accessible and is never deleted, even when no domain is associated.
:::
### The permanent technical URL
Each Managed Hosting for WordPress site has a **permanent technical URL**, independent of any domain name. This URL is generated automatically when the WordPress website is created and cannot be deleted.

It lets you:
- Access your WordPress website **in all circumstances**, even without an associated domain name.
- Test your WordPress website before pointing a domain name to it.
- Maintain a fallback access in case of a DNS issue.
:::info
The technical URL is of the form `*.mcms.ovh.net`
or similar. Find it in the `My sites
` datagrid, next to each WordPress website.
:::
## Go further
[Getting started with Managed Hosting for WordPress](/en/guides/web-cloud/managed-hosting/wordpress.md)
[Managing your WordPress websites with MainWP](/en/guides/web-cloud/managed-hosting/mainwp-site-management.md)
For specialised services (SEO, development, etc.), contact [OVHcloud partners](https://partner.ovhcloud.com/en-gb/directory/).
Join our [community of users](https://community.ovhcloud.com/).