---
title: "Zimbra Pro - Configuring your email account via ActiveSync in Outlook for Windows"
description: "Find out how to configure your Zimbra Pro email address in Outlook for Windows using the ActiveSync protocol"
url: https://docs.ovhcloud.com/en/guides/web-cloud/email-and-collaborative-solutions/zimbra/zimbra-outlook-windows
lang: en
lastUpdated: 2025-12-31
---
# Zimbra Pro - Configuring your email account via ActiveSync in Outlook for Windows
## Objective
Zimbra Pro accounts can be configured on Windows using the ActiveSync protocol, allowing you to configure all the collaborative features of your email address at once. The Outlook application for Windows allows you to view your Zimbra Pro email account via the ActiveSync protocol.
**Find out how to configure your Zimbra Pro email address in Outlook for Windows using the ActiveSync protocol.**
## Requirements
- A [Zimbra Pro](https://www.ovhcloud.com/en-gb/emails/zimbra-emails/) account
- [Outlook Classic](https://support.microsoft.com/en-gb/office/install-or-reinstall-classic-outlook-on-a-windows-pc-5c94902b-31a5-4274-abb0-b07f4661edf5) for Windows installed on your device
- The login details for the email account you would like to configure
Information regarding the management and configuration of OVHcloud services
OVHcloud provides services for which you are responsible with regard to their configuration and management. It is therefore your responsibility to ensure that they function correctly.
This guide is designed to help you with common tasks. Nevertheless, we recommend contacting a [specialist provider](https://partner.ovhcloud.com/en-gb/directory/) or the software publisher if you encounter any difficulties. OVHcloud cannot provide you with technical support in this regard. You can find more information in the "[Go further](#go-further)" section of this guide.
## Instructions
:::warning
Before you begin configuring your account, it is important to note that the Outlook application included free with Windows 11 is incompatible with the ActiveSync protocol, which is required to configure a Zimbra Pro account. You will need to use the classic **Outlook** version to benefit from ActiveSync protocol support.
To install Outlook Classic on your Windows computer, download it from the Microsoft page "[Install or reinstall Outlook Classic on a Windows PC](https://support.microsoft.com/en-gb/office/install-or-reinstall-classic-outlook-on-a-windows-pc-5c94902b-31a5-4274-abb0-b07f4661edf5)", and install it.
Once the installation is complete, to distinguish between the two versions when they are installed, type "Outlook" in the Windows search bar. You can then see the difference as below.
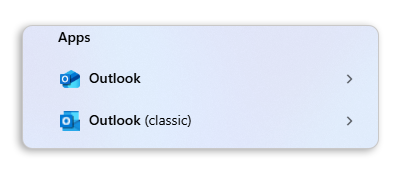
:::
### Add the [](#) account
To add a Zimbra Pro account to Classic Outlook, follow the steps below by clicking on the tabs below in sequence:
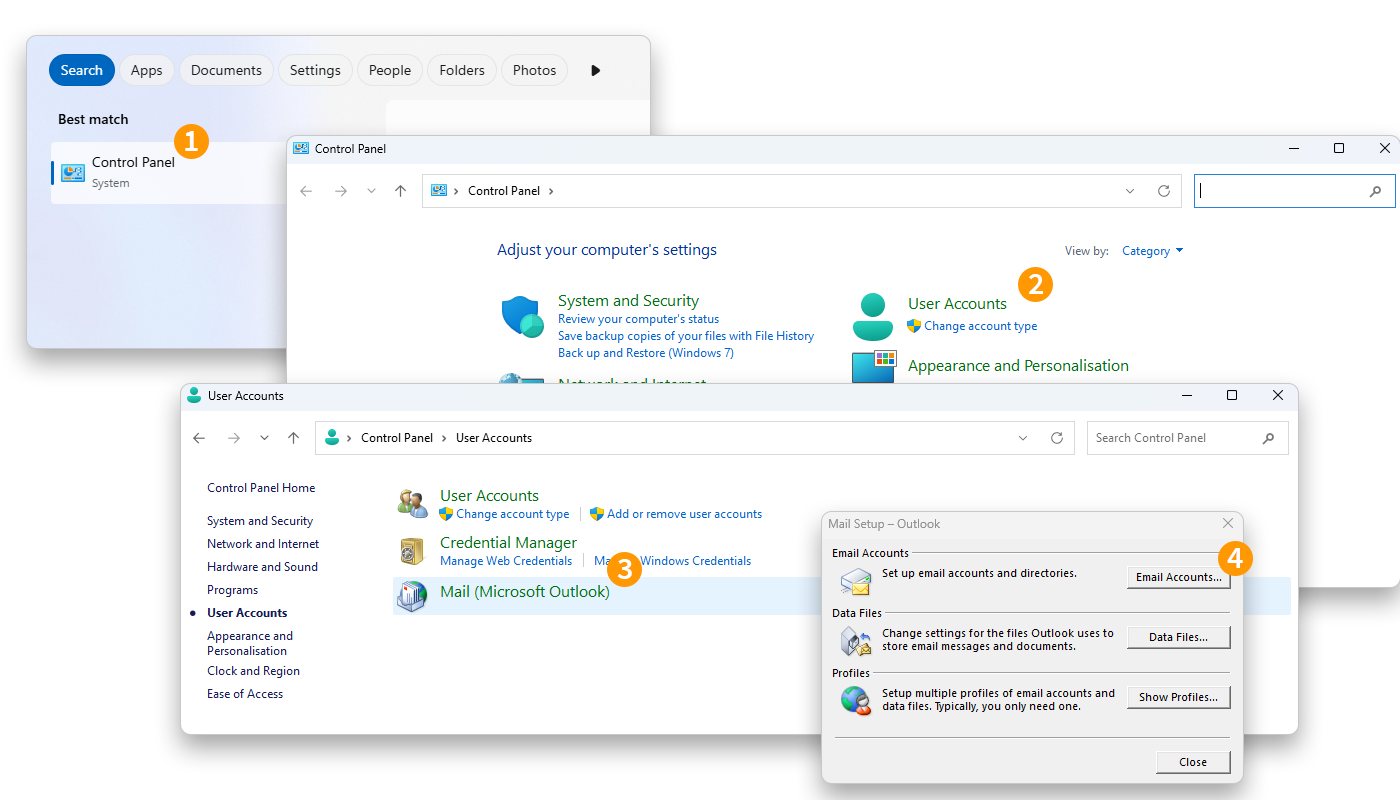
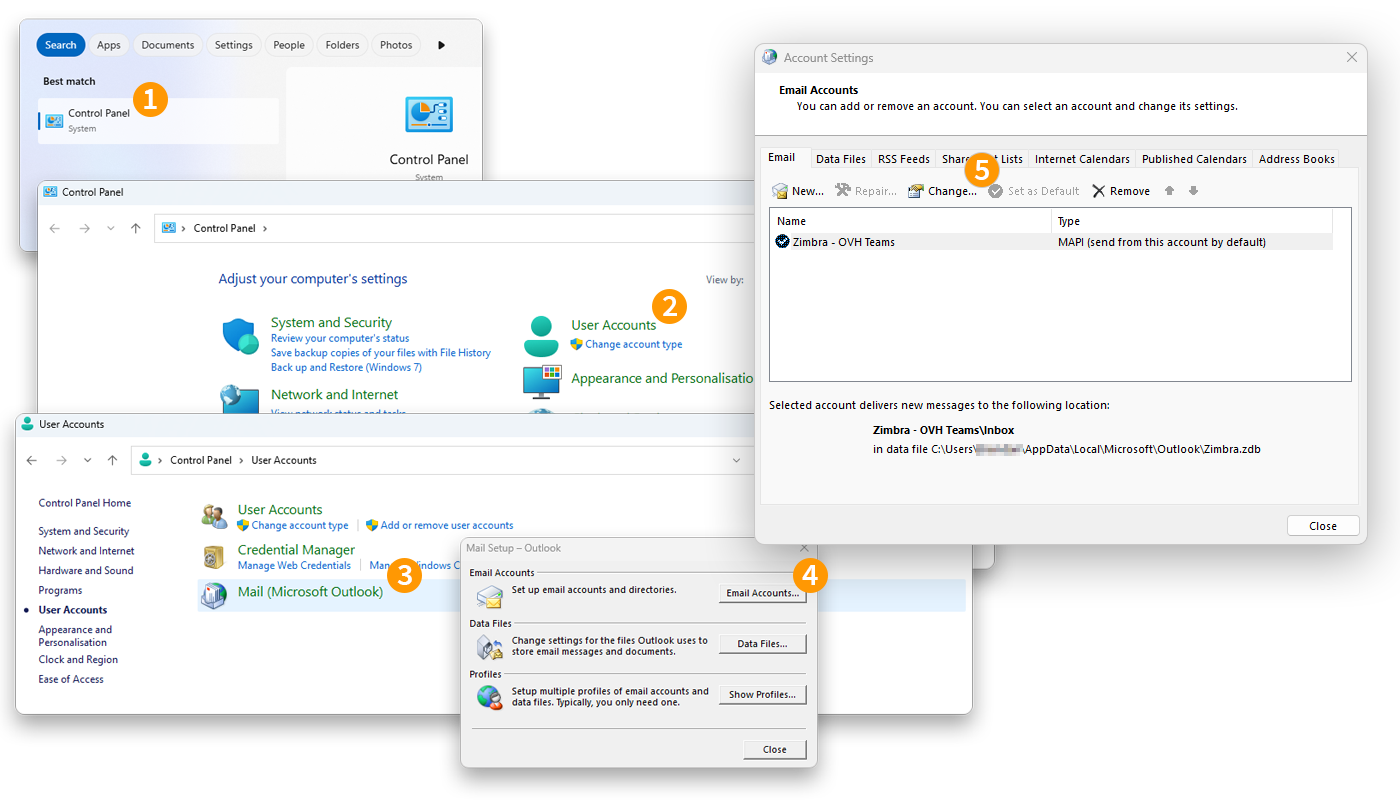
**Step 1**
1. Go to the Windows **control panel**.
2. Click User Accounts.
3. Click Mail.
4. Click Email accounts....
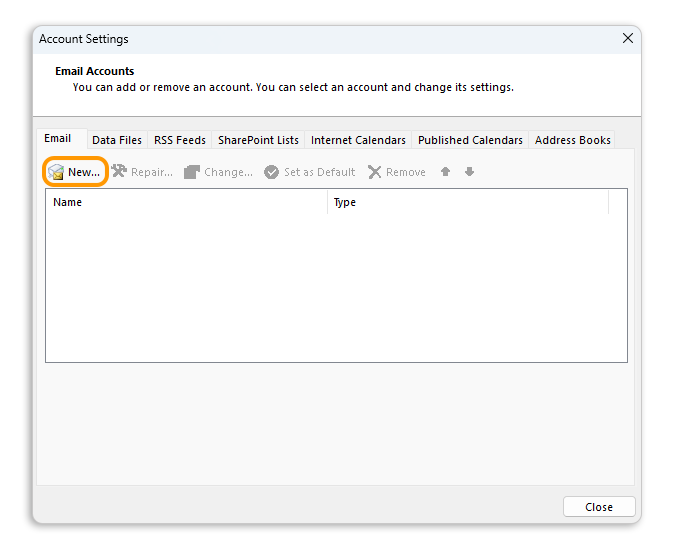
**Step 2**
- In the **Account settings** window, in the `Email` tab, click New\....
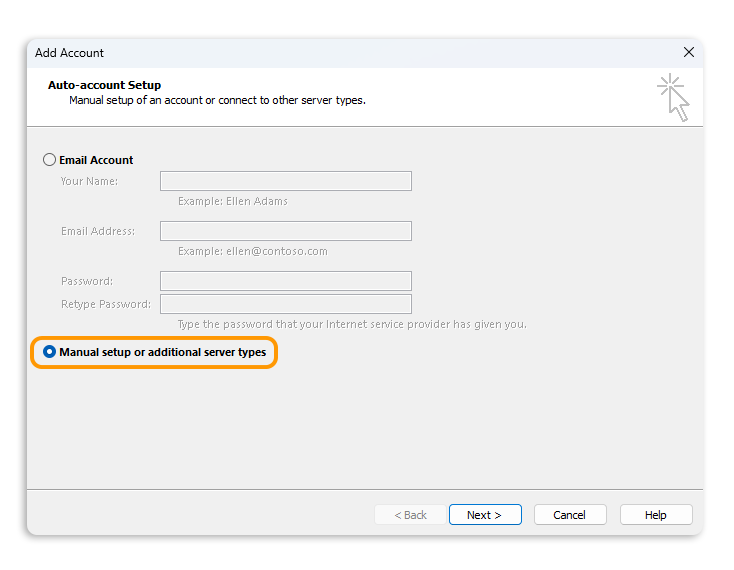
**Step 3**
- In the **Add an account** window, select Manual configuration or additional server types.
- Click Next to continue.
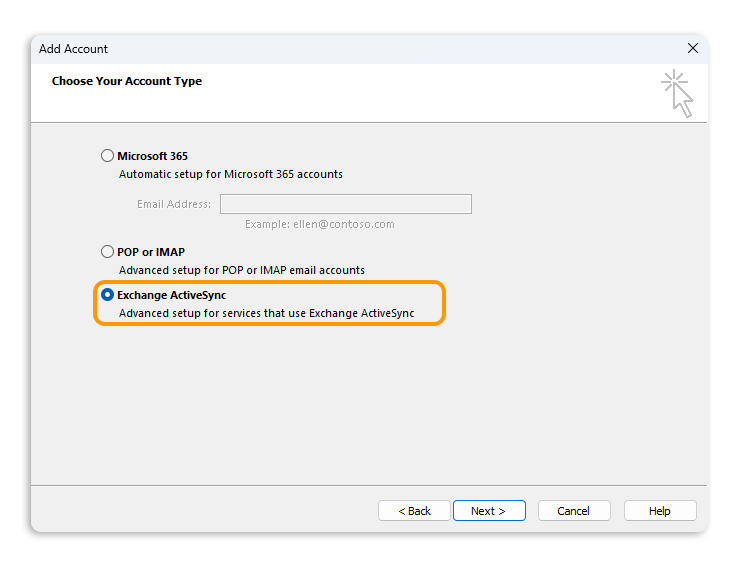
**Step 4**
- Select Exchange ActiveSync.
- Click Next to continue.
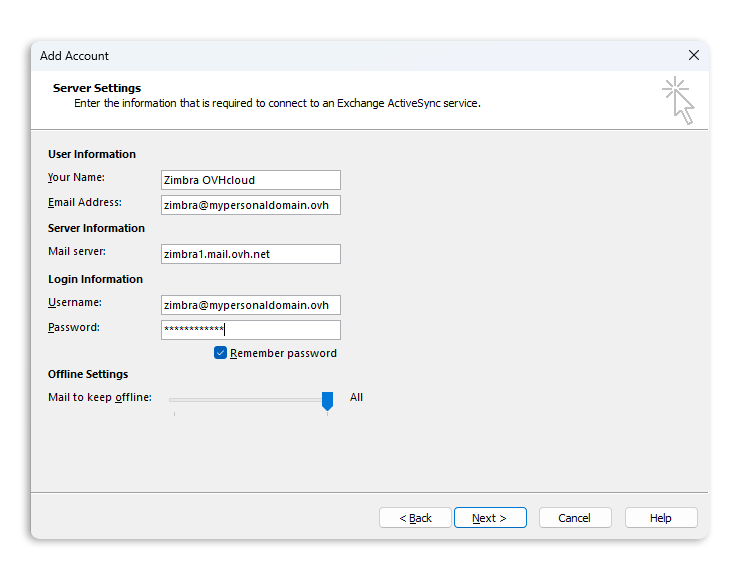
**Step 5**
Enter your account information:
- **Your name**: Define a display name.
- **Email address**: Enter your full email address.
- **Mail server** : Enter "zimbra1.mail.ovh.net".
- **Username** : Enter your full email address.
- **Password**: Enter the password associated with your email address.
Click Next to finish adding the account.
**Step 6**
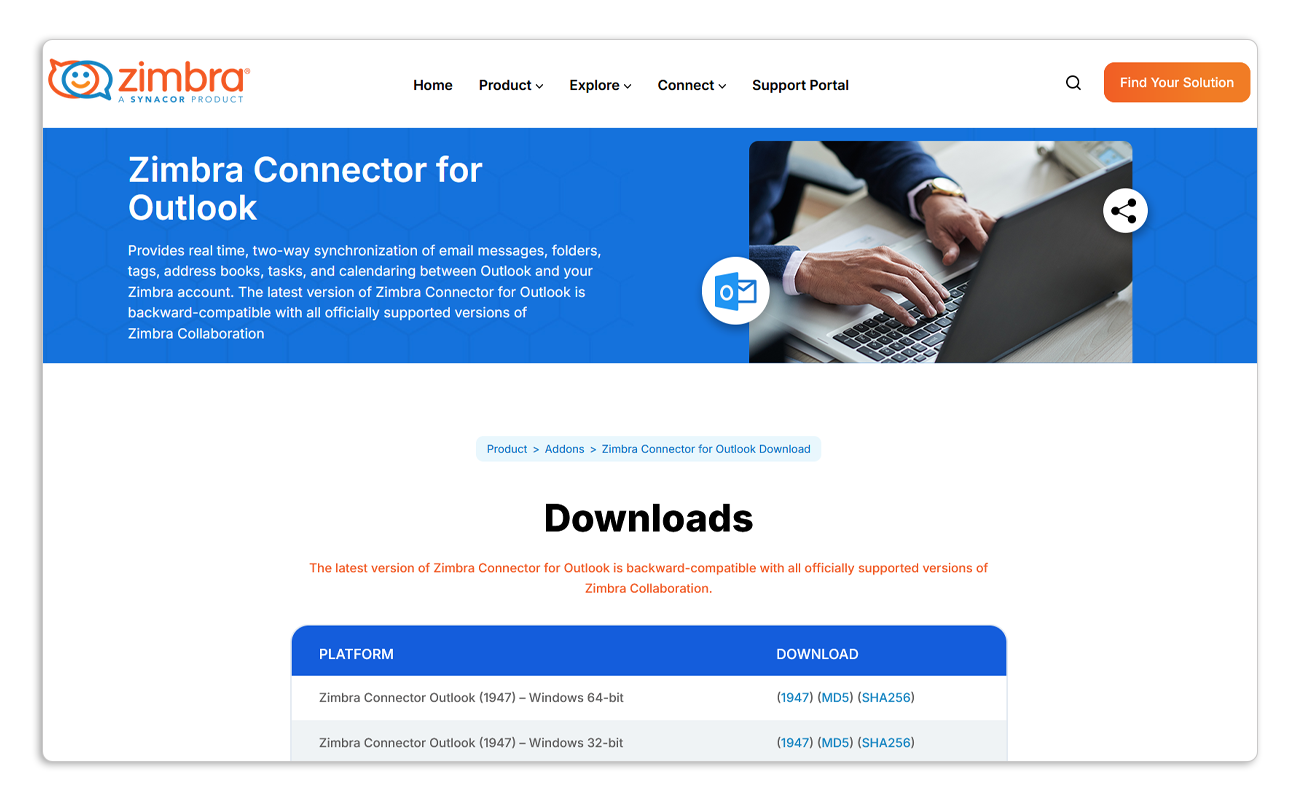
Your email address is now configured for Outlook. To fully synchronize the features of your Zimbra Pro account, **download and install** the [Zimbra Connector for Outlook module](https://www.zimbra.com/product/addons/zimbra-connector-for-outlook-download/).
**Step 7**
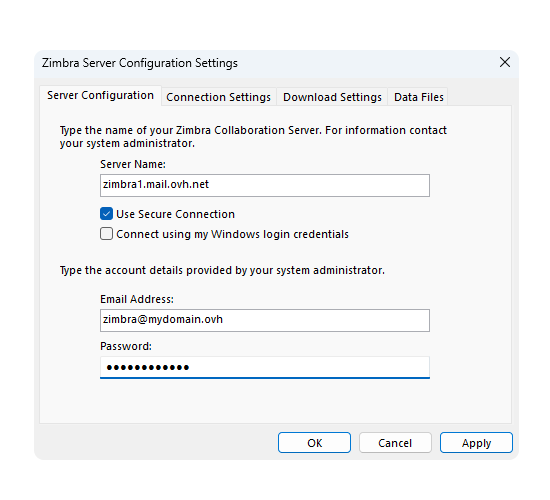
Once you have installed the [Zimbra Connector for Outlook module](https://www.zimbra.com/product/addons/zimbra-connector-for-outlook-download/), launch Outlook Classic.\
The first time, the **Zimbra Server configuration Settings** configuration window appears. Enter the following information:
- **Server name** : Enter "zimbra1.mail.ovh.net".
- **Email address**: Enter your full email address.
- **Password**: Enter the password associated with your email address.
You do not need to change any other settings. Click Apply to validate the settings and ensure that they are compliant. Finally, click OK to go to Outlook and start using your email address.
:::warning
If you encounter a sending or receiving error after following the configuration steps above, please refer to the “[Modify existing settings](#modify-settings)” section of this guide.
:::
### Use the email address
Once you have configured your email address, you can start using it! You can now send and receive messages, and manage your calendars and tasks.
OVHcloud also offers a web application that allows you to access your email address from an internet browser. You can log in to the [OVHcloud webmail](https://www.ovhcloud.com/en-gb/mail/) using your email credentials. If you have any questions on how to use it, please read our guide on [Using Zimbra webmail](/en/guides/web-cloud/email-and-collaborative-solutions/mx-plan/email-zimbra.md).
### How do I modify existing settings? [](#)
To modify the settings of an email account that has already been configured, follow the instructions below:
1. Go to the Windows **Control Panel**.
2. Click User Accounts.
3. Click Mail.
4. Click Email accounts....
5. Select the email account concerned from the list and click Modify....
Find the settings in **Step 7** under [Add account](#add-account).
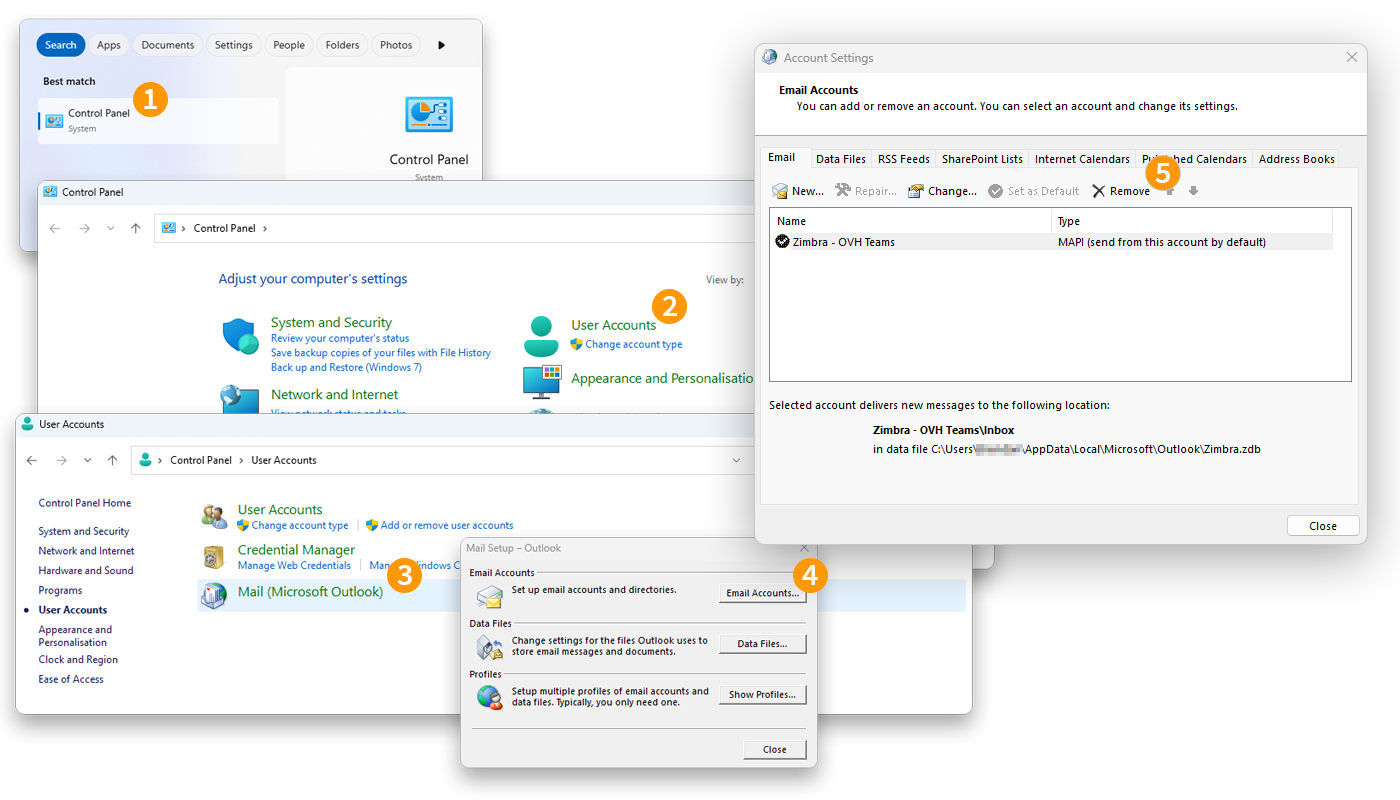
### How do I delete an email account? [](#)
To delete your email account, follow the instructions below:
1. Go to the Windows **Control Panel**.
2. Click User Accounts.
3. Click Mail.
4. Click Email accounts....
5. Select the email account concerned from the list and click Delete.
:::warning
To delete your email account, it is necessary that it is not the default email account.
:::
## Go further [](#)
:::info
For more information about configuring an email address from the Outlook application on Windows, see [Microsoft Help Center](https://support.microsoft.com/en-gb/office/add-an-email-account-to-outlook-for-windows-6e27792a-9267-4aa4-8bb6-c84ef146101b?ocmsassetID=\&CorrelationId=778d1d8d-9ac2-4449b-96292924_4b).
:::
For specialised services (SEO, development, etc.), contact [OVHcloud partners](https://partner.ovhcloud.com/en-gb/directory/).
If you would like assistance using and configuring your OVHcloud solutions, please refer to our [support offers](https://www.ovhcloud.com/en-gb/support-levels/).
Join our [community of users](https://community.ovhcloud.com/community/en).