---
title: "Creating filters for your email addresses"
description: "Find out how to create and configure filter rules on your email address"
url: https://docs.ovhcloud.com/en/guides/web-cloud/email-and-collaborative-solutions/mx-plan/feature-filters
lang: en
lastUpdated: 2025-04-28
---
# Creating filters for your email addresses
## Objective
With a filter you can configure conditions for your account's incoming emails and set actions based on them.
For example: you can automatically delete emails tagged as spam by our spam protection.
- Condition: email subject contains _\[SPAM]_
- Action: delete email
**This guide explains how to create and configure a filter on your email address.**
## Requirements
- an MX Plan email solution or a [Web Hosting plan](https://www.ovhcloud.com/en-gb/web-hosting/)
***
### OVHcloud Control Panel Access
- **Direct link:** MX Plan
- **Navigation path:** Web Cloud > MX Plan > Select your MX Plan service
***
:::warning
The following instructions are only eligible for the legacy MX Plan solution. For our current solution, you can manage filters directly via OWA (**O**utlook **W**eb **A**pp). You can identify which version you are using with the table below.
:::
| MX Plan legacy version | MX Plan new version |
| ------------------------------------------------------------------------------------------------------------------------------------------------------------------------------------------------------------------------- | -------------------------------------------------------------------------------------------------------------------------------------------------------------------------------------------------------------------------------- |
| 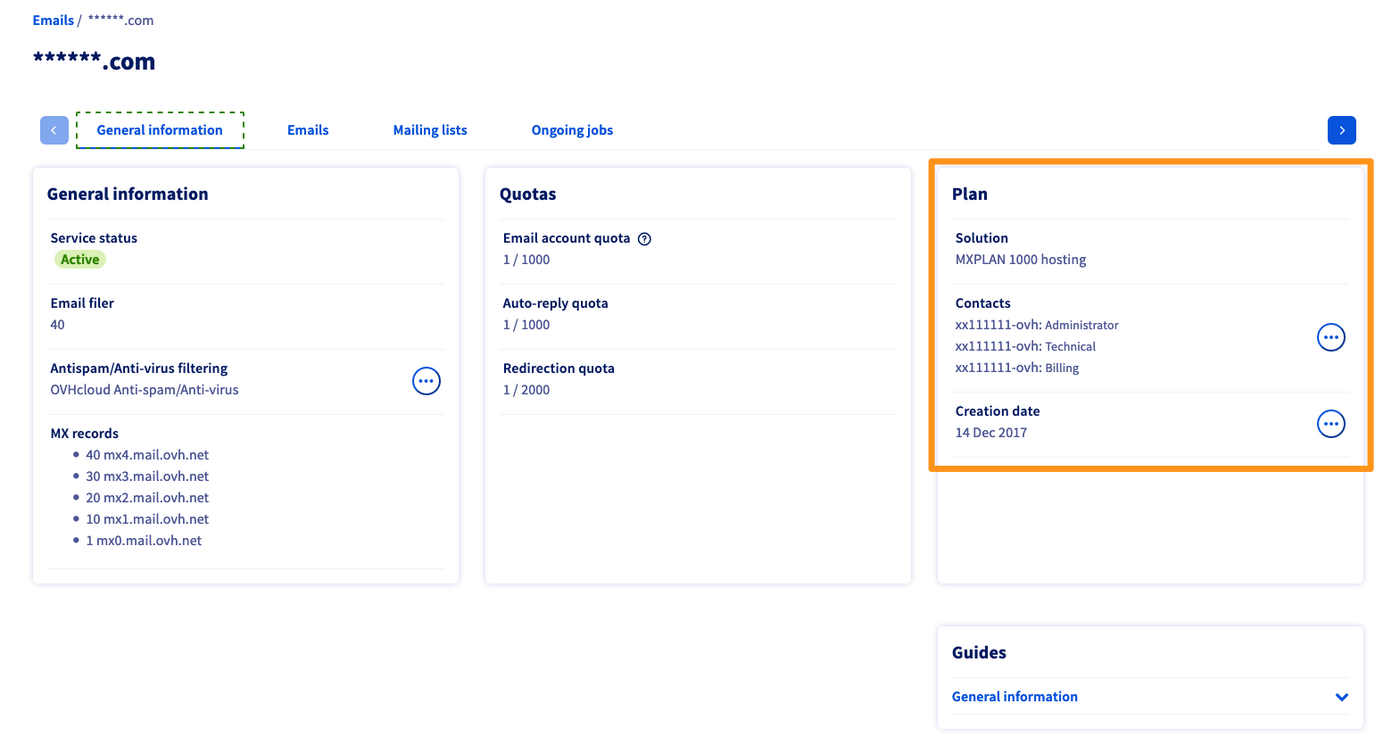
Find the solution in the section "Plan". | 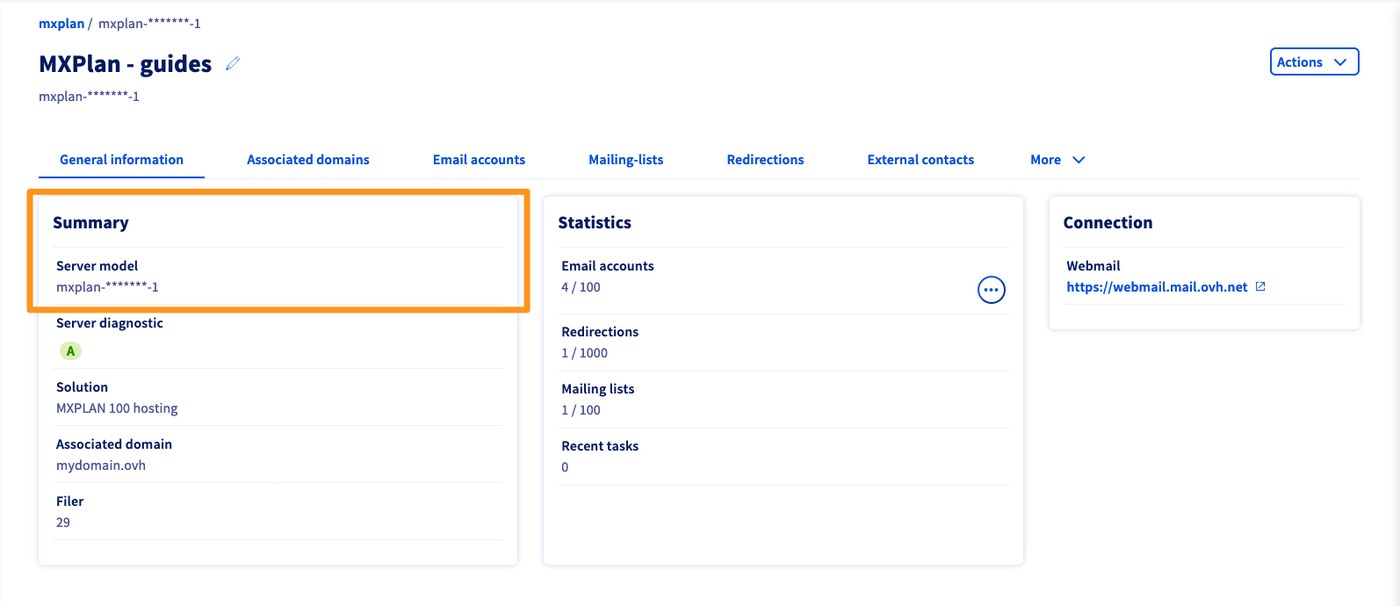
Locate the `Server model` in the section "Summary". |
| Continue reading this guide in the [Instructions](#oldmxplan) section below. | Continue with our guide regarding [Inbox rules in OWA](/en/guides/web-cloud/email-and-collaborative-solutions/using-the-outlook-web-app-webmail/creating-inbox-rules-in-owa-mx-plan.md). |
## Instructions [](#)
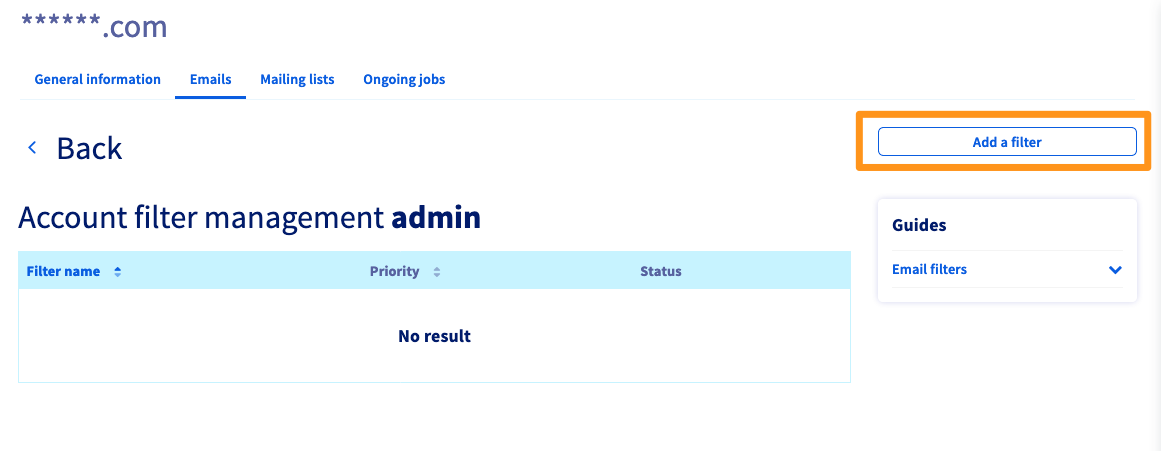
In the table listing your email addresses, click on the `Filter
` icon in the row of the email address concerned.
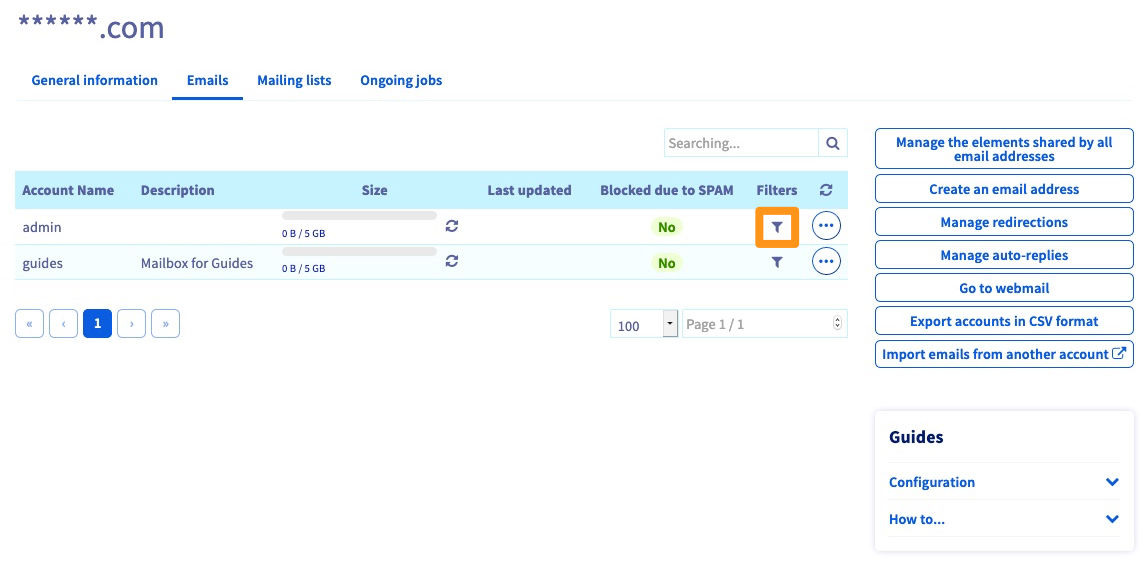
A new window will open which contains the list of filters currently configured for this email address. To add one, click on the button `Add a Filter
`.
### Understanding the email filter settings

#### Information
- **Filter name:** This is used to differentiate your filters inside the Control Panel.
- **Priority:** This sets the order in which your filters will run for all emails received on this address. A Priority 1 filter will run before a Priority 5 filter.
- **Enable filter:** This determines whether the filter will be applied to the inbox (for example, you can temporarily disable a filter without deleting it by unchecking this option).
####Rules:
In this section you can configure the filter conditions, also known as inbox rules.
First choice (Header):
- **From**: Corresponds to the sender, example: `If the sender ...`.
- **To**: Corresponds to the recipient, example: `If the recipient ...`.
- **Message subject**: Matches the subject of the message, example: `If the subject of the message ...`.
- **Other**: Other parameter.
Second choice (Rule):
- **spf**: Parameter that depends on a domain's SPF, example: `... has no SPF record`.
- **includes**: Positive condition, example: `the subject contains ...`.
- **does not include**: Negative condition, example: `... does not contain ...`.
:::info
SPF (Sender Policy Framework) allows the server that receives an email to ensure that it has been sent from a trusted server.
It helps prevent identity fraud from email addresses that use your domain name (spoofing). For more information on the SPF record, please refer to our guide on [How to improve email security with an SPF record](/en/guides/web-cloud/domains/dns-zone-spf.md).
:::
Third choice (Value):
- A concrete value to define this rule, for example: `[SPAM]`.
Fourth choice (+):
- This allows you to add more rules for the action defined below.
**Result of these rules**
- Example: `If the message subject contains [SPAM]`
#### Action
This is where you decide how the filter handles an email if the above conditions are met.
You can choose between these types of actions:
- **accept**: the email will stay in your inbox.
- **redirect to a local address**: redirects the email to one of your other email addresses on the same domain.
- **deletion**: deletes the email from your inbox without further notice.
- **redirect to a remote address**: redirects the email to whichever email address you enter.
### Examples
#### Deleting spam emails
:::warning
In our example, we will mention \[SPAM] as it appears in the subject line of an email. It is added automatically when the receiving server’s anti-spam solution delivers emails that it considers unwanted directly to the inbox. This is the case with the legacy version of the MX Plan solution.
:::
| | Header | Rule | Value | Action |
| ----------------------- | ----------------------------- | -------- | ----------------- | ------------------------ |
| Filter settings | Message subject | includes | \[SPAM] | deletion |
| What the filter will do | If the subject of the message | includes | the word `[SPAM]` | then delete the message. |
#### Redirecting emails from a certain sender
| | Header | Rule | Value | Action |
| ----------------------- | ------------- | -------- | ------------------------------------------------------- | --------------------------------------------------------------------------------- |
| Filter settings | From | includes | [contact@domaintest.ovh](mailto:contact@domaintest.ovh) | redirect to a remote address: [jean@otherdomain.ovh](mailto:jean@otherdomain.ovh) |
| What the filter will do | If the sender | is | [contact@domaintest.ovh](mailto:contact@domaintest.ovh) | then redirect the email to [jean@otherdomain.ovh](mailto:jean@otherdomain.ovh) |
#### Redirecting emails sent to a mailing list
| | Header | Rule | Value | Action |
| ----------------------- | ------------------------------------------- | -------- | --------------------------------------- | ---------------------------------------------------------------------------------------------------------------------- |
| Filter settings | To | includes | [ML@mailing.com](mailto:ML@mailing.com) | redirect to a local address: [recipient@mypersonaldomain.ovh](mailto:recipient@mypersonaldomain.ovh) |
| What the filter will do | If the message was sent to the mailing list | called | [ML@mailing.com](mailto:ML@mailing.com) | then redirect the message to my other address: [recipient@mypersonaldomain.ovh](mailto:recipient@mypersonaldomain.ovh) |
[](#)
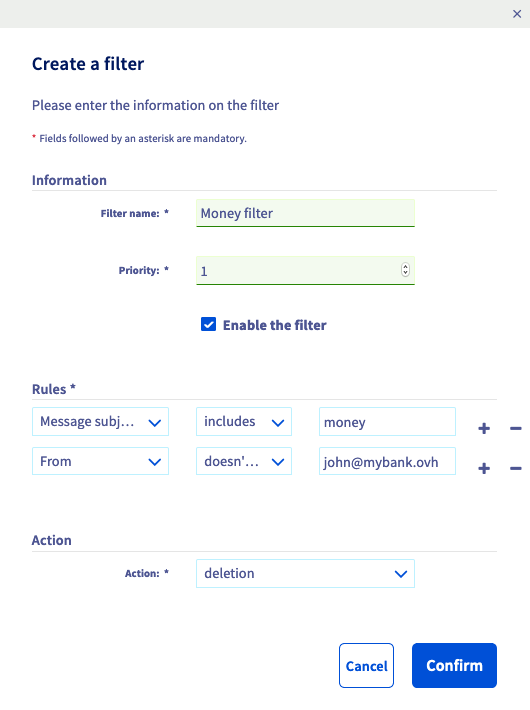
#### Deleting emails containing an unwanted phrase, excluding one sender
This filter example consists of two rules:
| | Header | Rule | Value | Action |
| ----------------- | --------------- | ---------------- | ----------------------------------------- | -------- |
| Filter settings 1 | Message subject | includes | money | deletion |
| Filter settings 2 | From | does not include | [john@mybank.ovh](mailto:john@mybank.ovh) | deletion |
**What the filter will do**: If the subject of the message contains the word `money` **and** the sender of the message is not `john@mybank.ovh`, then the message will be deleted.
In the Control Panel, the filter configuration looks like this:
## Go further [](#)
Join our [community of users](https://community.ovhcloud.com/community/en).