---
title: "Email Pro - Configuring your email address in Outlook for Android"
description: "Find out how to configure an Email Pro account on Adroid with the Microsoft Outlook application"
url: https://docs.ovhcloud.com/en/guides/web-cloud/email-and-collaborative-solutions/email-pro/outlook-android-configuration
lang: en
lastUpdated: 2025-08-18
---
# Email Pro - Configuring your email address in Outlook for Android
## Objective
You can configure Email Pro accounts on email clients, if they are compatible. This allows you to use your email address from the device of your choice. The Outlook app from Microsoft on Android is available for free from the Google Play Store.
**Find out how to configure an Email Pro account on Android with the Microsoft Outlook application.**
:::warning
OVHcloud provides services that you are responsible for with regard to their configuration and management. It is therefore your responsibility to ensure that they function properly.
This guide is designed to help you with common tasks. Nevertheless, we recommend contacting a [specialist provider](https://partner.ovhcloud.com/en-gb/directory/) and/or the service’s software publisher if you encounter any difficulties. We will not be able to assist you. You can find more information in the [“Go further”](#go-further) section of this guide.
:::
## Requirements
- An [Email Pro](https://www.ovhcloud.com/en-gb/emails/email-pro/) solution.
- You need to have the Outlook app on your mobile device [Android](https://play.google.com/store/apps/details?id=com.microsoft.office.outlook\&hl=en).
- You must have the login details for the email address you would like to configure.
***
### OVHcloud Control Panel Access
- **Direct link:** Email Pro
- **Navigation path:** Web Cloud > Email Pro > Select your platform
***
## Instructions
### Add the account [](#)
:::warning
In our examples, we use the server hint: pro?.mail.ovh.net. You will need to replace the “?” with the number designating the server of your Email Pro service.
Click [this link
](https://auth.eu.ovhcloud.com/signin/?onsuccess=https%3A%2F%2Fmanager.eu.ovhcloud.com%2F%23%2Fweb%2Femail_pro&ovhSubsidiary=GB) to access the `Email Pro
` section. The server name is visible in the **Connection**
box in the `General information
` tab.
:::
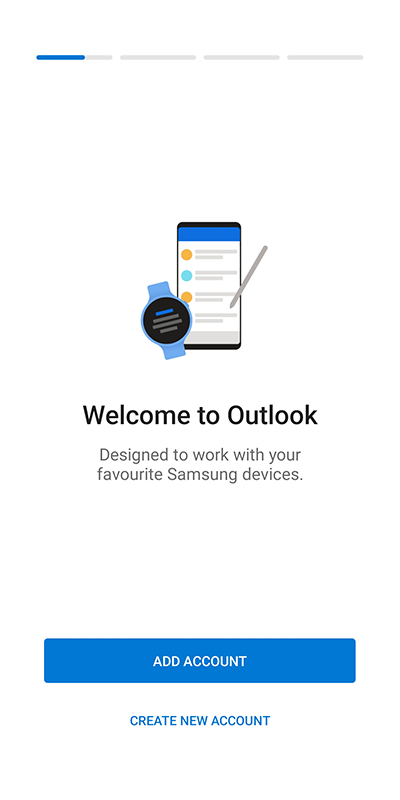
- **When you start the application for the first time**: A configuration wizard will appear. Tap Add account.
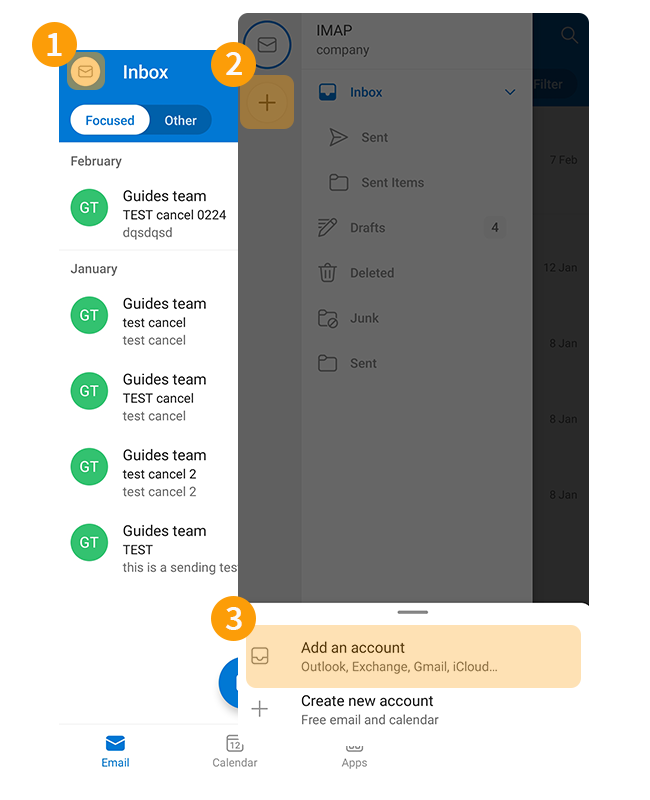
- **If an account has already been set up**:
- Tap the envelope "✉" at the top left of your screen.
- Then tap the +' button in the left-hand vertical bar.
- Tap Add Account.
Follow the installation steps by clicking on the tabs below:
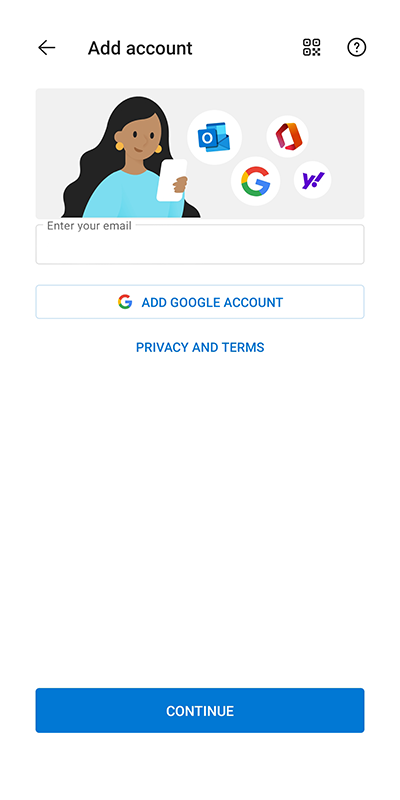
**Step 1**
Enter your email address and tap Continue.
**Step 2**
Select the receive protocol, **IMAP**(recommended) or **POP3**.
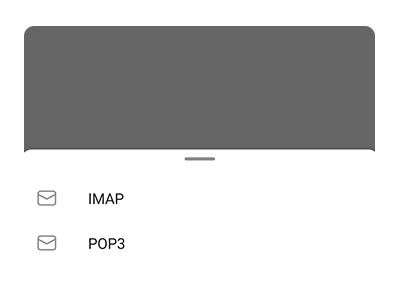:::warning
If the protocol selection window does not appear, tap the `?` button in the top right-hand corner of the screen, then choose Change account provider. Then select `IMAP`(recommended) or `POP3`.
:::
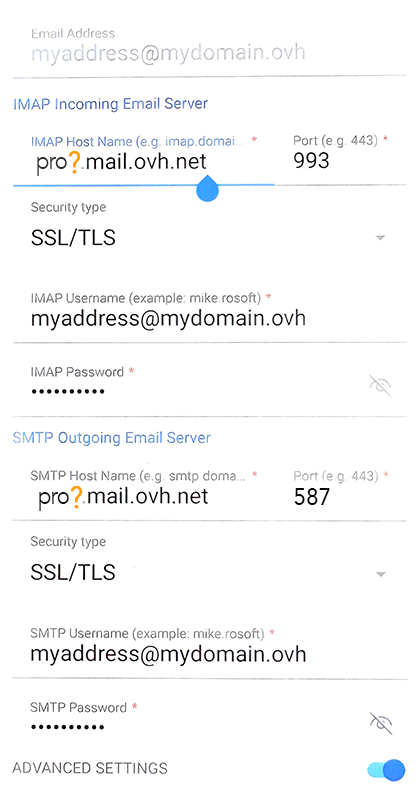
**Step 3 - IMAP**
In the next window, tick Advanced settings and enter the following information:
- **Email address**
- **Full name**: Enter your full email address
- **Description**
- **IMAP Incoming Mail Server**:
- **IMAP Hostname**: Type pro?.mail.ovh.net (replace "?" with your server number).
- **Port**: 993
- **Security Type**: SSL/TLS
- **IMAP Username**: Your full email address
- **IMAP password**: Your email address
- **SMTP Outgoing Mail Server**:
- **SMTP Hostname**: Type pro?.mail.ovh.net (replace "?" with your server number).
- **Port**: 587
- **Security Type**: STARTTLS
- **SMTP Username**: Your full email address
- **SMTP password**: Your email address
To finalize the configuration, click the “✓” button.
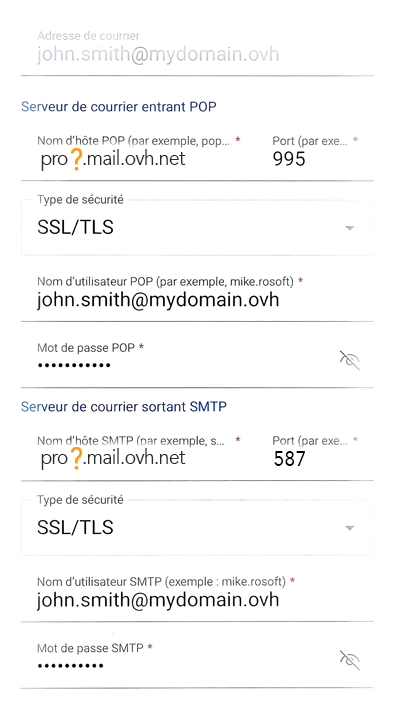
**Step 3 - POP3**
In the next window, tick Advanced settings and enter the following information:
- **Email address**
- **Full name**: Enter your full email address
- **Description**
- **POP3 Incoming Mail Server**:
- **POP3 Hostname**: Type pro?.mail.ovh.net (replace "?" with your server number).
- **Port**: 995
- **Security Type**: SSL/TLS
- **POP3 User Name**: Your full email address
- **POP3 Password**: Your email address
- **SMTP Outgoing Mail Server**:
- **SMTP Hostname**: Type pro?.mail.ovh.net (replace "?" with your server number).
- **Port**: 587
- **Security Type**: STARTTLS
- **SMTP Username**: Your full email address
- **SMTP password**: Your email address
To finalize the configuration, click the “✓” button.
:::warning
After following the configuration steps above, if you encounter a sending or receiving error, please refer to the topic “[Modify existing settings](#modify-settings)”.
:::
### Use the email address
Once you have configured your email address, you can start using it! You can now send and receive messages.
OVHcloud also offers a web application that can be used to access your email address from a web browser. You can access it here: [Webmail](https://www.ovhcloud.com/en-gb/mail/). You can log in using your email credentials. If you have any questions on how to use it, please refer to our guide [View your account via the OWA interface](/en/guides/web-cloud/email-and-collaborative-solutions/using-the-outlook-web-app-webmail/email-owa.md).
### Modify existing settings [](#)
The Outlook application does not allow you to modify the server settings of your email account.
If your email account is already set up and you want to set it up again, you will need to delete and recreate it:
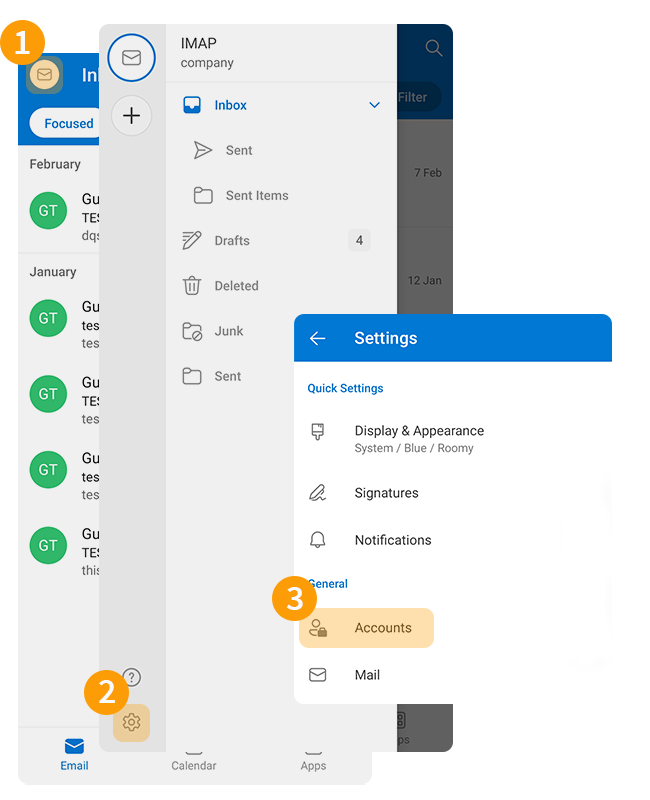
1. Tap the envelope "✉" at the top left of your screen.
2. Tap the "⛭" adjustment icon at the bottom of the left column.
3. In the "General" section, tap `Accounts` to view all of the email addresses configured on the application.
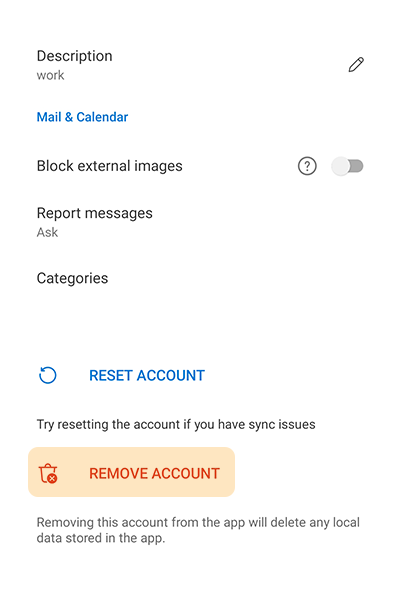
- Select the email account concerned.
- Tap Delete account.
- Tap Delete at the question “Do you want to delete the account?”.
:::tip
Once you have deleted your email account, follow the instructions in the “[Add account](#add-account)” section of this guide.
:::
### Reminder of POP, IMAP and SMTP settings [](#)
### IMAP and POP Receive Settings
When you choose your account type, we recommend using **IMAP** to receive emails. However, you can select **POP**.
Click on the tab corresponding to your receive protocol:
**IMAP configuration**
- **Username**: Enter the full **email address**
- **Password**: Enter the password for the email address
- **Server (incoming)**: pro?.mail.ovh.net
- **Port**: 993
- **Security type**: SSL/TLS
**POP configuration**
- **Username**: Enter the full **email address**
- **Password**: Enter the password for the email address
- **Server (incoming)**: pro?.mail.ovh.net
- **Port**: 995
- **Security type**: SSL/TLS
#### SMTP Send Settings
For sending emails, if you have to enter the **SMTP** settings manually in your account preferences, you will find the settings below:
**SMTP configuration**
- **Username**: Enter the **full** email address
- **Password**: Enter the password for the email address
- **Server (outgoing)**: pro?.mail.ovh.net
- **Port**: 587
- **Security type**: STARTTLS
:::info
**Change your configuration**
If your email address is configured in **IMAP** and you want to change this configuration to **POP**, you will need to delete the account, then recreate it in **POP**. Refer to the “[Modify existing settings](#modify-settings)” chapter of this guide.
:::
## Go further [](#)
:::info
For more information on configuring an email address from the Outlook app on Android, see [Microsoft Help Center](https://support.microsoft.com/en-gb/office/set-up-email-in-the-outlook-for-android-app-886db551-8dfa-4fd5-b835-f8e532091872).
:::
For specialised services (SEO, development, etc.), contact [OVHcloud partners](https://partner.ovhcloud.com/en-gb/directory/).
If you would like assistance using and configuring your OVHcloud solutions, please refer to our [support offers](https://www.ovhcloud.com/en-gb/support-levels/).
Join our [community of users](https://community.ovhcloud.com/community/en).