---
title: "Configure an MX record for email management"
description: "Find out how to configure an MX record on your domain name at OVHcloud"
url: https://docs.ovhcloud.com/en/guides/web-cloud/domains/dns-zone-mx
lang: en
lastUpdated: 2026-06-08
---
# Configure an MX record for email management
## Objective
With an MX record, you can link a domain name to the server on your email platform. It is essential for the sender’s email service to reach the recipient’s email service.
**Find out how to configure an MX record for your domain name at OVHcloud.**
## Requirements
- The domain name concerned uses the OVHcloud configuration (i.e. OVHcloud DNS servers).
- You have an MX Plan solution (included in the [web hosting plan](https://www.ovhcloud.com/en-gb/web-hosting/), a [free hosting](https://www.ovhcloud.com/en-gb/domains/free-web-hosting/), or the MX Plan solution ordered separately), one of our [OVHcloud email offers](https://www.ovhcloud.com/en-gb/emails/), or an external email service.
***
### OVHcloud Control Panel Access
- **Direct link:** DNS zones
- **Navigation path:** Web Cloud > DNS zones > Select your domain name
***
:::info
- If your domain name does not use OVHcloud DNS servers, you will need to modify the MX records using the interface of the service provider that manages your domain name configuration.
- If your domain name is registered with OVHcloud, you can check if it uses our configuration. If needed, refer to our guide "[Modifying an OVHcloud domain name's DNS servers](/en/guides/web-cloud/domains/dns-server-edit.md)".
:::
## Instructions
### Understanding the role of MX records
The MX (**M**ail e**X**change) record is a type of DNS record that determines which receiving email servers are attached to your domain name.
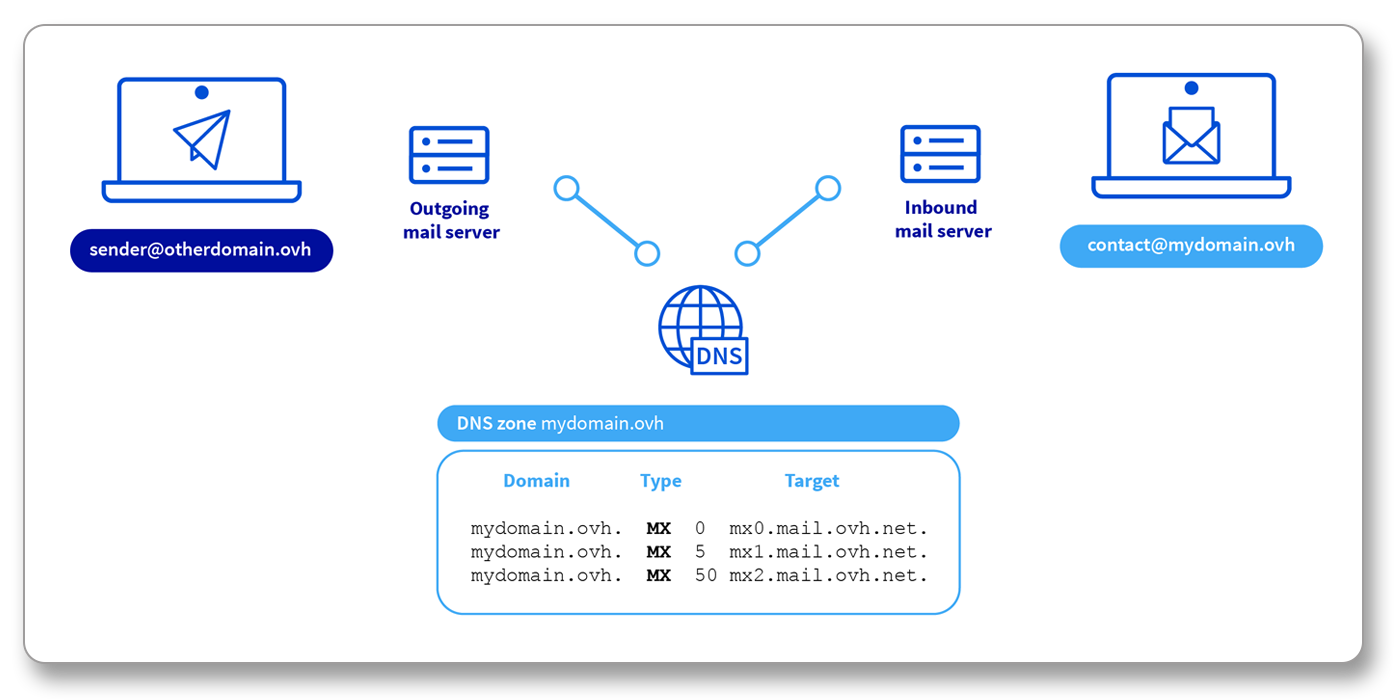
To understand how it works, we will use an example:
- The address **[sender@otherdomain.ovh](mailto:sender@otherdomain.ovh)** sends an email to **[contact@mydomain.ovh](mailto:contact@mydomain.ovh)**.
- The sending email server (**Outgoing mail server**) queries the DNS zone for the domain name **mydomain.ovh** and reads the **MX** records.
- The email is forwarded to the URL of the **MX** record that was read.
- The email is sent to the target **mx0.mail.ovh.net**, which is preceded by the value **0**. This value corresponds to the priority: the lowest value is queried first and the highest last. This means that having multiple MX records helps compensate for a lack of response from the server designated by the record with the lowest priority, by moving on to subsequent servers in order of priority.
You can set up multiple MX records for the same domain name. It is then necessary to define a _priority_ number for each of them. MX records are queried in ascending order from lowest number to highest number until a response is received from the receiving server.
:::warning
Generally speaking, **modifying MX records in a domain name’s DNS zone warrants caution**. If you make any mistakes configuring the records, it may make it impossible for emails to reach your email address. Please take care when you carry out this procedure.
If you have any doubts, we advise contacting a [specialist provider](https://partner.ovhcloud.com/en-gb/directory/).
:::
### OVHcloud MX configuration values [](#)
Below, you will find the OVHcloud MX configuration to use for our MX Plan solutions (MX Plan standalone or included in an [OVHcloud web hosting](https://www.ovhcloud.com/en-gb/web-hosting/) plan), [Email Pro](https://www.ovhcloud.com/en-gb/emails/email-pro/), [Exchange](https://www.ovhcloud.com/en-gb/emails-exchange/) and [Zimbra](https://www.ovhcloud.com/en-gb/emails/zimbra-emails/). Our email servers have antispam and antivirus integrated.
These values are common to all of these solutions, with the exception of [Private Exchange](/en/guides/web-cloud/email-and-collaborative-solutions/microsoft-exchange/exchange-starting-private.md) and Dedicated Exchange.
| Domain | TTL | Record type | Priority | Target |
| ------------- | ---- | ----------- | -------- | ----------------- |
| _leave blank_ | 3600 | MX | 1 | mx0.mail.ovh.net. |
| _leave blank_ | 3600 | MX | 5 | mx1.mail.ovh.net. |
| _leave blank_ | 3600 | MX | 50 | mx2.mail.ovh.net. |
| _leave blank_ | 3600 | MX | 100 | mx3.mail.ovh.net. |
| _leave blank_ | 3600 | MX | 200 | mx4.mail.ovh.net. |
These MX records must be configured in your domain name’s DNS zone.
### Configuring an MX record in an OVHcloud DNS zone
Click on the tabs below to view each of the **5** steps.
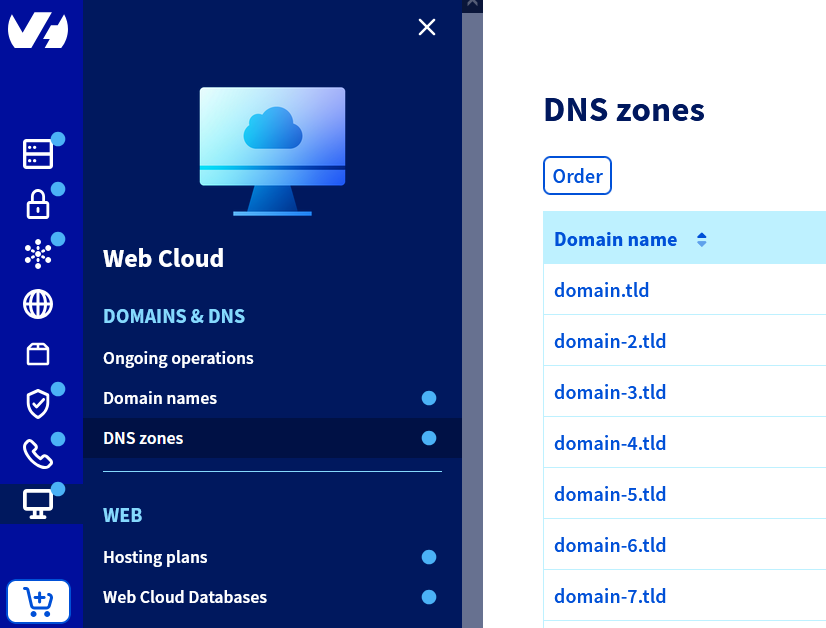
**Step 1**
Go to the DNS zones page, then choose the domain name concerned.
**Step 2**
The table shows your domain name’s OVHcloud configuration. Each row corresponds to a DNS record.
Check if MX records already exist by selecting the **MX** type in the filter list above the table, then confirm.
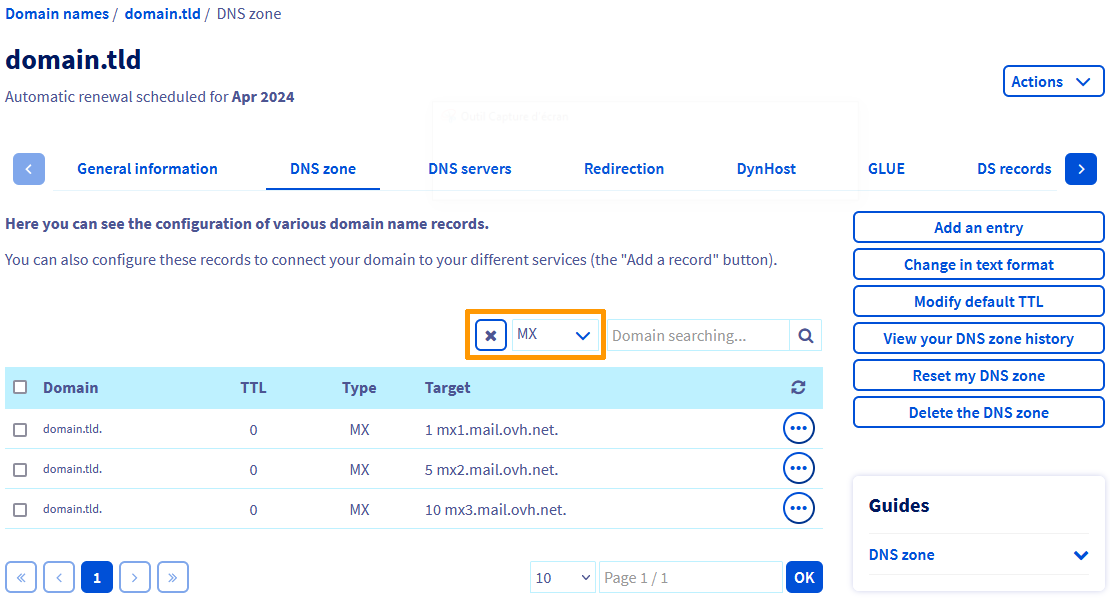
**Step 3**
- If MX records already exist and you want to edit them, click the ... button to the right of each table row, then click Modify record.
- If no MX record is present, click the Add an entry button to the right of the table, then choose MX.
**Step 4**
Fill in the information requested depending on the email solution you have chosen.
**If you have an OVHcloud email solution**, refer to the information provided in the "[OVHcloud MX configuration](#mxovhcloud)" step.
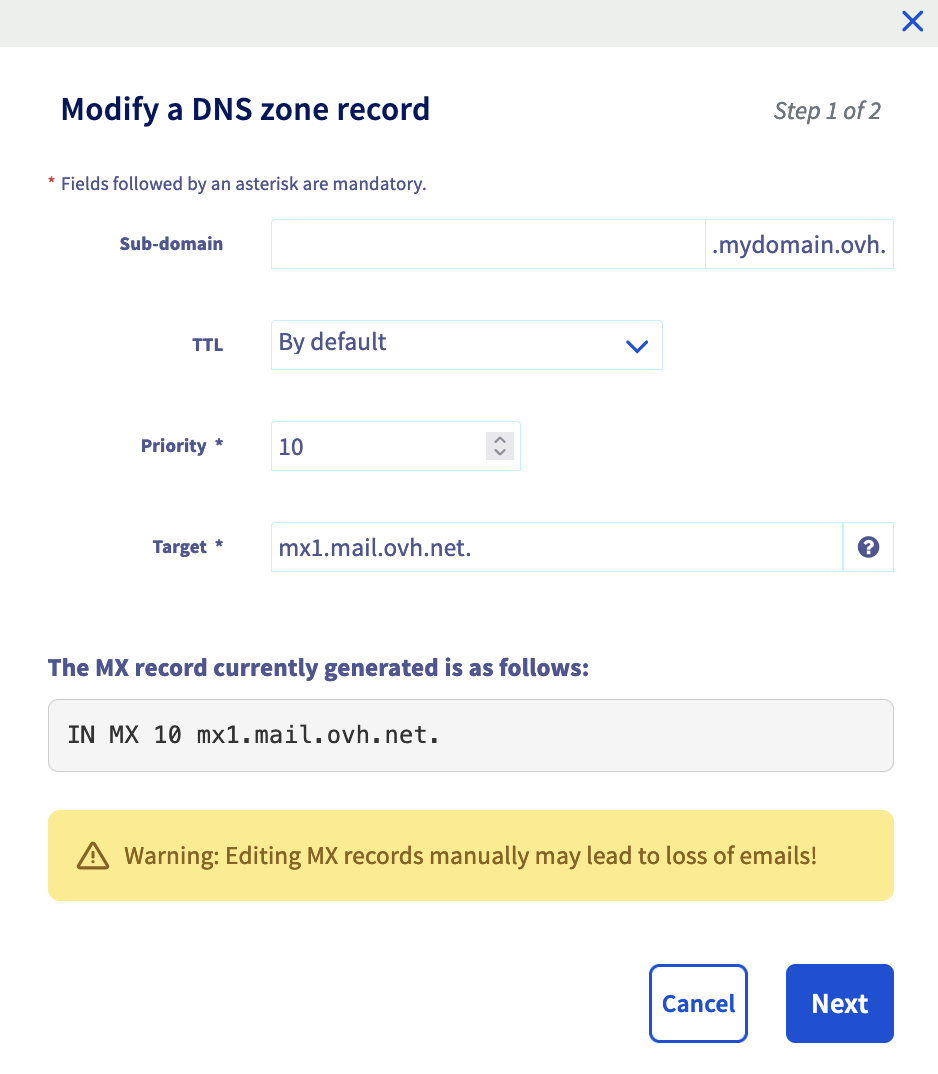
**Step 5**
Once the information has been filled in, complete the steps and click Confirm.
**If you have another email solution**, refer to the information provided by your email service provider.
:::info
The change can take between 4 and 24 hours to propagate fully.
:::
## Go further
[General information about DNS servers](/en/guides/web-cloud/domains/dns-server-general-information.md)
[Editing an OVHcloud DNS zone](/en/guides/web-cloud/domains/dns-zone-edit.md)
[How to improve email security with an SPF record](/en/guides/web-cloud/domains/dns-zone-spf.md)
[How to improve email security with a DKIM record](/en/guides/web-cloud/domains/dns-zone-dkim.md)
For specialised services (SEO, development, etc.), contact [OVHcloud partners](https://partner.ovhcloud.com/en-gb/directory/).
If you would like assistance using and configuring your OVHcloud solutions, please refer to our [support offers](https://www.ovhcloud.com/en-gb/support-levels/).
Join our [community of users](https://community.ovhcloud.com/).