---
title: "Securing your domain name with DNSSEC"
description: "Find out how to protect your domain name from Cache Poisoning by enabling DNSSEC"
url: https://docs.ovhcloud.com/en/guides/web-cloud/domains/dns-dnssec
lang: en
lastUpdated: 2026-06-08
---
# Securing your domain name with DNSSEC
## Objective
A DNS server hosts one or more DNS zones. A DNS zone contains the DNS configuration of a domain name. This configuration links your domain name to the various services associated with it (hosting server for your website, servers for your custom email addresses with your domain name, etc.).
In some cases, data streams that pass through DNS servers can be intercepted by hackers.\
To achieve this, they manipulate the DNS server cache to apply their own DNS configuration to your domain name. This is called _cache poisoning_.
This way, they can redirect incoming traffic for your domain name to their websites and email addresses.
The **D**omain **N**ame **S**ystem **SEC**ecurity Extensions (**DNSSEC**) protect your domain name’s DNS configuration against _cache poisoning_ by verifying and authenticating DNS responses.
**This guide explains how to enable DNSSEC for your domain name to protect it against _cache poisoning_.**
For more information on how **DNSSEC** works, please visit our page “[Understanding DNSSEC](https://www.ovhcloud.com/en-gb/domains/dnssec/)”.
You can also refer to our guides on [OVHcloud DNS servers](/en/guides/web-cloud/domains/dns-server-general-information.md) and on [editing an OVHcloud DNS zone](/en/guides/web-cloud/domains/dns-zone-edit.md) if you would like more information on these topics.
## Requirements
- A domain name with an extension compatible with DNSSEC
***
### OVHcloud Control Panel Access
- **Direct link:** Domain names
- **Navigation path:** Web Cloud > Domain names > Select your domain name
***
## Instructions
To check if your domain name uses the OVHcloud DNS configuration, click on the tabs below to view each of the **2** steps.
:::warning
**These 2 steps are only valid if your domain name is registered with OVHcloud.** Otherwise, you will need to check with your domain name registrar.
If the DNS server names end with _ovh.net_ (with the exception of the _snds2.ovh.net_ server), _ovh.ca_ or _anycast.me_, your domain name will use OVHcloud DNS servers.
:::
**Step 1**
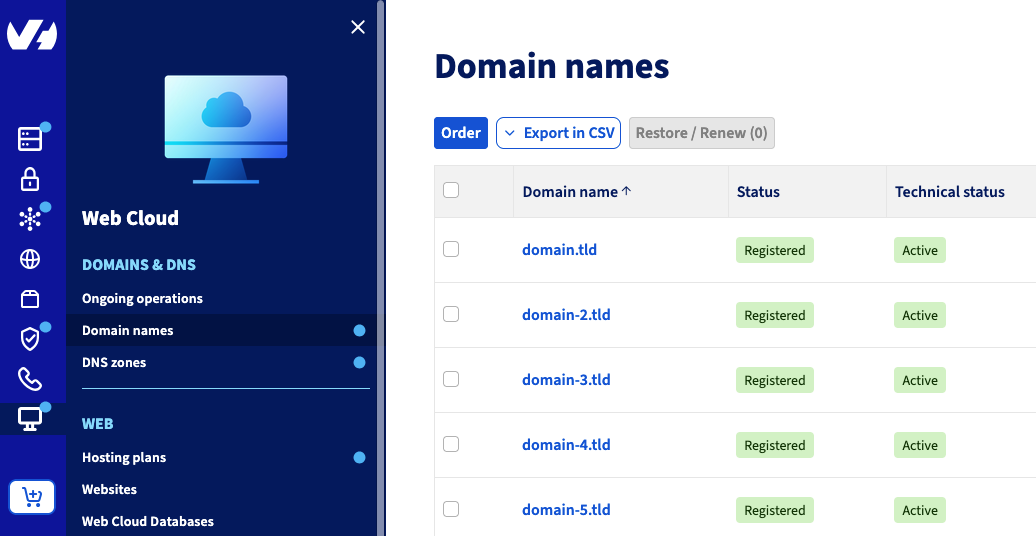
Go to the Domain names page, then choose the domain name concerned.
**Step 2**
Select the DNS servers tab once you have clicked on the domain concerned.
If the DNS server names end with _ovh.net_ (with the exception of the _snds2.ovh.net_ server), _ovh.ca_ or _anycast.me_, your domain name will use OVHcloud DNS servers.
:::info
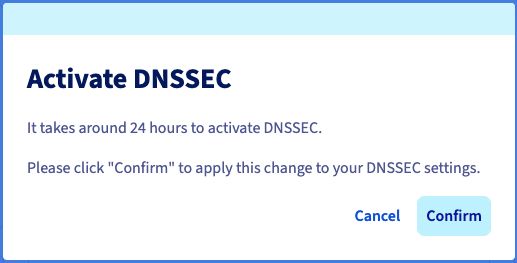
The activation/deactivation of **DNSSEC** takes **24** hours to be effective.
If you would like to change the DNS servers associated with your domain name at a later stage, the DNS servers will only be modified on the OVHcloud side after the **DNSSEC** has been disabled. After this, an additional period of **24** to **48** hours will be required for the DNS propagation of the modification.
In total, the modification of a domain name’s DNS servers with the **DNSSEC** active solution will be fully effective after **48** at **72** hours.
:::
You can enable **DNSSEC** in three scenarios detailed below.
### Case 1 - Your domain name is registered with OVHcloud and uses OVHcloud DNS servers
To enable (or disable) the **DNSSEC** solution for your domain name, click on the tabs below to view each of the **3** steps.
**Step 1**
Go to the Domain names page, then choose the domain name concerned.

**Step 2**
The page that appears will display general information about your domain name. You can check the activation status of the **DNSSEC** on it.
In the `Security` box, check the status next to `Secured Delegation - DNSSEC`.
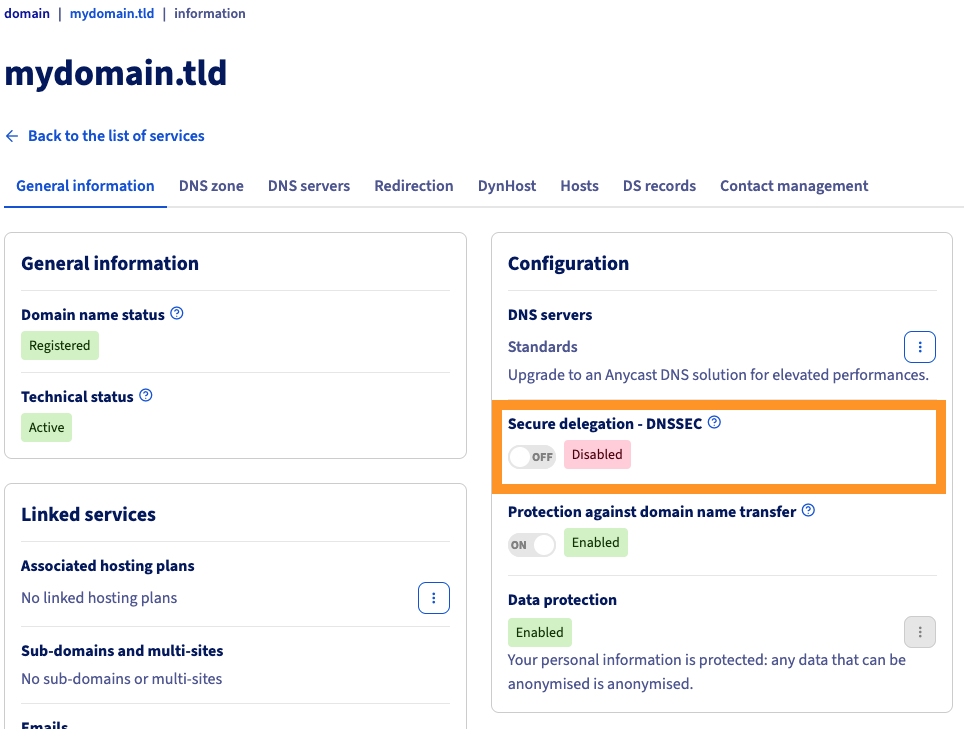
**Step 3**
With the activation button above Secured Delegation - DNSSEC, you can activate or deactivate **DNSSEC** on your domain name. When you do this, a new window will appear, where you can confirm the change.
### Case 2 - Your domain name is registered with OVHcloud and does not use OVHcloud DNS servers
Once you have retrieved these 4 parameters, click on the tabs below to view each of the **4** steps.
**Step 1**
Go to the Domain names page, then choose the domain name concerned.

**Step 2**
On the page that appears, click on the DS records tab. **This tab will only appear if your domain name uses external DNS servers**.
**Step 3**
In the new page that appears, click the Edit button on the right, then the + button.
**Step 4**
Fill in the 4 forms `Key Tag`, `Flag`, `Algorithm` and `Public key (encoded in base64)` with the data communicated by your current provider.
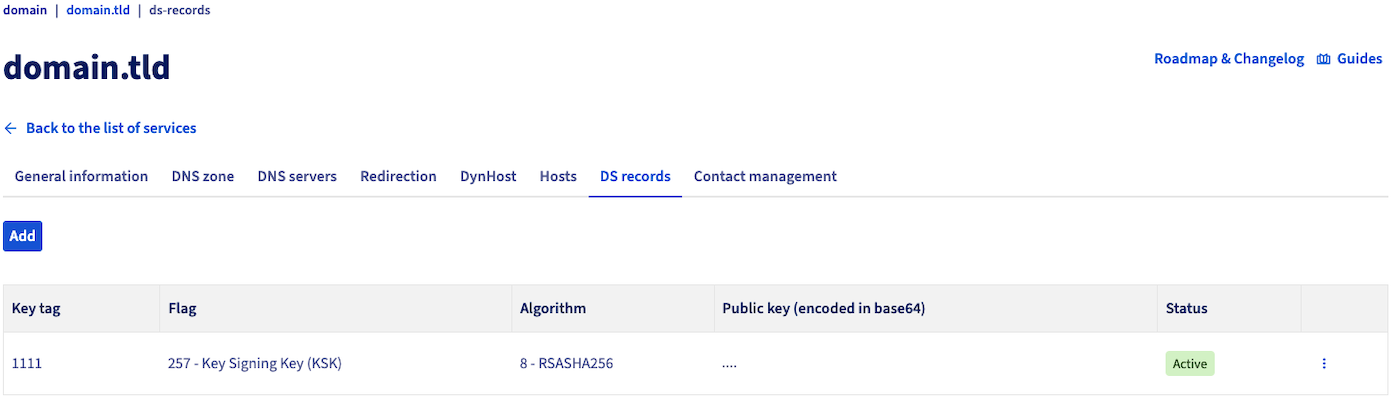Once you have filled in the 4 forms, click on the blue Confirm button to the right of the table.
### Case 3 - Your domain name is not registered with OVHcloud and uses OVHcloud DNS servers
:::warning
Before you proceed, please check with your domain name’s current registrar to make sure that there are no DNSSEC options already enabled for it.
:::
Unlike **case 2**, you will need to retrieve the DNSSEC activation settings ("Key Tag" / "Flag" / "Algorithm" / "Public key (encoded in base64)") from the OVHcloud side.
To do this, you will need to use the [OVHcloud APIs](/en/guides/manage-and-operate/api/first-steps.md) and perform the following actions:
- Go to our website [OVHcloud API](https://eu.api.ovh.com/) (check that you are on `https://eu.api.ovh.com` if your services are hosted in Europe, and on `https://ca.api.ovh.com` if they are hosted outside Europe).
- On the page that pops up, middle-click Explore the OVHcloud API.
- On the new page that appears, and on the left-hand side of the page, use the dropdown menu to the right of the form v1, then select/enter the choice `/domain`.
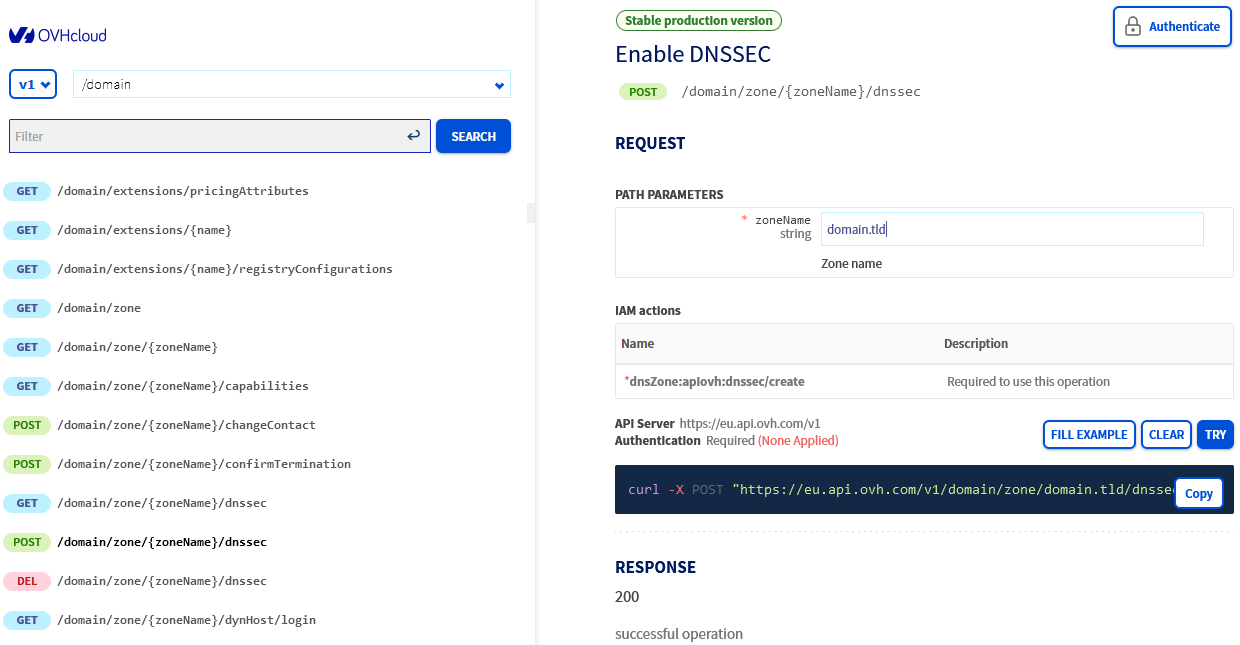
- From the list of APIs that appears below in the left-hand column, locate and click on the following node: **POST /domain/zone/\{zoneName}/dnssec**. You can also click on this link to access it:
🇪🇺EU▾
[POST/domain/zone/{zoneName}/dnssec](https://eu.api.ovh.com/console/?section=/domain&branch=v1#post-/domain/zone/-zoneName-/dnssec)
- On the right-hand side of the page, you will then see the various forms to fill in.
- Click the button in the top right-hand corner labeled Authenticate, then the Login with OVHcloud SSO button.
- The interface for connecting to your OVHcloud Control Panel will open.
- Log in to your account, then click Authorize to use the OVHcloud API with the services in your Control Panel.
- You will then be automatically redirected to the previous page of the **POST /domain/zone/\{zoneName}/dnssec** API, where you will now be authenticated.
- On the right-hand side of the page, you will then see the form to fill in.
- Fill in the form in the `PATH PARAMETERS` section as follows:
- `zoneName`: Enter the domain name concerned (e.g. `domain.tld`).
Once you have filled in the form, click on the blue `EXECUTE
` button in the bottom right-hand corner of the previously filled-in section.
After a few minutes, you will receive an email from OVHcloud to the contact email address of your OVHcloud DNS zone.\
This email will contain the 4 parameters ("Key Tag" / "Flag" / "Algorithm" / "Public key (encoded in base64)") required to activate DNSSEC with your domain name registrar.
:::tip
Check your spam folder if you have not received the email within an hour.
:::
Finally, contact your domain name registrar with the 4 settings to enable the DNSSEC option for them.
## Go further
[General information on OVHcloud DNS servers](/en/guides/web-cloud/domains/dns-server-general-information.md)
[Edit an OVHcloud DNS zone](/en/guides/web-cloud/domains/dns-zone-edit.md)
[First Steps with the OVHcloud APIs](/en/guides/manage-and-operate/api/first-steps.md)
For specialised services (SEO, development, etc.), contact [OVHcloud partners](https://partner.ovhcloud.com/en-gb/directory/).
If you would like assistance using and configuring your OVHcloud solutions, please refer to our [support offers](https://www.ovhcloud.com/en-gb/support-levels/).
Join our [community of users](https://community.ovhcloud.com/).