---
title: "How to enable Anycast DNS for your domain name"
description: "Find out how to speed up access to your web services with the DNS resolution speed offered by your domain name’s Anycast DNS option"
url: https://docs.ovhcloud.com/en/guides/web-cloud/domains/dns-anycast-enable
lang: en
lastUpdated: 2025-06-18
---
# How to enable Anycast DNS for your domain name
## Objective
Do you need your services (e.g. your website) to be accessible in record time across the globe? Do you want your domain name’s DNS resolution to be optimized?\
OVHcloud offers the [Anycast DNS](https://www.ovhcloud.com/en-gb/domains/options/dns-anycast/) option.
**Find out how to speed up access to your web services with the DNS resolution speed offered by your domain name’s Anycast DNS option.**
## Requirements
- A domain name with an extension compatible with the Anycast DNS option.
***
### OVHcloud Control Panel Access
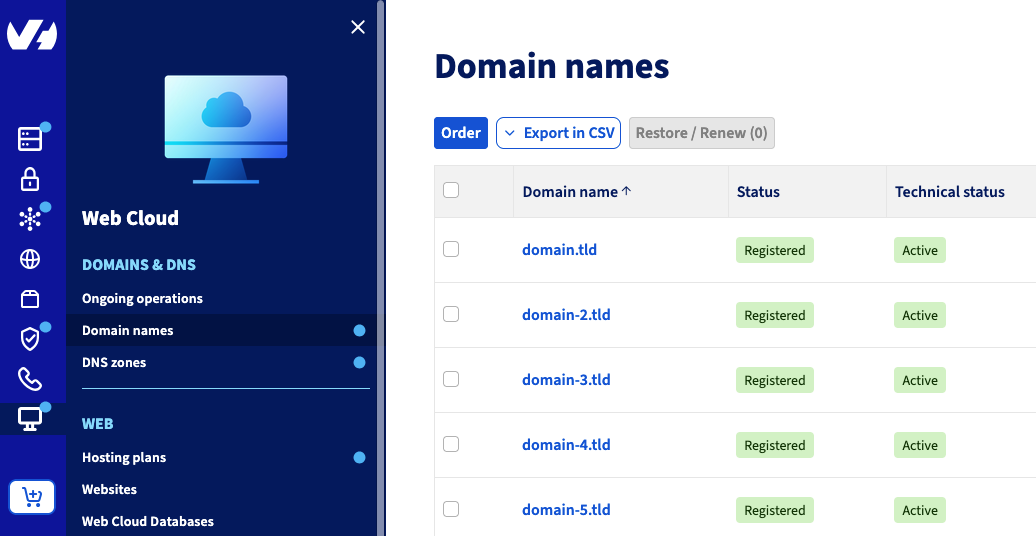
- **Direct link:** Domain names
- **Navigation path:** Web Cloud > Domain names > Select your domain name
***
## Instructions
Click on the tabs below to view each of the **4** steps.
**Step 1**
Go to the Domain names page, then choose the domain name concerned.
**Step 2**
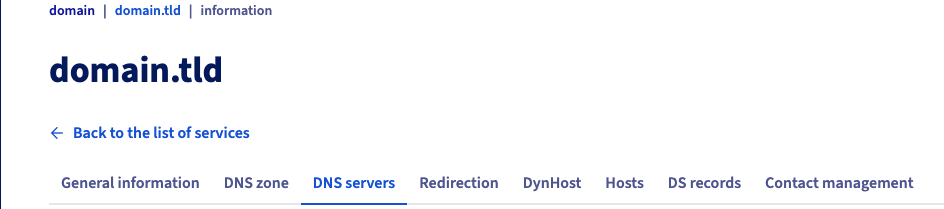
Select the DNS servers tab once you have clicked on the domain concerned.
**Step 3**
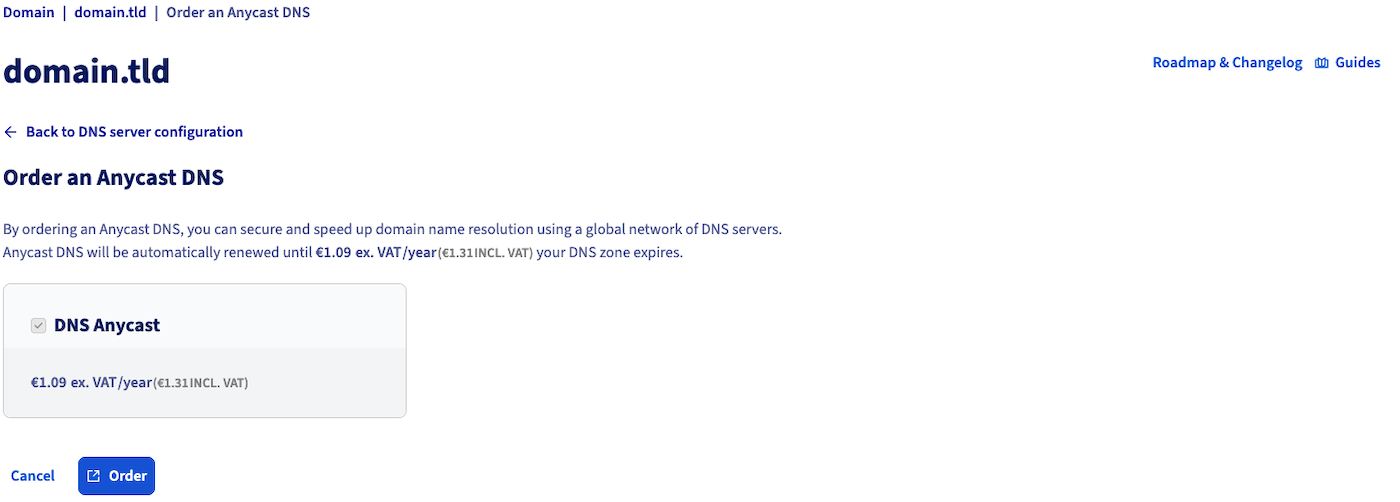
On the page that pops up, click Order Anycast DNS.

**Step 4**
On the new page that opens:
- Choose the duration proposed in the `1` section and click Next.
- Select your payment method, then click Pay to continue activating Anycast DNS.
In the message that appears in green, click the Purchase order button to be redirected to the purchase order for enabling the Anycast DNS option.
Once you have placed an order, continue to validate it using a payment method to complete the processing of the order.
It may take several minutes for the Anycast DNS option to be enabled.
## Go further
For specialised services (SEO, development, etc.), contact [OVHcloud partners](https://partner.ovhcloud.com/en-gb/directory/).
If you would like assistance using and configuring your OVHcloud solutions, please refer to our [support offers](https://www.ovhcloud.com/en-gb/support-levels/).
Join our [community of users](https://community.ovhcloud.com/).