---
title: "Restoring and importing a database to your database server"
description: "Find out how to restore and import a database on your Web Cloud Databases server from the OVHcloud Control Panel or via phpMyAdmin"
url: https://docs.ovhcloud.com/en/guides/web-cloud/databases/db-restore-import-database
lang: en
lastUpdated: 2026-06-08
---
# Restoring and importing a database to your database server
## Objective
Following an error on your database, you must be able to restore a backup or import a local database.
**Find out how to restore and import your database on your database server.**
## Requirements
- A [Web Cloud Databases instance](https://www.ovhcloud.com/en-gb/web-cloud/databases/) (included in a [Web Hosting](https://www.ovhcloud.com/en-gb/web-hosting/) Performance, Agency, Agency Plus or Agency Max plan)
***
### OVHcloud Control Panel Access
- **Direct link:** Web Cloud Databases
- **Navigation path:** Web Cloud > Web Cloud Databases > Select your database service
***
## Instructions
:::info
[Web Cloud Databases](https://www.ovhcloud.com/en-gb/web-cloud/databases/) solutions do not give access to the database management system, but to the databases hosted on it.
- There is no superuser "root" access.
- Generic SQL commands work normally, and software such as HeidiSQL, SQuirreL SQL or Adminer is fully compatible.
:::
### Restoring and importing a database from the Control Panel
#### Restoring an existing backup
Click on the tabs below to view each of the **4** steps.
**Step 1**
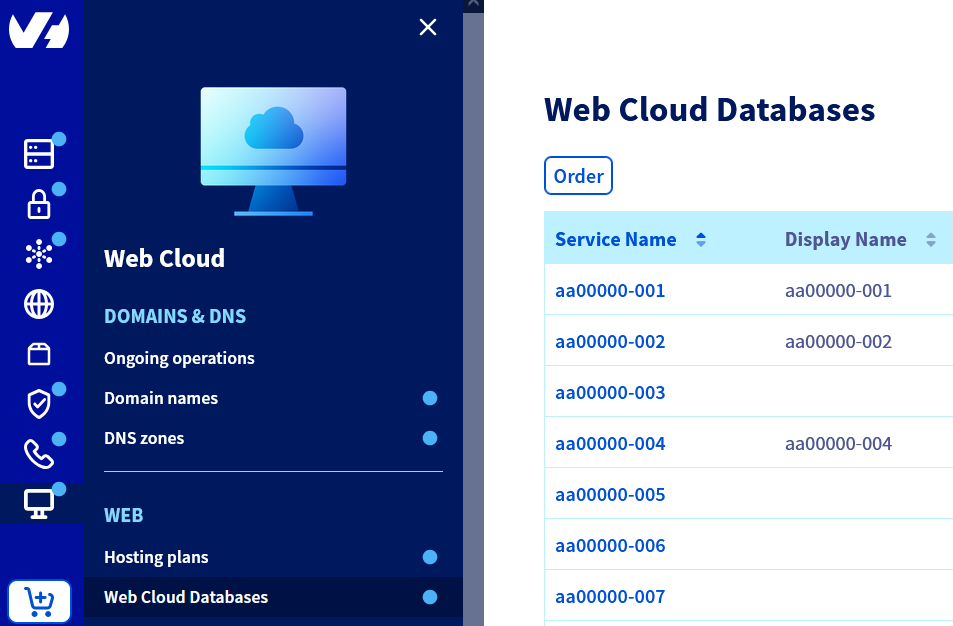
Go to the Web Cloud Databases page, then select the solution concerned.
**Step 2**
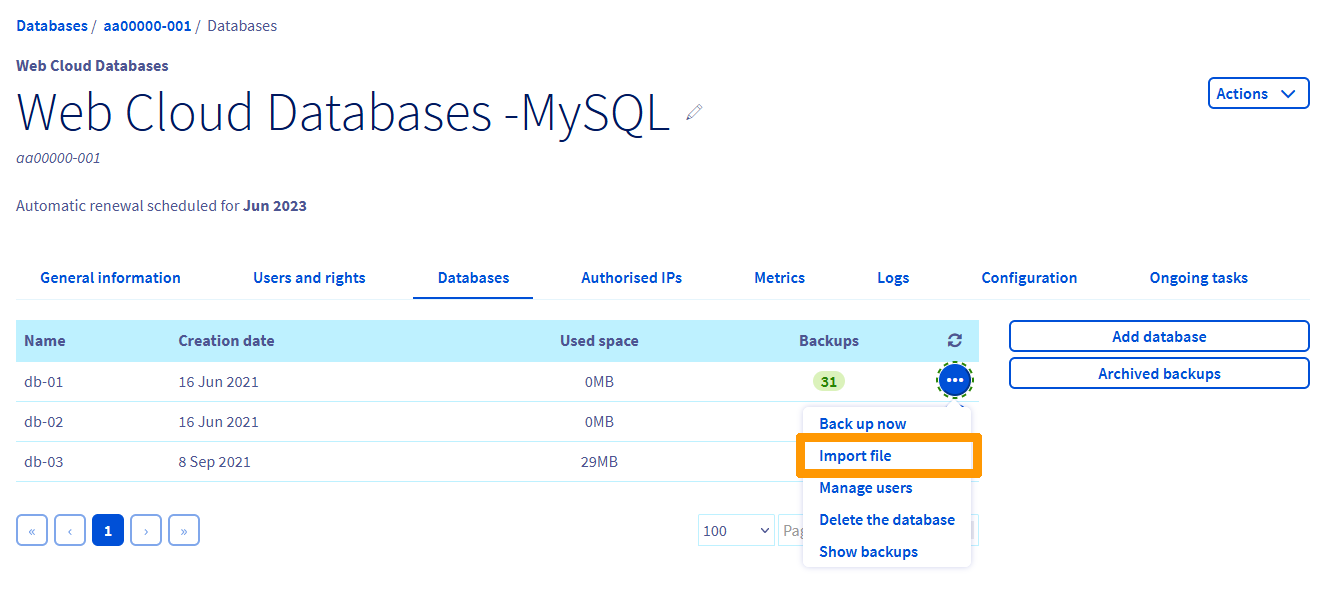
Click on the Databases tab.
In the **Backups** column, the number corresponds to the number of backups available for your database.
**Step 3**
Click on the ... button to the right of the database, then on Show backups.
**Step 4**
The list of available backups appears. Click on the ... button to the right of the chosen backup, then on Restore the backup.
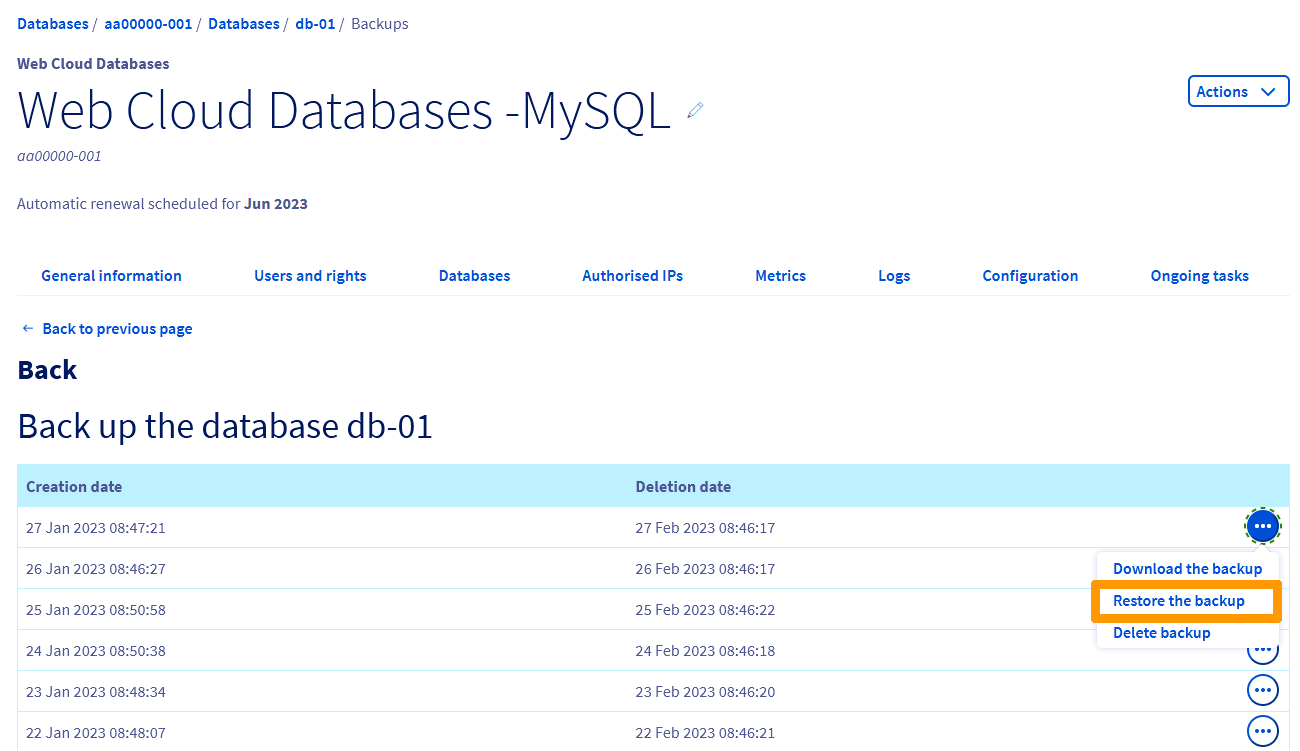:::warning
Restoration involves overwriting the contents of the database, potentially resulting in data loss. If you are unsure of what you are doing, we recommend creating a backup beforehand.
:::
#### Importing a local backup
Click on the tabs below to view each of the **4** steps.
**Step 1**
Go to the Web Cloud Databases page, then select the solution concerned.

**Step 2**
Click on the Databases tab.
**Step 3**
Click on the ... button to the right of the database, then on Import file.
**Step 4**
_**You have two options:**_
**1 - Import a new file**
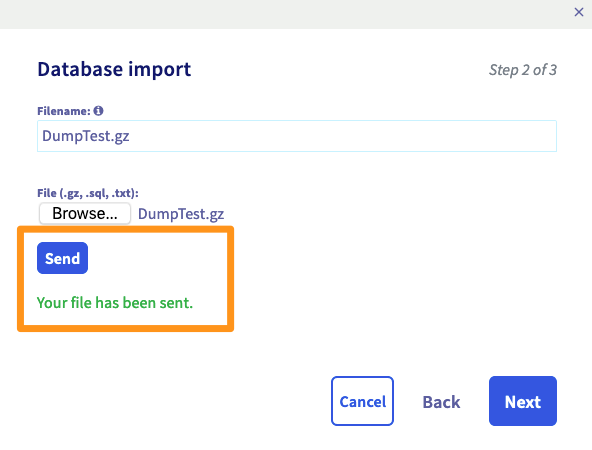
Click on **"Import a new file"**, then on Next.
Enter a name for your imported file, click Browse to select it, then Submit, and finally click Next.
:::warning
The file must be in ".sql", ".txt" or ".gz" format.
:::
If you wish, tick **"Empty the current database"** before importing, and **"Send an email when importing is complete"** to be informed of the completion of the operation on the primary email address of your OVHcloud account, then click Confirm.
**2 - Use an existing file**
If you had already imported a file before, you can choose the **"Import an existing file"** option.
Then choose the file from the dropdown menu, and click Next.
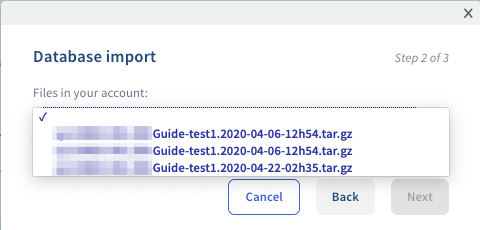If you wish, tick **"Empty the current database"** before importing, and **"Send an email when importing is complete"** to be informed of the completion of the operation on the primary email address of your OVHcloud account, then click Confirm.
### Importing a database outside the Control Panel
In some cases, the RAM available on your database server may not be sufficient to perform the desired import outside the Control Panel. If so, we recommend using the OVHcloud tool in the Control Panel. Refer to the section "[Restoring and importing a database from the Control Panel](#restoring-and-importing-a-database-from-the-control-panel)" of this guide.
**Click on the import method of your choice to view the content.**
Importing a MySQL or MariaDB database from phpMyAdmin
To import your database directly from phpMyAdmin, you must first log in by following the section "[Connecting to a MySQL or MariaDB database](/en/guides/web-cloud/databases/db-connecting-database-server.md#connecting-to-a-mysql-or-mariadb-database)".
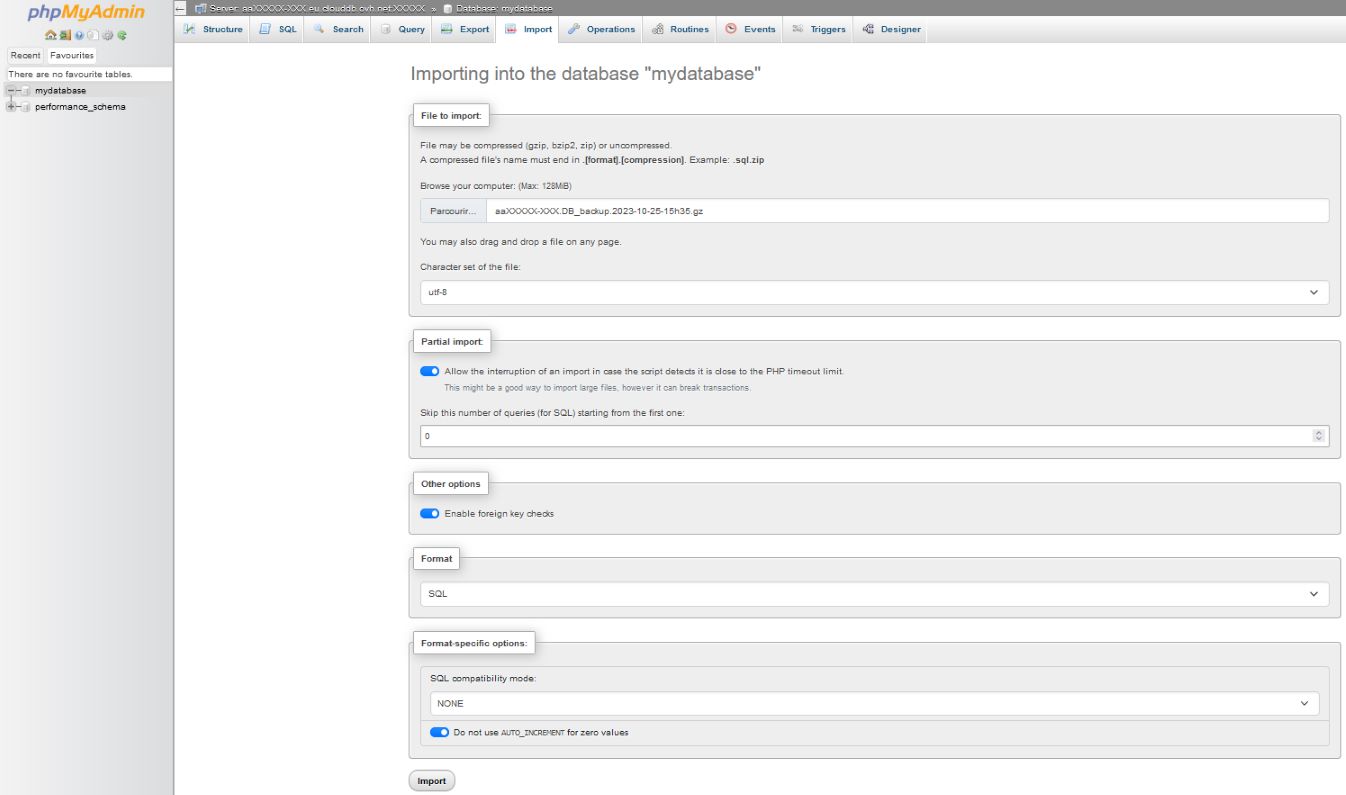
Once logged in to phpMyAdmin, select your database by clicking on its name.
Then click on the Import tab.
Select your backup file by clicking Browse (the file cannot exceed 100 MB).
:::info
We recommend splitting your database into several files if it exceeds 100 MB, and performing multiple imports from phpMyAdmin.
You can import files larger than 100 MB from the Control Panel by following the step "[Restoring and importing a database from the Control Panel](#restoring-and-importing-a-database-from-the-control-panel)".
:::
Leave the default options and click Run to start the import.
Importing a MySQL or MariaDB database from the command line
This action is only possible via [SSH](/en/guides/web-cloud/web-hosting/ssh-on-webhosting.md) from an OVHcloud shared hosting plan.
```bash
cat database_name.sql | mysql --host=server --user=username --port=port --password=password database_name
```
Importing a MySQL or MariaDB database from a PHP file
```php
1. ";
3. system("cat database_name.sql | mysql --host=server --user=username --port=port --password=password database_name");
4. echo "Completed. Your database is in place on this hosting plan.";
5. ?>
```
:::warning
- To prevent someone from accessing this file containing sensitive data, secure access to it by following the guide: [How do I password-protect a directory?](/en/guides/web-cloud/web-hosting/htaccess-protect-directory-by-password.md)
- This action is only possible from an OVHcloud shared hosting plan.
:::
Importing a PostgreSQL database from the command line
This action is only possible via [SSH](/en/guides/web-cloud/web-hosting/ssh-on-webhosting.md) from an OVHcloud shared hosting plan in stable version or higher.
```bash
psql --host=server --port=port --user=username --password=password database_name < database_name.sql
```
Importing a PostgreSQL database from a PHP file
```php
1. ";
3. system("PGPASSWORD=password psql --host=server --port=port --user=username --password=password database_name < database_name.sql");
4. echo "Completed. Your database is in place on this hosting plan.";
5. ?>
```
:::warning
- To prevent someone from accessing this file containing sensitive data, secure access to it by following the guide: [How do I password-protect a directory?](/en/guides/web-cloud/web-hosting/htaccess-protect-directory-by-password.md)
- This action is only possible from an OVHcloud shared hosting plan.
:::
## Go further
For specialised services (SEO, development, etc.), contact [OVHcloud partners](https://partner.ovhcloud.com/en-gb/directory/).
If you would like assistance using and configuring your OVHcloud solutions, please refer to our [support offers](https://www.ovhcloud.com/en-gb/support-levels/).
Join our [community of users](https://community.ovhcloud.com/).