---
title: "Web Cloud Databases - Connecting to a database"
description: "Find out how to connect to a database on your Web Cloud Databases solution"
url: https://docs.ovhcloud.com/en/guides/web-cloud/databases/db-connecting-database-server
lang: en
lastUpdated: 2026-06-08
---
# Web Cloud Databases - Connecting to a database
## Objective
You can view the content of your database via an interface. There are several ways to connect to it.
**Find out how to connect to your database on your database server.**
## Requirements
- A [Web Cloud Databases instance](https://www.ovhcloud.com/en-gb/web-cloud/databases/) (included in a [Web Hosting](https://www.ovhcloud.com/en-gb/web-hosting/) Performance, Agency, Agency Plus or Agency Max plan).
***
### OVHcloud Control Panel Access
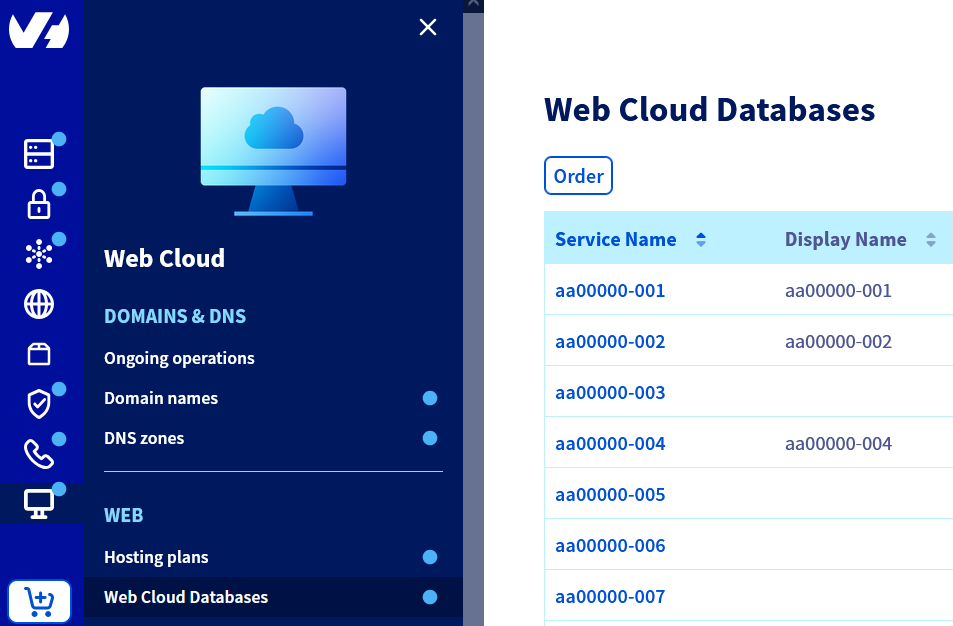
- **Direct link:** Web Cloud Databases
- **Navigation path:** Web Cloud > Web Cloud Databases > Select your database service
***
## Instructions
:::info
[Web Cloud Databases](https://www.ovhcloud.com/en-gb/web-cloud/databases/) solutions do not provide access to the database management system itself, but to the databases hosted on it.
- There is no super user "root" access.
- Generic SQL commands work normally, and software such as HeidiSQL, SQuirreL SQL or Adminer is fully compatible.
:::
### Connect to a MySQL or MariaDB database
:::info
Since MariaDB is a fork of MySQL, the commands are exactly the same for both types of databases.
:::
#### Connection via OVHcloud phpMyAdmin
Click on the tabs below to view each of the **4** steps.
**Step 1**
Go to the Web Cloud Databases page, then select the solution concerned.
**Step 2**
Retrieve the following connection information:
- **Server (hostname) and port:** visible in the General information tab, `Login information` section.
- **Username:** visible in the Users and rights tab.
- **Password:** the password associated with the user. If you have forgotten it, go to the Users and rights tab, click ... to the right of the user concerned, then Change password.
:::warning
If you change the password for a database user, all applications/websites that access this database must be updated accordingly.
:::
**Step 3**
In the General information tab, locate the **Database administration** section and click the phpMyAdmin link under **User interface**.

**Step 4**
On the phpMyAdmin login page, enter the information retrieved in step 2:
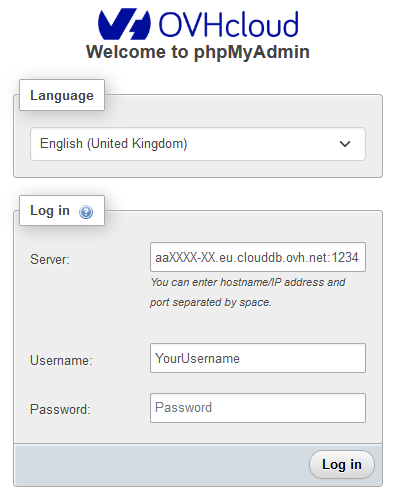- **Server:** enter the _hostname_ followed by the _port number_, separated by "**:**" or a "**space**". For example: **aaXXXXX-XXX.eu.clouddb.ovh.net:12345**.
- **Username:** enter the _username_.
- **Password:** enter the _password_.
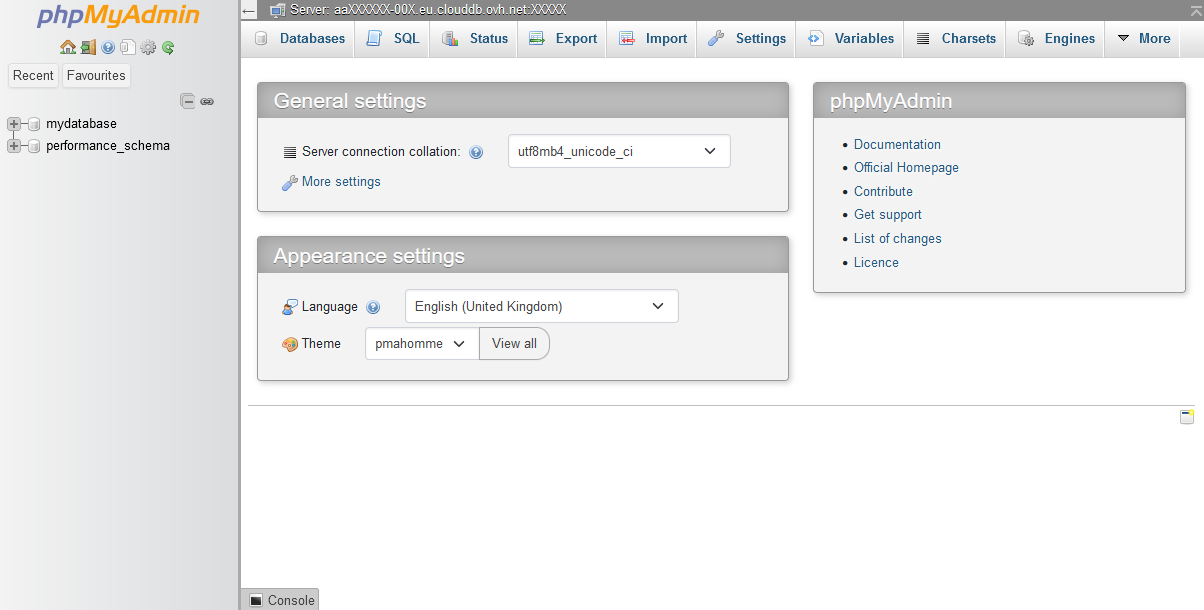
If the connection is successful, the following page will appear.
:::warning
**In case of error:**
- Error #1045 means the credentials are incorrect. Check your username and/or password.
- Error #2005 means the server name should be checked, and whether it is functioning correctly.
:::
#### Connection to the database outside the Control Panel
:::warning
If you are using a "Web Cloud Databases"/"Private SQL" solution, remember to authorise your IP using the guide on [configuring your database server](/en/guides/web-cloud/databases/db-configure-optimise-database-server.md#gerer-vos-acces).
:::
Click on the tabs below to view each of the **2** steps.
**Step 1**
Go to the Web Cloud Databases page, then select the solution concerned.

**Step 2**
Retrieve the following connection information:
- **Server (hostname):** visible in the General information tab, **"Database administration"** section, "Hostname" in the **SQL** part.
- **Port:** visible in the same location, "Port" in the **SQL** part.
- **Username:** visible in the Users and rights tab.
- **Password:** the password associated with the user concerned.
- **Database name:** visible in the Databases tab.
**Click on the connection method of your choice to view the content.**
Command line connection
```bash
mysql --host=server --user=user --port=port --password=password database_name
```
PHP script connection
```php
1.
```
Software connection (SQuirreL SQL)
:::info
In our example, we use the open-source software SQuirreL, but other interfaces such as HeidiSQL or Adminer are fully compatible.
:::
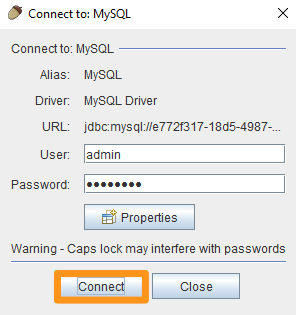
- Launch SQuirreL SQL and click on Aliases, then on +
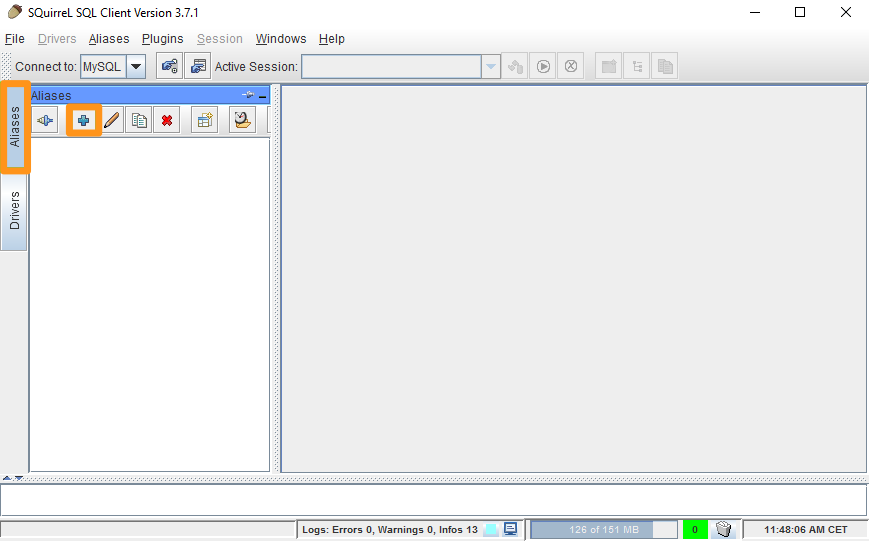- Fill in the fields below and confirm with the OK button:
- **Name**: Choose a name
- **Driver**: Choose "MySQL Driver"
- **URL**: Enter the server address and port in the form jdbc:mysql://server:port
- **User Name**: Enter the username
- **Password**: Enter the password
- Confirm again with the Connect button
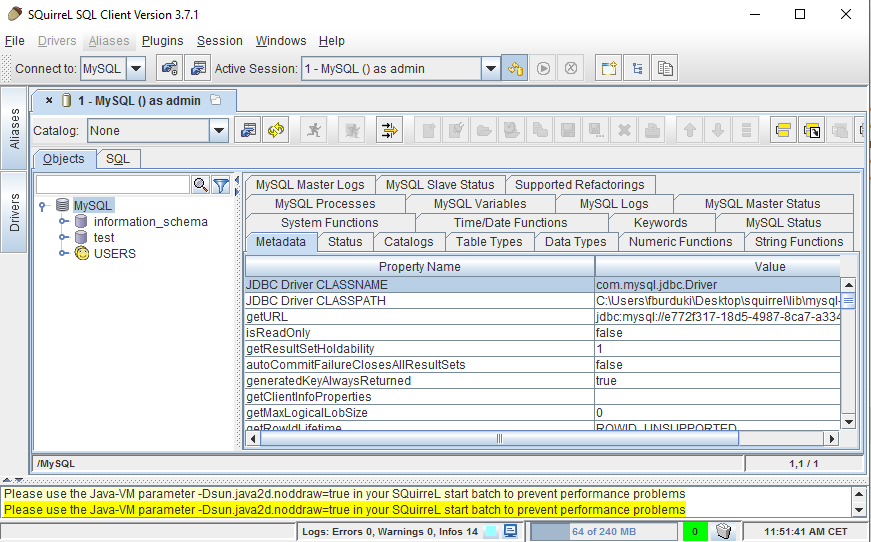
You are now connected to your database:
phpMyAdmin connection
You can use your own phpMyAdmin interface to explore the content of your database. To do this, install phpMyAdmin on your own server or web hosting plan. During installation, make sure you correctly configure the information for your database server and desired database so that phpMyAdmin can connect to it.
### Connect to a PostgreSQL database
Click on the tabs below to view each of the **2** steps.
**Step 1**
Go to the Web Cloud Databases page, then select the solution concerned.

**Step 2**
Retrieve the following connection information:
- **Server (hostname):** visible in the General information tab, **"Database administration"** section, "Hostname" in the **SQL** part.
- **Port:** visible in the same location, "Port" in the **SQL** part.
- **Username:** visible in the Users and rights tab.
- **Password:** the password associated with the user concerned.
- **Database name:** visible in the Databases tab.
**Click on the connection method of your choice to view the content.**
Command line connection
```bash
psql --host=server --port=port --user=user --password=password database_name
```
PHP script connection
```php
1.
```
Software connection (SQuirreL SQL)
:::info
In our example, we use the open-source software SQuirreL, but other interfaces such as HeidiSQL or Adminer are fully compatible.
:::
- Launch SQuirreL SQL and click on Aliases, then on +
- Fill in the fields below and confirm with the OK button:
- **Name**: Choose a name
- **Driver**: Choose "PostgreSQL"
- **URL**: Enter the server address and port in the form jdbc:postgresql://server:port/database
- **User Name**: Enter the username
- **Password**: Enter the password
- Confirm again with the Connect button
You are now connected to your database:

## Go further
[Web Hosting - My database is full, what should I do?](/en/guides/web-cloud/web-hosting/sql-overquota-database.md)
For specialised services (SEO, development, etc.), contact [OVHcloud partners](https://partner.ovhcloud.com/en-gb/directory/).
If you would like assistance using and configuring your OVHcloud solutions, please refer to our [support offers](https://www.ovhcloud.com/en-gb/support-levels/).
Join our [community of users](https://community.ovhcloud.com/).