---
title: "Configuring your database server"
description: "Find out how to configure and optimise your database server"
url: https://docs.ovhcloud.com/en/guides/web-cloud/databases/db-configure-optimise-database-server
lang: en
lastUpdated: 2026-06-08
---
# Configuring your database server
## Objective
Web Cloud Databases database servers allow you to modify the global settings of your server. You can also view your server's activity.
**Find out how to configure and optimise your database server.**
## Requirements
- A [Web Cloud Databases instance](https://www.ovhcloud.com/en-gb/web-cloud/databases/) (included in a [Web Hosting](https://www.ovhcloud.com/en-gb/web-hosting/) Performance, Agency, Agency Plus or Agency Max plan).
***
### OVHcloud Control Panel Access
- **Direct link:** Web Cloud Databases
- **Navigation path:** Web Cloud > Web Cloud Databases > Select your database service
***
## Instructions
### View general information on your database server
Click on the tabs below to view each of the **2** steps.
**Step 1**
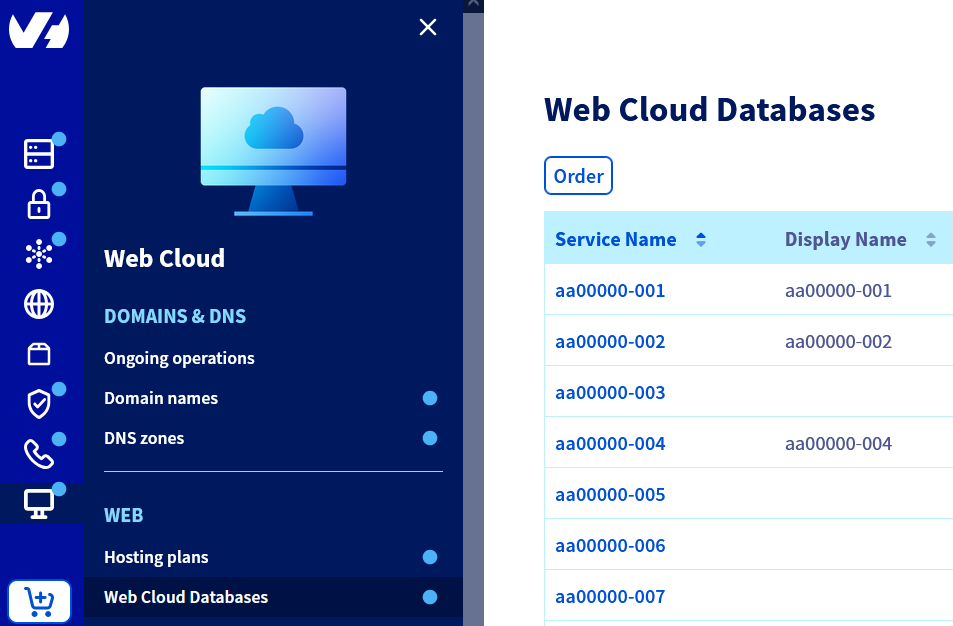
Go to the Web Cloud Databases page, then select the solution concerned.
**Step 2**
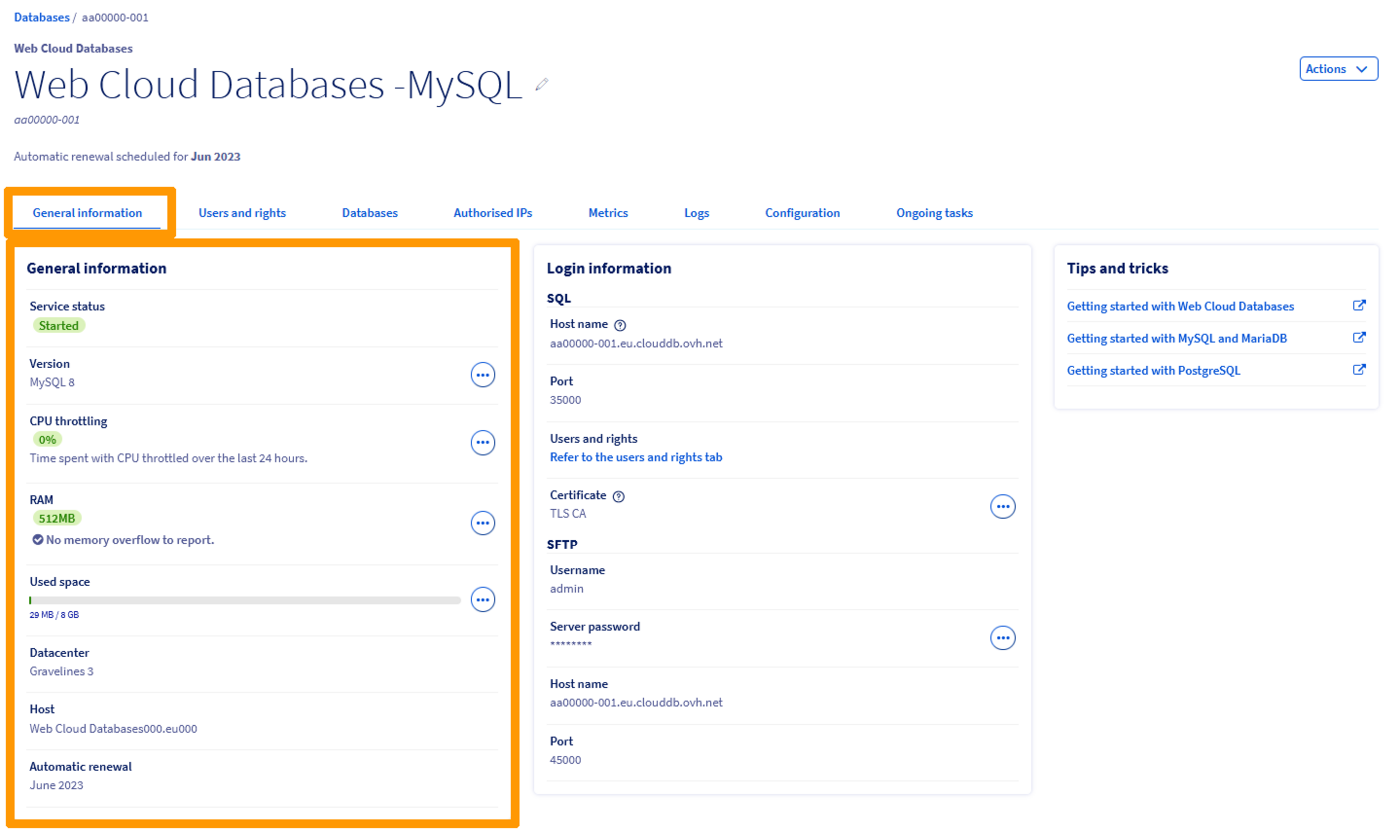
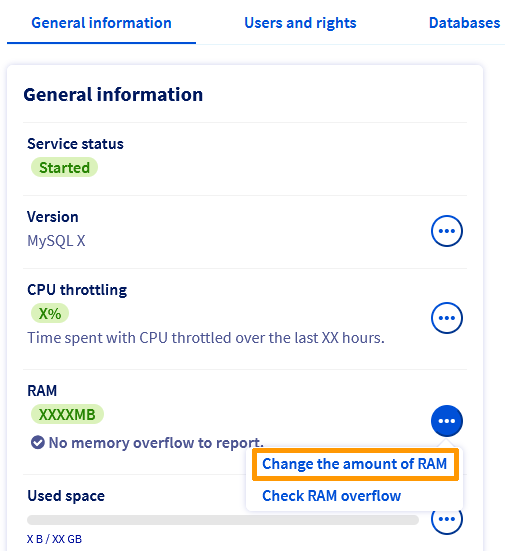
Make sure you are on the General information tab.
You can view important information about your SQL instance. Please take a few moments to ensure that the information displayed is correct and corresponds to the information below.
| Information | Details |
| -------------- | ----------------------------------------------------------------------------------------------------------------------------------------------------------------------------------------------------------------------------------------------------------------------------------------- |
| Service status | Shows if the instance has been started, is restarting, or is suspended. Your instance must be started in order to perform actions on it. |
| Type | Shows the database system used by the server. If you are unsure whether the correct type is being used, please note that the most common is "MySQL", but other types also exist (PostgreSQL, MariaDB). For example, if your website is a WordPress, a MySQL system is perfectly suitable. |
| Version | Shows the database system version used by the server. Check that your website is compatible with the version chosen. |
| CPU throttling | Displays the CPU time spent in saturation over the last 24 hours. |
| RAM | Shows the RAM available for your instance as well as any memory overflows. Your database server has dedicated, guaranteed resources: its RAM. If required, you can scale it up and be warned if you are consuming all of your instance's RAM resources. |
| Infrastructure | Shows the infrastructure used by your instance. This information is inherent to the OVHcloud infrastructure. |
| Datacenter | Shows the data centre in which the instance was created. Make sure your instance's data centre is the same as the OVHcloud web hosting plan where your website is (or will be) hosted. |
| Host | Shows the OVHcloud server in which your instance was created. This information is inherent to the OVHcloud infrastructure and can be used in our communications relating to [OVHcloud incidents](https://web-cloud.status-ovhcloud.com/). |
### Manage your access
Your Web Cloud Databases is accessible from your OVHcloud web hosting plans and/or from the public network.
**Click on each title to view its content.**
Authorise an IP address
To access your Web Cloud Databases instance, you must specify the IP addresses or IP ranges authorised to connect to your databases.
Click on the tabs below to view each of the **3** steps.
**Step 1**
Go to the Web Cloud Databases page, then select the solution concerned.

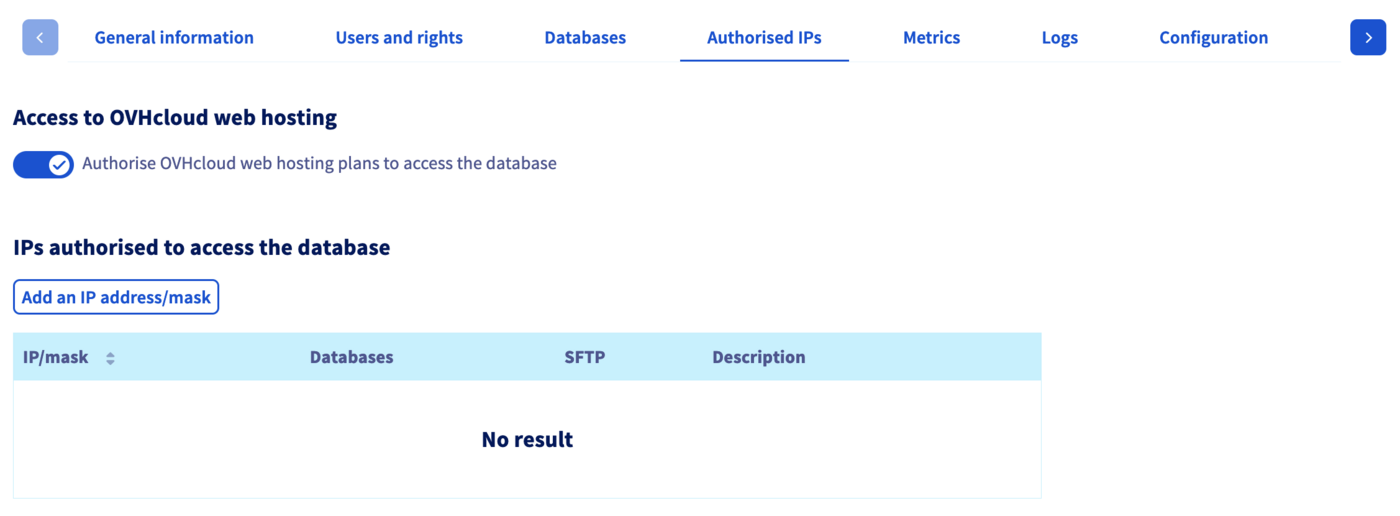
**Step 2**
Click on the Authorised IPs tab, then on the Add an IP address/mask button.

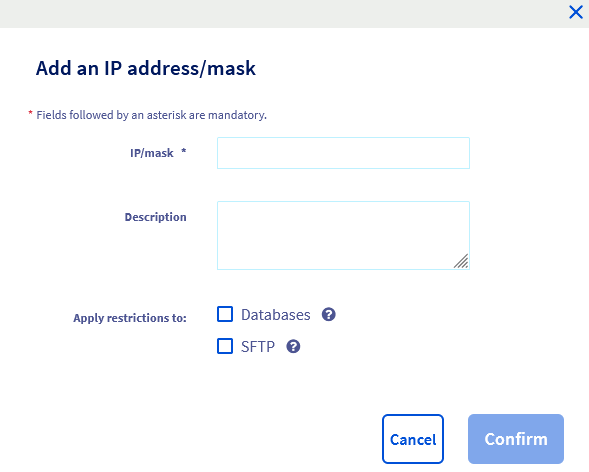
**Step 3**
Enter the IP address or mask to authorise in IP/mask and optionally add a description. Choose whether to grant access to databases only or also to SFTP, then click Confirm.
Authorise connections to OVHcloud web hosting plans
Click on the tabs below to view each of the **3** steps.
**Step 1**
Go to the Web Cloud Databases page, then select the solution concerned.

**Step 2**
Click on the Authorised IPs tab.
**Step 3**
Tick Authorise OVHcloud web hosting plans to access the database.
### Modify your Web Cloud Databases plan [](#)
:::warning
If your Web Cloud Databases plan is linked to a **Performance**, **Agency**, **Agency Plus** or **Agency Max** web hosting plan, you must first detach the Web Cloud Databases plan from your hosting plan before upgrading to a higher plan.
To detach a Web Cloud Databases plan from a **Performance**, **Agency**, **Agency Plus** or **Agency Max** web hosting plan, please refer to our guide "[Detach my Web Cloud Databases solution from a web hosting plan](/en/guides/web-cloud/databases/db-detach-from-web-hosting.md)".
**This action is irreversible, and the Web Cloud Databases plan will then be billed separately from your Performance, Agency, Agency Plus or Agency Max web hosting plan.**
:::
Click on the tabs below to view each of the **3** steps.
**Step 1**
Go to the Web Cloud Databases page, then select the solution concerned.

**Step 2**
In the **General information** tab displayed by default, click ... to the right of "RAM", then Change the amount of RAM to access the order for this change.
**Step 3**
Choose the amount of RAM you want, then click Next. You can then choose the duration you want.
:::info
The remaining term until expiration will be prorated. This pro rata calculation will be based on the expiration date of your Web Cloud Databases instance, not on the date of the purchase order.
:::
Once you have confirmed your contracts, you will be redirected to the purchase order to pay for this change. It will then be effective within a few hours.
:::warning
If you currently have a free Web Cloud Databases with your Performance, Agency, Agency Plus or Agency Max hosting plan, modifying the plan will mean it is no longer free.
:::
### Modify my database server configuration
**Click on each title to view its content.**
MySQL and MariaDB instance
Click on the tabs below to view each of the **3** steps.
**Step 1**
Go to the Web Cloud Databases page, then select the solution concerned.

**Step 2**
Click on the Configuration tab.
**Step 3**
In the **General MySQL configuration** box, you will find the configuration currently set for your database. You can modify it directly, then click Apply.
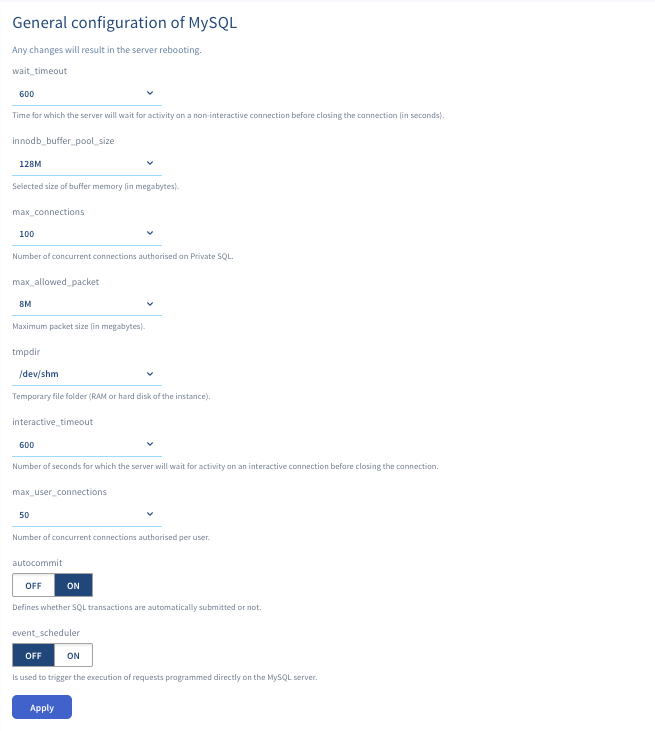- **MaxAllowedPacket**: Maximum packet size.
- **Max\_user\_connections**: Number of concurrent connections authorised per user.
- **AutoCommit**: Defines whether requests are automatically committed or not.
- **Interactive\_timeout**: Time (in seconds) for which the server will wait for activity on an interactive connection before closing it.
- **InnodbBufferPoolSize**: Selected buffer memory size.
- **MaxConnections:** Number of concurrent connections authorised on the database server.
- **Wait\_timeout**: Time (in seconds) for which the server will wait for activity on a non-interactive connection before closing it.
- **Event\_scheduler**: Triggers the execution of requests programmed directly on the MySQL server.
- **sql\_mode**: The **sql\_mode** option affects the supported SQL syntax and the data validation checks performed by MySQL/MariaDB.
:::info
When you encounter an error on your website stating **"Too many connections"**, this is due to the number of simultaneous connections on your database server being exceeded. You can then increase the **"MaxConnections"** variable if it is not at its maximum.
:::
:::info
sql\_mode:
Default mode of MariaDB 10.1:
NO\_ENGINE\_SUBSTITUTION,NO\_AUTO\_CREATE\_USER
Default mode of MariaDB 10.2 and higher:
STRICT\_TRANS\_TABLES,ERROR\_FOR\_DIVISION\_BY\_ZERO,NO\_AUTO\_CREATE\_USER,NO\_ENGINE\_SUBSTITUTION
Default mode of MySQL 5.6:
NO\_ENGINE\_SUBSTITUTION
Default mode of MySQL 5.7 and higher:
ONLY\_FULL\_GROUP\_BY,STRICT\_TRANS\_TABLES,NO\_ZERO\_IN\_DATE,NO\_ZERO\_DATE,ERROR\_FOR\_DIVISION\_BY\_ZERO,NO\_ENGINE\_SUBSTITUTION
We recommend always using the default mode, unless your database was updated from a version with a default mode that is different from the current version.
:::
Make the necessary changes, then click Confirm.
:::warning
Any changes require a restart of the database server.
:::
PostgreSQL instance
Click on the tabs below to view each of the **3** steps.
**Step 1**
Go to the Web Cloud Databases page, then select the solution concerned.

**Step 2**
Click on the Configuration tab.
**Step 3**
In the **General PostgreSQL configuration** box, you will find the configuration currently set for your database. You can modify it directly, then click Apply.
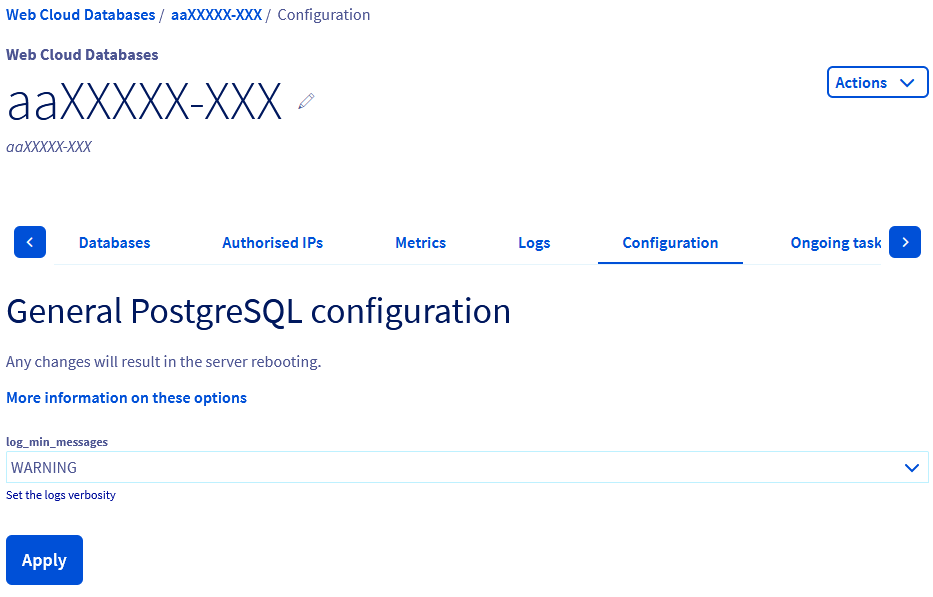- **log\_min\_messages**: Controls the levels of messages to be logged in the server logs. The levels available for a Web Cloud Databases solution are:
- **"WARNING"**: Provides warning messages about potential problems.
- **"ERROR"**: Sends the error that caused an ongoing command to be cancelled.
- **"LOG"**: Stores information for server administrators.
- **"FATAL"**: Sends the error that caused the current session to end.
- **"PANIC"**: Sends the error that caused all sessions to end.
Each level includes all levels that follow it. The higher the level, the fewer messages are recorded in the server logs.
By default, the value set is **"WARNING"** because it includes the values **"ERROR"**, **"LOG"**, **"FATAL"**, and **"PANIC"**.
You can also enable extensions for your databases. To do this, click on the Databases tab, then on the table icon for your database in the **"Extensions"** column.

### Change the MySQL, PostgreSQL or MariaDB version of the database server
Click on the tabs below to view each of the **3** steps.
**Step 1**
Go to the Web Cloud Databases page, then select the solution concerned.

**Step 2**
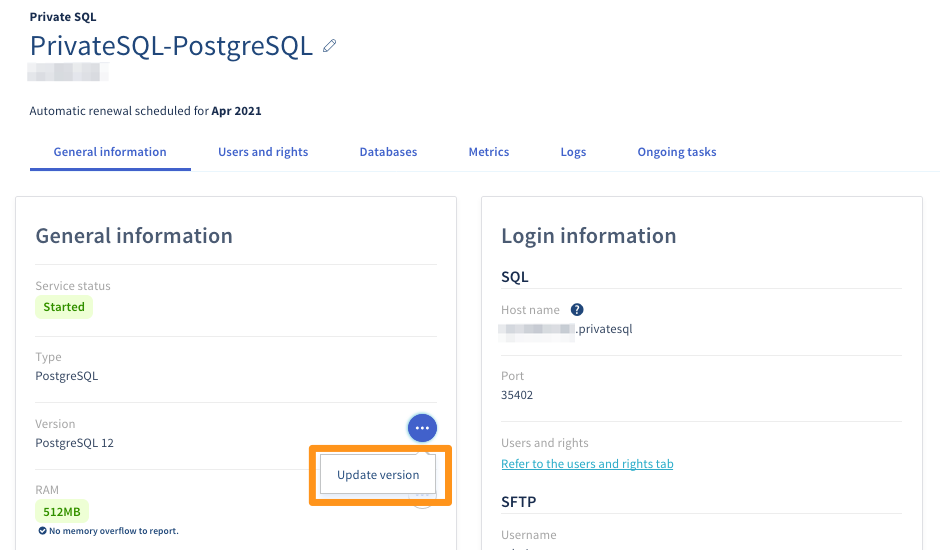
In the **General information** tab, the current version appears in the **Version** row.
**Step 3**
To modify this version, click Update version.
How do I know the exact version of PostgreSQL I am using?
Enter this command in phpPgAdmin by clicking on **Your database** in the **"SQL"** section, then click Launch:
```sql
select version();
```
How do I know the exact version of MySQL or MariaDB I am using?
Enter this command in phpMyAdmin, in the **"SQL"** section, then click Run:
```sql
show variables like "version";
```
:::info
- Before migrating to a higher version, ensure that your database is compatible with the version you have chosen.
- The modification will be effective within a few minutes.
:::
:::warning
It is not possible to switch from an old version to the latest version
directly. It is mandatory to use all intermediate versions.
:::
### Logs and Metrics
**Click on each title to view its content.**
Log access
To access the logs for your Web Cloud Databases solution, please refer to our guide "[Web Cloud Databases - How to retrieve logs](/en/guides/web-cloud/databases/db-retrieve-logs.md)".
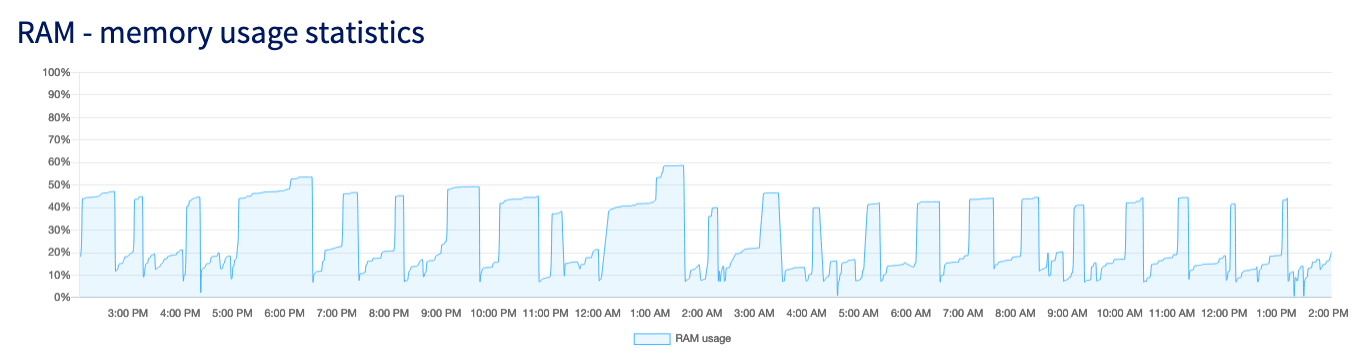
Monitor RAM usage
Click on the tabs below to view each of the **2** steps.
**Step 1**
Go to the Web Cloud Databases page, then select the solution concerned.

**Step 2**
Click on the Metrics tab. You will find the graph **"RAM usage statistics"**.
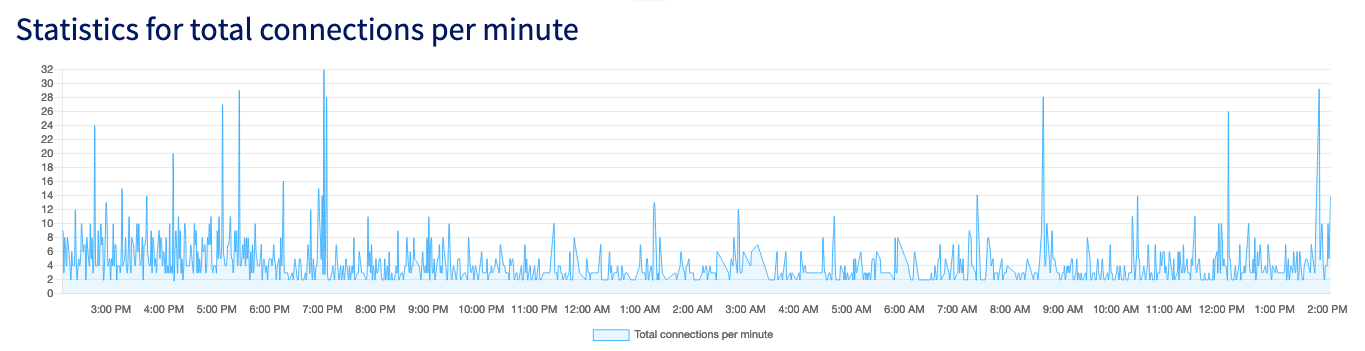
Monitor the number of connections per minute
This graph allows you to track, over the last 24 hours, the load of connections per minute on your database server.
Click on the tabs below to view each of the **2** steps.
**Step 1**
Go to the Web Cloud Databases page, then select the solution concerned.

**Step 2**
Click on the Metrics tab. You will find the graph **"Statistics for total connections per minute"**.
### Optimise your databases
Maintain your database to keep it performing well and returning information to scripts quickly. This requires a structured and optimised database.
**Click on each title to view its content.**
Index the database
To increase the speed of searches during a query, you must index the fields used in WHERE clauses.
Example: you regularly search for people by city. Index the "city" field with the following query:
```sql
ALTER TABLE 'test' ADD INDEX ('city')
```
Purge the database
Some of your data is no longer being accessed? By archiving it, your tables will be less crowded and searches will be faster.
Display limit
Limit the display of records to a fixed number (for example, 10 per page) with the LIMIT portion of your SQL query.
Query grouping
Group your queries at the beginning of the script this way:
```bash
open_connection
request1
request2
...
close_connection
Display...
Process data
Loop through data...
Display...
...
```
Retrieve only useful data
In your SQL queries, make sure you select only what you need, and that you have not forgotten the links between the tables.
Example:
```sql
(where table1.champs = table2.champs2)
```
Avoid options that consume too many resources
Avoid using **"HAVING"** for example. It increases your requests. Similarly, avoid using **"GROUP BY"**, unless it is strictly necessary.
## Go further
[IP address list for Web Hosting clusters](/en/guides/web-cloud/web-hosting/clusters-and-shared-hosting-ip.md)
For specialised services (SEO, development, etc.), contact [OVHcloud partners](https://partner.ovhcloud.com/en-gb/directory/).
If you would like assistance using and configuring your OVHcloud solutions, please refer to our [support offers](https://www.ovhcloud.com/en-gb/support-levels/).
Join our [community of users](https://community.ovhcloud.com/).