---
title: "Backup Agent - Triggering restores"
description: "Find out how to restore your data with Backup Agent: file-level restore (FLR) or full server restore (Bare Metal Recovery)"
url: https://docs.ovhcloud.com/en/guides/storage-and-backup/backup-agent/restore
lang: en
lastUpdated: 2026-07-08
---
# Backup Agent - Triggering restores
## Objective
**Learn how to restore your backed-up data with Backup Agent.**
You have two restore methods, to choose according to your needs:
- **File-level restore (FLR wizard)**: this is the primary and most common method. It lets you restore one or more files or folders from a backup, without restarting the server.
- **Full server restore (Bare Metal Recovery)**: it lets you restore the entire system from a recovery ISO image. It is intended for disaster recovery scenarios, when the server no longer boots.
:::info
Find more information on the Backup Agent product on [this page](/en/guides/storage-and-backup/backup-agent/product-presentation.md).
:::
## Requirements
- A Bare Metal server with the Backup Agent installed and configured on it. Read our "[How to configure your first backup](/en/guides/storage-and-backup/backup-agent/first-configuration.md)" guide for more information.
- At least one backup has been performed. See our "[Managing your backups](/en/guides/storage-and-backup/backup-agent/backup-restore.md)" guide for more information.
## Instructions
### File-level restore (FLR wizard)
This is the primary method to recover one or more files or folders from a backup.
To restore files and folders, click on the tab corresponding to your Operating System:
**Windows**
Open the "Veeam Agent" application on your Bare Metal server:
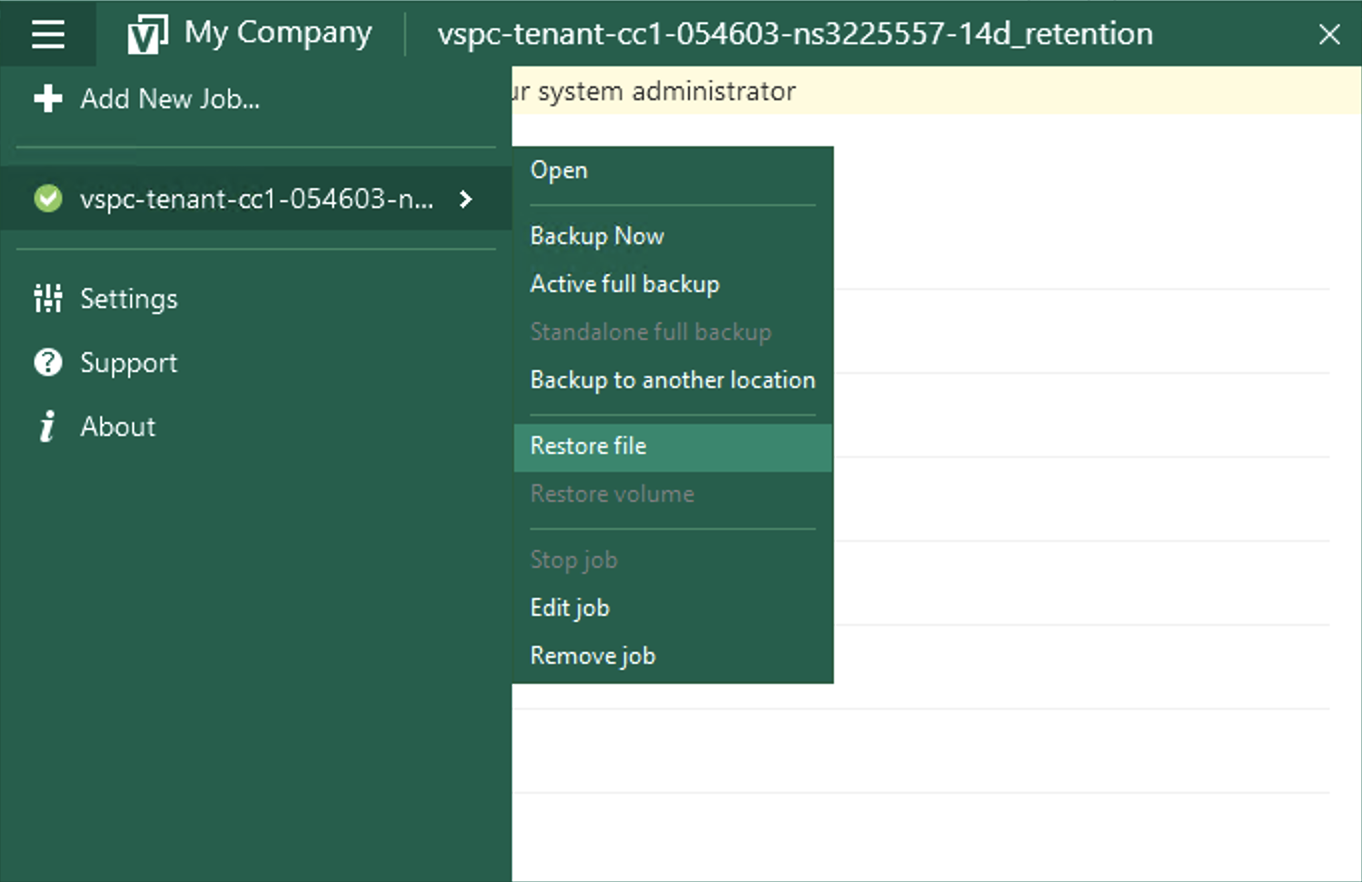
Go to the menu and select Restore File:
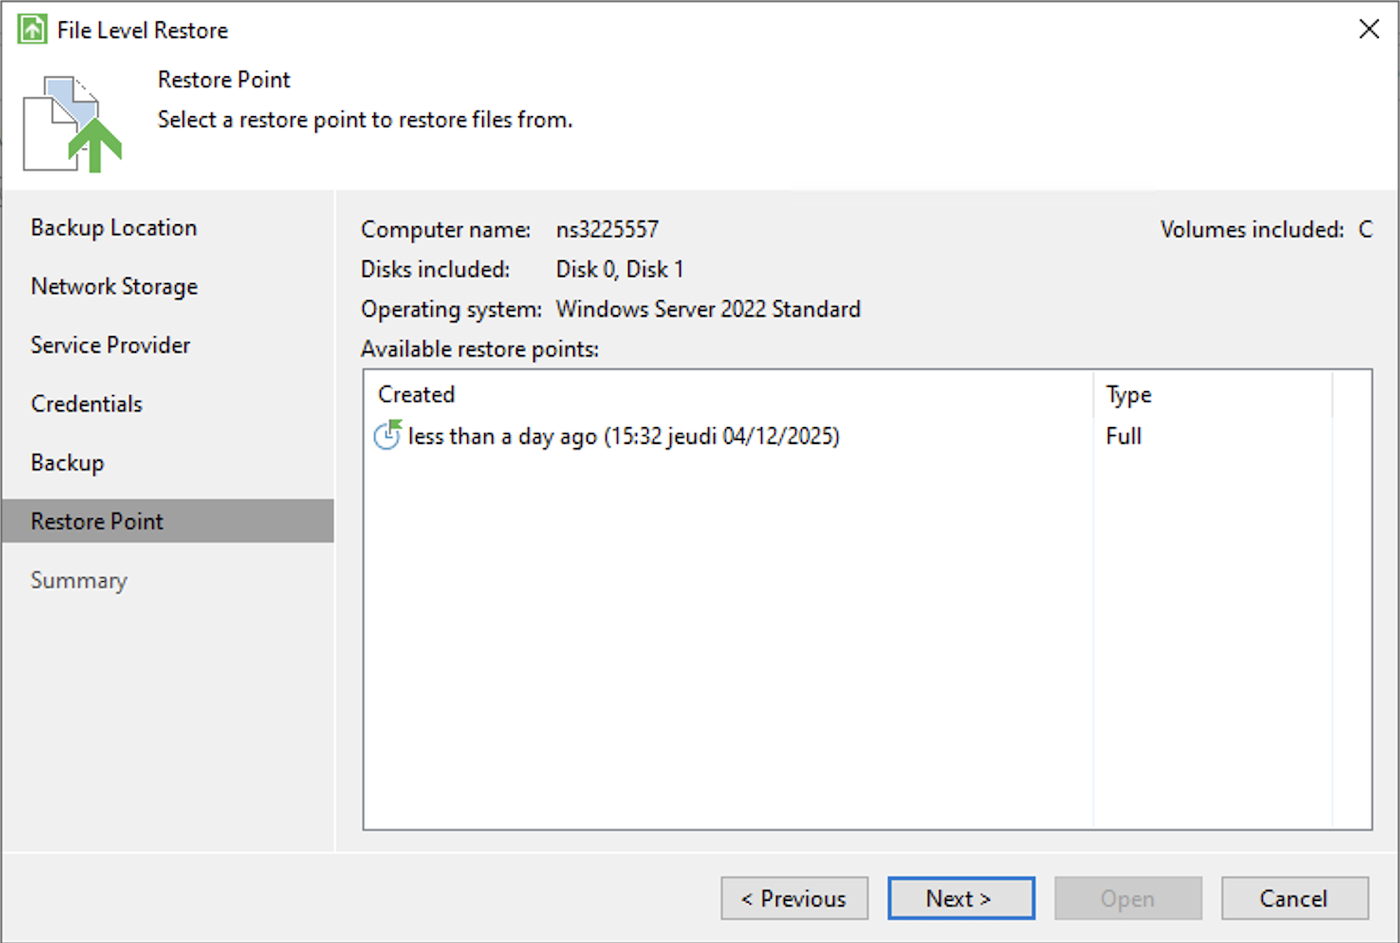
Select the desired restore point in the wizard:
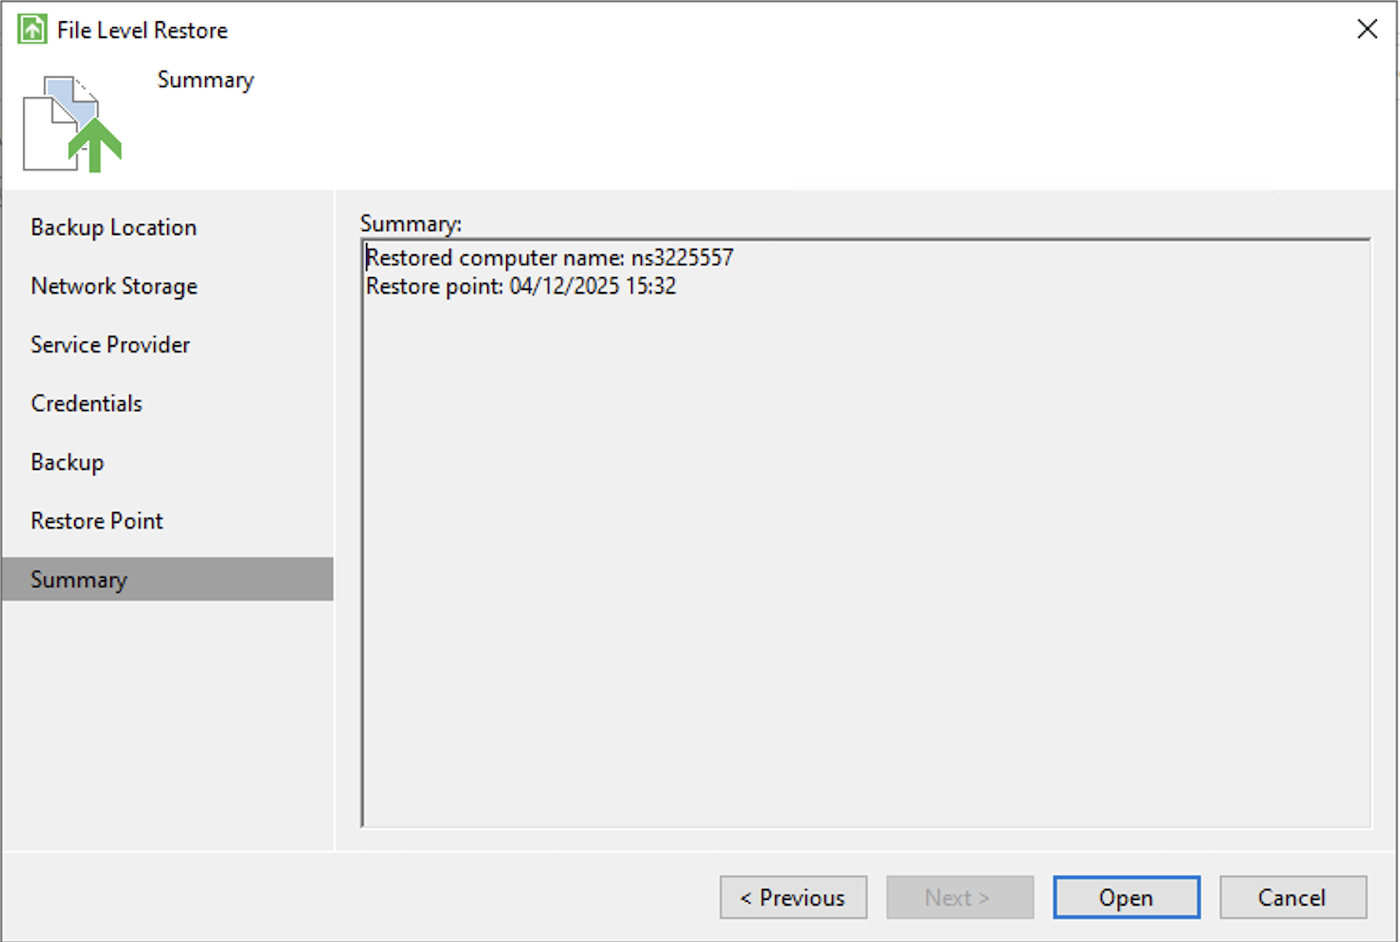
Then confirm:
Finally, search for your file and select an option:
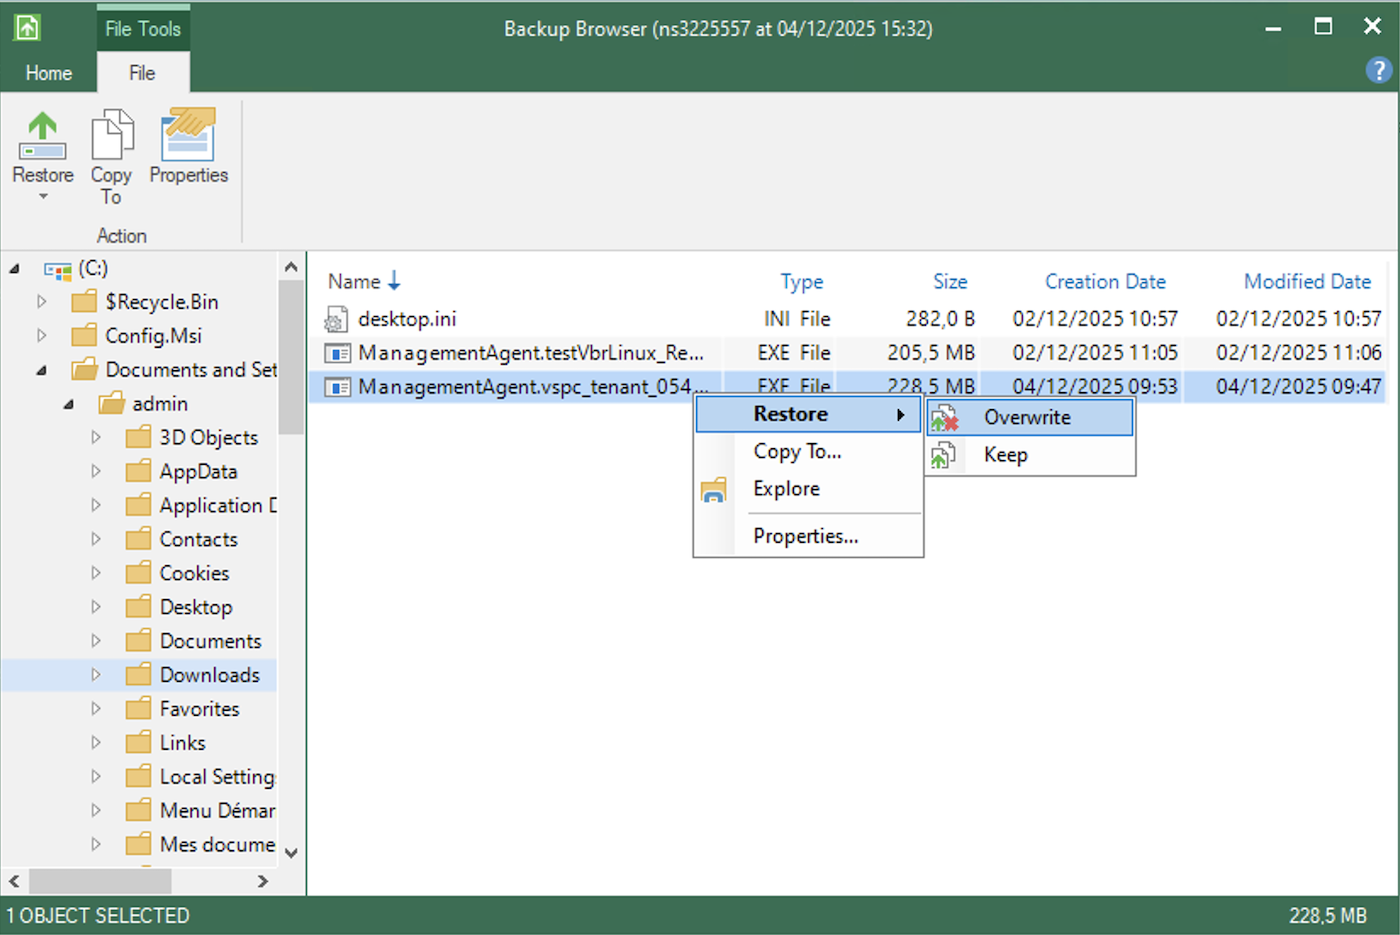- Restore - Overwrite: restores the file, overwriting the one currently on the server.
- Restore - Keep: restores the file while keeping the one currently on the server.
- Copy To: copies the file to a location on your server.
- Explore: explores the backup.
- Properties: displays the file properties.
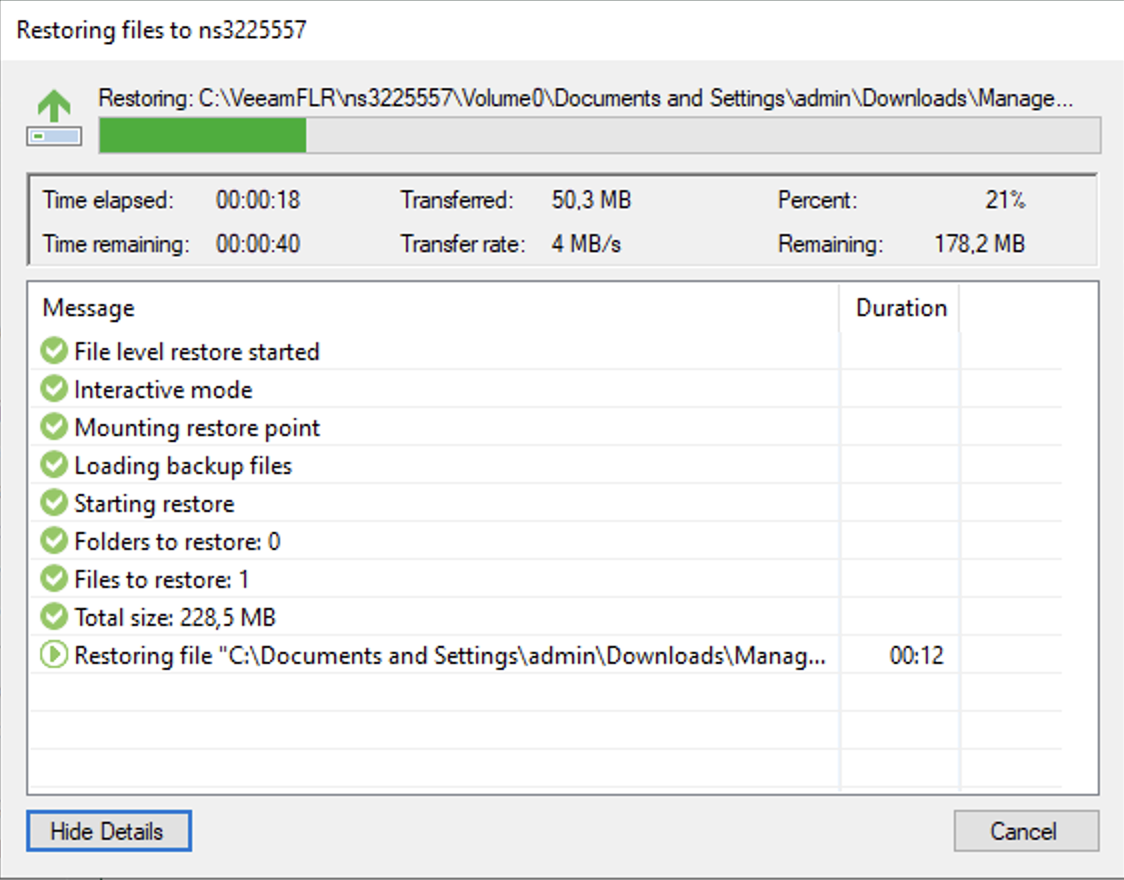
Launching a restore opens a final window showing the transfer:
**Linux**
To restore files and folders on Linux, you have two options: via the graphical interface or via the command line.
#### Via the graphical interface
1\. Connect to your Bare Metal server via SSH.
2\. Launch the Veeam interface by typing the following command:
```bash
sudo veeam
```
3\. In the interface, select the file restore option.
4\. Select the backup and the desired restore point.
5\. Navigate through the backup to find the files or folders to restore.
6\. Select the files and choose the restore action:
- Restore to original location
- Copy to a new location
- Explore the backup
#### Via the command line
To restore files via the command line, you must first mount the backup:
1\. List your available backups:
```bash
sudo veeamconfig backup list
```
2\. List the restore points of a backup:
```bash
sudo veeamconfig restore list --backup
```
3\. Mount a restore point:
```bash
sudo veeamconfig mount --backup --restorepoint
```
4\. Once mounted, you can access the files via the mount point (usually in `/mnt/veeam/`).
5\. Copy the desired files from the mount point to their destination.
6\. Once the restore is complete, unmount the backup:
```bash
sudo veeamconfig unmount --backup
```
For more information, see the [Veeam documentation](https://helpcenter.veeam.com/docs/agentforlinux/userguide/files_restore_gui.html?ver=13) and the [command line restore documentation](https://helpcenter.veeam.com/docs/agentforlinux/userguide/files_restore_cmd.html?ver=13).
### Full server restore (Bare Metal Recovery)
Bare Metal Recovery is a Veeam feature. You create a custom ISO image in advance, then use it to boot a system and restore it from a backup stored on a different server. This method is intended for disaster recovery scenarios, when your server no longer boots.
It allows you to:
- Create a **recovery ISO image**: this file allows you to start your machine if the system fails to boot.
- Use your ISO image to access your latest backup and restore it from the OVHcloud infrastructure.
:::warning
This guide is based on the Veeam Agent for Windows. If you are using the Veeam Agent for Linux, the procedure is similar, although the interface is text-based.
:::
To boot from the recovery ISO, use your Bare Metal server's IPMI to load the ISO.
#### Step 1: Create the recovery ISO
If your computer no longer boots, you will need a recovery ISO image to start it again.
:::warning
This image must be created before any incident. If your server is no longer available, you will not be able to create it.
:::
Here is how to create it:
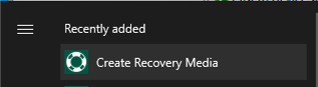
1\. Open the **Create Recovery Media** tool, included with the Veeam Agent, on your machine.
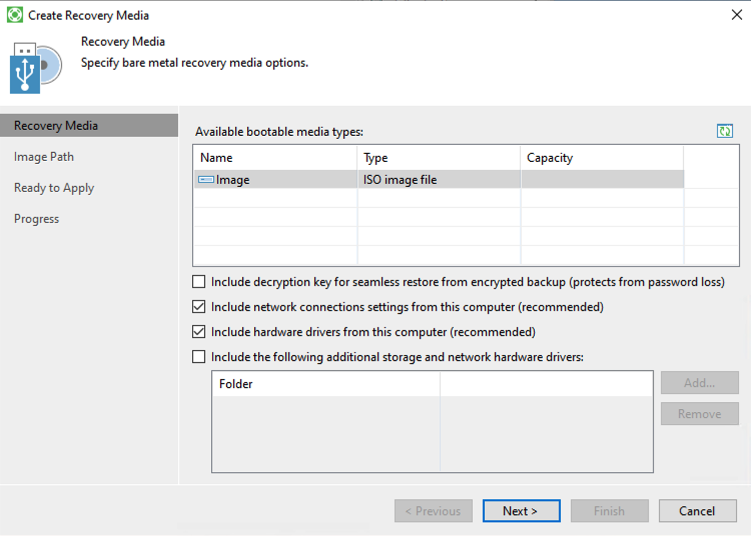
2\. Veeam will ask if you want to include additional drivers.
:::info
If you are using specific hardware (such as a RAID controller), select the required drivers. Otherwise, the default options are usually sufficient.
:::
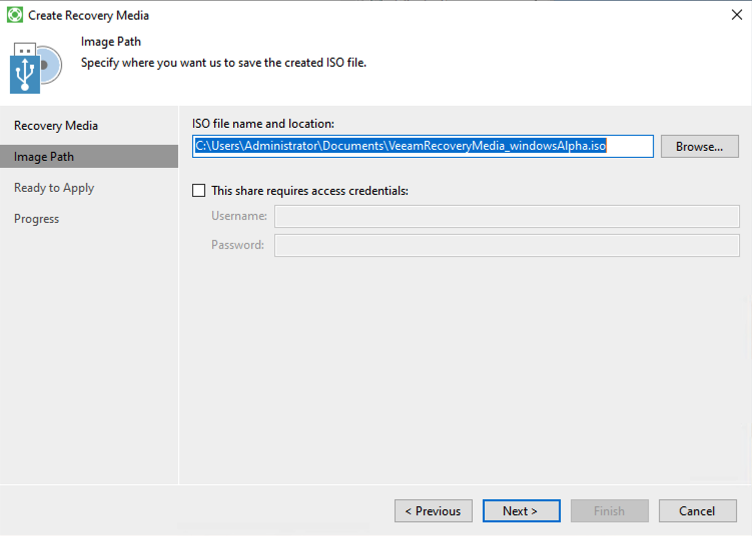
3\. Choose where to save the ISO and give it a name.
4\. Wait until the operation completes. The ISO file will be generated.
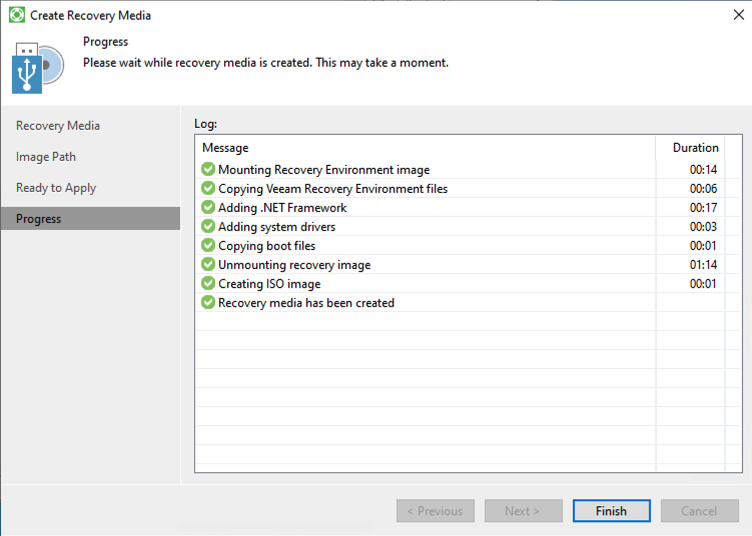
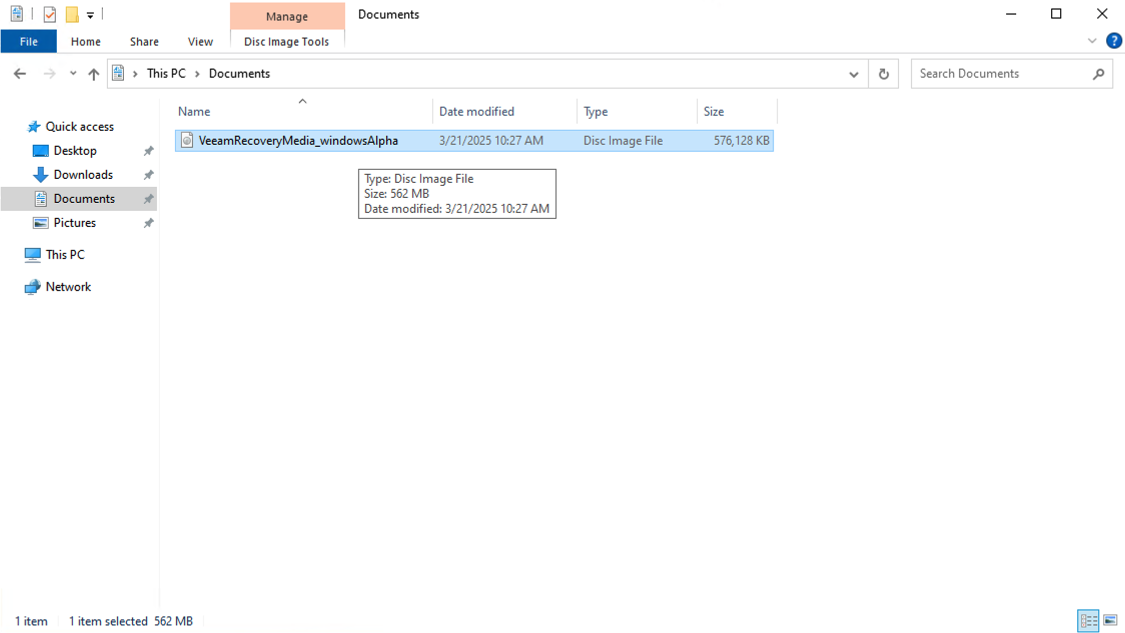
You can now use this ISO to create a bootable USB key using a tool like Rufus.
#### Step 2: Boot the machine from the recovery ISO
If your system no longer boots and you need to restore it:
1\. Mount the ISO in your server console, then boot the machine from it.
:::tip
**Not sure how to boot from an ISO?**
Restart your physical machine and press the key indicated (usually F2, F12, ESC or DEL) to access the boot menu.
:::
2. Once the system has started, the Veeam recovery wizard will open. Click `Bare Metal Recovery
`.
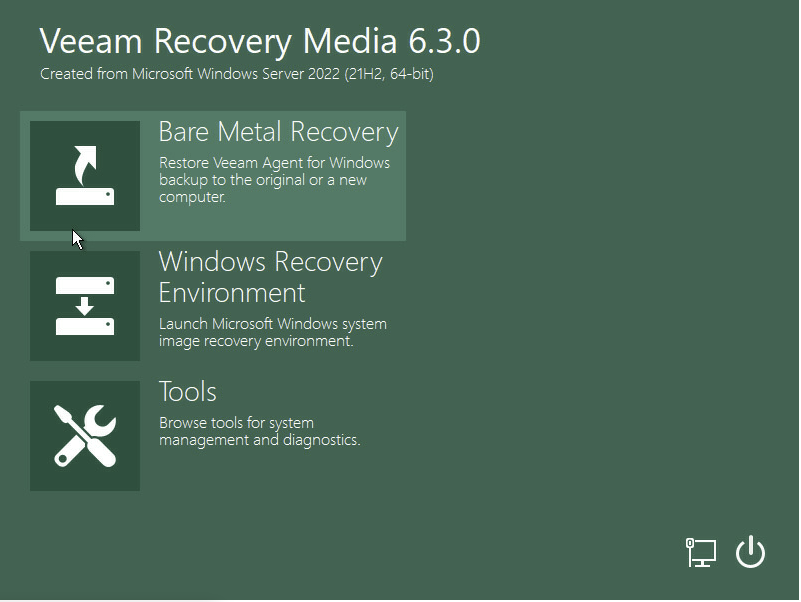
3. Select `Network Storage
` to access your online backups.
:::warning
If the network is not detected, you may need to configure it manually. Click `Configure network settings
` and load any missing drivers.
:::
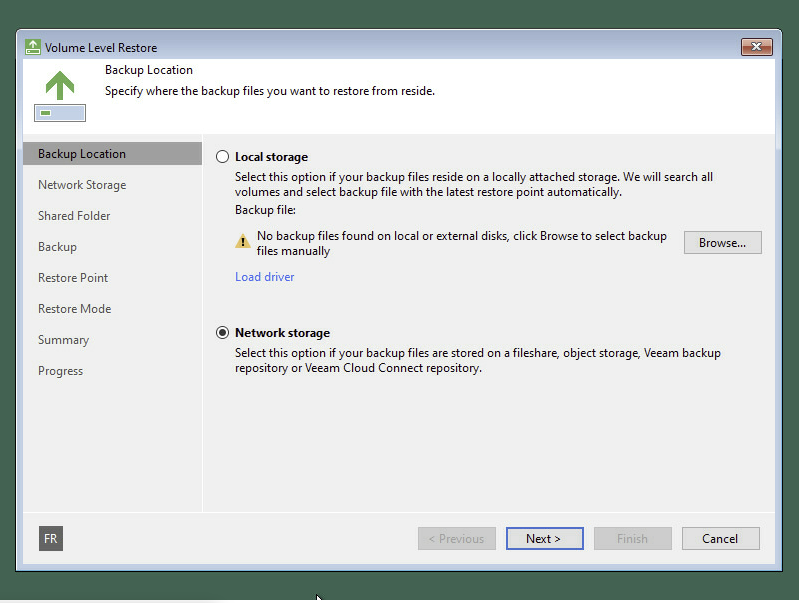
4. Select `Veeam Cloud Connect repository
`.
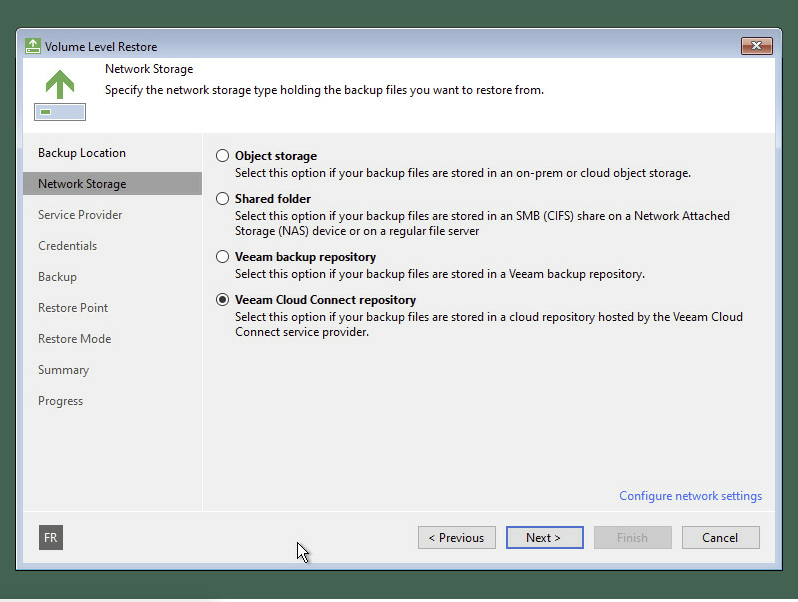
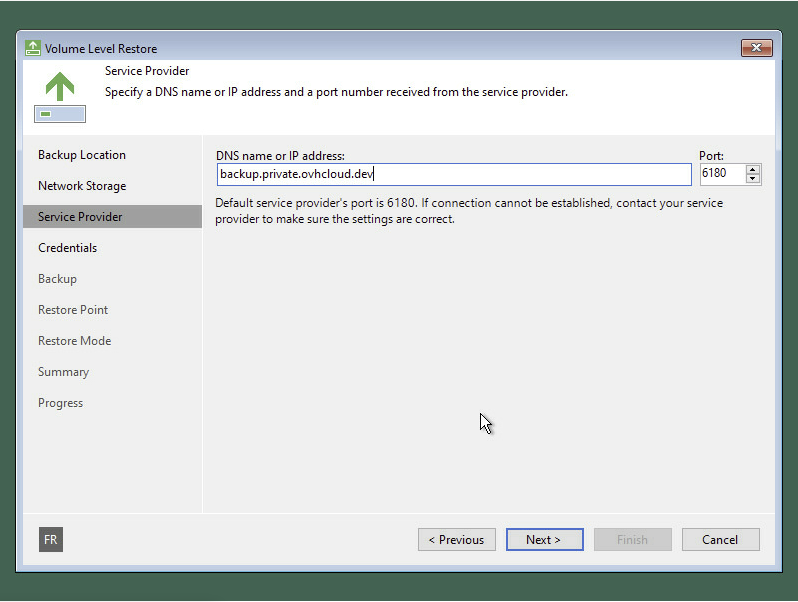
5\. Enter the following address when prompted for the service provider:
:::warning
To obtain the DNS address and credentials to use, [contact our support team](https://help.ovhcloud.com/csm?id=csm_get_help).
:::
6\. Enter your username and password to log in.
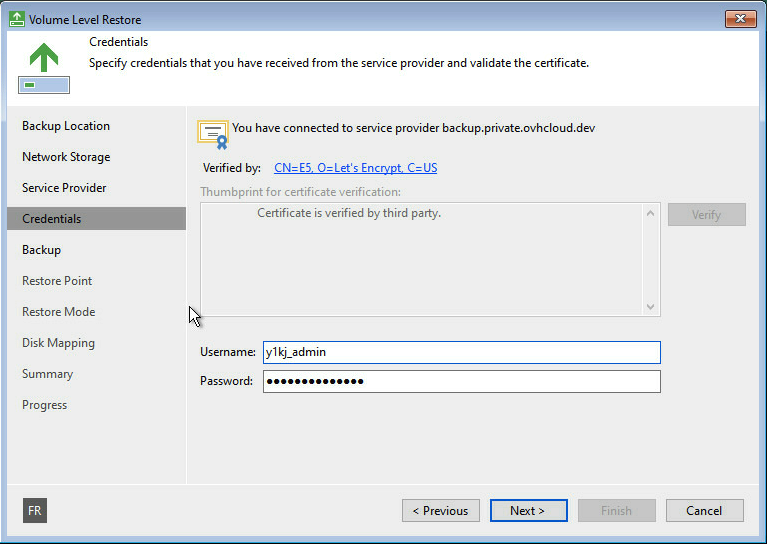
7\. Select the server you want to restore.
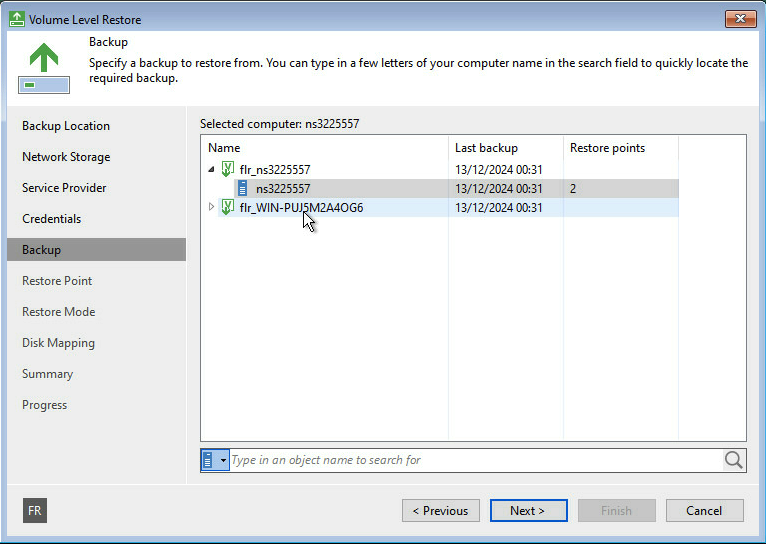
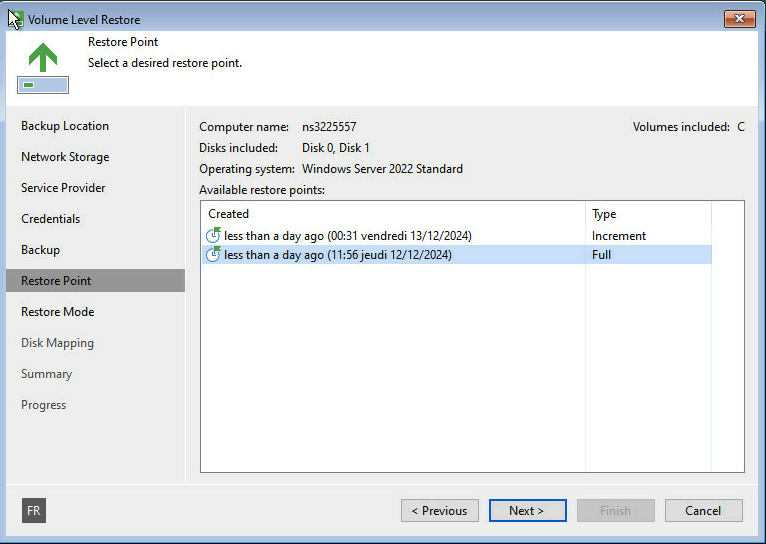
8\. Choose the restore point (date/time) you want to go back to.
We recommend using the most recent successful backup unless you have a specific reason to go back to an earlier version.
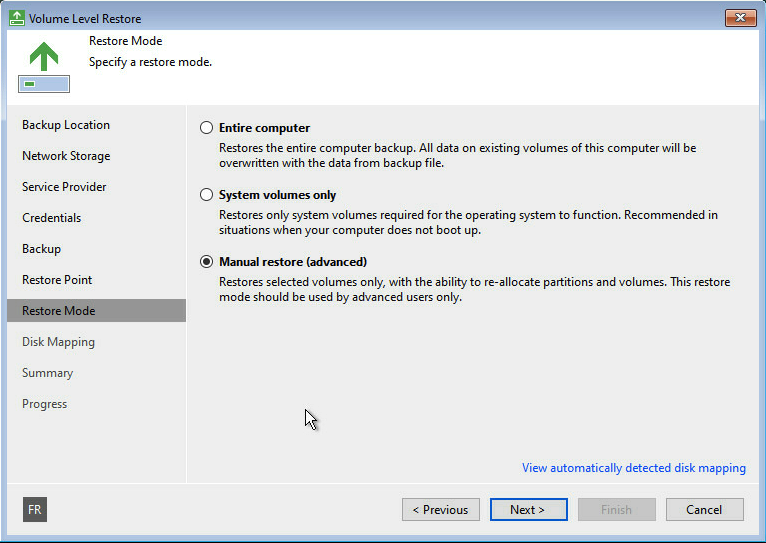
9\. Choose the restore mode that fits your situation (choose **Entire computer** for a full restore).
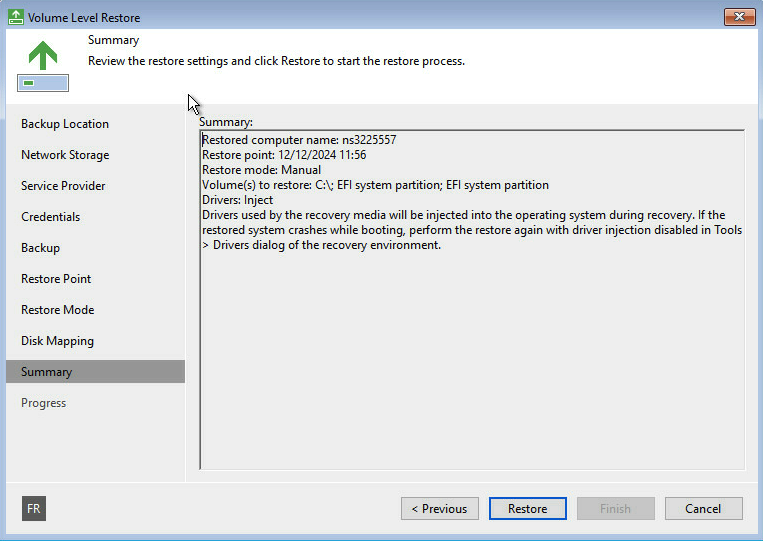
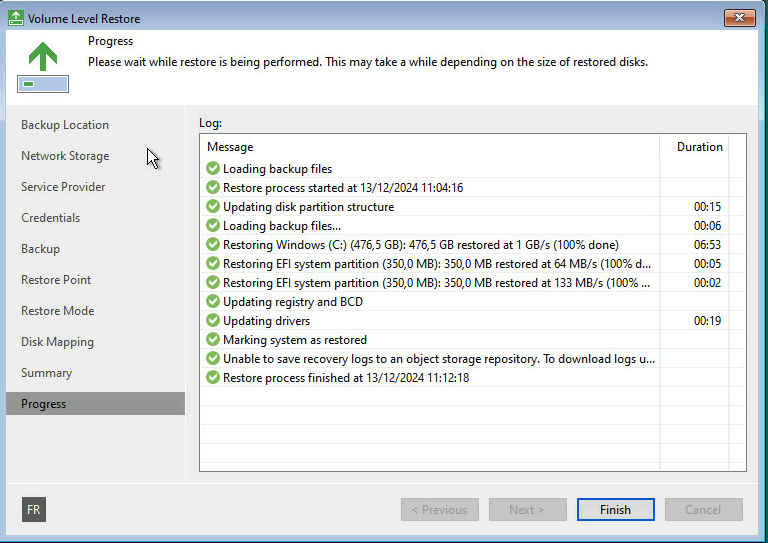
10\. Review the summary, then start the restore.
:::warning
The duration of the restore process depends on the size of your backup and your internet connection speed. Once complete, your system will reboot with the state corresponding to the selected restore point.
:::
## Go further
Join our [community of users](https://community.ovhcloud.com/).