---
title: "Configuring a TERMINATED_HTTPS listener via CLI / Horizon"
description: "Discover how to configure a secure Public Cloud Load Balancer with a certificate from a third-party supplier."
url: https://docs.ovhcloud.com/en/guides/public-cloud/network-services/load-balancer-third-party-certificat
lang: en
lastUpdated: 2024-12-24
---
# Configuring a TERMINATED_HTTPS listener via CLI / Horizon
## Objective
Our Public Cloud Load Balancer is based on [OpenStack Octavia](https://wiki.openstack.org/wiki/Octavia) and is fully integrated into the Public Cloud universe.
After setting up your Load Balancer, you can configure it with a certificate in order to process HTTPS connections.
**This tutorial explains how to configure a secure Public Cloud Load Balancer.**
## Requirements
- A [Public Cloud project](/en/guides/public-cloud/cross-functional/create-a-public-cloud-project.md) in your OVHcloud account
- [Preparing your environment for using the OpenStack API](/en/guides/public-cloud/cross-functional/compute-prepare-openstack-api-environment.md)
- [OpenStack Octavia client](https://docs.openstack.org/python-octaviaclient/latest/install/index.html) and [OpenStack Barbican](https://docs.openstack.org/python-barbicanclient/latest/install/index.html) set up
- A certificate from a third-party supplier
If you are not yet familiar with creating a Load Balancer, please follow our guide on [Getting started with Load Balancer on Public Cloud](/en/guides/public-cloud/network-services/getting-started-load-balancer.md) before you continue with this tutorial.
***
### OVHcloud Control Panel Access
- **Direct link:** Public Cloud Projects
- **Navigation path:** Public Cloud > Select your project
***
## Instructions
### Attaching a Floating IP address to a Load Balancer
You can find the instructions for this part in this [documentation](/en/guides/public-cloud/network-services/load-balancer-letsencrypt.md) in the section bearing the same name.
### Preparing the certificate [](#)
For this stage, we need a certificate, which has already been generated.
When your certificate is generated by your supplier, you generally receive 2 or 3 files, described as follows:
- Main certificate (.crt or .pem file).
- Private key (.key file) generated during the CSR request.
- Intermediate certificate or complete chain (.crt file), if supplied. Some suppliers already include the intermediate chain in the main certificate, in which case you will only receive 2 files.
:::warning
If you have obtained 3 files, you will need to merge the main certificate with the intermediate certificate to create a complete certificate. If your supplier already provides a complete certificate incorporating the intermediate chain, this merging step should be omitted.
:::
```bash
sudo cat > main_certificate.pem
```
You need to create a PKCS#12 package with your certificate inside:
```bash
sudo openssl pkcs12 -export -inkey -in -out domain.tld.p12
```
You must download this file directly onto your computer in order to be able to send it to Openstack Barbican (‘Secret as a Service’).
```bash
openstack secret store --name='cert-domain.tld' -t 'application/octet-stream' -e 'base64' --payload="$(base64 < domain.tld.p12)"
```
### Configuring your Load Balancer
Via Horizon
In the [Horizon interface](https://horizon.cloud.ovh.net/auth/login/), open the Network section, then click Load Balancers
Select your Load Balancer by clicking on it.
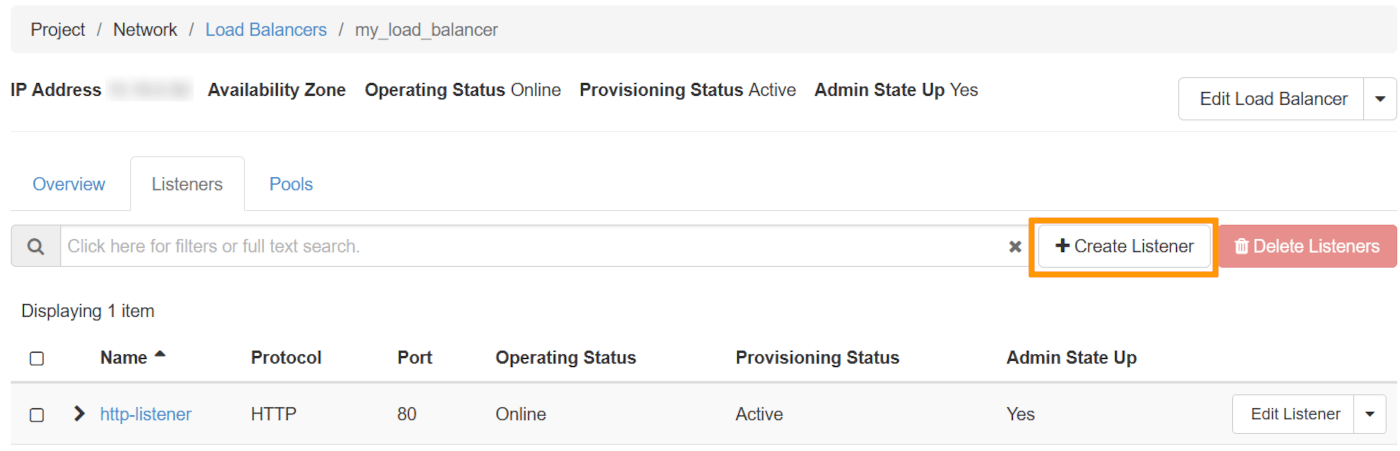
Next, click on the Listeners tab, then on Create Listener:
**Listener Details**
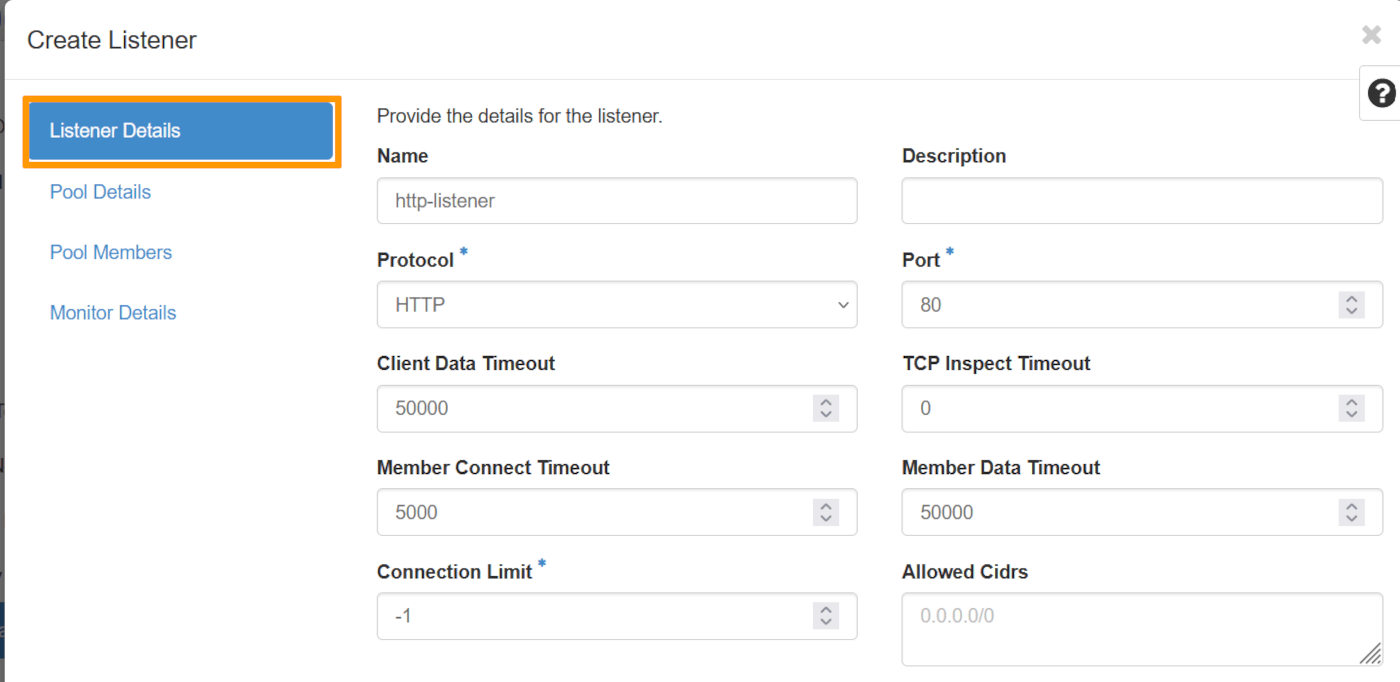| Information | Details |
| ----------- | --------------------------------- |
| Name | Specify a name for your listener. |
| Protocol | Select the HTTP protocol |
| Port | Select `80` |
**Pool Details**
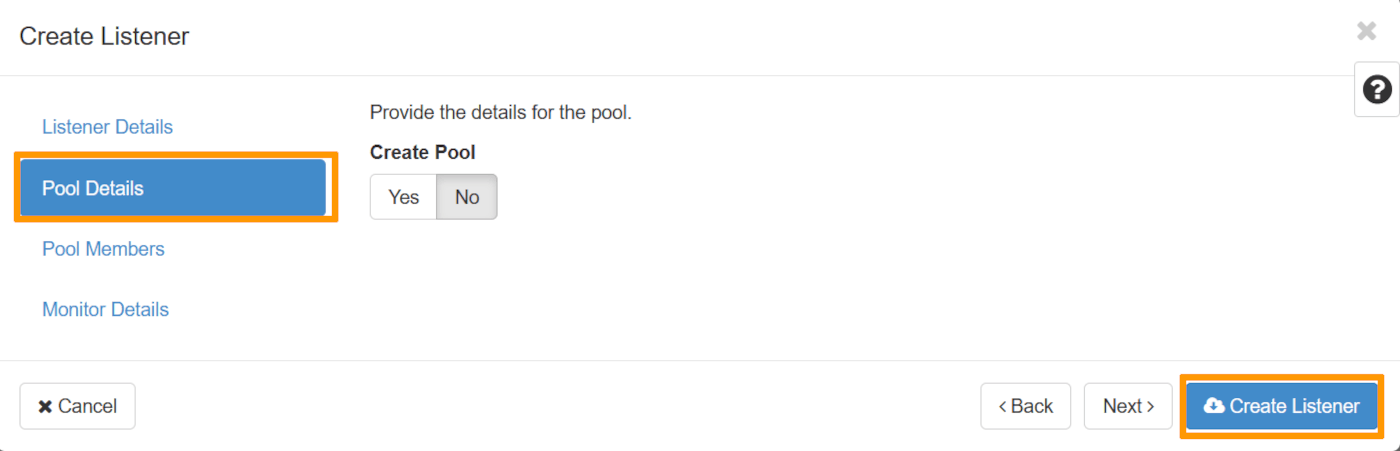Under ‘Create Pool’, click No, then at the bottom, click on Create Listener.
Once the listener has been created, click on it. Next, click on the L7 policies tab, then on Create L7 Policy.
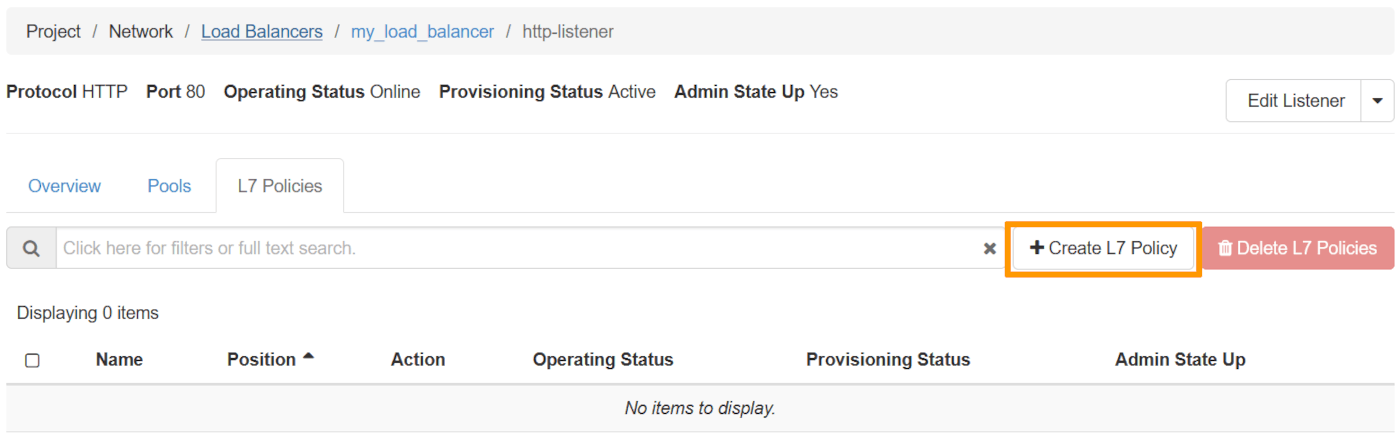**L7 Policy Details**
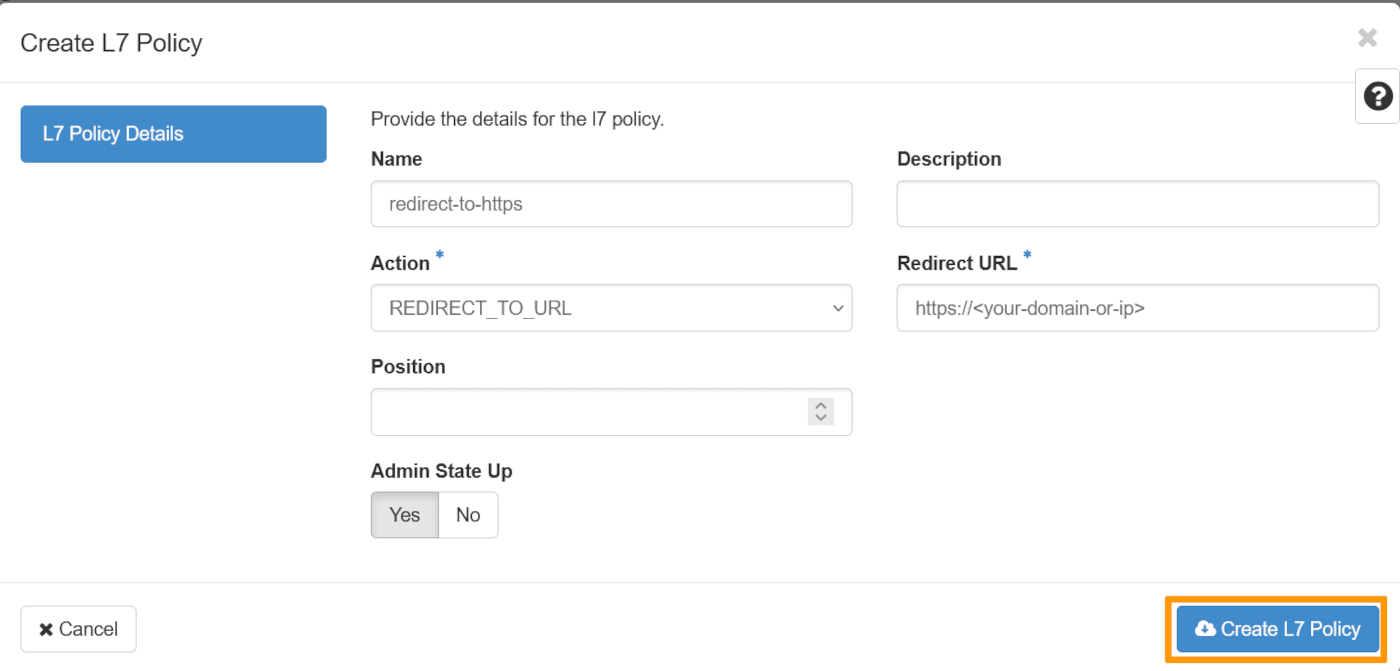| Information | Details |
| ------------ | ---------------------------------- |
| Name | Specify a name for your L7 Policy |
| Action | choose the value REDIRECT\_TO\_URL |
| Redirect URL | Enter the domain name |
Once done, click on Create L7 policy.
Via the OpenStack API or via the OVHcloud Control Panel
To create a listener via the OpenStack API or via the OVHcloud Control Panel you can consult the relevant section in [this guide](/en/guides/public-cloud/network-services/getting-started-load-balancer.md), in the ‘Configuring your Load Balancer’ section.
Then configure the redirection of HTTP requests to HTTPS:
```bash
openstack loadbalancer l7policy create --action REDIRECT_TO_URL --redirect-url https:// --name redirect-to-https http-listener
```
### Configuring the secure Listener on the Load Balancer
Now that you have managed your certificate, you can add a secure Listener and associate a pool and its members with it:
Via Horizon
In the Horizon interface, open the Network section, then click on Load Balancers.
Select your Load Balancer by clicking on it.
You can now click on the Listeners section, then on `Create Listener` as follows:
**Listener Details**
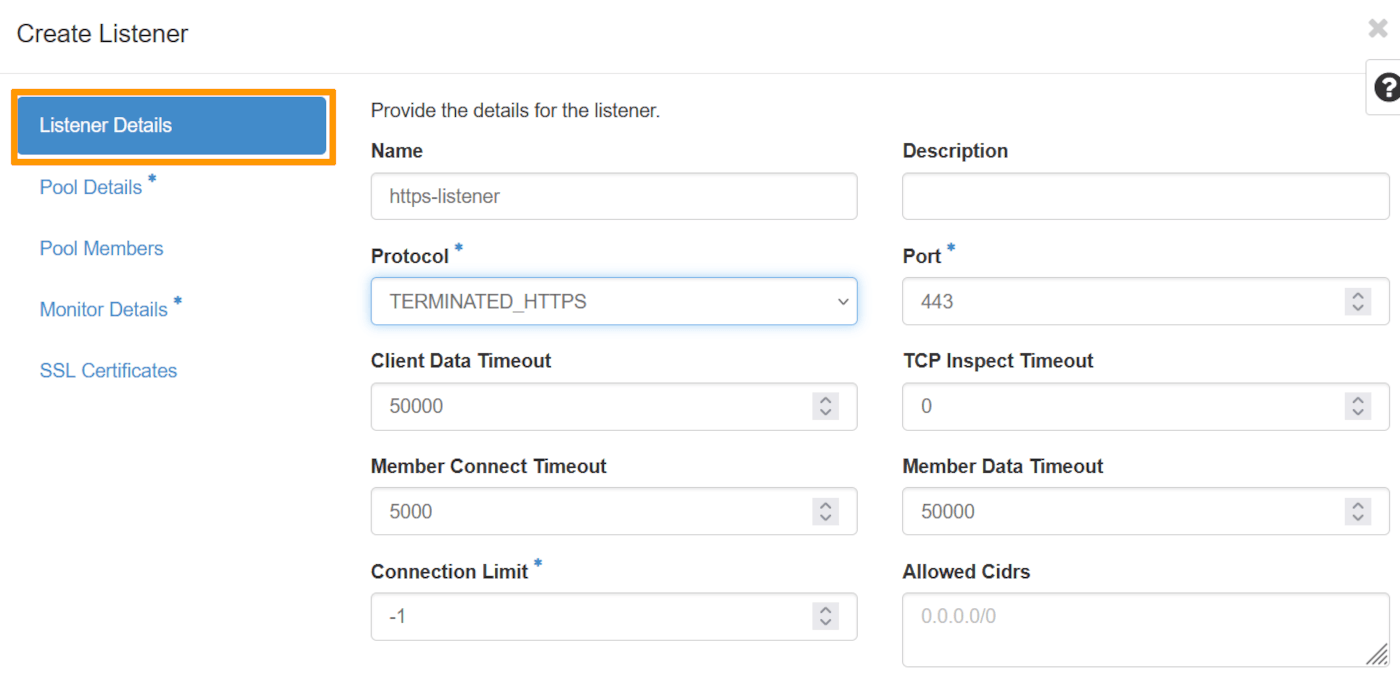| Information | Details |
| ----------- | ------------------------------------- |
| Name | Specify a name for your listener. |
| Protocol | Select the TERMINATED\_HTTPS protocol |
| Port | Select `443` |
**Pool Details**
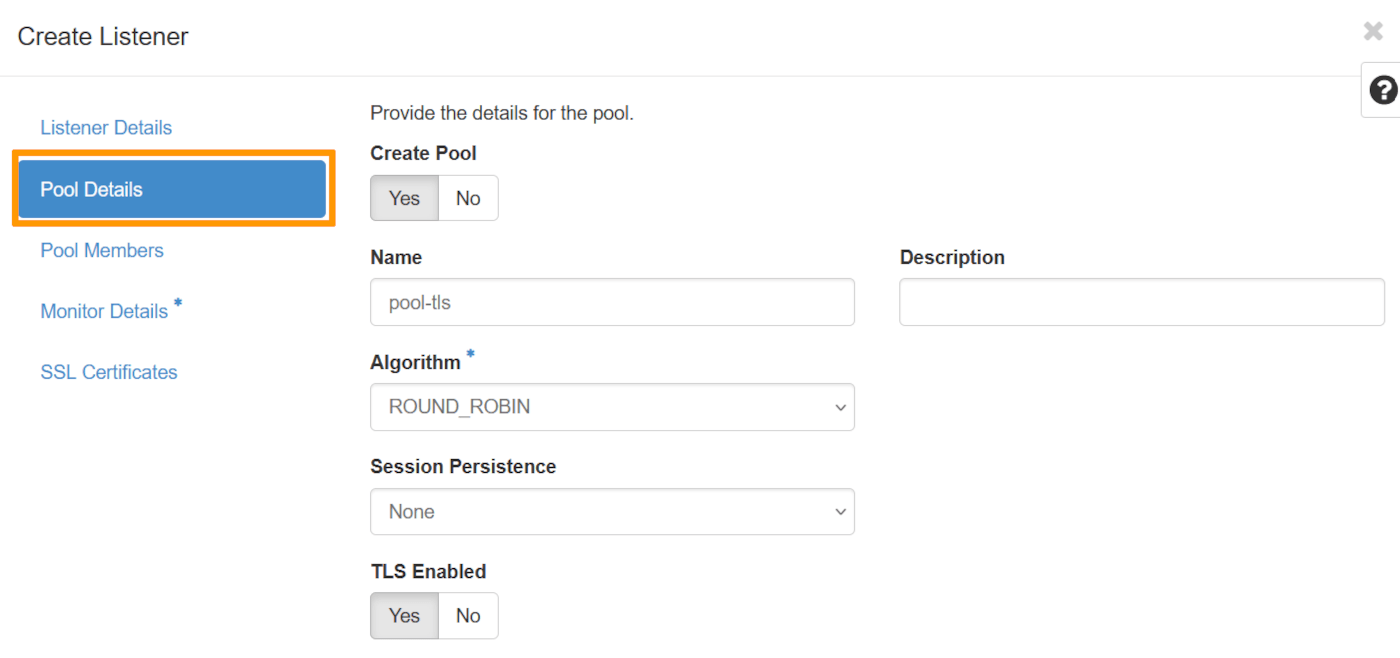Under ‘Create Pool’ select Yes.
Choose a name for your Pool, in the ‘Algortihm’ field, choose the value ROUND\_ROBIN and select Yes under ‘TLS Enabled’.
**Pool Members**
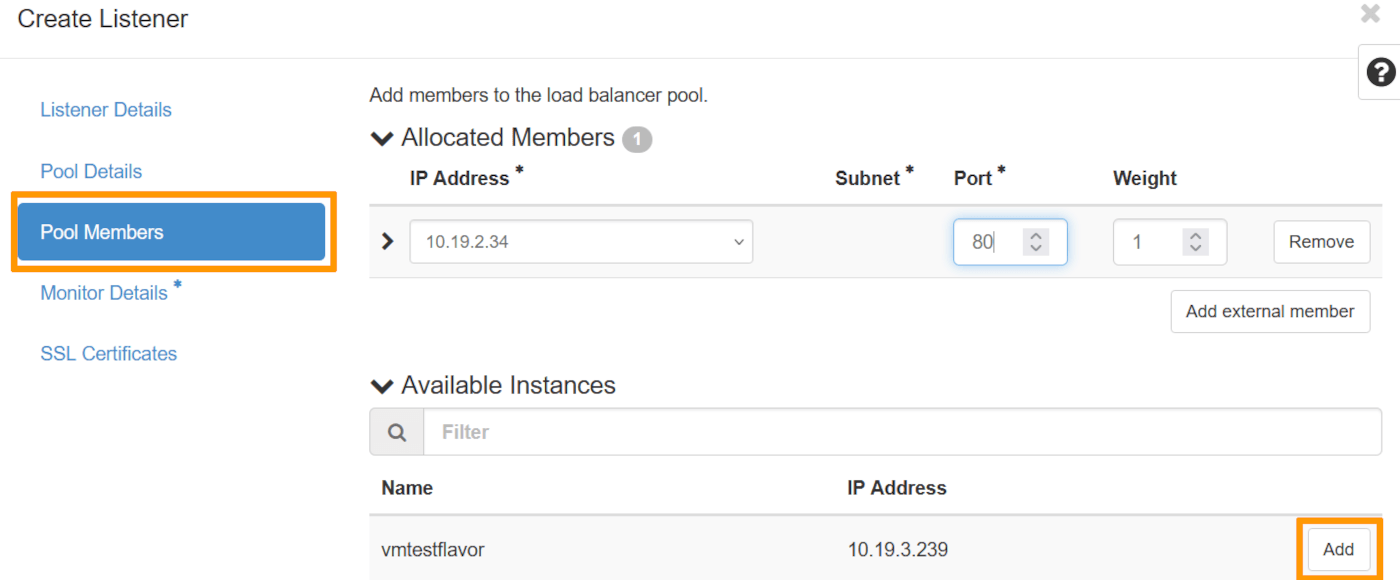Select the corresponding instance and click on Add. Once this has been done, select port 80. as the ‘Port’.
**Monitor Details**
We're going to select No as we won't be demonstrating this part in this guide.
**SSL Certificates**
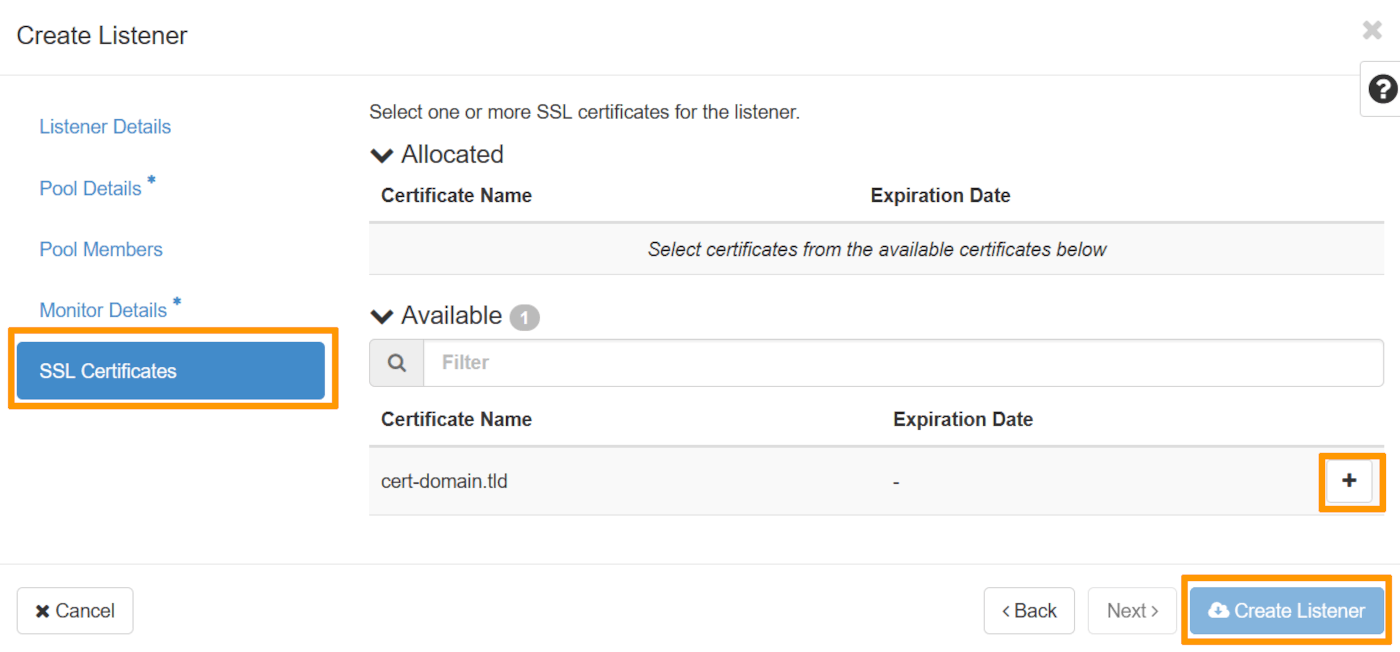Select the certificate that was previously added to Openstack Barbican, [in this section](#preparingcertificate).
Once done, click on Create Listener to create your configured Load Balancer.
Via the OpenStack API
```bash
openstack loadbalancer listener create --protocol-port 443 --protocol TERMINATED_HTTPS --name https-listener --default-tls-container=$(openstack secret list | awk '/ cert-domain.tld / {print $2}') my_load_balancer
openstack loadbalancer pool create --name pool-tls --lb-algorithm ROUND_ROBIN --listener https-listener --protocol HTTP
openstack loadbalancer member create --subnet-id my_subnet --address --protocol-port 80 pool-tls
```
You can now access your Load Balancer securely. However, you will need to renew your certificate. Check the renewal policy with your certificate provider.
## Go further
[Official documentation of OpenStack Octavia](https://docs.openstack.org/octavia/latest/)
[Cookbook OpenStack Octavia](https://docs.openstack.org/octavia/latest/user/guides/basic-cookbook.html)
[Getting started with Load Balancer on Public Cloud](/en/guides/public-cloud/network-services/getting-started-load-balancer.md)
If you need training or technical assistance to implement our solutions, contact your sales representative or click on [this link](https://www.ovhcloud.com/en-gb/professional-services/) to get a quote and ask our Professional Services experts for assisting you on your specific use case of your project.
Join our [community of users](https://community.ovhcloud.com/).