---
title: "How to create and configure an additional disk on an instance"
description: "Find out how to attach a new volume to your Public Cloud instance"
url: https://docs.ovhcloud.com/en/guides/public-cloud/compute/create-and-configure-an-additional-disk-on-an-instance
lang: en
lastUpdated: 2026-06-02
---
# How to create and configure an additional disk on an instance
## Objective
It is possible to create additional disks for your Public Cloud instances.\
This can be useful in cases where:
- You want to increase your storage capacity without changing the instance model.
- You want to have a highly available, high-performance storage.
- You want to move your storage as well as your data to another instance.
- You want to prepare the environment if you want to use [Terraform](/en/guides/public-cloud/cross-functional/how-to-use-terraform.md).
**This guide explains how to create an additional disk and configure it on your instance.**
## Requirements
- A [Public Cloud Instance](/en/guides/public-cloud/compute/first-steps-with-public-cloud-instance.md) in your OVHcloud account
- Administrative (sudo) access to your instance via SSH (Linux) or RDP (Windows)
***
### OVHcloud Control Panel Access
- **Direct link:** Public Cloud Projects
- **Navigation path:** Public Cloud > Select your project
***
:::warning
This feature is currently not available for Metal instances.
:::
## Instructions
### The different types of volumes
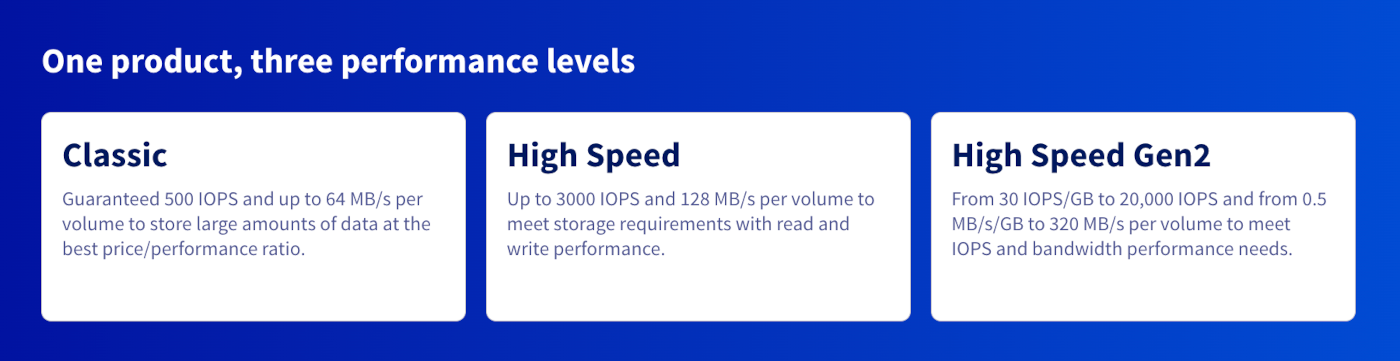
OVHcloud offers three types of Block Storage volumes, each tailored to specific needs in terms of performance, capacity, and cost. These solutions allow you to attach persistent storage volumes to your instances, ensuring a high level of reliability and availability. If the feature is available, encryption can be enabled when creating a volume, for all volume types except Classic Multi-Attach volumes in 3AZ regions.
**Classic – 500 IOPS guaranteed**
The Classic volume is a reliable, cost-effective storage solution, ideal for workloads requiring moderate performance. It offers 500 guaranteed IOPS, making it suitable for the following uses:
- Hosting of classic web applications
- Storage of small to medium-sized databases
- Data backup and archiving
In 3AZ regions, Classic Volumes are regional services that use distributed erasure coding across multiple Availability Zones. This ensures data remains available without impact or downtime in the event of an AZ failure, provided the multi-attached resilient architecture conditions are met. For more information, please refer to our guide "[Proper Usage and Limitations of Classic Multi-Attach Block Storage in 3AZ Regions](/en/guides/public-cloud/compute/storage-classic-multi-attach-3az.md)".
**High Speed Gen2 – 30 IOPS/GB and up to 20,000 IOPS**
Generation 2 High Speed volumes are optimized for the most demanding workloads. Performance scales with volume size:
- **IOPS**: 30 IOPS/GB (base 3,000 IOPS for 10–100 GB, up to 20,000 IOPS)
- **Throughput**: 0.5 MB/s/GB (base 50 MB/s for 10–100 GB, up to 512 MB/s)
- **Maximum size**: 12 TB
This type of volume is recommended for:
- Big Data and real-time analysis
- Artificial intelligence and machine learning
- Large database processing and high-performance storage
:::info
**You can no longer order High Speed (Gen1) volumes via the OVHcloud Control Panel.** They have been replaced by High Speed Gen2 volumes at the same price, with better performance for volumes above 100 GB. High Speed volumes remain available via the API, Terraform, and OpenStack.
Existing High Speed volumes remain supported. You can also [change your Block Storage volume type](/en/guides/public-cloud/compute/switch-volume-type.md) to migrate them to Gen2.
:::
:::info
All volume types are also available in an encrypted version (LUKS). These volumes ensure data confidentiality without impacting performance. They are available through the OVHcloud Control Panel as well as via the tools presented in the next section, by specifying the type `-luks`.
:::
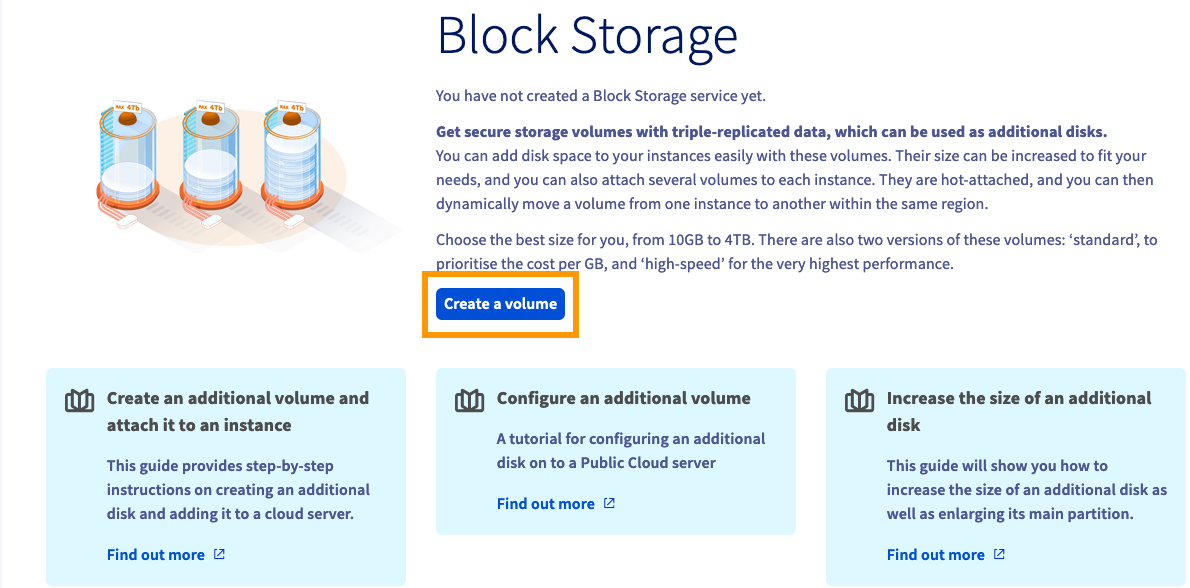
### Attaching a new volume
**Via the OVHcloud Control Panel**
Open Block Storage in the left-hand menu under **Storage & backup**.
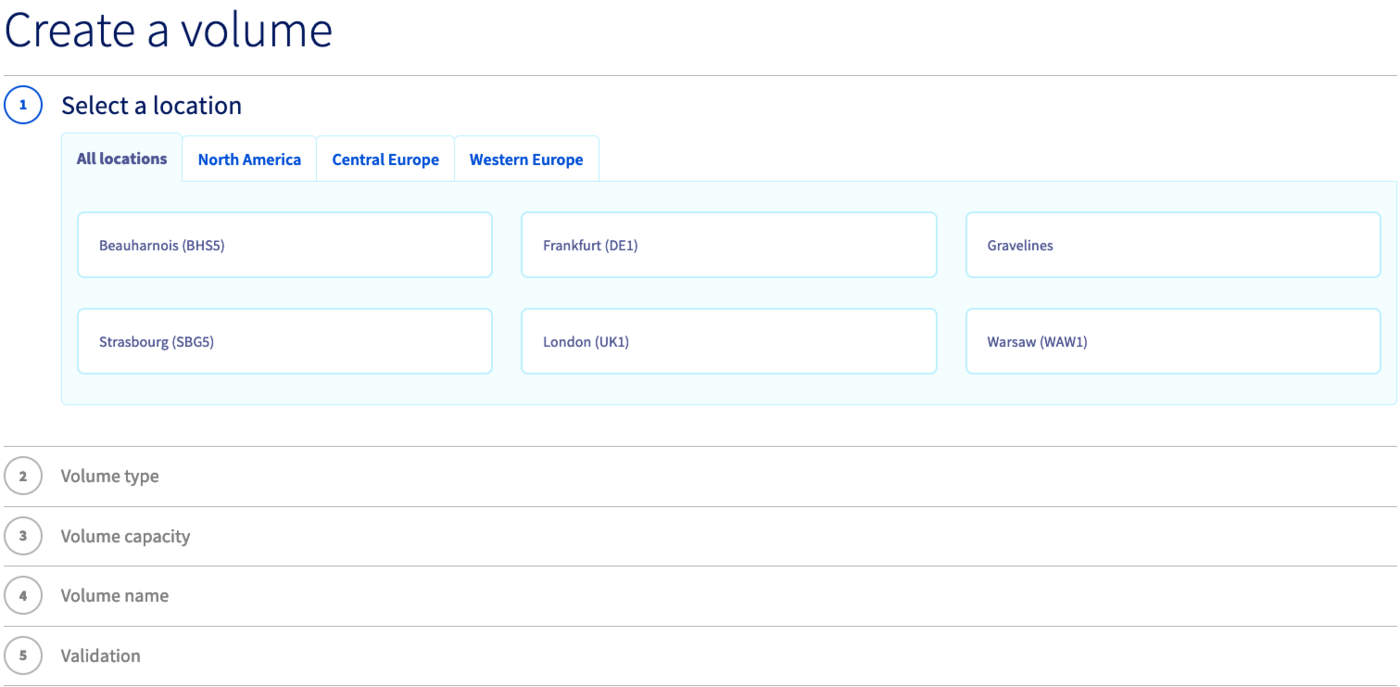
In this section, click on the button Create a volume.
Follow the configuration steps to select the location, disk type, encryption and disk capacity options. Enter a name for the volume and confirm by clicking on Create volume.
:::warning
Please note: Your volume must be created in the same region as the instance to which you want to attach it. If you create it in another region, you can delete it and recreate it in the correct region.
:::
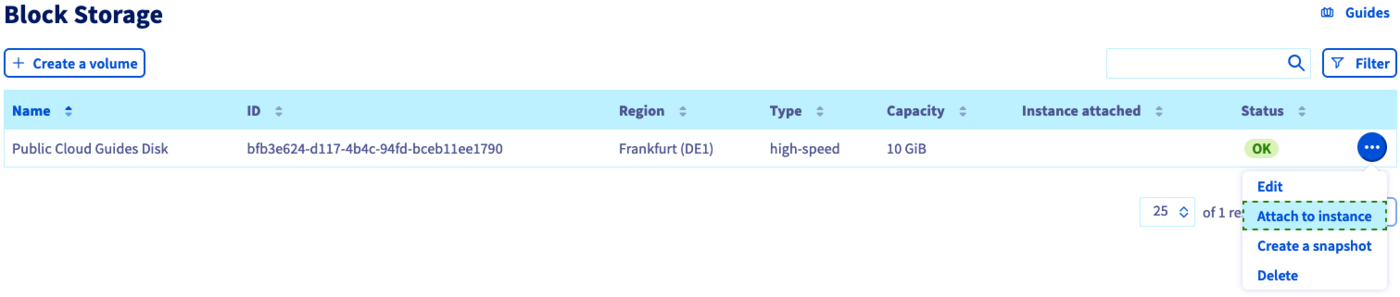
The new disk will now be displayed in the Control Panel.
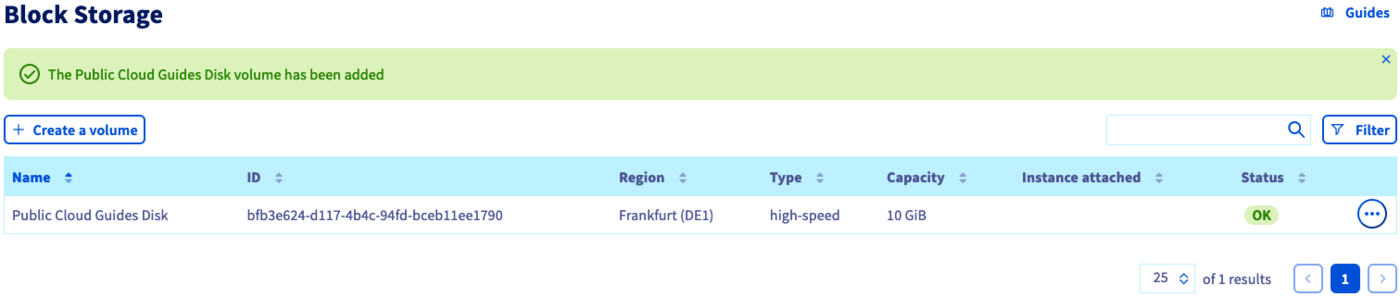To the right of the volume, click on the ... button, then select Attach to instance.
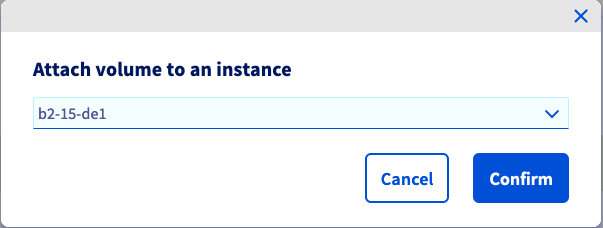
In the popup window, choose an instance from the list and click on Confirm to attach the disk.
The process of attaching the disk to your instance will now begin. This may take a few minutes to complete.
:::warning
Make sure to not leave the current page in your OVHcloud Control Panel while the disk is being attached. This might interrupt the process.
:::
**Via Terraform**
:::warning
Please note that the "high-speed-gen2" or "luks" volume types may not be available in all regions.
:::
Types of volumes:
- Classic
- High-speed
- High-speed-gen2
- Classic-luks
- High-speed-luks
- High-speed-gen2-luks
The types ending in -luks are encrypted (LUKS).
:::warning
Creating a **-luks** volume automatically generates a dedicated key.
Do not modify or delete this key if it is linked to a Block Storage volume. Doing so would make the data on that volume and all its snapshots permanently unrecoverable.
:::
To create a simple block storage volume, you need 3 elements:
- The name of the volume
- The region
- The size of the volume in GB
In our example, we will create a block storage in the **GRA11** region with a size of **10 GB**. Add the following lines to a file named _simple\_blockstorage.tf_:
```python
# Creation of a block storage volume
resource "openstack_blockstorage_volume_v3" "terraform_blockstorage" {
name = "terraform_blockstorage" # Name of the block storage volume
size = 10 # Volume size
region = "GRA11" # Region where the volume must be created
volume_type = "volume_type" # classic, high-speed, high-speed-gen2 or equivalent `-luks`
}
```
Then we will attach it to the target instance.
:::warning
The instance and the volume must be in the same region.
:::
Add the following lines below the previous ones:
```python
# Attach the volume to the instance
resource "openstack_compute_volume_attach_v2" "volume_attach" {
instance_id = ""
volume_id = openstack_blockstorage_volume_v3.terraform_volume.id
}
```
You can create your block storage volume and attach it to the desired instance by entering the following command:
```console
terraform apply
```
The output should look like this:
```console
$ terraform apply
Terraform used the selected providers to generate the following execution plan. Resource actions are indicated with the following symbols:
+ create
Terraform will perform the following actions:
# openstack_blockstorage_volume_v3.terraform_blockstorage will be created
+ resource "openstack_blockstorage_volume_v3" "terraform_blockstorage" {
+ attachment = (known after apply)
+ availability_zone = (known after apply)
+ id = (known after apply)
+ metadata = (known after apply)
+ name = "terraform_blockstorage"
+ region = "GRA11"
+ size = 10
+ volume_type = "high-speed-gen2"
}
# openstack_compute_volume_attach_v2.volume_attach will be created
+ resource "openstack_compute_volume_attach_v2" "volume_attach" {
+ device = (known after apply)
+ id = (known after apply)
+ instance_id = "11cc1279-xxxx-xxxx-xxxx-3ace4c954780"
+ region = (known after apply)
+ volume_id = (known after apply)
}
Plan: 2 to add, 0 to change, 0 to destroy.
Do you want to perform these actions in workspace "test_terraform"?
Terraform will perform the actions described above.
Only 'yes' will be accepted to approve.
Enter a value: yes
openstack_blockstorage_volume_v3.terraform_blockstorage: Creating...
openstack_blockstorage_volume_v3.terraform_blockstorage: Still creating... [10s elapsed]
openstack_blockstorage_volume_v3.terraform_blockstorage: Creation complete after 12s [id=daf3a86e-xxxx-xxxx-xxxx-ac7b6ffbb806]
openstack_compute_volume_attach_v2.volume_attach: Creating...
openstack_compute_volume_attach_v2.volume_attach: Still creating... [10s elapsed]
openstack_compute_volume_attach_v2.volume_attach: Creation complete after 14s [id=11cc1279-xxxx-xxxx-xxxx-3ace4c954780/daf3a86e-xxxx-xxxx-xxxx-ac7b6ffbb806]
Apply complete! Resources: 2 added, 0 changed, 0 destroyed.
```
**Via the Horizon interface**
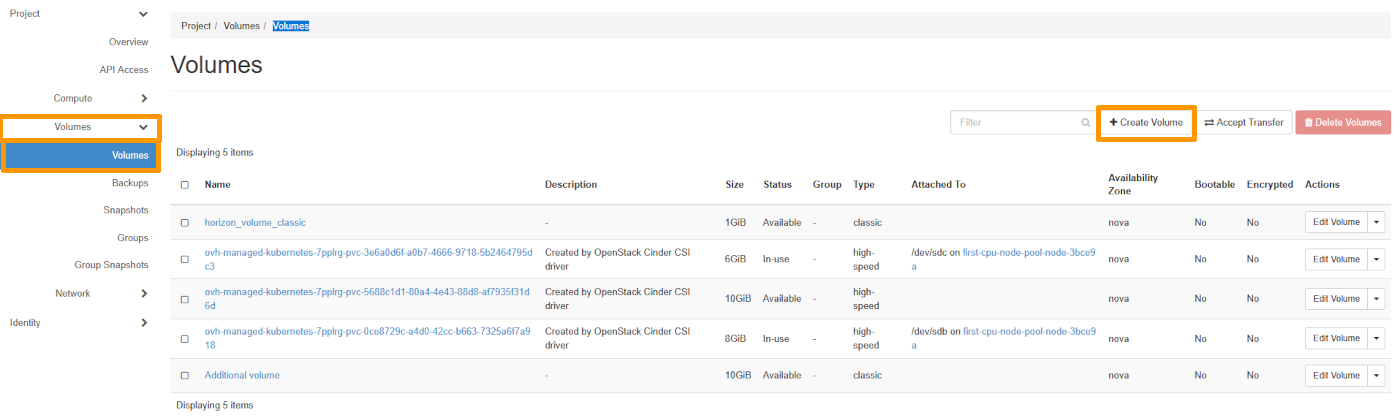
Go to the Volumes drop-down section, click Volumes and then Create Volume.
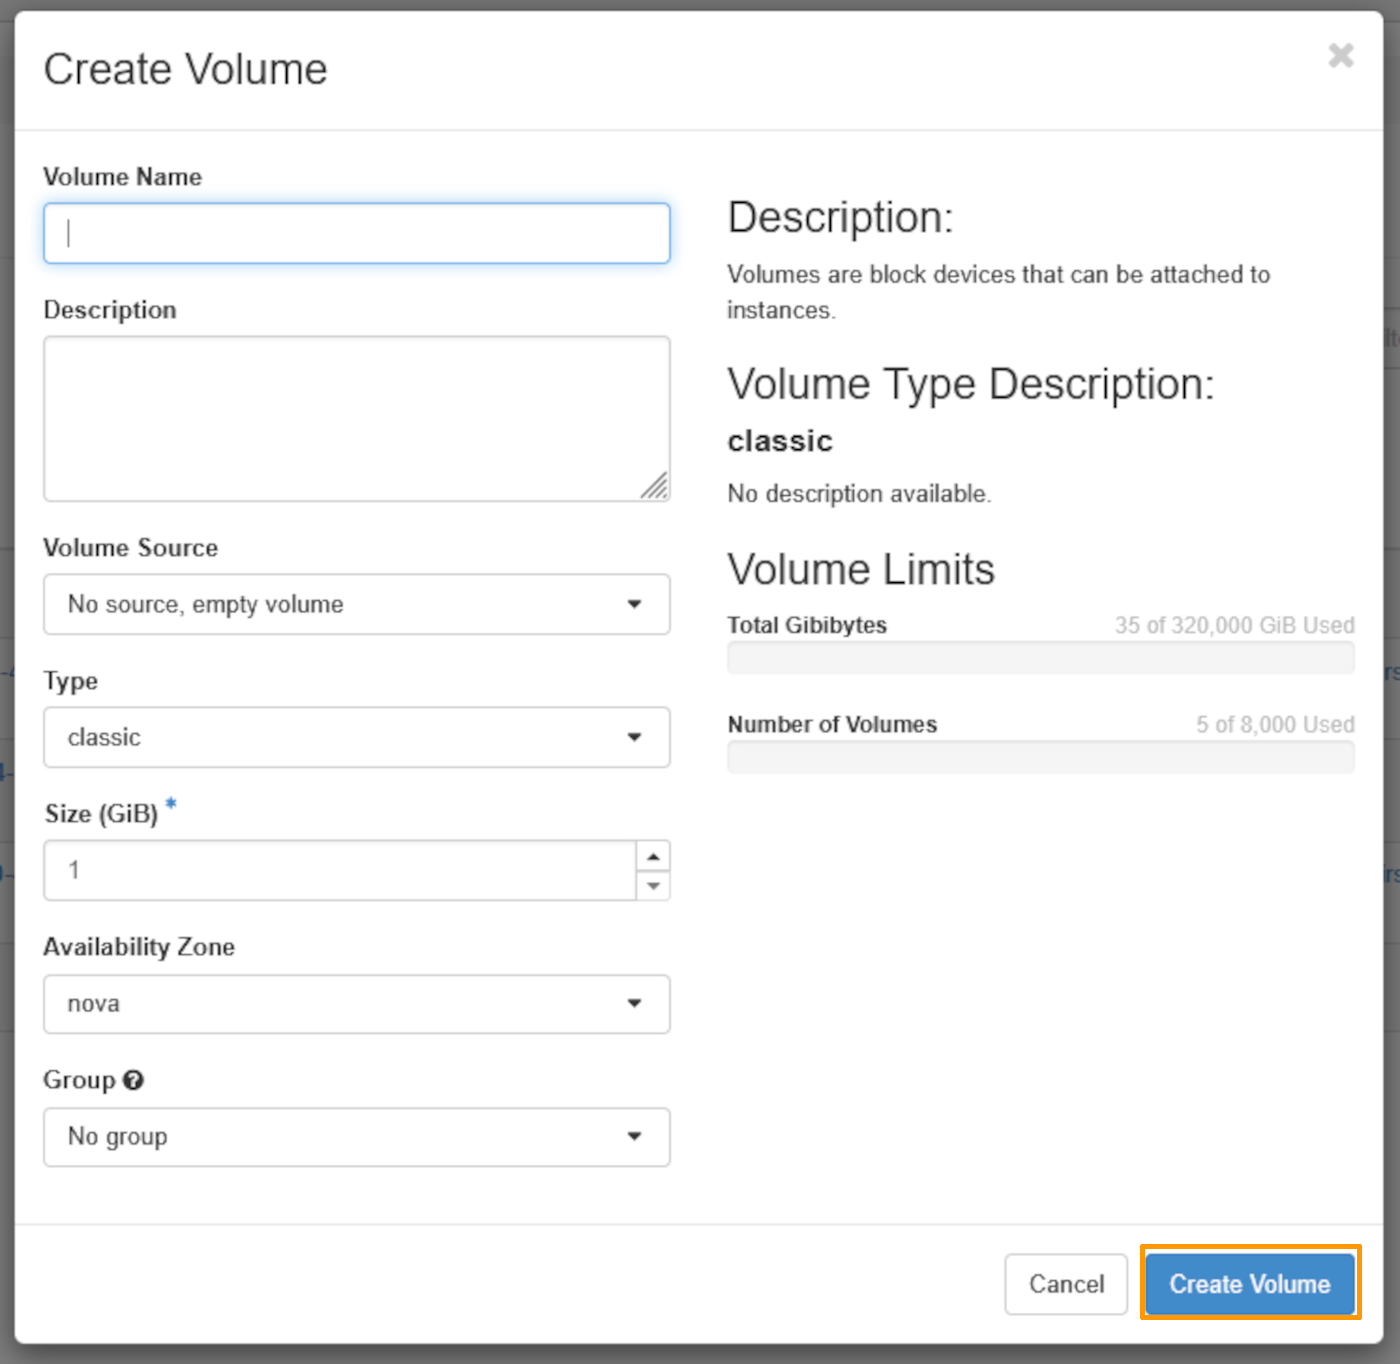
Fill in the Volume Name field and select the type of volume you want. Then click on Create Volume
:::warning
Please note that if the volume type "high-speed-gen2" or "luks" does not appear in the list, this means that it is not available in this region.
:::
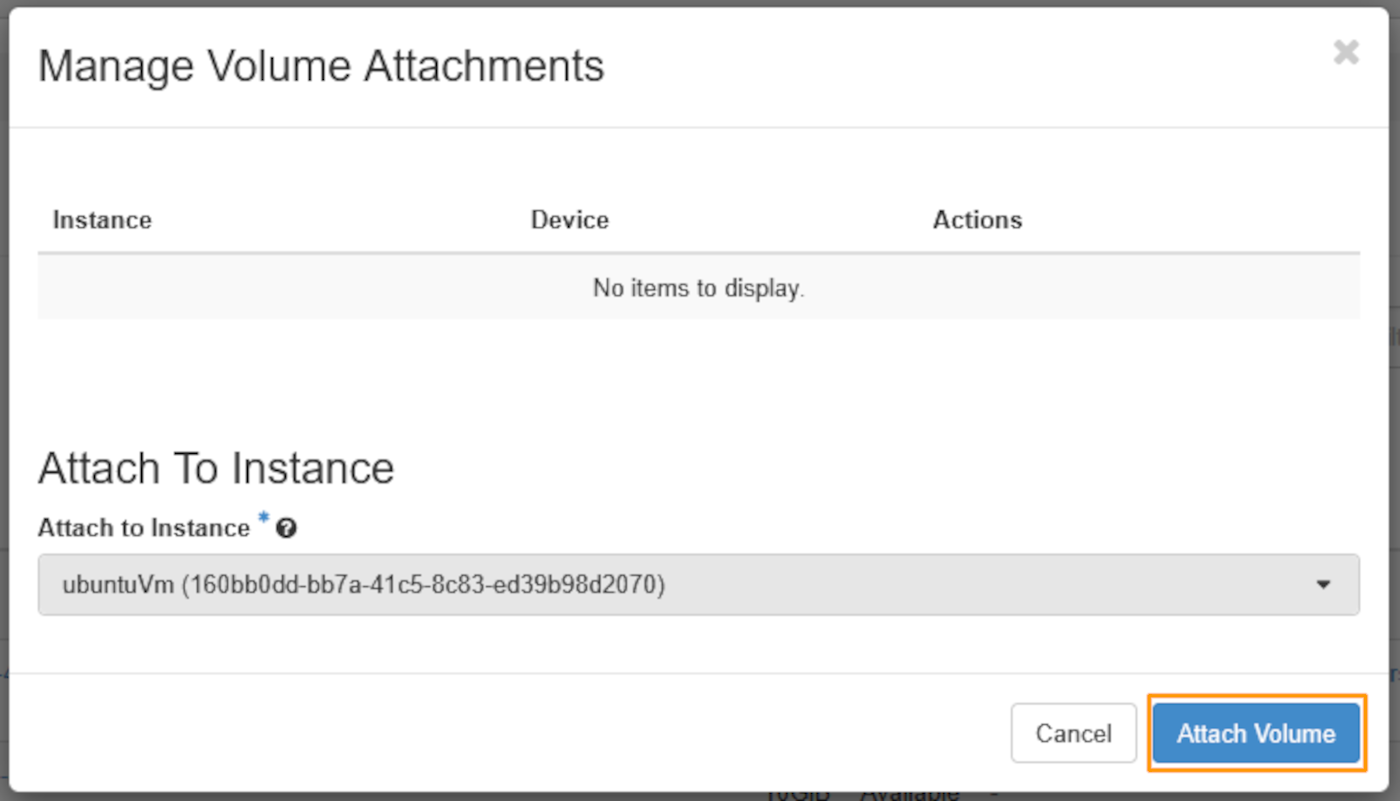
To attach this volume to an instance, on your volume line, click the arrow at the end of the line next to `Edit Volume`. Then click on Manage Attachments.
Select the instance to which you wish to attach your volume, then click on Attach Volume.
**Via the OpenStack CLI**
:::warning
Please note that if the volume type "high-speed-gen2" or "luks" does not appear in the list, this means that it is not available in this region.
:::
Types of volumes:
- Classic
- High-speed
- High-speed-gen2
- Classic-luks
- High-speed-luks
- High-speed-gen2-luks
The types ending in -luks are encrypted (LUKS).
:::warning
Creating a **-luks** volume automatically generates a dedicated key.
Do not modify or delete this key if it is linked to a Block Storage volume. Doing so would make the data on that volume and all its snapshots permanently unrecoverable.
:::
List the volume types available in the region:
```bash
openstack volume type list
```
Create a volume, specifying at least its size (in GB) and a type from those listed above. You can also specify a name for your volume at the end of the command.
```bash
openstack volume create --size 1 --type high-speed-gen2 volumeName # classic, high-speed, high-speed-gen2 or equivalent `-luks`
```
To attach a volume to an instance available in the region, use the following command:
```bash
openstack server add volume
+-----------+-------------------------------------+
| Field | Value |
+-----------+-------------------------------------+
| ID | 7d3d670f- ****-****-****-60dd1e6**** |
| Server ID | 74317f97-****-****-80cf2d4**** |
| Volume ID | 7d3d670f-****-****-****-60dd1e6**** |
| Device | /dev/sdb |
| Tag | None |
+-----------+-------------------------------------+
```
**Via the OVHcloud CLI**
:::warning
If the volume type "high-speed-gen2" or "luks" does not appear in the list, it is not available in this region.
:::
| Option | Description |
| ---------- | -------------------------------------------------------------------------------------- |
| `` | Region where the volume will be created (e.g. `GRA11`) |
| `--name` | Volume name |
| `--size` | Volume size in GB |
| `--type` | Volume type: `classic`, `high-speed`, `high-speed-gen2`, or equivalent `-luks` variant |
| `--wait` | Wait for creation to complete before exiting |
Create a volume by specifying the region, a name, the size in GB, and a type:
```bash
ovhcloud cloud storage block create --name --size --type --wait
```
Once the volume is created, attach it to an instance:
| Parameter | Description |
| --------------- | ------------------------------------------ |
| `` | ID of the volume to attach |
| `` | ID of the instance to attach the volume to |
```bash
ovhcloud cloud storage block attach
```
### Configuring the new disk
The examples below presume you are logged in as a user with elevated permissions.
#### Using Linux
Establish an [SSH connection to your instance](/en/guides/public-cloud/compute/getting-started.md#connect-instance), then use the command below to list the attached disks.
```bash
lsblk
```
```console
NAME MAJ:MIN RM SIZE RO TYPE MOUNTPOINT
vda 254:0 0 10G 0 disk
└─vda1 254:1 0 10G 0 part /
vdb 254:16 0 10G 0 disk
```
:::info
`vda` in this example refers to the default disk of the instance. The additional disk will then be labelled `vdb`.
:::
Create a partition on the additional disk using the commands below.
If your additional disk is less than 2TB:
```bash
sudo fdisk /dev/vdb
```
```console
Welcome to fdisk (util-linux 2.25.2).
Changes will remain in memory only, until you decide to write them.
Be careful before using the write command.
Device does not contain a recognized partition table.
Created a new DOS disklabel with disk identifier 0x95c4adcc.
Command (m for help): n
Partition type
p primary (0 primary, 0 extended, 4 free)
e extended (container for logical partitions)
Select (default p):
Using default response p.
Partition number (1-4, default 1):
First sector (2048-20971519, default 2048):
Last sector, +sectors or +size{K,M,G,T,P} (2048-20971519, default 20971519):
Created a new partition 1 of type 'Linux' and of size 10 GiB.
Command (m for help): w
The partition table has been altered.
Calling ioctl() to re-read partition table.
Syncing disks.
```
If your additional disk is larger than 2TB:
```bash
sudo parted /dev/vdb
```
```console
GNU Parted 3.5
Using /dev/vdb
Welcome to GNU Parted! Type 'help' to view a list of commands.
(parted) help
align-check TYPE N check partition N for TYPE(min|opt) alignment
help [COMMAND] print general help, or help on COMMAND
mklabel,mktable LABEL-TYPE create a new disklabel (partition table)
mkpart PART-TYPE [FS-TYPE] START END make a partition
name NUMBER NAME name partition NUMBER as NAME
print [devices|free|list,all] display the partition table, or available devices, or free space, or all found partitions
quit exit program
rescue START END rescue a lost partition near START and END
resizepart NUMBER END resize partition NUMBER
rm NUMBER delete partition NUMBER
select DEVICE choose the device to edit
disk_set FLAG STATE change the FLAG on selected device
disk_toggle [FLAG] toggle the state of FLAG on selected device
set NUMBER FLAG STATE change the FLAG on partition NUMBER
toggle [NUMBER [FLAG]] toggle the state of FLAG on partition NUMBER
unit UNIT set the default unit to UNIT
version display the version number and copyright information of GNU Parted
(parted) mklabel gpt
(parted) mkpart primary 0 3750G
Warning: The resulting partition is not properly aligned for best performance: 34s % 2048s != 0s
Ignore/Cancel? I
(parted) quit
```
Next, format the new partition `vdb1` using the command below.
```bash
sudo mkfs.ext4 /dev/vdb1
```
```console
mke2fs 1.42.12 (29-Aug-2014)
Creating filesystem with 2621184 4k blocks and 655360 inodes
Filesystem UUID: 781be788-c4be-462b-b946-88429a43c0cf
Superblock backups stored on blocks:
32768, 98304, 163840, 229376, 294912, 819200, 884736, 1605632
Allocating group tables: done
Writing inode tables: done
Creating journal (32768 blocks): done
Writing superblocks and filesystem accounting information: done
```
Mount the partition with the following commands:
```bash
sudo mkdir /mnt/disk
```
```bash
sudo mount /dev/vdb1 /mnt/disk/
```
Finally, check the mount point using this command:
```bash
df -h
```
```console
Filesystem Size Used Avail Use% Mounted on
/dev/vda1 9.8G 840M 8.6G 9% /
udev 10M 0 10M 0% /dev
tmpfs 393M 5.2M 388M 2% /run
tmpfs 982M 0 982M 0% /dev/shm
tmpfs 5.0M 0 5.0M 0% /run/lock
tmpfs 982M 0 982M 0% /sys/fs/cgroup
/dev/vdb1 9.8G 23M 9.2G 1% /mnt/disk
```
:::info
The mounting is not persistent because the disk will be detached when the instance reboots. In order to automate the mounting process, the `fstab` file needs to be edited.
:::
First, retrieve the UUID (block ID) of the new volume:
```bash
sudo blkid
```
```console
/dev/vda1: UUID="51ba13e7-398b-45f3-b5f3-fdfbe556f62c" TYPE="ext4" PARTUUID="000132ff-01"
/dev/vdb1: UUID="2e4a9012-bf0e-41ef-bf9a-fbf350803ac5" TYPE="ext4" PARTUUID="95c4adcc-01"
```
Open `/etc/fstab` with a text editor:
```bash
sudo nano /etc/fstab
```
Add the line below to the file and replace the UUID with your own:
```console
UUID=2e4a9012-bf0e-41ef-bf9a-fbf350803ac5 /mnt/disk ext4 nofail 0 0
```
Save and exit the editor. The disk should be automatically mounted after every reboot from now on.
#### Using Windows
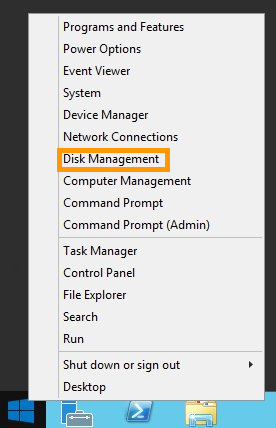
Establish a remote desktop (RDP) connection to your Windows instance.
Once logged in, right-click on the `Start Menu
` button and open `Disk Management
`.
The new disk will be displayed as an unknown volume with unallocated space.
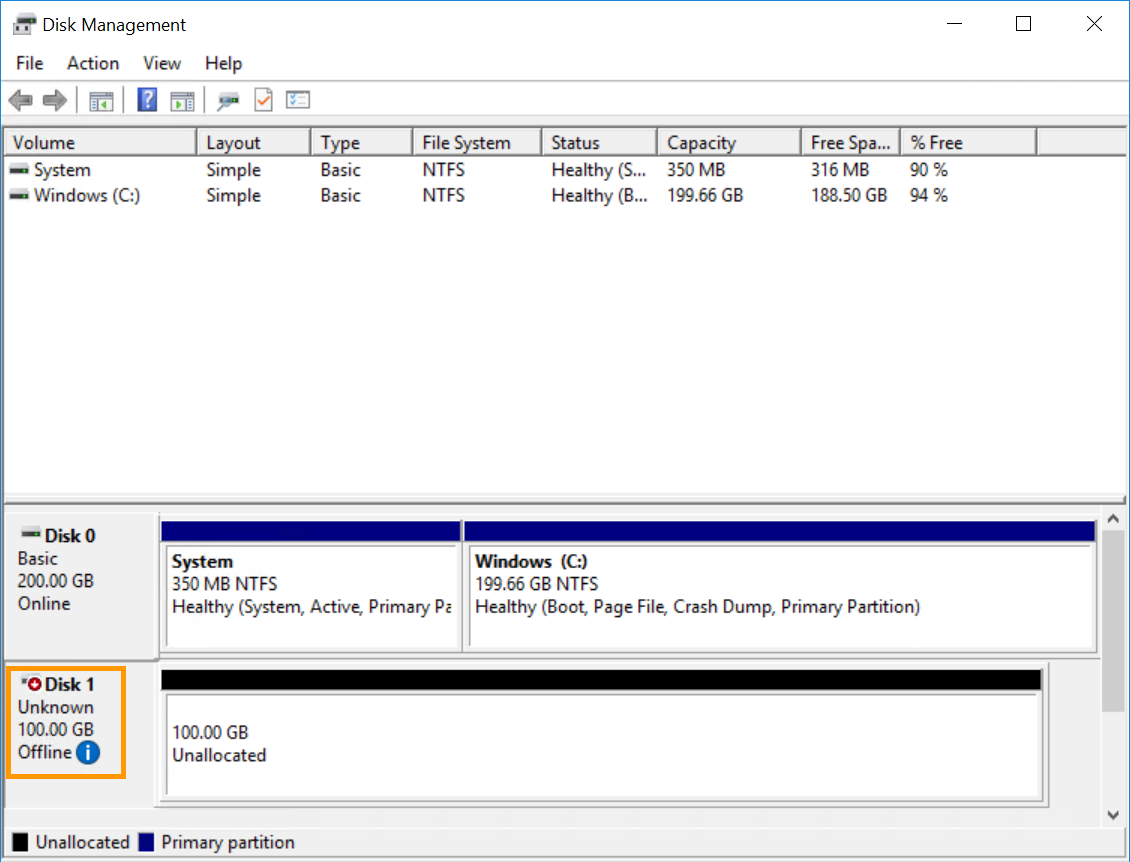
If the disk is marked as offline here, it needs to be initialised first. You can use the [Windows GUI](#initDiskManagement) or the [DISKPART utility](#initDiskpart) to achieve this. Otherwise, proceed with [formatting the disk in Disk Management](#formatDiskManagement).
##### **Initialising the disk in Disk Management**
[](#)
Right-click on the disk and select `Online
`.
If the disk is marked as offline here, this is likely due to a policy in place on the instance. To fix this, right-click on the disk and select `Online
`.

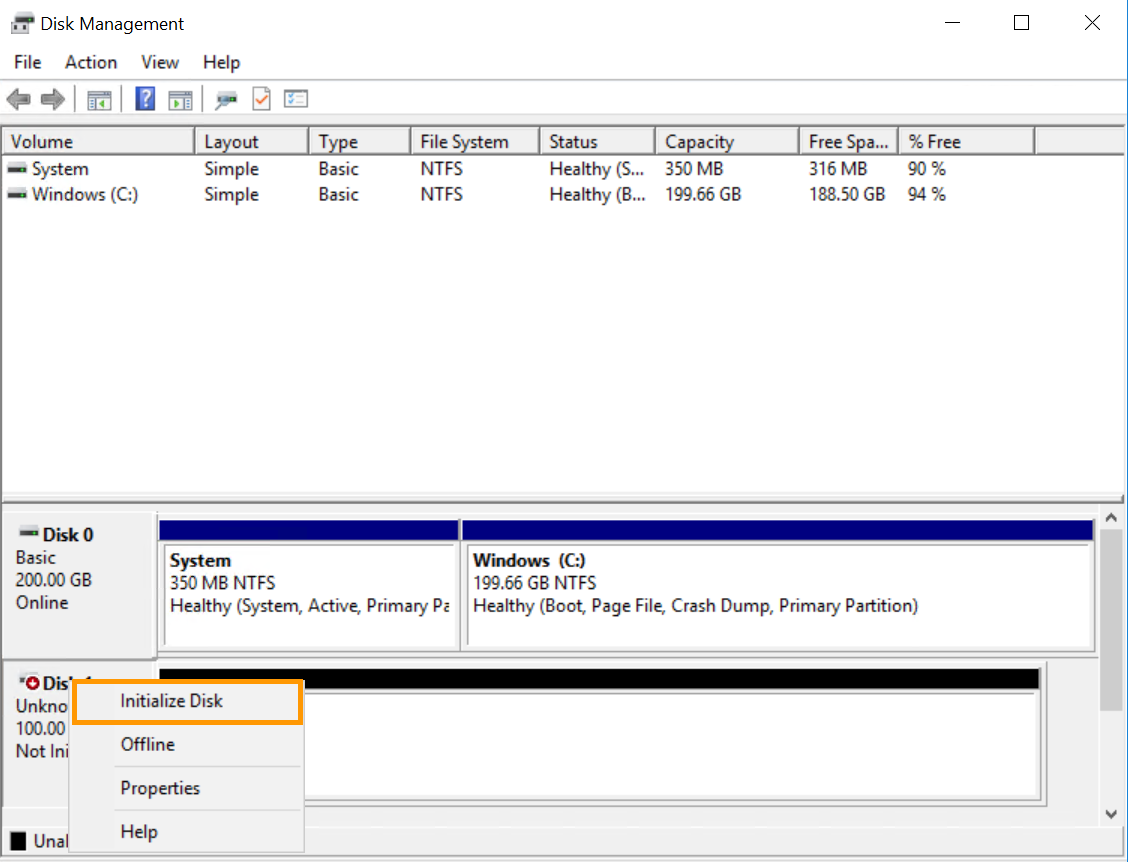
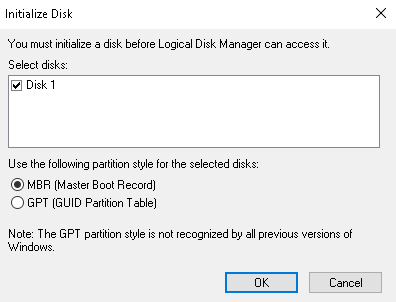
Then right-click it again and this time select `Initialise Disk
`.
Next, select `MBR
` if your additional disk is less than 2TB, or `GPT
` if it is more than 2TB, then click `OK
`.
##### **Initialising the disk with DISKPART**
[](#)
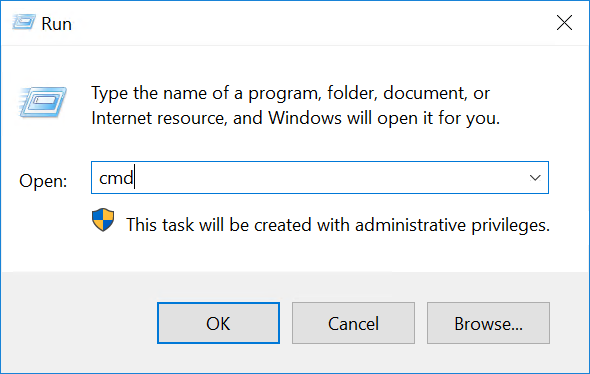
Right-click on the `Start Menu
` button and open `Run
`.
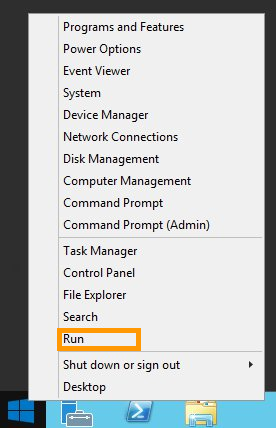
Type `cmd`
and click `OK
` to open the command line application.
At the command prompt, open DISKPART:
```console
C:\> diskpart
```
Use the following series of DISKPART commands to set the disk to `online`:
```console
DISKPART> san
SAN Policy : Offline Shared
DISKPART> san policy = OnlineAll
DiskPart successfully changed the SAN policy for the current operating system .
- Implementation of the strategy on the extra disk:
[Code] DISKPART> list disk
Disk ### Status Size Free Dyn Gpt
-------- ------------- ------- ------- --- ---
Disk 0 Online 200 GB 0 B
* Disk 1 Offline 10 GB 1024 KB
DISKPART> select disk 1
Disk 1 is now the selected disk.
DISKPART> attributes disk clear readonly
Disk attributes cleared successfully.
DISKPART> attributes disk
Current Read-only State : No
Read-only : No
Boot Disk : No
Pagefile Disk : No
Hibernation File Disk : No
Crashdump Disk : No
Clustered Disk : No
DISKPART> online disk
DiskPart successfully onlined the selected disk.
```
##### **Formatting the disk**
[](#)
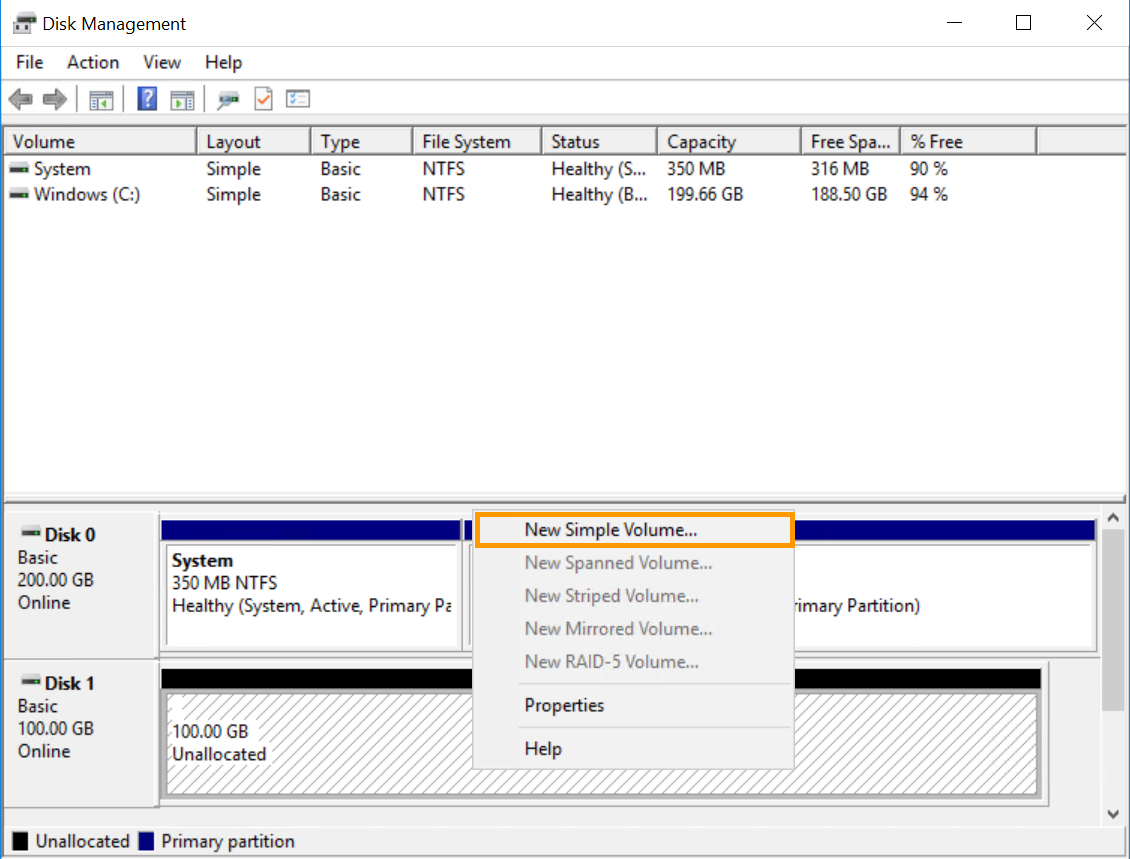
In `Disk Management
`, right-click on the new disk and select `New Simple Volume...
`.
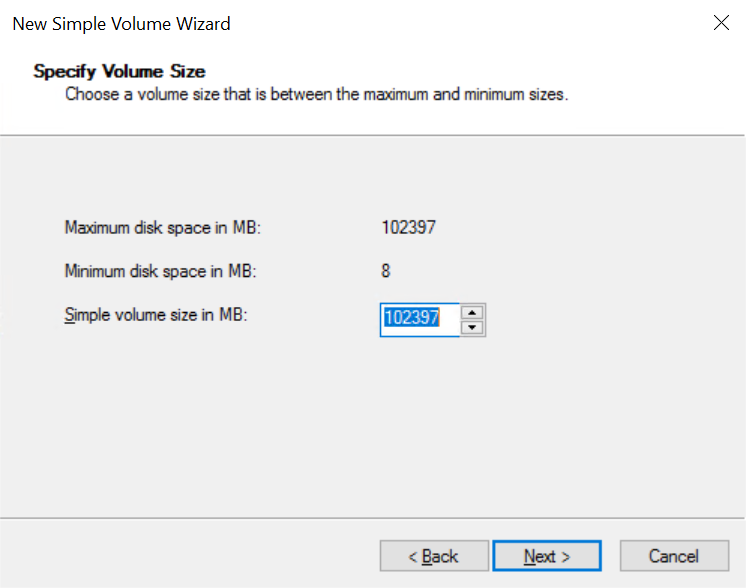
In the wizard, click `Next
` to specify the volume size. It should be set to maximum by default. Click `Next
` to continue.
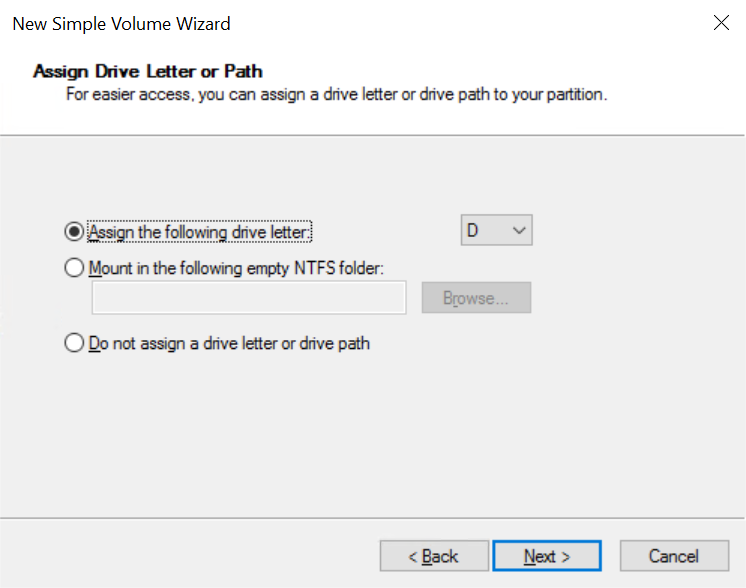
Leave the new drive letter at default or select a different one, then click `Next
`.
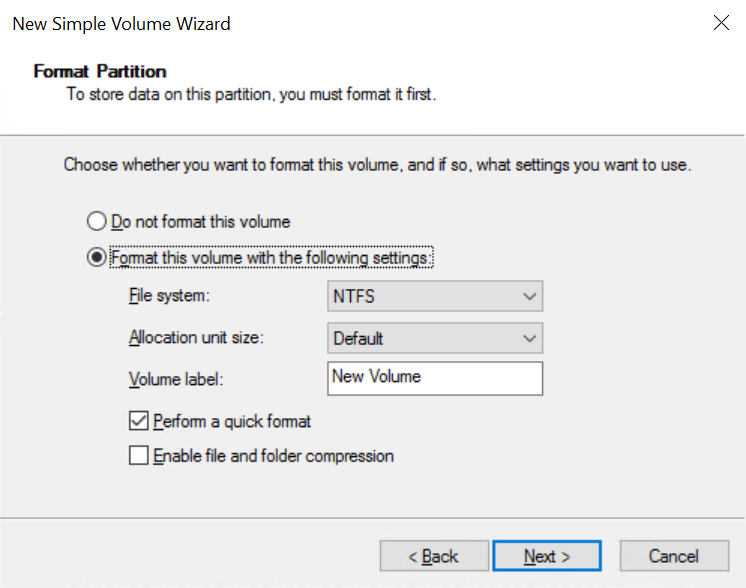
Label the volume (optional) and confirm the formatting options by clicking `Next
`.
In the last window, click `Finish
` to format the disk.
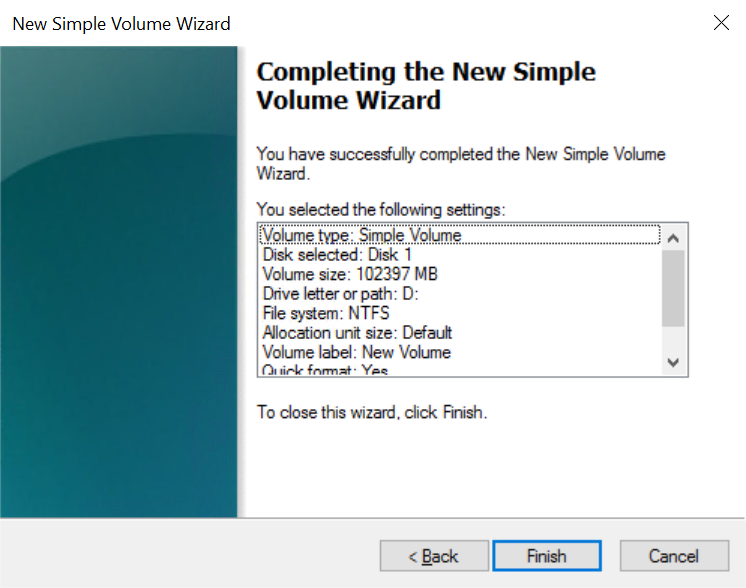
The disk will be available as a drive in File Explorer after the operation.
### Detach a volume
If you wish to detach a volume from your instance, the best practice is to unmount the volume in the operating system before detaching it from the instance.
:::warning
An error message may appear if you have software or processes running on the additional disk. In this case, it is recommended to stop all processes before continuing.
:::
Here's how to **unmount the volume** from the operating system before detaching it from the instance :
**On Linux**
Establish an [SSH connection to your instance](/en/guides/public-cloud/compute/getting-started.md#connect-instance), then use the command below to list the attached disks.
```bash
lsblk
```
```console
NAME MAJ:MIN RM SIZE RO TYPE MOUNTPOINT
vda 254:0 0 10G 0 disk
└─vda1 254:1 0 10G 0 part /
vdb 8:0 0 10G 0 disk
└─vdb1 8:1 0 10G 0 part /mnt/disk
```
Unmount the partition using the command below:
```bash
sudo umount /dev/vdb1
```
Remove the device ID from the fstab to complete the unmount process, if this is not done, the partition will be mounted right back after a reboot.
```bash
sudo nano /etc/fstab
```
Save and exit the editor.
**On Windows**
Establish a remote desktop (RDP) connection to your Windows instance.
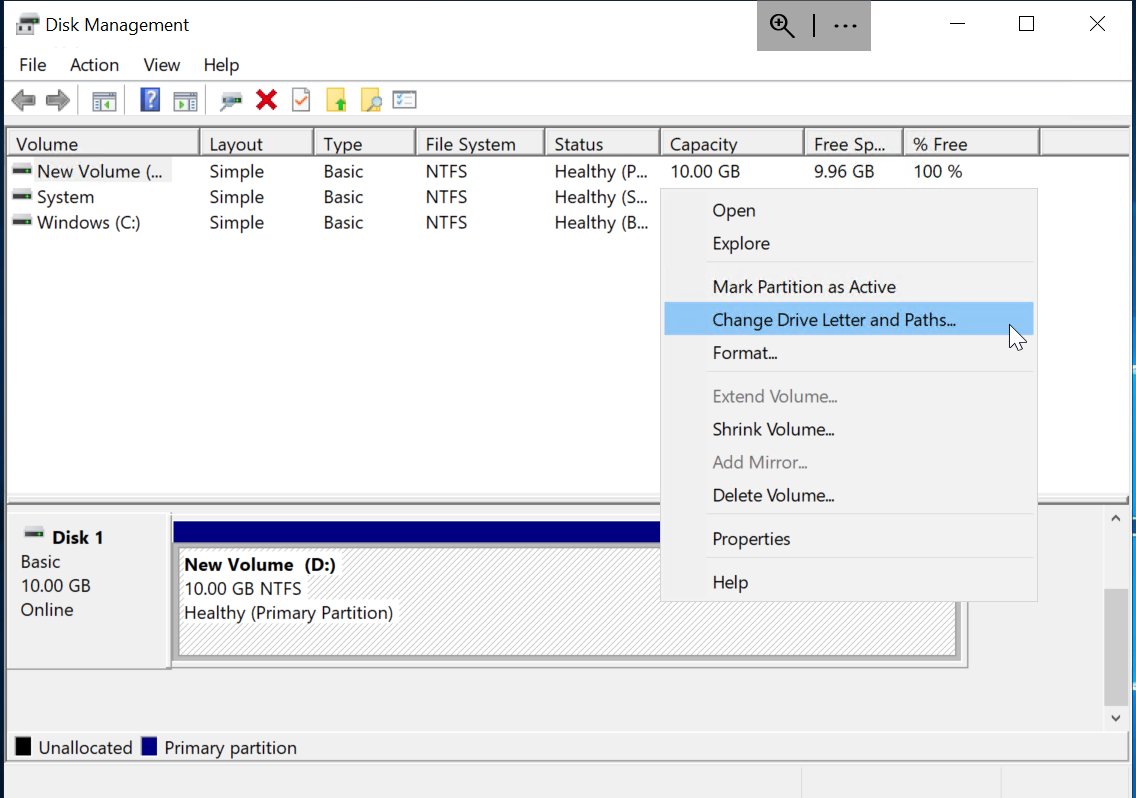
Once logged in, right-click on the Start Menu button and open Disk Management.
Right click on the volume you wish to unmount and select Change Drive Letter and Paths....
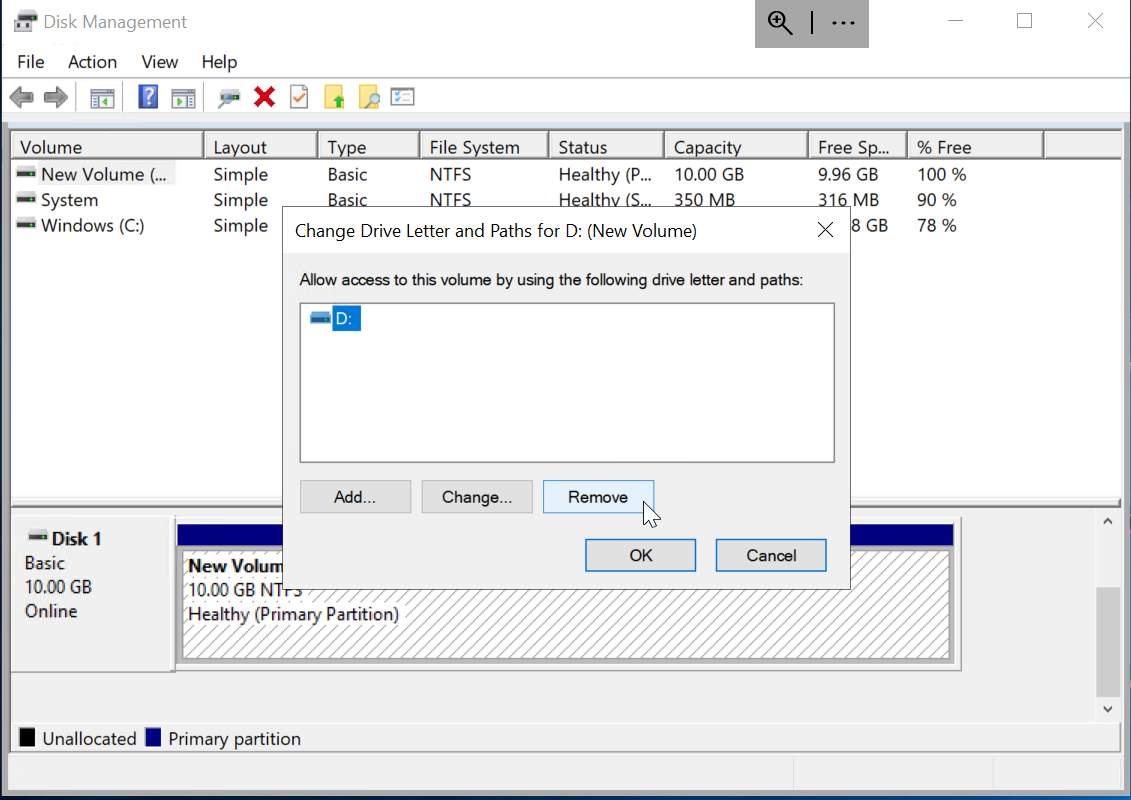
Click on Remove to remove the drive.
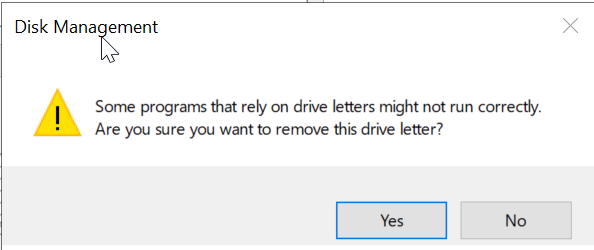
Next, click on Yes to confirm the disk removal.
When finished, you can close the Disk Management window.
Finally, we will detach the volume from the instance:
**Via the OVHcloud Control Panel**
Go to the Public Cloud section of your OVHcloud Control Panel and click on Block Storage in the left-hand menu under **Storage & backup**.
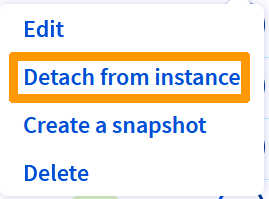
Click the ... button next to the corresponding volume and select Detach from instance.
Click on Confirm in the pop up window to start the process.
**Via Terraform**
Start by deleting the lines previously created in your Terraform file:
```python
# Attach the volume to the instance
resource "openstack_compute_volume_attach_v2" "volume_attach" {
instance_id = ""
volume_id = openstack_blockstorage_volume_v3.terraform_volume.id
}
```
Enter the following command to check whether the correct resource will be deleted:
```console
terraform plan
```
The output should look like this:
```console
$ terraform plan
openstack_compute_volume_attach_v2.va_1: Refreshing state... [id=11cc1279-xxxx-xxxx-xxxx-3ace4c954780/daf3a86e-xxxx-xxxx-xxxx-ac7b6ffbb806]
openstack_blockstorage_volume_v3.terraform_volume: Refreshing state... [id=daf3a86e-xxxx-xxxx-xxxx-ac7b6ffbb806]
Terraform used the selected providers to generate the following execution plan. Resource actions are indicated with the following symbols:
- destroy
Terraform will perform the following actions:
# openstack_compute_volume_attach_v2.va_1 will be destroyed
# (because openstack_compute_volume_attach_v2.va_1 is not in configuration)
- resource "openstack_compute_volume_attach_v2" "va_1" {
- device = "/dev/sdb" -> null
- id = "11cc1279-xxxx-xxxx-xxxx-3ace4c954780/daf3a86e-xxxx-xxxx-xxxx-ac7b6ffbb806" -> null
- instance_id = "11cc1279-xxxx-xxxx-xxxx-3ace4c954780" -> null
- region = "GRA11" -> null
- volume_id = "daf3a86e-xxxx-xxxx-xxxx-ac7b6ffbb806" -> null
}
Plan: 0 to add, 0 to change, 1 to destroy.
```
Then apply the changes by entering this command:
```console
terraform apply
```
The output should look like this:
```console
$ terraform apply
openstack_compute_volume_attach_v2.va_1: Refreshing state... [id=11cc1279-xxxx-xxxx-xxxx-3ace4c954780/daf3a86e-xxxx-xxxx-xxxx-ac7b6ffbb806]
openstack_blockstorage_volume_v3.terraform_volume: Refreshing state... [id=daf3a86e-xxxx-xxxx-xxxx-ac7b6ffbb806]
Terraform used the selected providers to generate the following execution plan. Resource actions are indicated with the following symbols:
- destroy
Terraform will perform the following actions:
# openstack_compute_volume_attach_v2.va_1 will be destroyed
# (because openstack_compute_volume_attach_v2.va_1 is not in configuration)
- resource "openstack_compute_volume_attach_v2" "va_1" {
- device = "/dev/sdb" -> null
- id = "11cc1279-xxxx-xxxx-xxxx-3ace4c954780/daf3a86e-xxxx-xxxx-xxxx-ac7b6ffbb806" -> null
- instance_id = "11cc1279-xxxx-xxxx-xxxx-3ace4c954780" -> null
- region = "GRA11" -> null
- volume_id = "daf3a86e-xxxx-xxxx-xxxx-ac7b6ffbb806" -> null
}
Plan: 0 to add, 0 to change, 1 to destroy.
Do you want to perform these actions in workspace "test_terraform"?
Terraform will perform the actions described above.
Only 'yes' will be accepted to approve.
Enter a value: yes
openstack_compute_volume_attach_v2.va_1: Destroying... [id=11cc1279-xxxx-xxxx-xxxx-3ace4c954780/daf3a86e-xxxx-xxxx-xxxx-ac7b6ffbb806]
openstack_compute_volume_attach_v2.va_1: Still destroying... [id=11cc1279-xxxx-xxxx-xxxx-3ace4c954780/daf3a86e-xxxx-xxxx-xxxx-ac7b6ffbb806, 10s elapsed]
openstack_compute_volume_attach_v2.va_1: Destruction complete after 17s
Apply complete! Resources: 0 added, 0 changed, 1 destroyed.
```
**Via the OVHcloud CLI**
| Parameter | Description |
| --------------- | -------------------------------------------- |
| `` | ID of the volume to detach |
| `` | ID of the instance to detach the volume from |
```bash
ovhcloud cloud storage block detach
```
## Go further
[Increasing the size of an additional disk](/en/guides/public-cloud/compute/increase-the-size-of-an-additional-disk.md)
Join our [community of users](https://community.ovhcloud.com/).