---
title: "Adding an ESXi server to a vSAN cluster"
description: "Find out how to add an ESXi server to an existing vSAN cluster"
url: https://docs.ovhcloud.com/en/guides/hosted-private-cloud/powered-by-vmware/vmware-vsan-add-host
lang: en
lastUpdated: 2021-12-22
---
# Adding an ESXi server to a vSAN cluster
## Objective
This guide explains how to add a new ESXi server storage to an existing vSAN cluster.
***
### OVHcloud Control Panel Access
- **Direct link:** [VMware vSphere](https://manager.eu.ovhcloud.com/#/dedicated/dedicated_cloud)
- **Navigation path:** Hosted Private Cloud > Managed VMware vSphere > Select your vSphere service
***
## Requirements
- Being an administrative contact of your [Hosted Private Cloud infrastructure](https://www.ovhcloud.com/en-gb/enterprise/products/hosted-private-cloud/) to receive login credentials
- A user account with access to vSphere as well as the specific rights for NSX (created in the OVHcloud Control Panel)
- A deployed [vSan Datastore](/en/guides/hosted-private-cloud/powered-by-vmware/vmware-vsan.md)
## Instructions
### Order a new vSan host
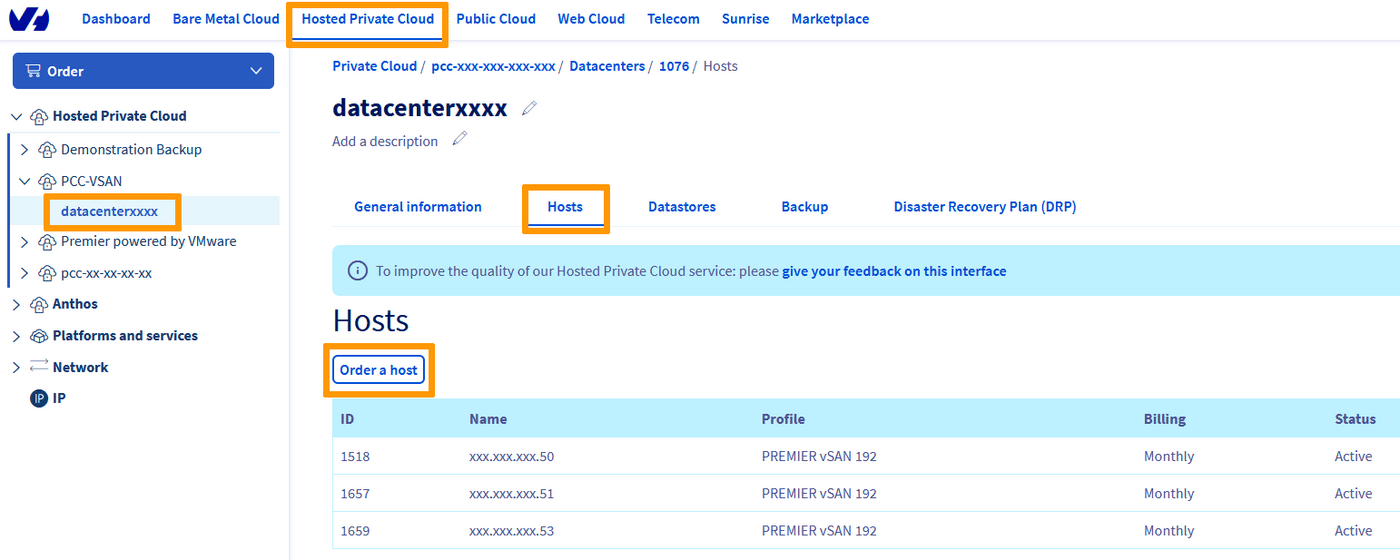
Log in to the OVHcloud Control Panel
with your administrative credentials.
In the `Hosted Private Cloud
` section, select your datacenter and go to the `Hosts
` tab.
Click on the `Order a Host
` button.
Select the fitting vSAN host for your need and click `Confirm Order
`
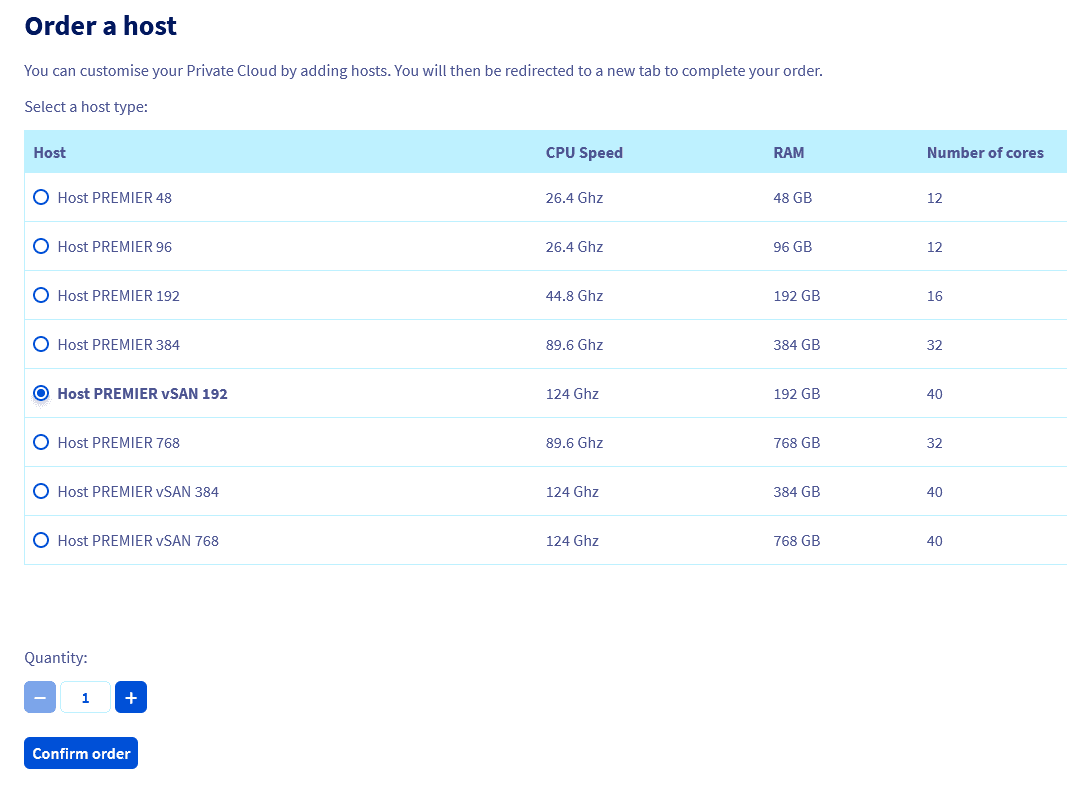
Verify the recap of your order and click `Next
`
Check the boxes to accept the terms and conditions and go on to the payment. You will get an order confirmation.
The new host will be automatically integrated to your infrastructure and you will receive a confirmation email when it is ready for use in vSphere.
### Add new vSan host storage to your datastore
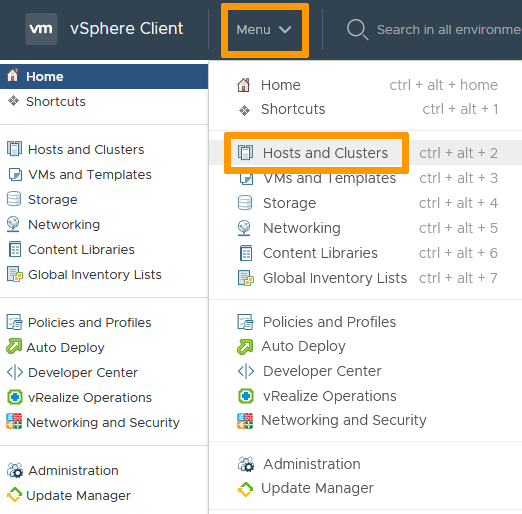
In the vSphere interface menu, go to the `Hosts and Clusters
` dashboard.
You should see your new host in the cluster.
On the left side, select your cluster, go in the `Configure
` tab then `vSAN
` / `Disk Management
`.
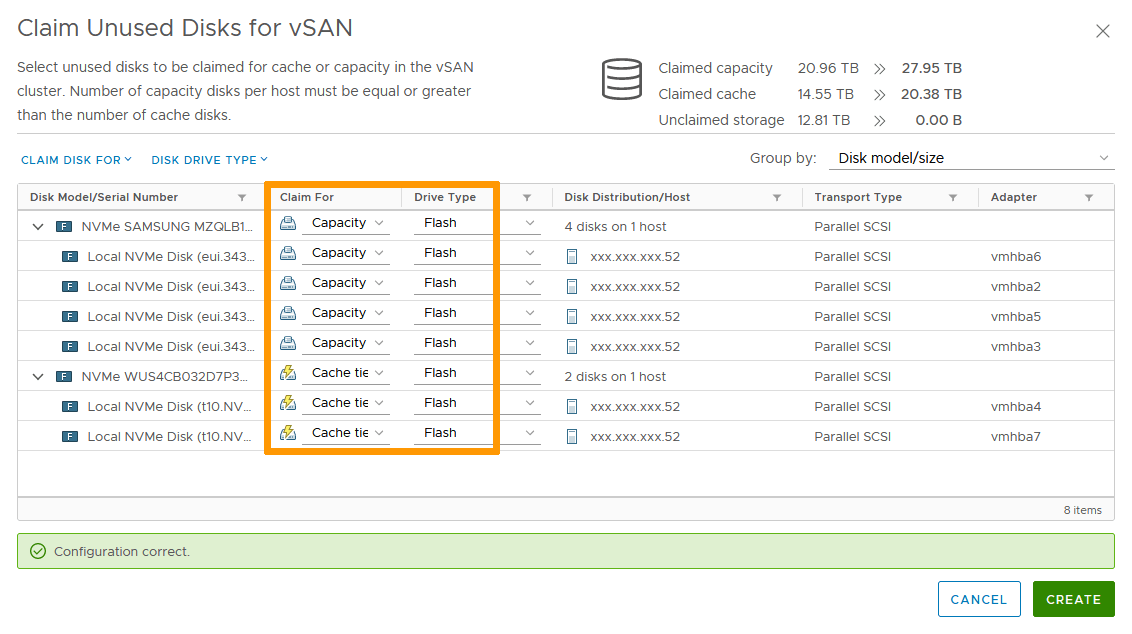
Click on `Claim Unused Disks
`.
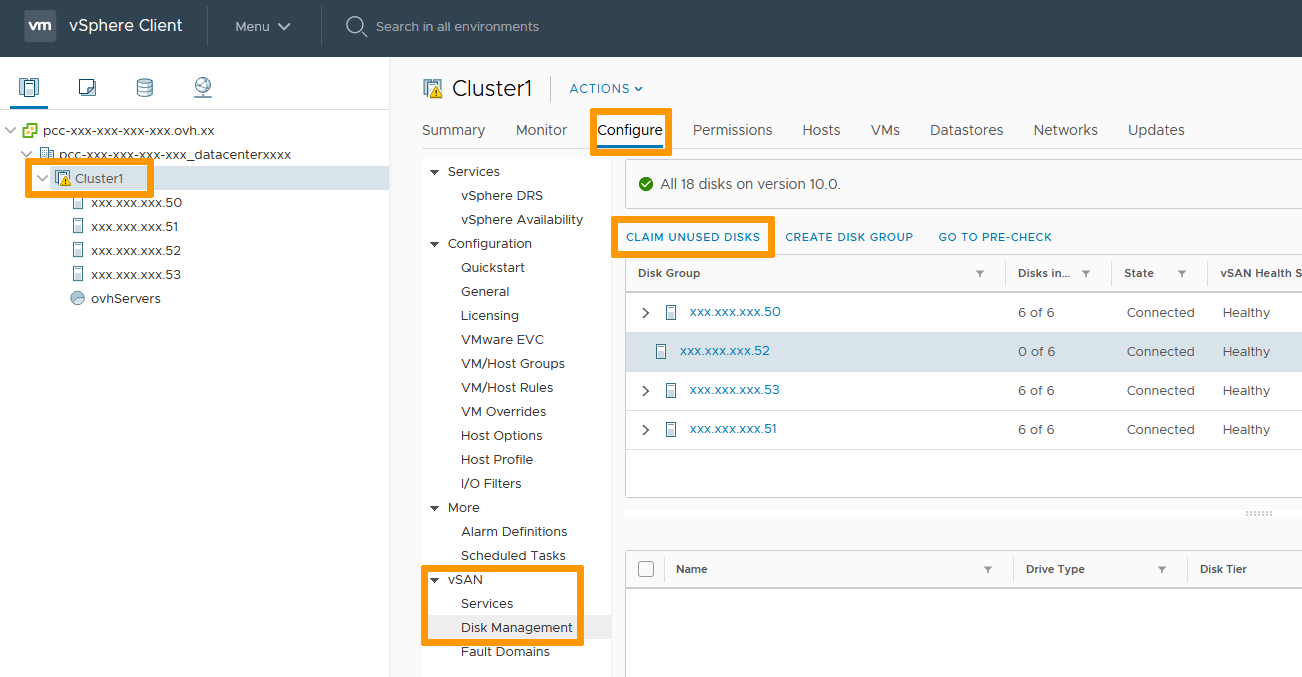
Available disks are assigned to cache or capacity (see [Official VMware VSAN page](https://docs.vmware.com/en/VMware-vSphere/6.7/com.vmware.vsphere.vsan-planning.doc/GUID-18F531E9-FF08-49F5-9879-8E46583D4C70.html) for explanation) depending on types and sizes. You can customize it to your need.
Click on `Create
` when ready.
The new disk group will take some time to be created and added to the vSAN datastore.

Once done, the datastore is ready for use with the added storage.
## Go further
Join our community of users on [https://community.ovh.com/en/](https://community.ovh.com/en/).