---
title: "Setting up Multicloud Snapshot Technology (MST) on a Nutanix on OVHcloud infrastructure"
description: "Learn how to activate MST with an OVHcloud Object Storage container"
url: https://docs.ovhcloud.com/en/guides/hosted-private-cloud/nutanix-on-ovhcloud/set-up-mst
lang: en
lastUpdated: 2026-03-31
---
# Setting up Multicloud Snapshot Technology (MST) on a Nutanix on OVHcloud infrastructure
## Objective
Find out how to deploy and configure **Multicloud Snapshot Technology (MST)** on a Nutanix on OVHcloud infrastructure with OVHcloud object storage.
With MST, you can **replicate snapshots** (UVM/Volume Groups) to **S3-compatible storage** to optimize TCO, improve data mobility, and simplify disaster recovery (DR.) using a **zero-compute** model.
## Overview & advantages
**Main features:**
- Periodic replication of snapshots to S31 buckets (typical RPO: 1 hour via the Nutanix DR. infrastructure).
- Model **Zero-Compute**: No need to maintain compute standby nodes.
- Store recent snapshots on the main cluster; offload older snapshots to object storage.
- Restore anywhere **Nutanix Cloud Platform (NCP)**: cloud, edge, on-prem.
- Native integration with **Prism Central** and existing DR. workflows.
**Benefits:**
- Reduced TCO (reduced/no standby compute, less expensive object storage).
- Mobility: Retrieve workloads on different NCP environments.
- Manageability via Prism.
## Requirements
### Nutanix Cluster
- AOS 7.5.1 minimum
- Prism Central 7.5.1 minimum
### Network
- Create an **MST dedicated subnet** in Prism Element (internal network).
- **3 static IP addresses** reserved (outside the DHCP range of the subnet MST).
- **4 IP addresses** from the DHCP range of the MST subnet (consumed by the 4 MST VMs).
### VM resources (typical — Instance _Small_)
- 3 × **MSP Controller VMs**: 10 vCPU / 24 GiB RAM each.
- 1 × **MSP Load Balancer VM**: 2 vCPU / 4 GiB RAM.
- **Total**: 32 vCPU and 76 GiB RAM.
### Accounts/Access
- **admin** Prism Central account (only an admin can deploy an MST).
- API/credentials access for the S3 bucket with write/list/delete permissions.
### Functional limits (Instance Small)
- Up to **2000 protected entities**.
- **75 Recovery Points** per entity.
- **300 TB** of supported active data.
## Instructions
### Prepare the environment
#### Create the Object Storage container (Bucket)
To create the container, you first need to create a project: [Create your first Public Cloud project - OVHcloud](/en/guides/public-cloud/cross-functional/create-a-public-cloud-project.md).
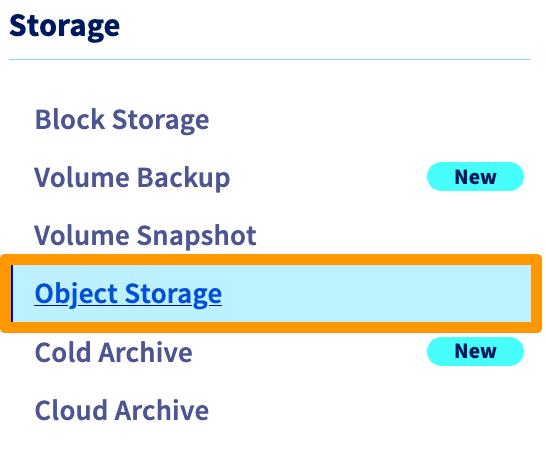
In the Public Cloud universe:
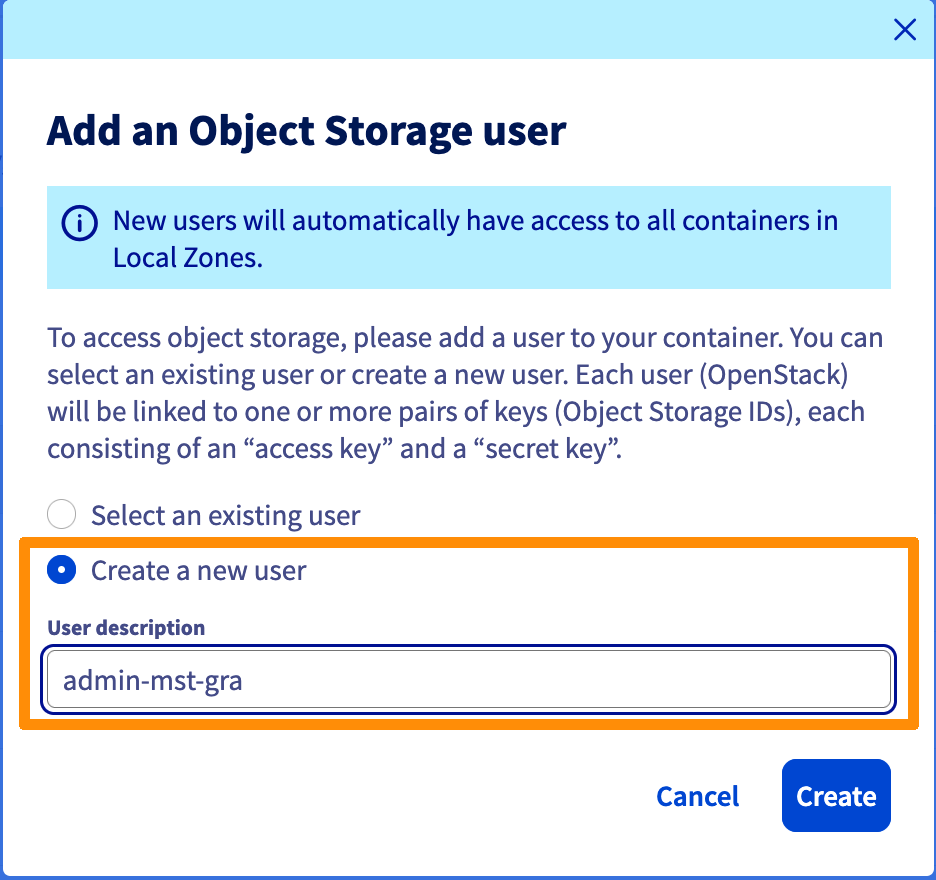
Create a user, for example _admin-mst-gra_:
Please note the following information:

Then create a container (bucket): [Object Storage - Getting started with Object Storage - OVHcloud](/en/guides/storage-and-backup/object-storage/s3-getting-started-with-object-storage.md).
In this example, I chose to create a container named _mst-dr-gra_ in Gravelines, since my cluster is Roubaix. This improves data resilience.
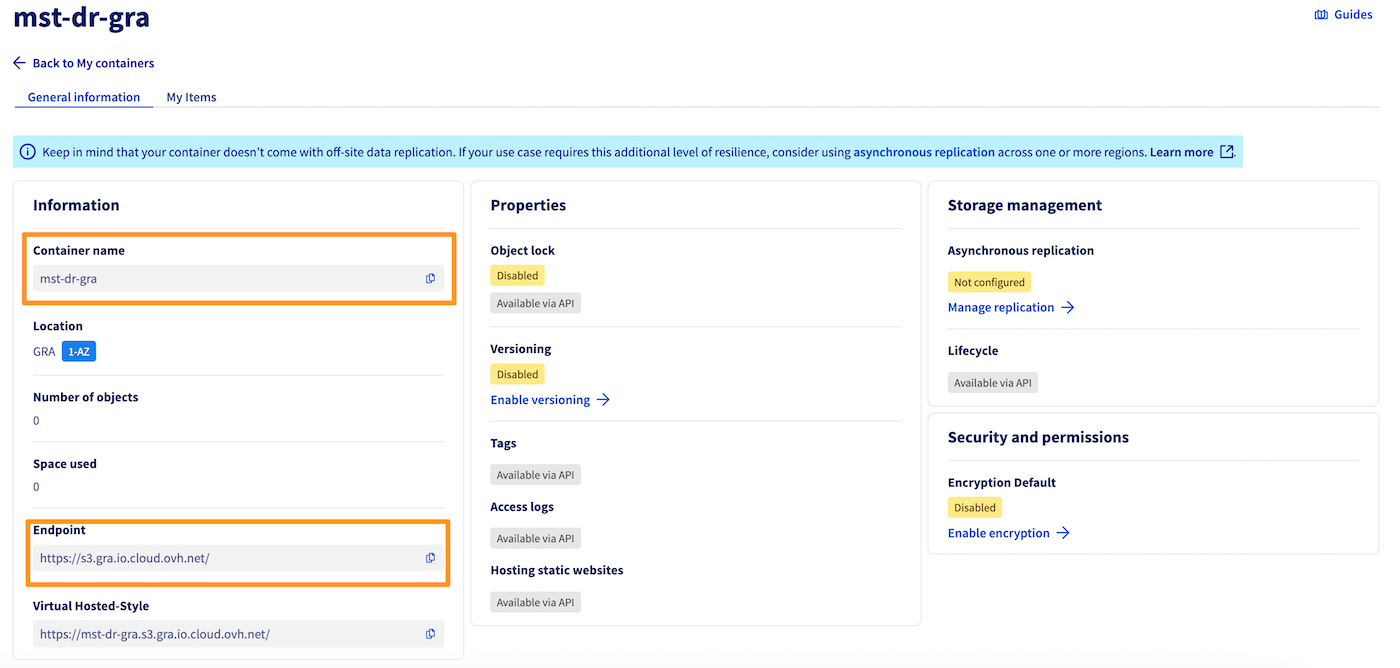
:::info
Once you have created the container and the user, you will need to have several pieces of information that are important for continuation:
- The name of your container: in our example, _mst-dr-gra_
- The URL of the container endpoint: [https://s3.gra.io.cloud.ovh.net/](https://s3.gra.io.cloud.ovh.net/)
- The **access key**
- The **secret key**
:::
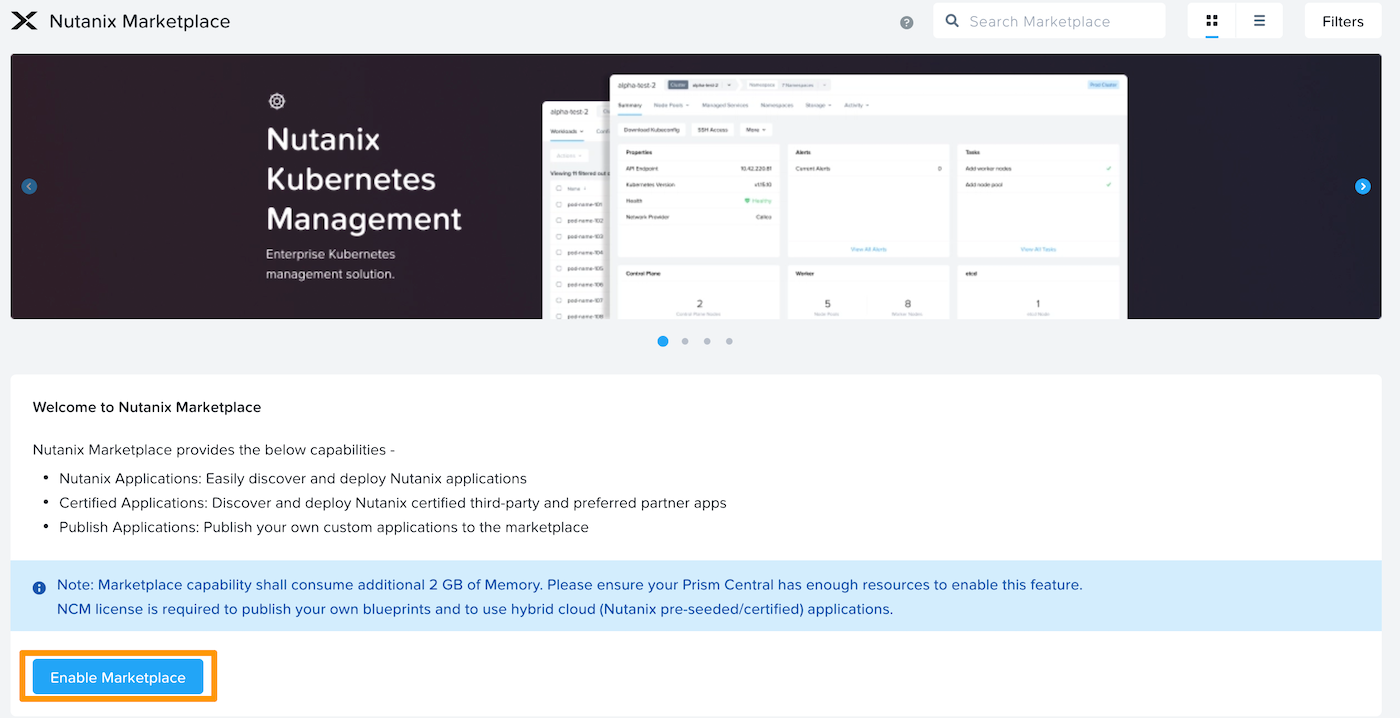
#### Activate the Market Place
Log in to Prism Central, go to the admin center, then click `Enable Marketplace
`.
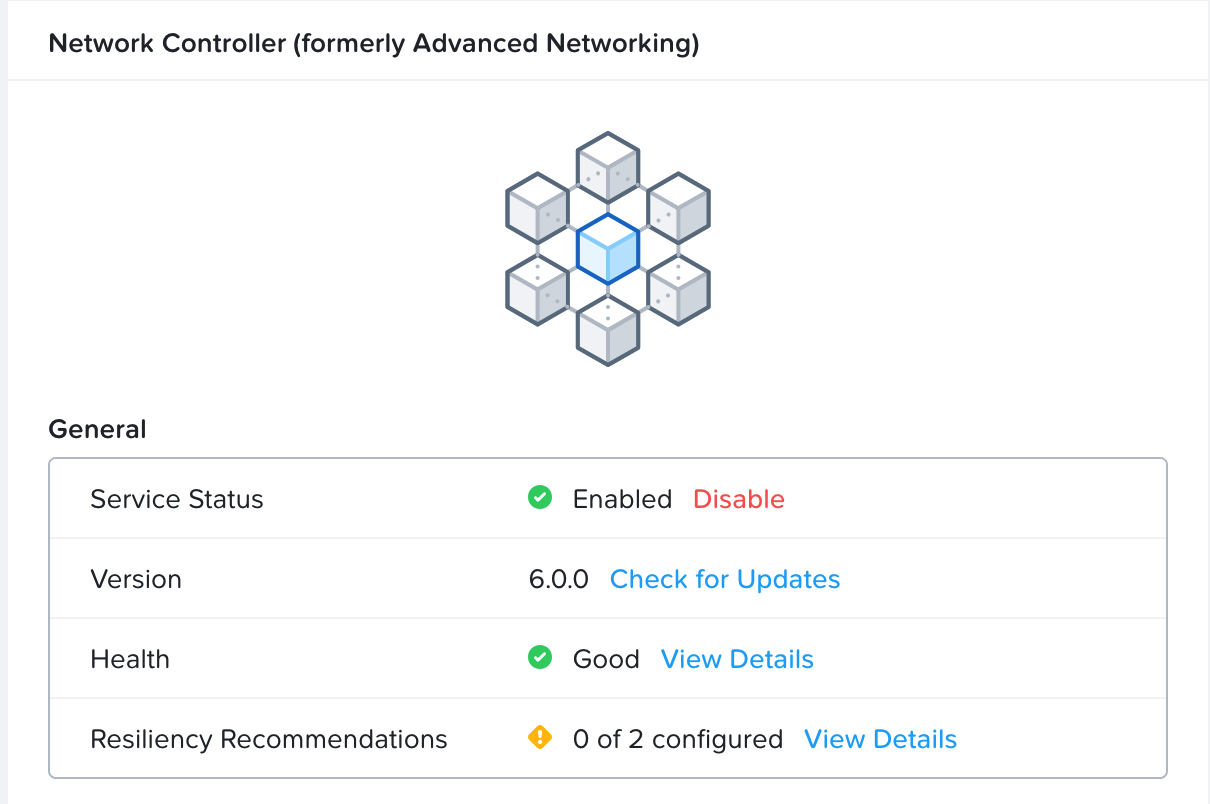
#### Enable Network Controller
In `Infrastructure
` go to `Prism Central Settings
`, click `Network Controller
` then `Enable
`.
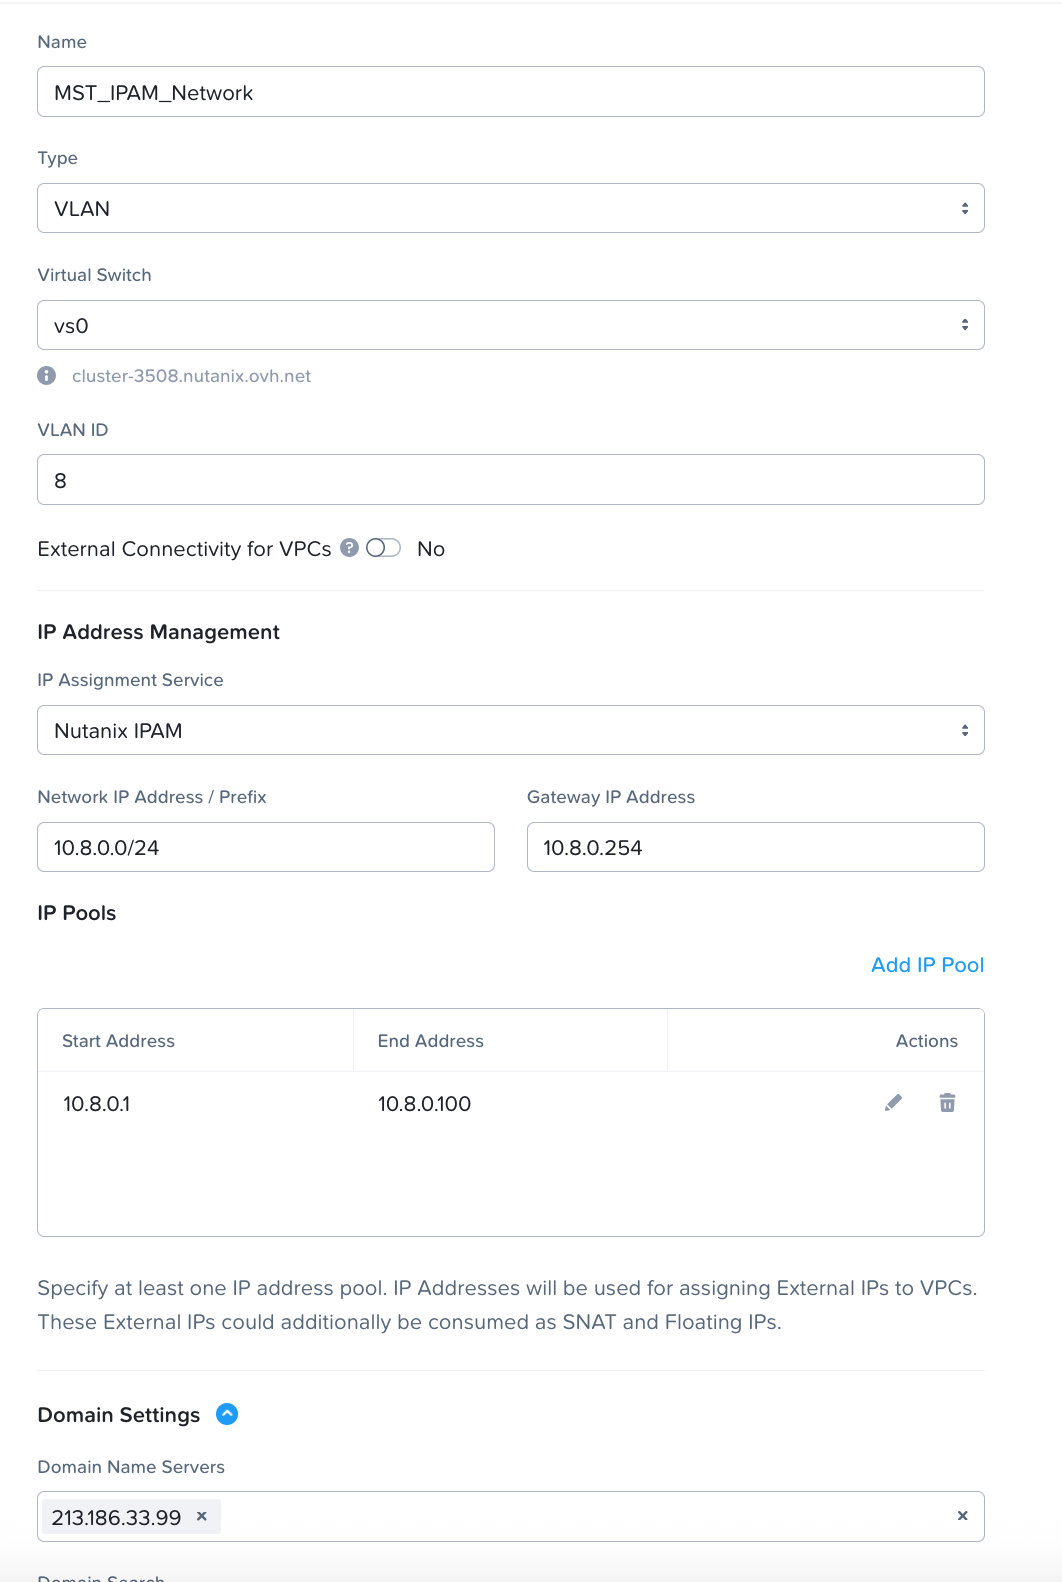
#### Create a Subnet dedicated to MST
We will create an IPAM subnet with a DHCP for using MST.
#### Reconfigure the Gateway
You will need to reconfigure the gateway with the new network.
Add a NIC to your VM:
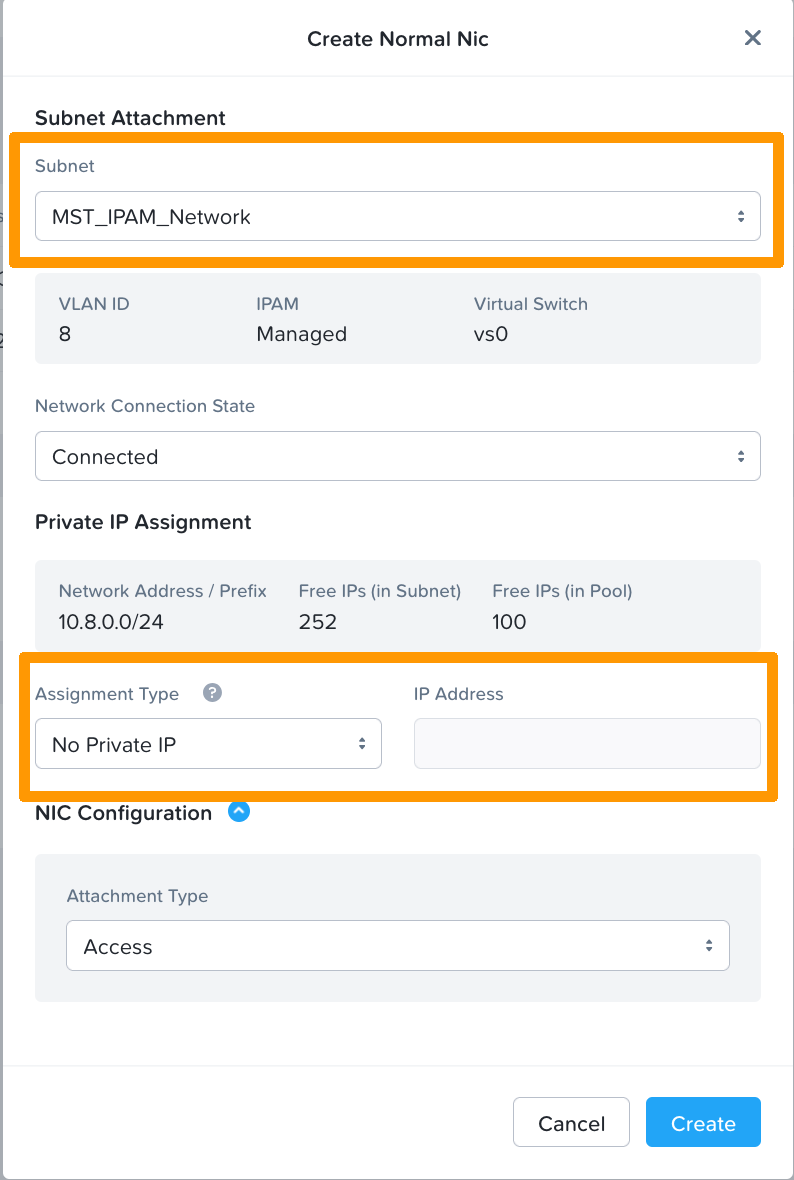
Then reconfigure your gateway with the IP defined in the IPAM network creation.
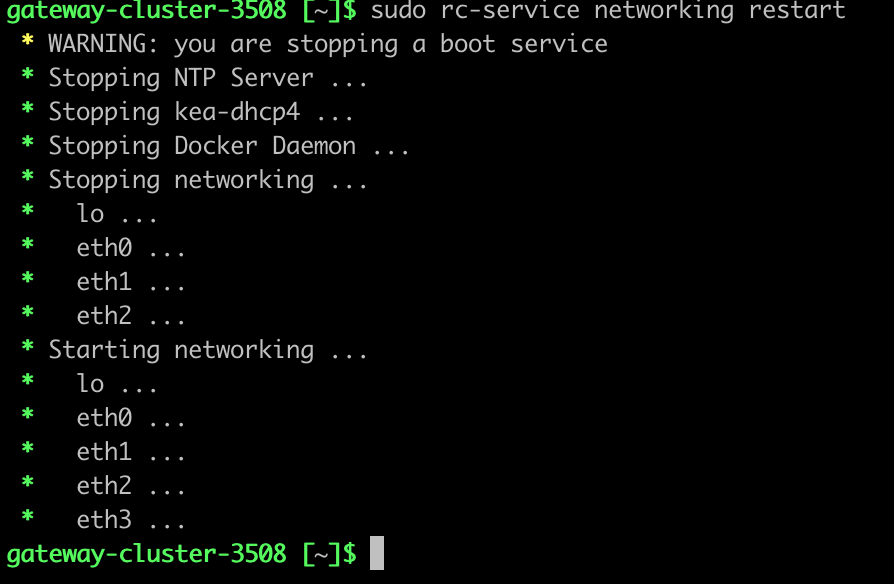
For example on an Alpine VM:

We would add:
```bash
auto eth3
iface eth3 inet static
address 10.8.0.254
netmask 255.255.255.0
```
Restarting network services:
### Deploy Multicloud Snapshot Technology
1. Log in to **Prism Central** as an **administrator**.
2. Go to **Admin Center → Marketplace**.
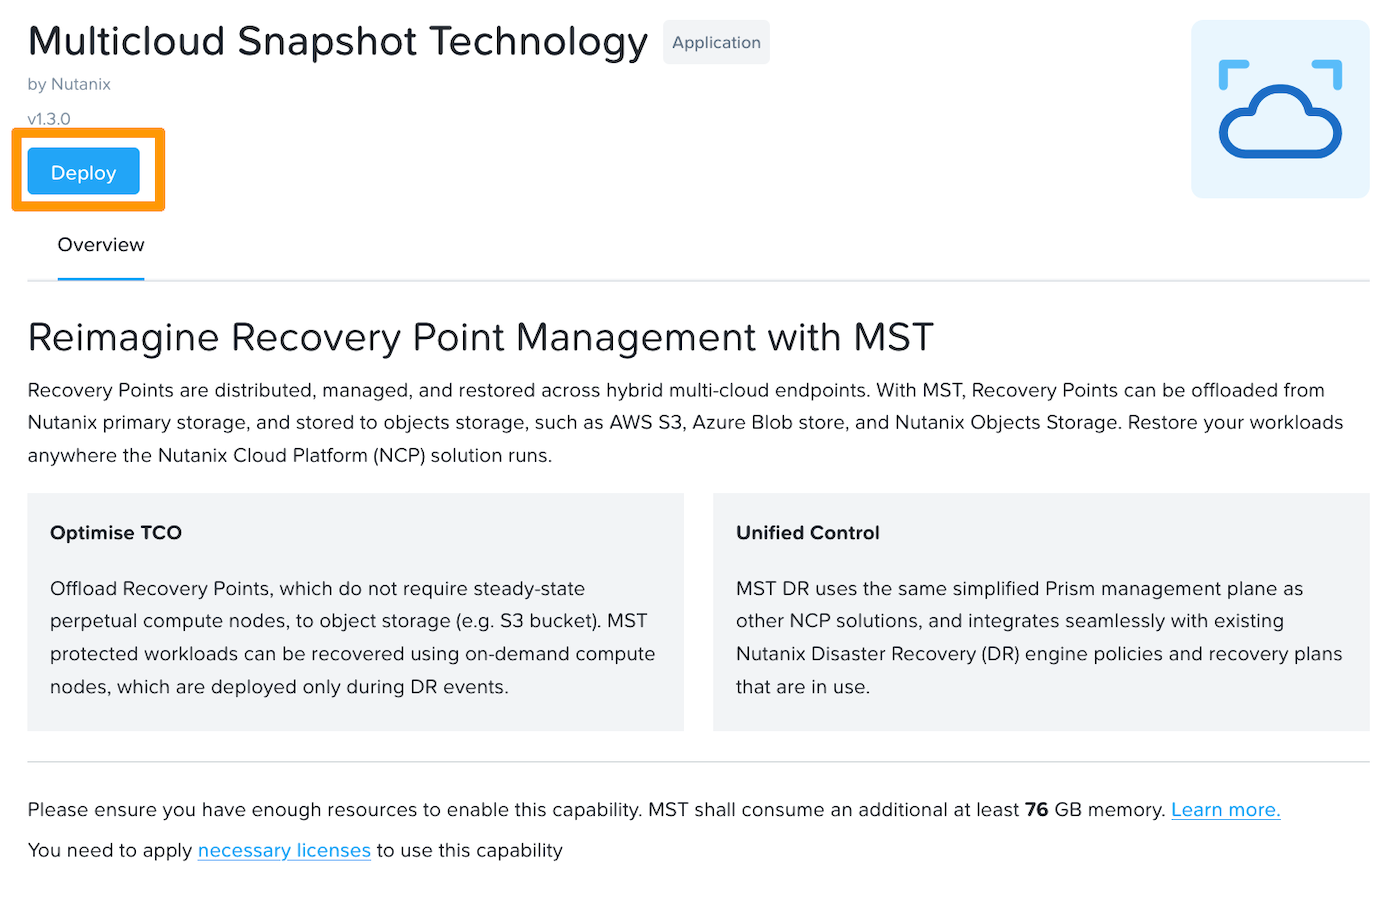
3. In **Nutanix Apps**, click Get for **Multicloud Snapshot Technology**.

On the introduction page, click `Deploy
`.
Then configure the MST instance:
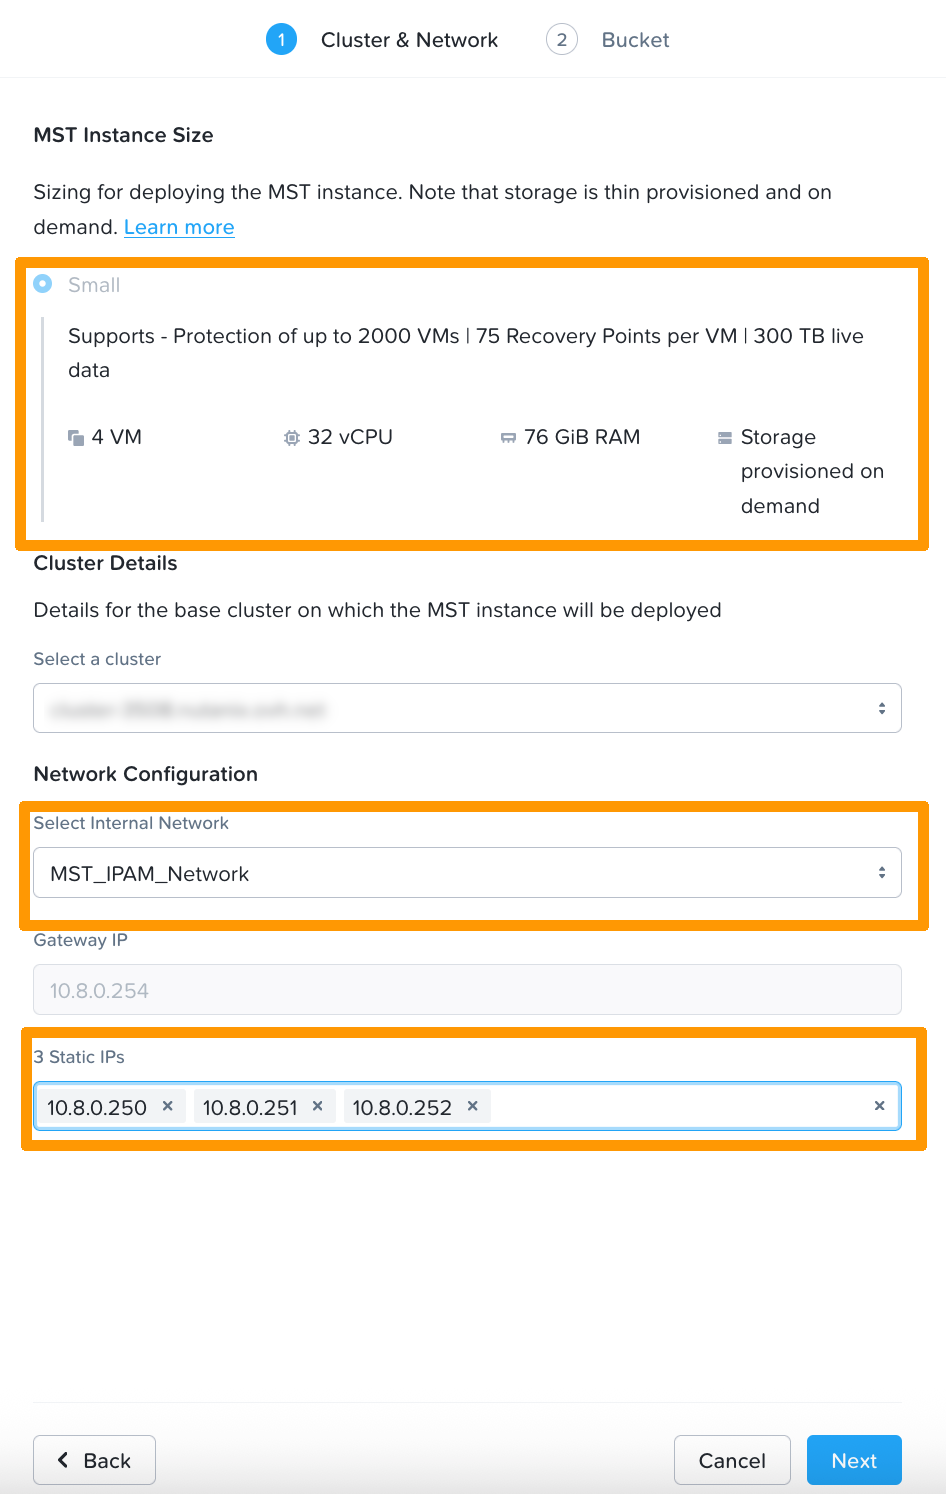
- **MST Instance Size** : Select Small (or other size if available).
- **Cluster Details**: Choose the target Prism Element cluster.
- **Network Configuration**: Select the MST subnet created.
- **Enter the 3 static IPs reserved** in the expected fields.
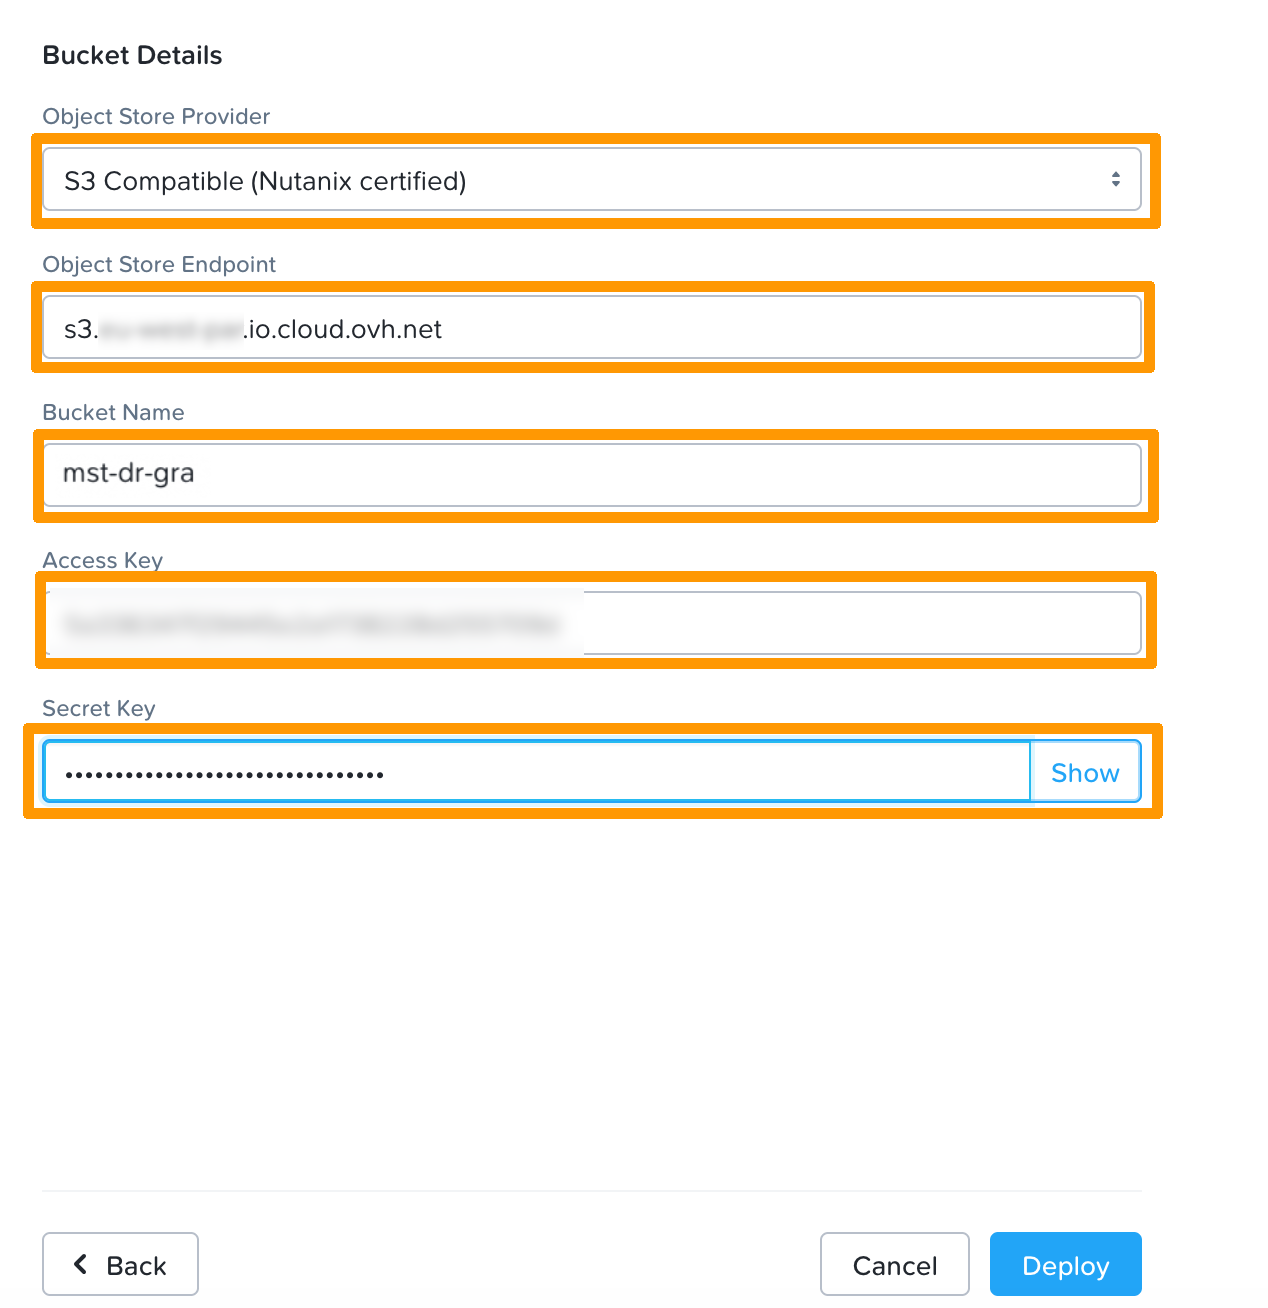
- **Object Store Provider**: Select S3 Compatible (Nutanix certified).
- **Object Store Endpoint**: Enter your container's endpoint URL, in our example [https://s3.gra.io.cloud.ovh.net/](https://s3.gra.io.cloud.ovh.net/).
- **Bucket Name**: Enter the name of your container. In our example, _mst-dr-gra_.
- **Access Key**: Enter your container’s `Access Key`.
- **Secret Key**: Enter the `Secret Key` of your container.
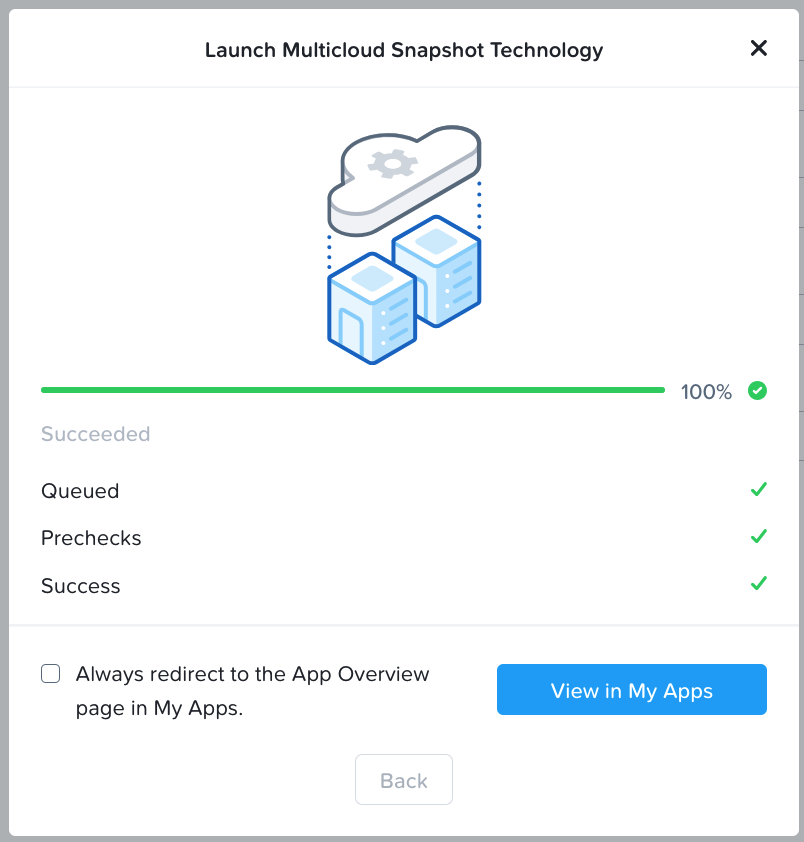
Launch the deployment.
## Disaster Recovery: use and configuration
Once you have deployed an MST and connected it to your Object Storage bucket, you can configure how your workloads are protected and restored.
### Entity protection
- **Steps:**
1. From **Prism Central**, go to **Protection Policies**, then create a protection policy.
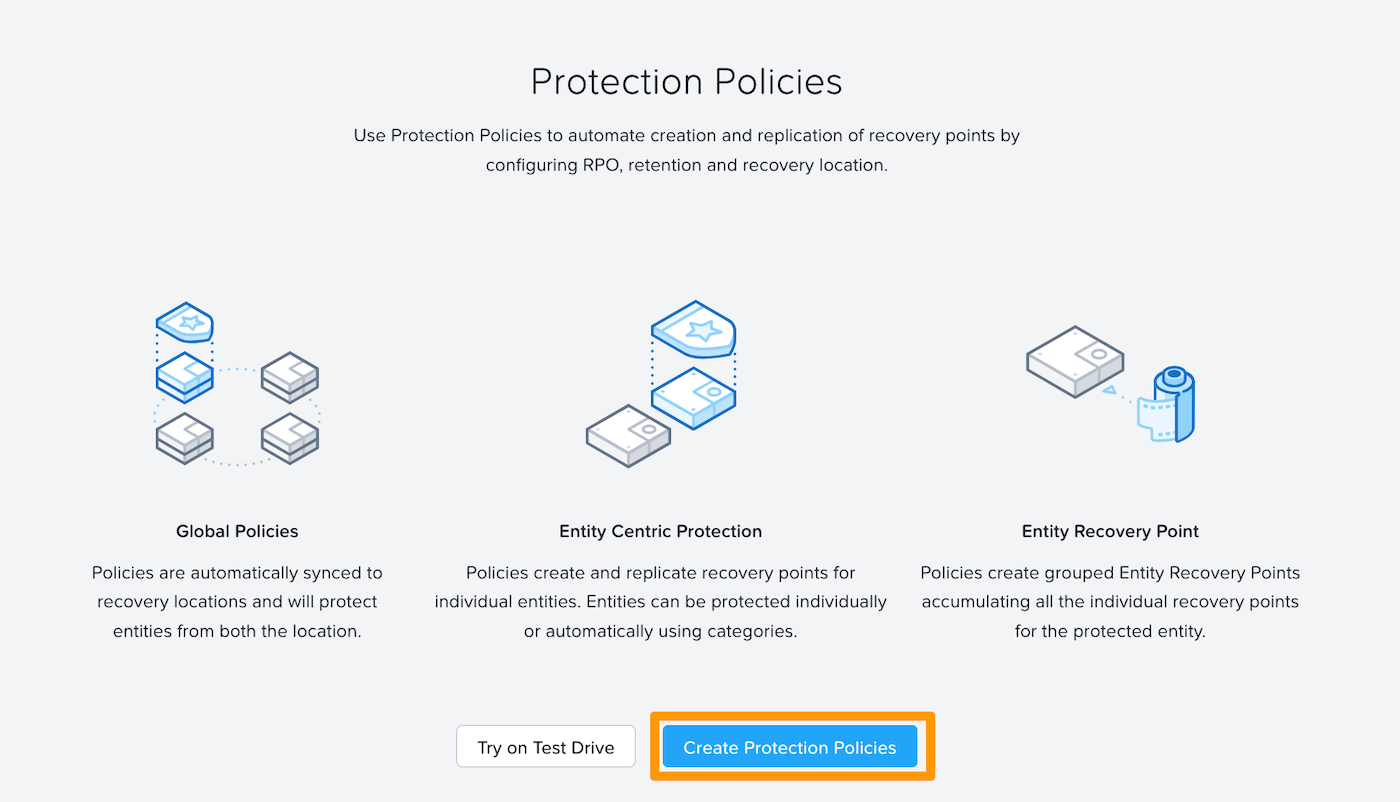 2. Define the `policy name` and enter your cluster in the `primary location` field.
In the `Recovery Location` box, keep Local AZ and select the container (Bucket) previously configured.
2. Define the `policy name` and enter your cluster in the `primary location` field.
In the `Recovery Location` box, keep Local AZ and select the container (Bucket) previously configured.
 3. Define an Add Schedule:
- The frequency of snapshots (every hour by default).
- The number of Recovery Points to keep locally.
- The number of Recovery Points to keep on the **OVHcloud S3 container**.
3. Define an Add Schedule:
- The frequency of snapshots (every hour by default).
- The number of Recovery Points to keep locally.
- The number of Recovery Points to keep on the **OVHcloud S3 container**.
 4. Protect VMs:
- Select the VMs you want to protect, then in the `action` menu → `data protection` click
4. Protect VMs:
- Select the VMs you want to protect, then in the `action` menu → `data protection` click Protect.
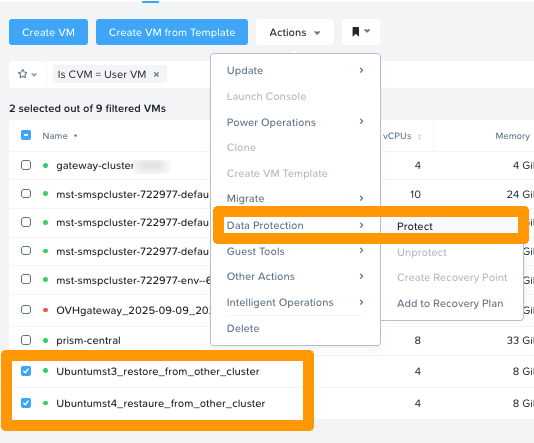 - Then select the Protection Policy you created earlier:
 ### Restoration
- From **Prism Central → Data Protection → VM Recovery Points**, choose a **Recovery Point** available in the bucket.

### Typical use cases
- **Disaster Recovery (DR.)**: Total loss of the source cluster → deployment of VMs on another Nutanix cluster linked to the same OVHcloud bucket.
- **Workloads migration**: Move an application to another site (edge or cloud) by importing snapshots from the bucket.
## Go further [](#)
[Nutanix Reimagines Business Continuity for Hybrid Multicloud Users](https://www.nutanix.com/blog/nutanix-reimagines-business-continuity-for-hybrid-multicloud-users)
[Cloud Clusters (NC2) Hosted - Deploying Multicloud Snapshot Technology](https://portal.nutanix.com/page/documents/details?targetId=Nutanix-Clusters-AWS:aws-cluster-protect-deploying-mst-t.html)
If you require training or technical support to implement our solutions, please contact your sales representative or click [this link](https://www.ovhcloud.com/en-gb/professional-services/) to get a quote and request a custom analysis of your project from our Professional Services team experts.
Join our [community of users](https://community.ovhcloud.com/community/en).
1
: S3 is a trademark of Amazon Technologies, Inc. OVHcloud’s service is not sponsored by, endorsed by, or otherwise affiliated with Amazon Technologies, Inc.
### Restoration
- From **Prism Central → Data Protection → VM Recovery Points**, choose a **Recovery Point** available in the bucket.

### Typical use cases
- **Disaster Recovery (DR.)**: Total loss of the source cluster → deployment of VMs on another Nutanix cluster linked to the same OVHcloud bucket.
- **Workloads migration**: Move an application to another site (edge or cloud) by importing snapshots from the bucket.
## Go further [](#)
[Nutanix Reimagines Business Continuity for Hybrid Multicloud Users](https://www.nutanix.com/blog/nutanix-reimagines-business-continuity-for-hybrid-multicloud-users)
[Cloud Clusters (NC2) Hosted - Deploying Multicloud Snapshot Technology](https://portal.nutanix.com/page/documents/details?targetId=Nutanix-Clusters-AWS:aws-cluster-protect-deploying-mst-t.html)
If you require training or technical support to implement our solutions, please contact your sales representative or click [this link](https://www.ovhcloud.com/en-gb/professional-services/) to get a quote and request a custom analysis of your project from our Professional Services team experts.
Join our [community of users](https://community.ovhcloud.com/community/en).
1
: S3 is a trademark of Amazon Technologies, Inc. OVHcloud’s service is not sponsored by, endorsed by, or otherwise affiliated with Amazon Technologies, Inc.