---
title: "Configure Veeam Backup for Nutanix"
description: "Installing Veeam Backup on a Nutanix cluster"
url: https://docs.ovhcloud.com/en/guides/hosted-private-cloud/nutanix-on-ovhcloud/nutanix-veeam-backup
lang: en
lastUpdated: 2025-06-06
---
# Configure Veeam Backup for Nutanix
## Objective
Veeam Backup is a backup software available for Nutanix.
**Find out how to install, configure and use Veeam on a Nutanix cluster**
:::warning
OVHcloud provides services for which you are responsible, with regard to their configuration and management. It is therefore your responsibility to ensure that they work properly.
This guide is designed to assist you as much as possible with common tasks. Nevertheless, we recommend contacting a specialist provider if you experience any difficulties or doubts when it comes to managing, using or setting up a service on a server.
:::
## Requirements
- A Nutanix cluster in your OVHcloud account.
- Access to the OVHcloud Control Panel.
- You must be connected to the cluster via **Prism Central**.
- **Veeam Backup & Replication** installed on a virtual machine in your Nutanix cluster via this procedure: [Setting up Veeam Backup & Replication](/en/guides/storage-and-backup/backup-and-disaster-recovery-solutions/veeam/veeam-veeam-backup-replication.md).
- Knowing the public IP address used by **Veeam Backup** to access the internet.
- You must have 4 GB of RAM, 60 GB of storage and 4 vCPUs to add an additional virtual machine when configuring extensions for **Veeam Backup & Replication**.
- You must have remote storage outside of the cluster, such as [OVHcloud Object Storage via S31](https://www.ovhcloud.com/en-gb/public-cloud/object-storage/).
## Instructions
We will customise **Veeam Backup & Replication** for use on a Nutanix cluster, with a remote repository for this cluster at OVHcloud, using the [OVHcloud Object Storage via S3 solution](https://www.ovhcloud.com/en-gb/public-cloud/object-storage/).
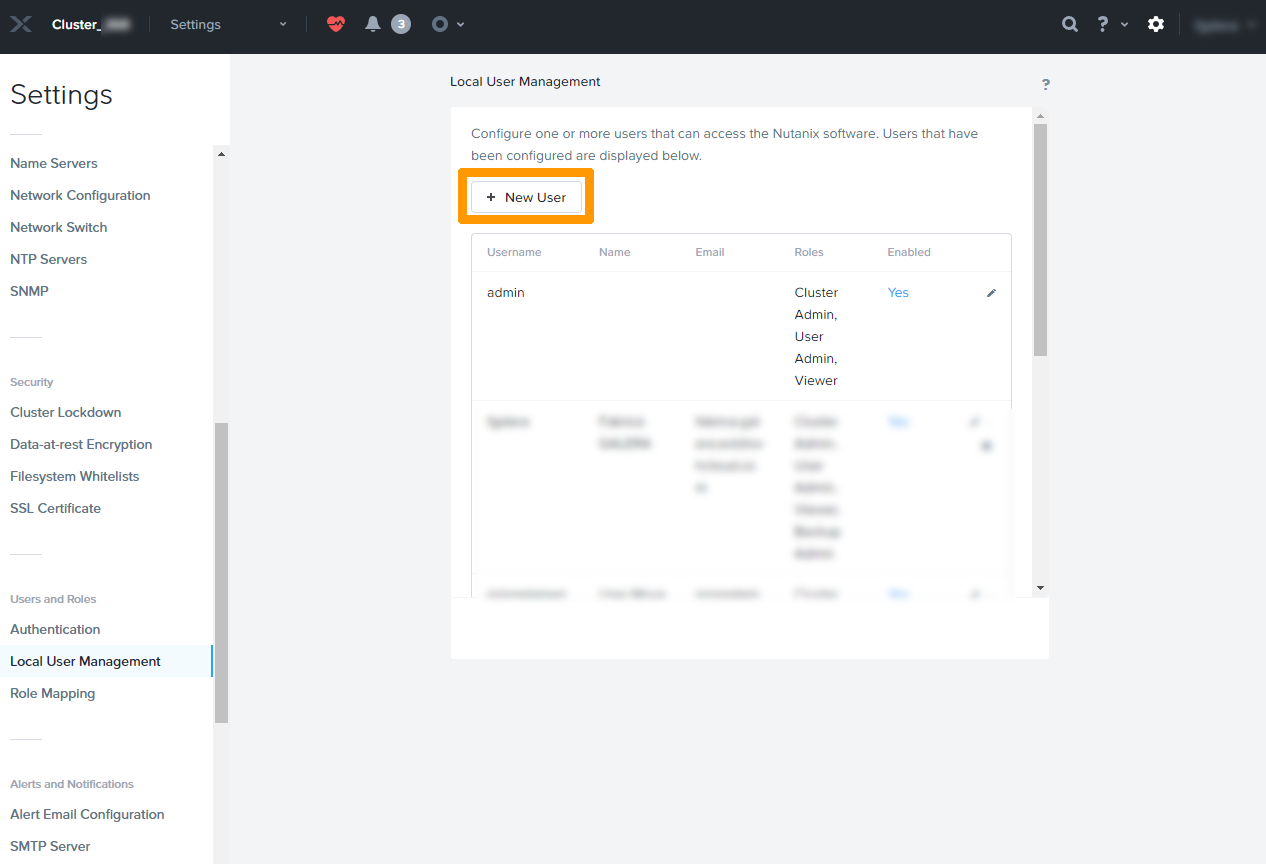
### Add a user in Prism Element for Veeam Backup
First, you need to create a specific user in Prism Element to use Veeam Backup.
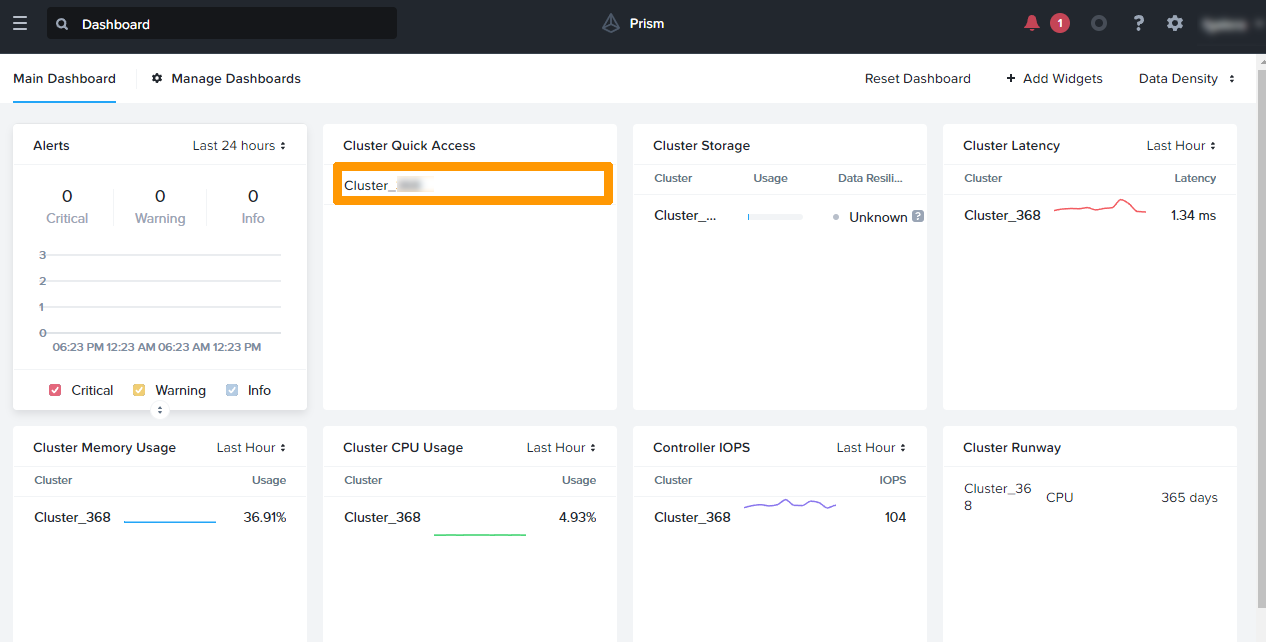
Through **Prism Central**, connect to **Prism Element** by clicking on the cluster under `Cluster Quick Access`.
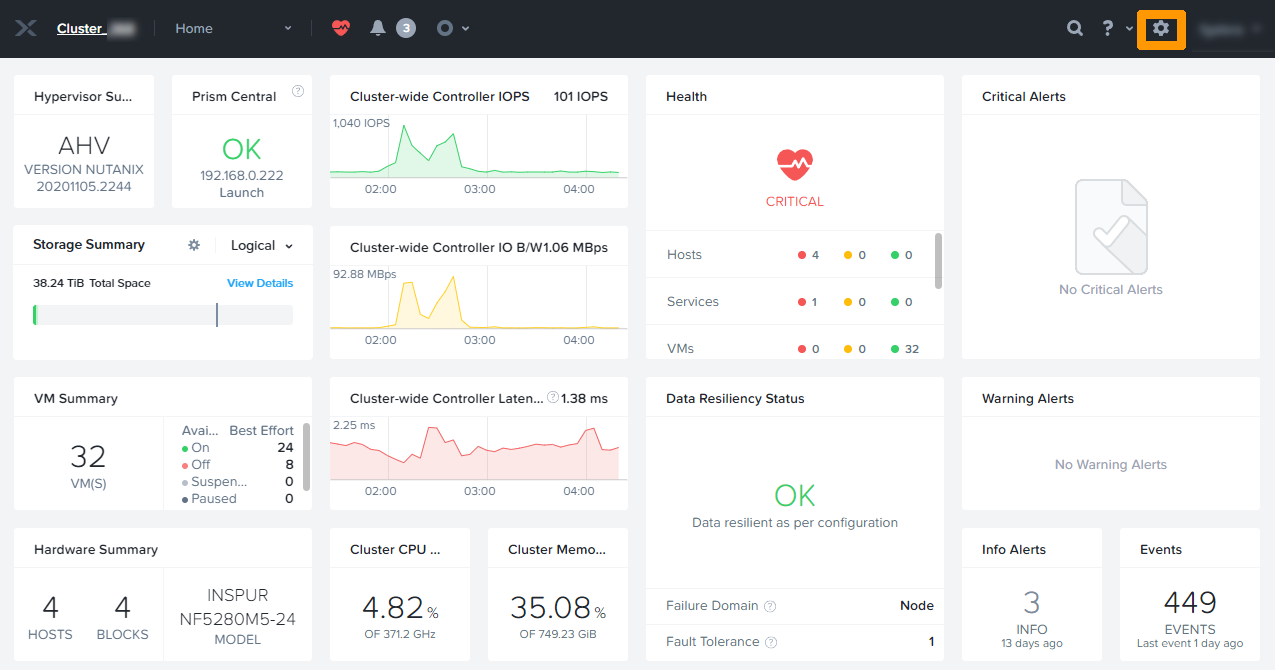
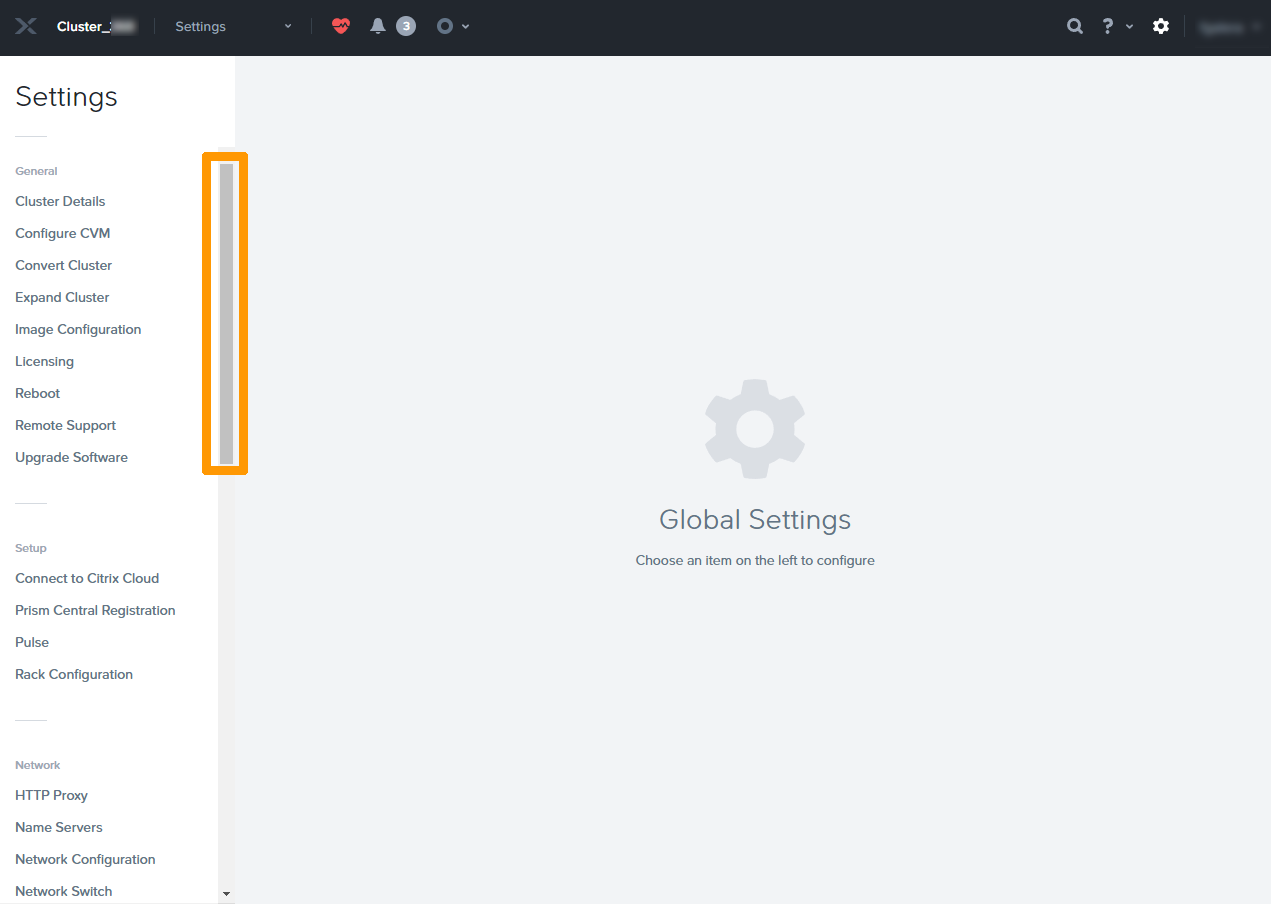
Once in the **Prism Element**
, go to the settings by clicking on the `gear
` icon in the top right.
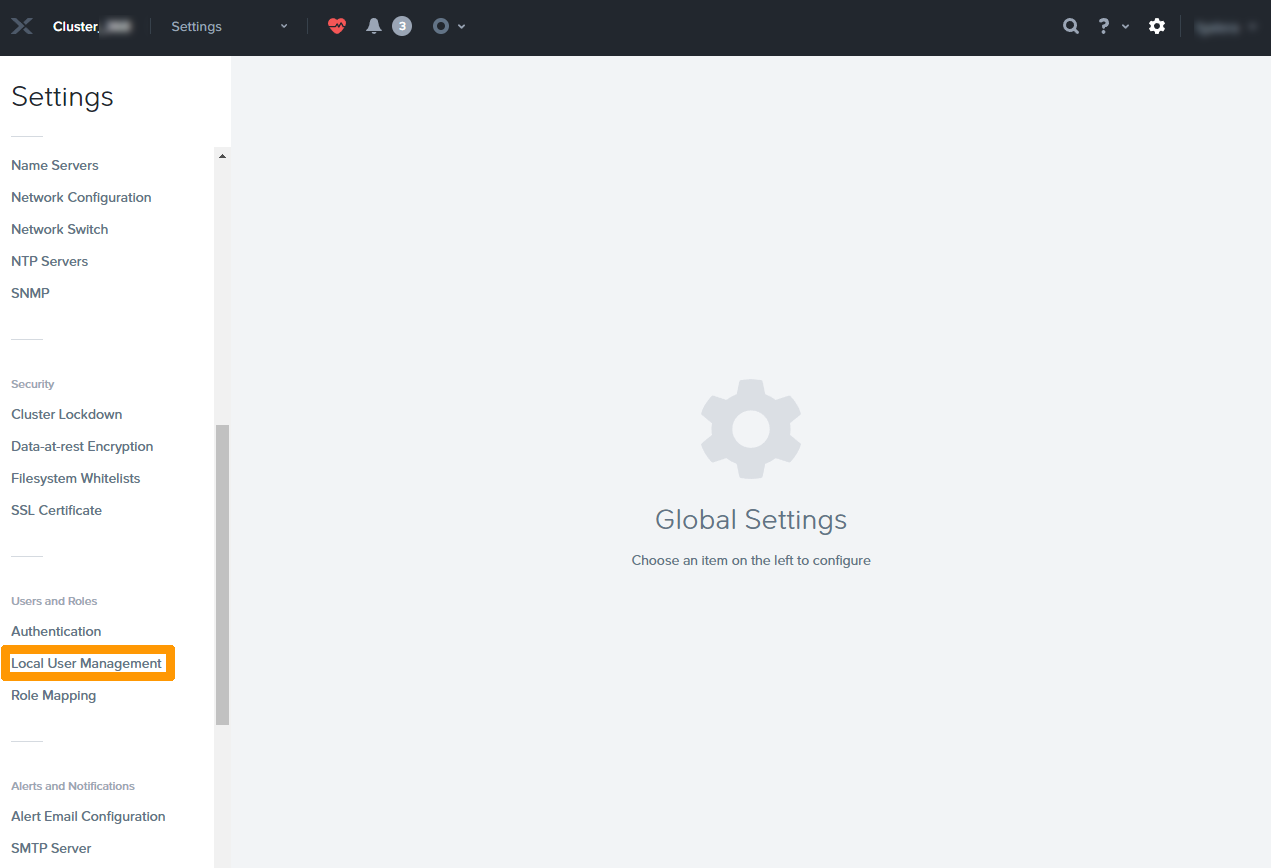
Scroll down the menu on the left using the scroll bar.
Click `Local User Management
`.
Click the `New User
` button.
Enter the information:
- **Username**: `svc_veeam`
- **First Name**: `Veeam`
- **Last Name**: `Backup`
- **Email**: `veeam@example.com`
- **Password**: `password`
:::info
This data is provided as an example. The email address is mandatory but is not used.
:::
Select the `Cluster Admin
` checkbox and click `Save
`
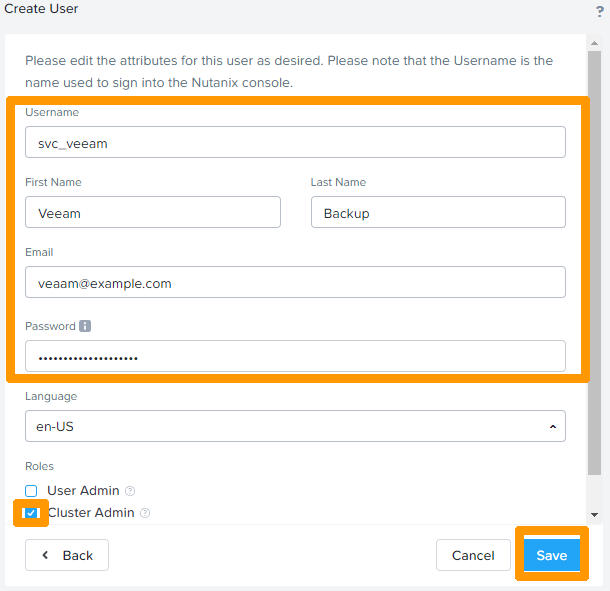
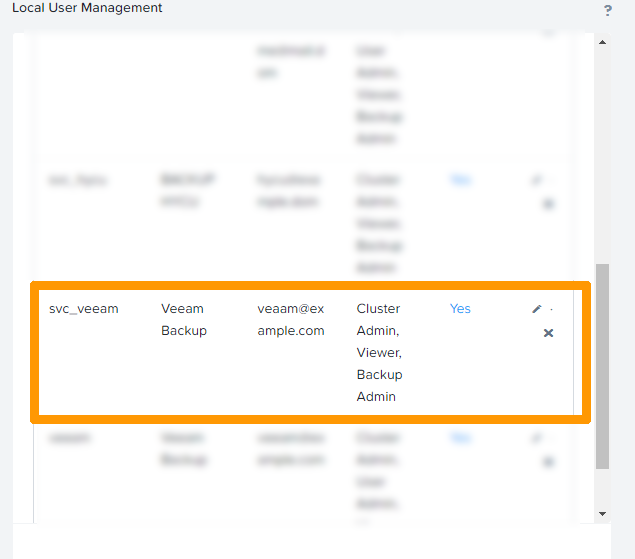
This user account is created and added to the **Prism Element** user list.
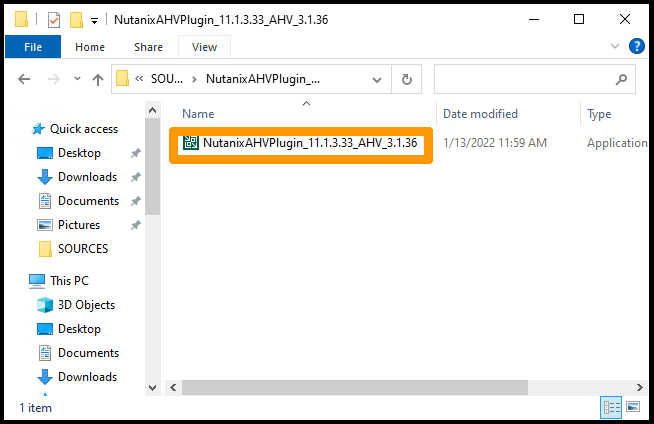
### Download and install the extension for a Nutanix cluster under AHV
Log in to the virtual machine where Veeam Backup is located.
From a web browser, download the latest version of the [AHV extension for Veeam](https://www.veeam.com/availability-nutanix-ahv-download.html). You must have a user account on the **Veeam** website, you can create it freely and free of charge.
Start the installation of the extension.
:::warning
Before starting the installation, make sure that the **Veeam Backup & replication** console is closed.
:::
Open the "NutanixAHPlugin" installer.
Accept the General Terms and Conditions of Use and click `Next
`.
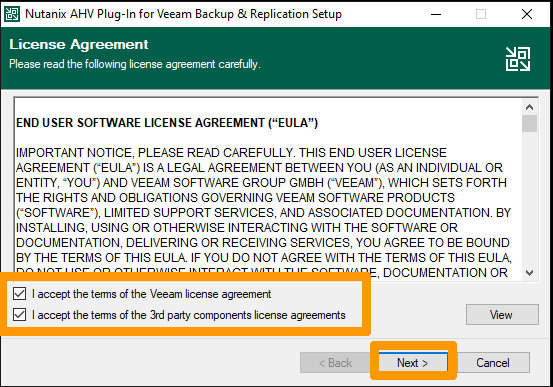
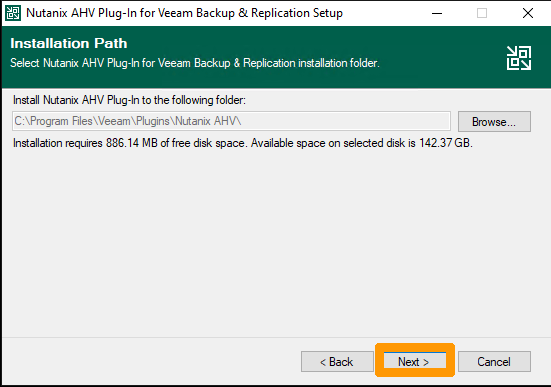
Click `Next
`.
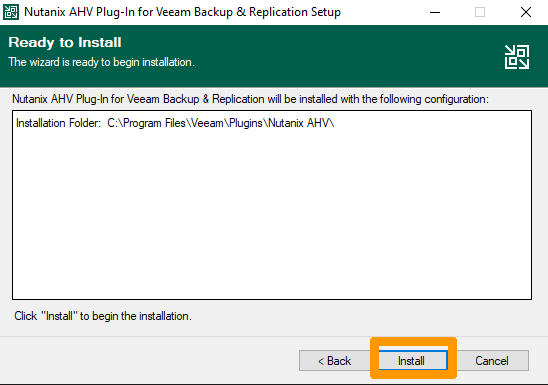
Click `Install
`.
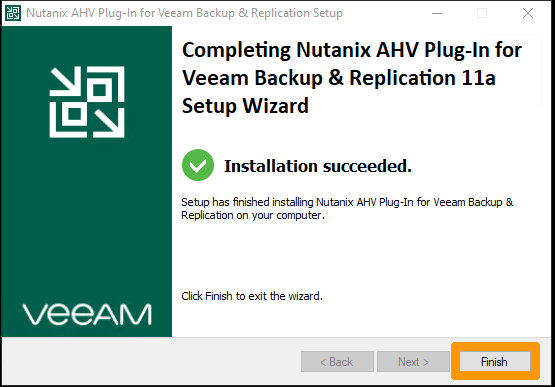
Once the installation is complete, click `Finish
`.
### Integrate Nutanix cluster in **Veeam Backup configuration**
When Configuring Veeam Backup for Nutanix, a new virtual machine is added to the cluster, which serves as the interface between the **Veeam Backup** software and the cluster.
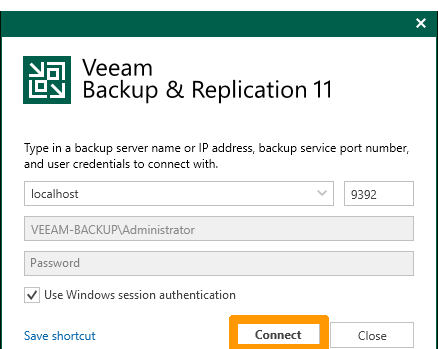
Launch the **Veeam Backup**
console and click `Connect
`.
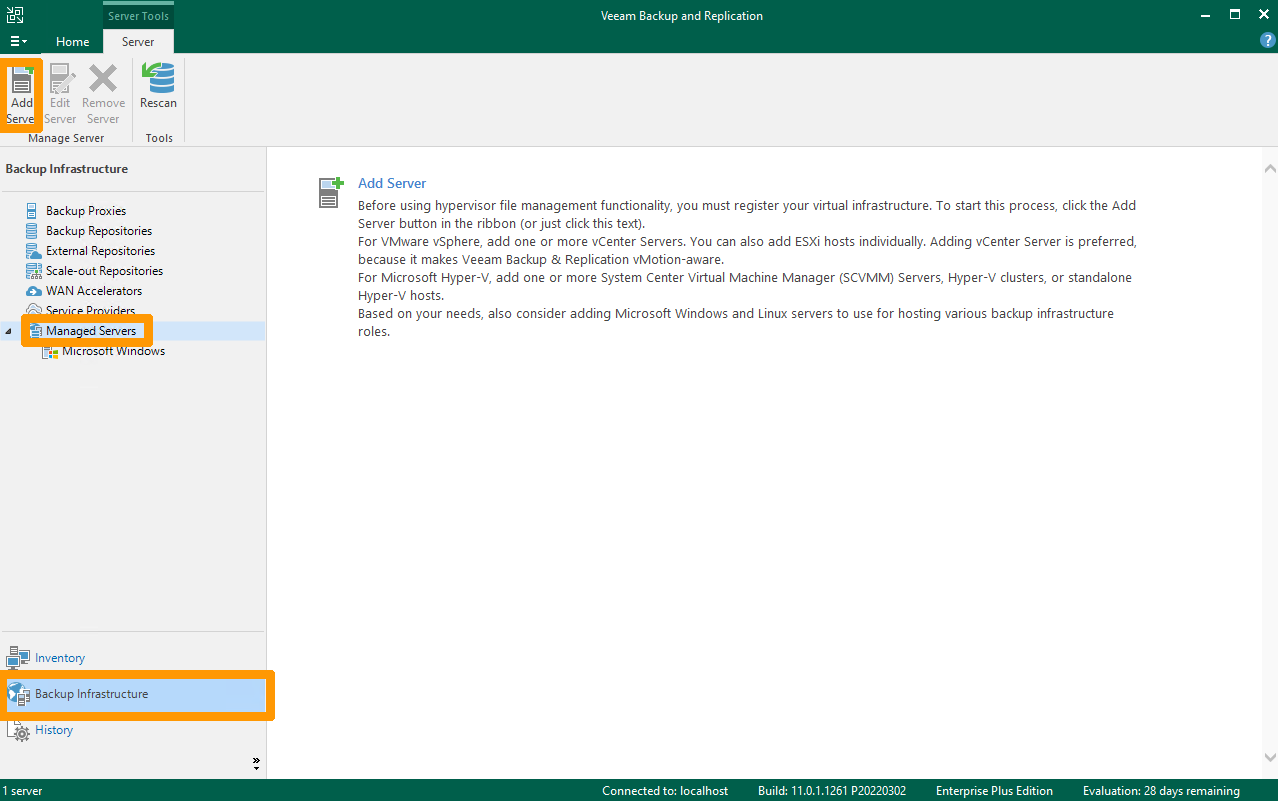
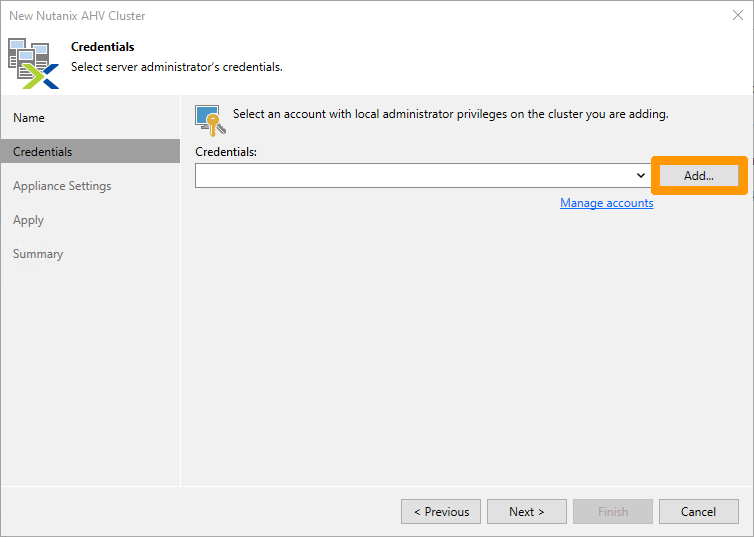
Go to `Backup Infrastructure
` in the menu at the bottom right, choose `Managed Servers
` and click `Add Server
`.
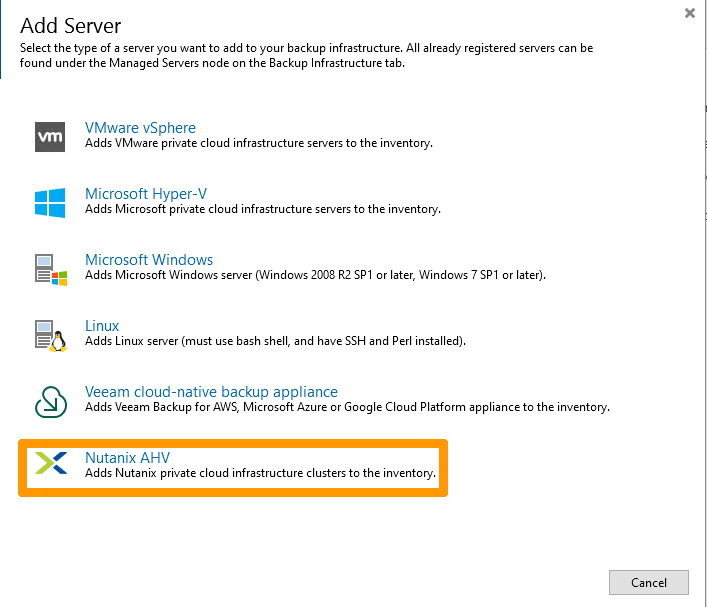
Click `Nutanix AHV
`.
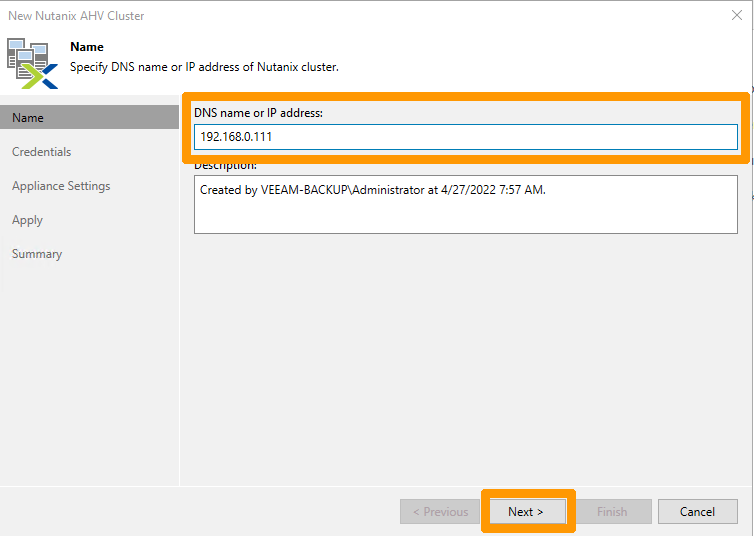
Enter the `private IP address
` of **Prism Element**
in `DNS name or IP address`
and click `Next
`.
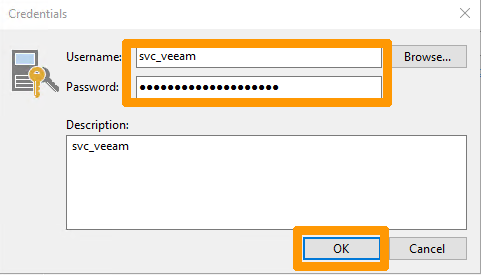
Click `Add
` to add the **Prism Element**
user account
Enter the information for the account created earlier in **Prism Element**:
- **Username**: `svc_veeam`
- **Password**: `Password`
Click `OK
`.
Check that the account you have created has been selected in the "Credentials" field, then click `Next
`.
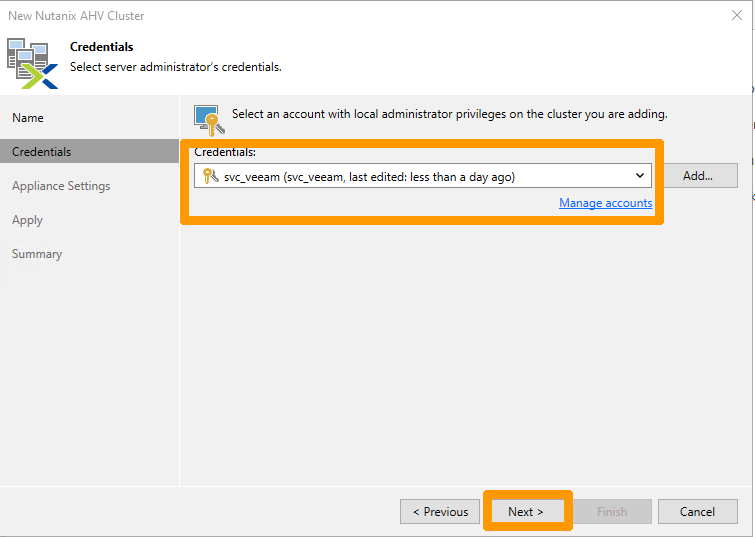
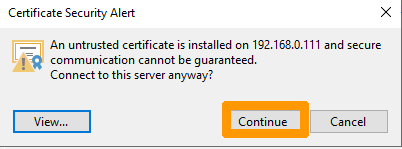
Click `Continue
` to validate the certificate warning message.
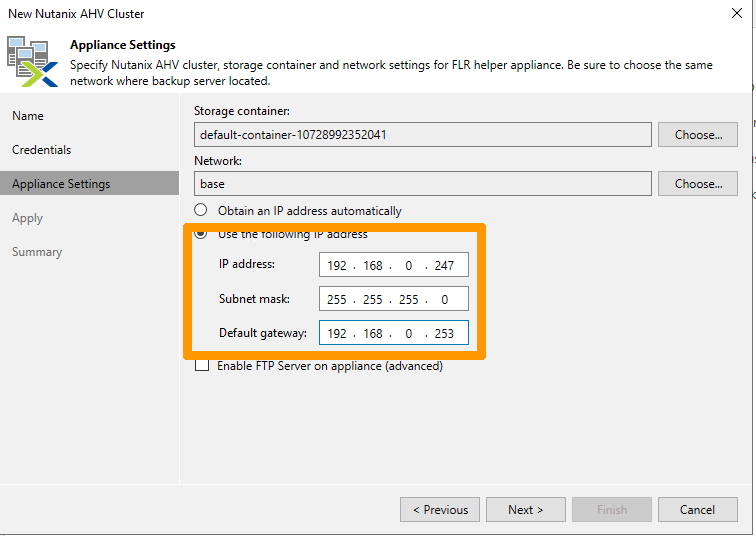
Check `Use the following IP address
` and choose an unused private IP address (this address is used when backing up and restoring files), then click `Next
`.
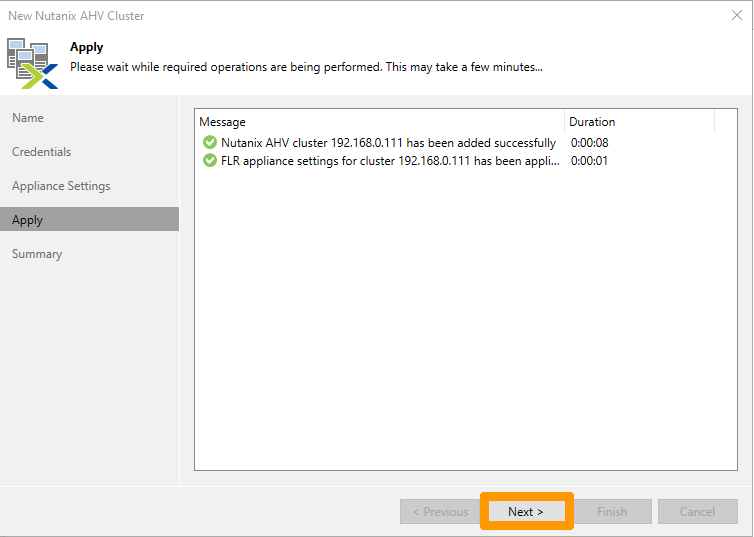
Click `Next
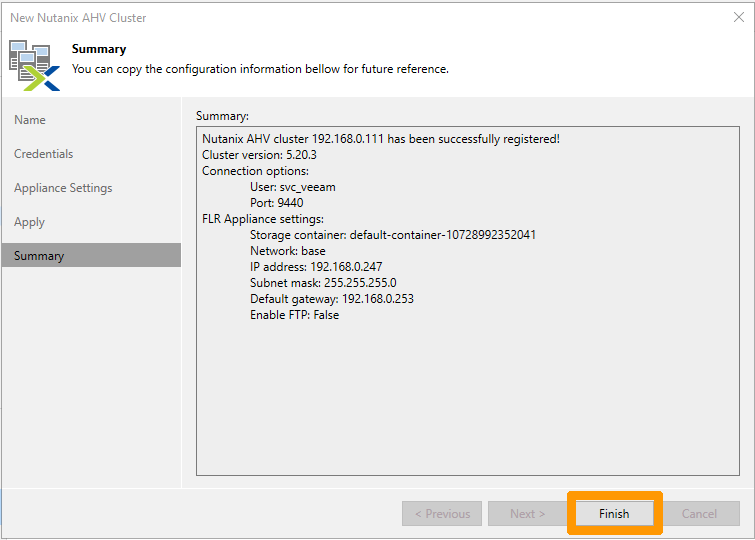
`.
Click `Finish
`.
Click `Yes
`.
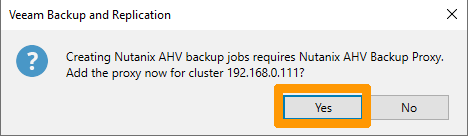
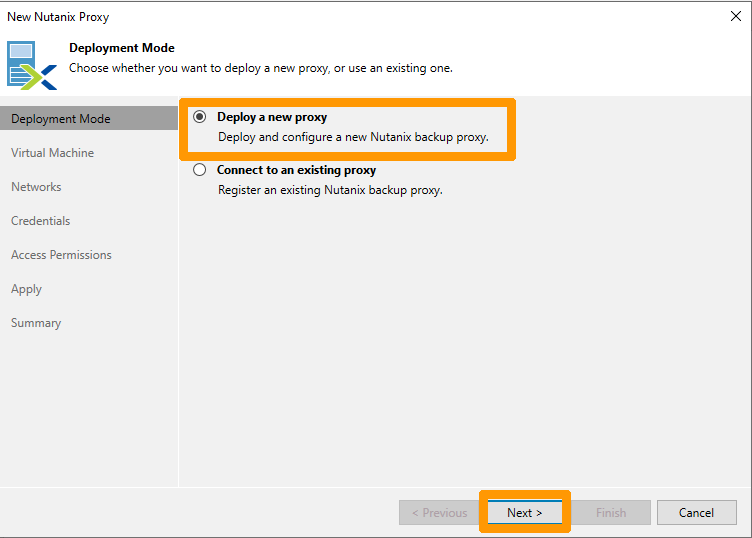
Select `Deploy a new proxy
` and click `Next
`.
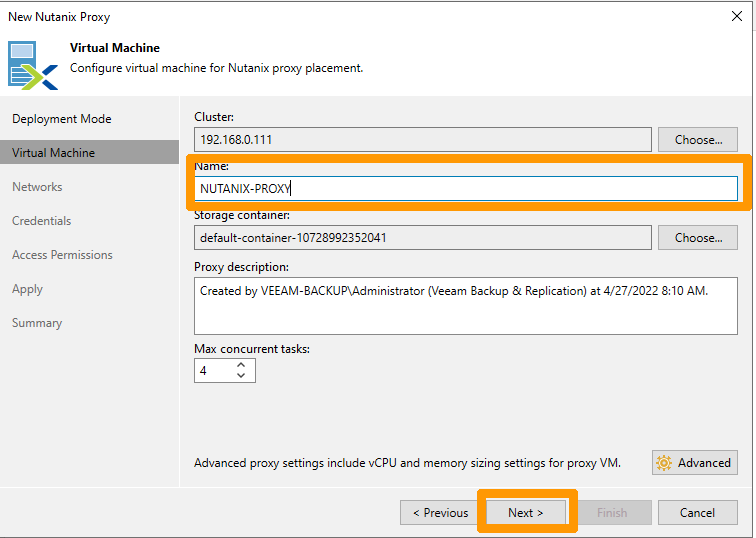
Name the VM in the “Name” field, then click `Next
`.
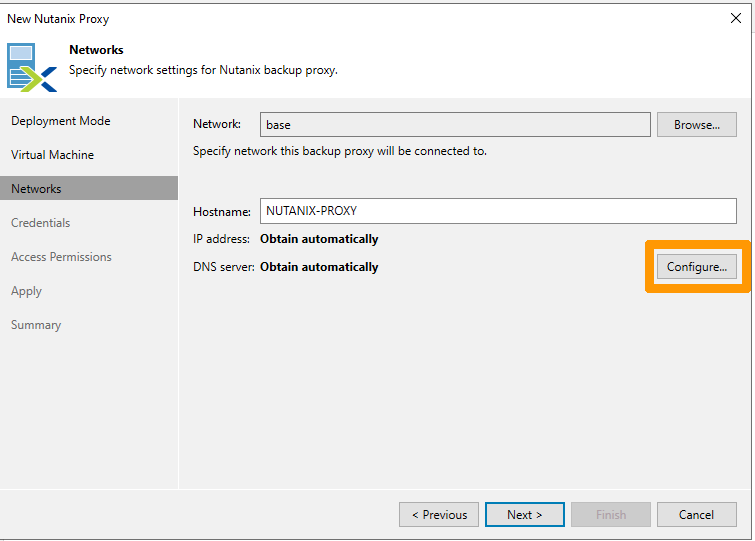
Click `Configure
`.
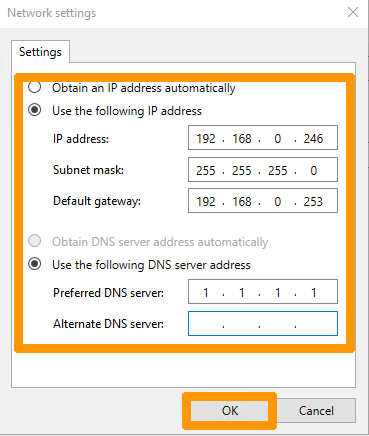
Choose an unused `IP address
` on the LAN for the virtual machine and click `OK
`.
Click `Next
`.
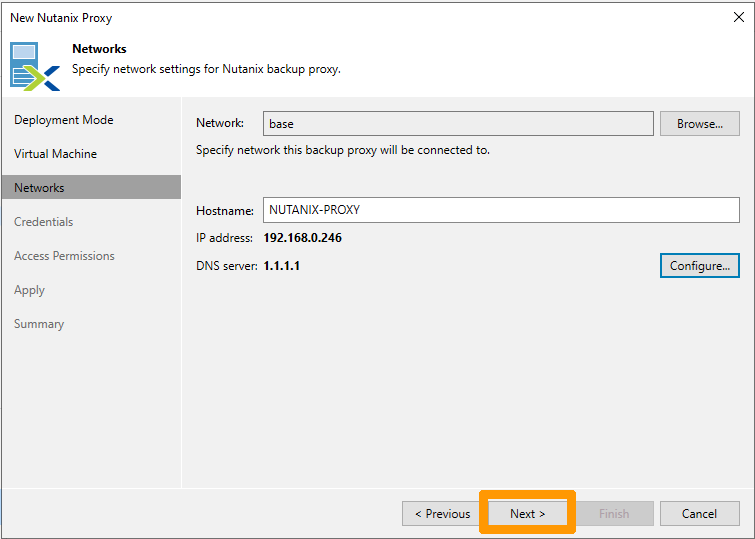
Click on `Add
` to add and create the **NUTANIX-PROXY**
VM login account. This VM is added when a Nutanix cluster is added to the **Veeam Backup and replication**
console.
:::warning
Take note of the user account and password created. These credentials allow you to connect to the new virtual machine via the web browser, without going through the **Veeam backup** software. The URL will be similar to `https://privateipaddress:8100`.
:::
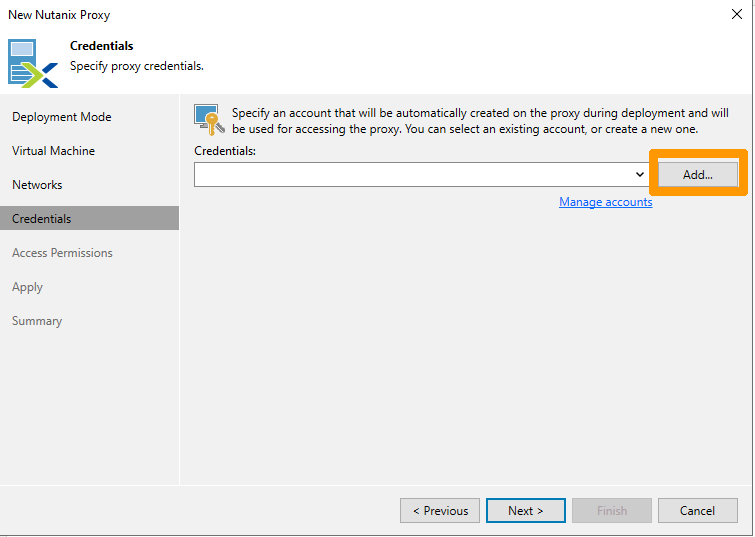
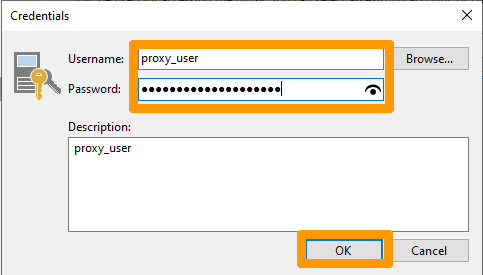
Enter the information for the account you created earlier in Prism Element:
- **Username**: `proxy_user`
- **Password**: `password`
Click `OK
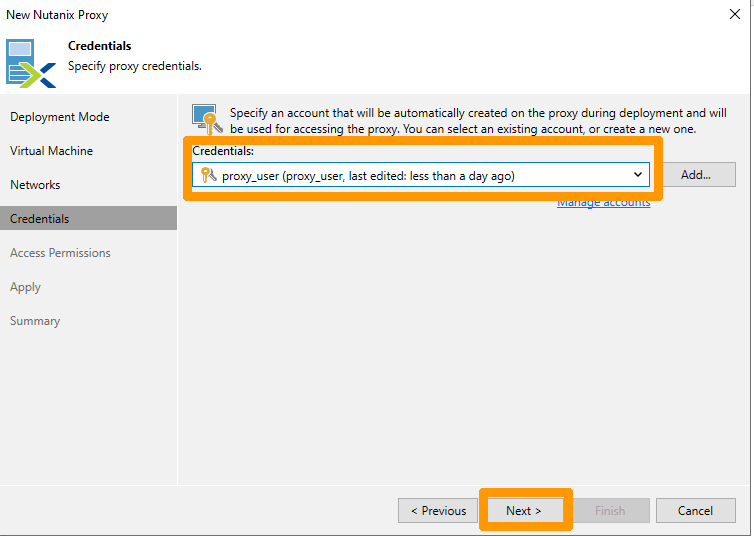
`.
Check the user account in the "Credentials" field and click `Next
`.
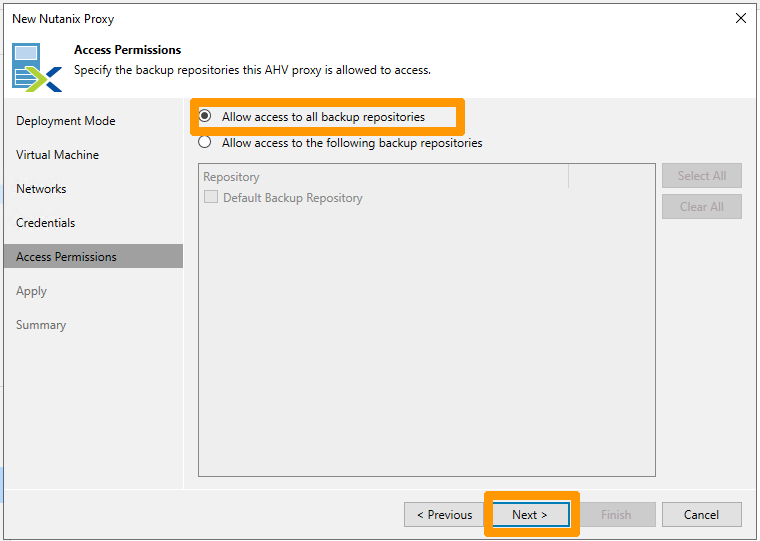
Check the box `Allow access to all backup repositories
` and click `Next
`.
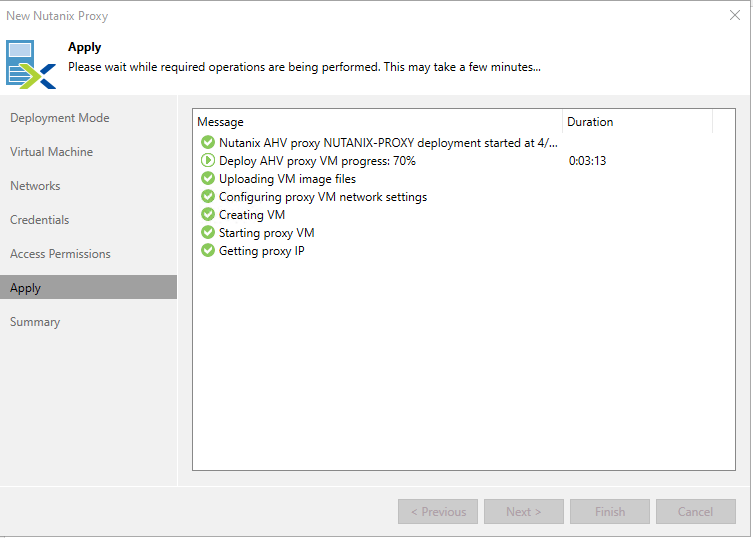
Wait a few minutes.
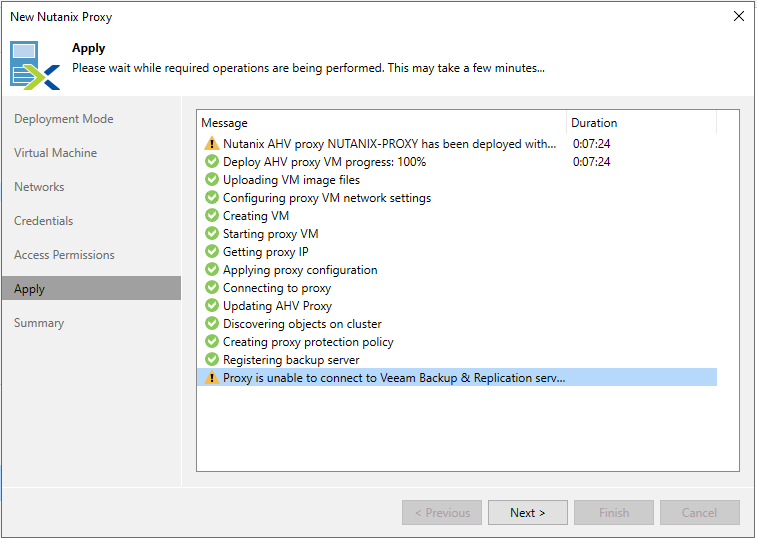
The installation ends with a warning message. Please ignore this, as it is the public DNS server that cannot resolve the Veeam server name.
Click `Next
`.
#### Modifying the interface virtual machine host file
:::info
This operation is required if you do not use an internal DNS server to resolve VM names.
Notably the VM that is used for the Veeam Backup software.
:::
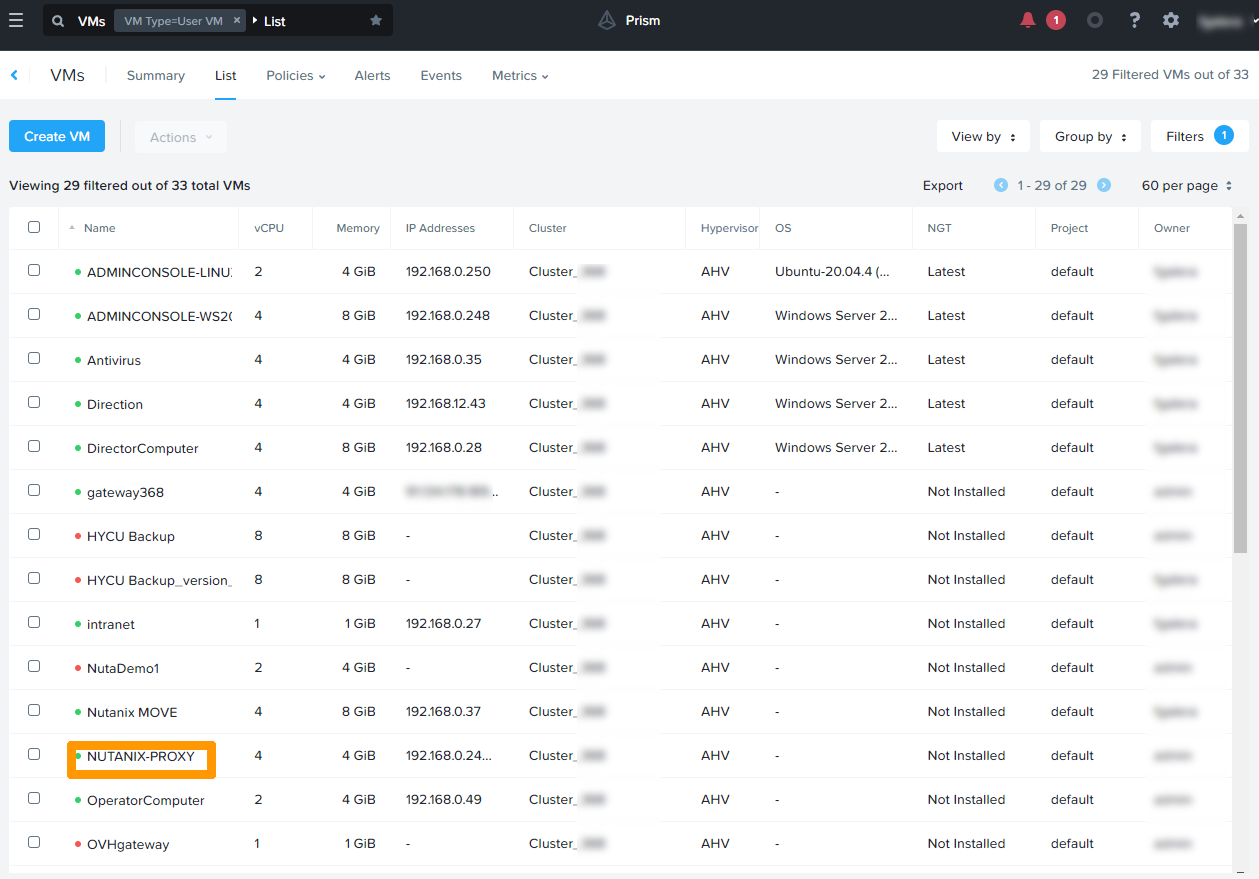
Via **Prism Central**, connect to the NUTANIX-PROXY virtual machine.
Open the main menu at the top left and choose `VMs
`.
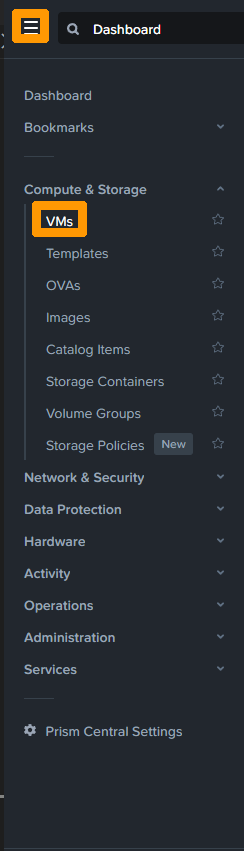
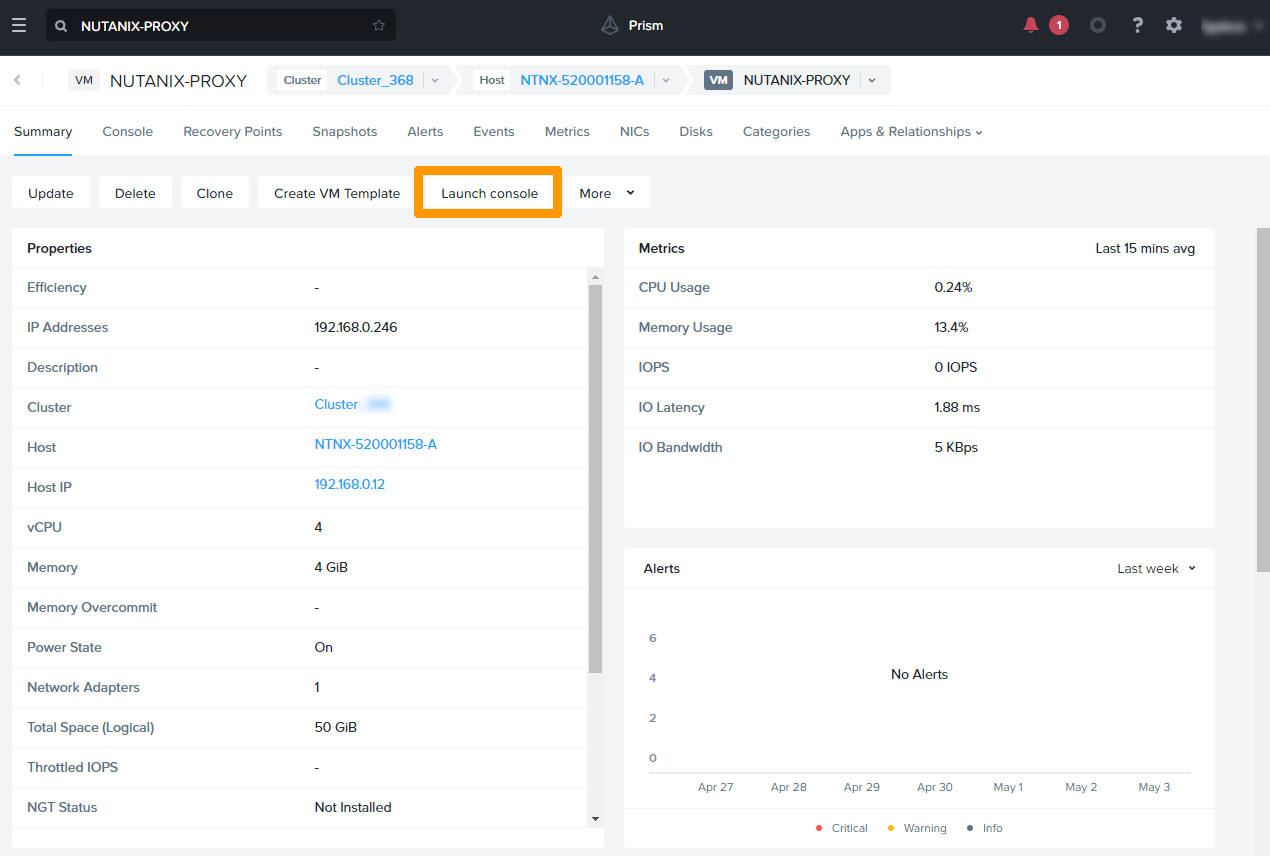
Click on the NUTANIX-PROXY virtual machine.
Click `Launch console
`.
Log in with the user account you created earlier and the password associated with that account.
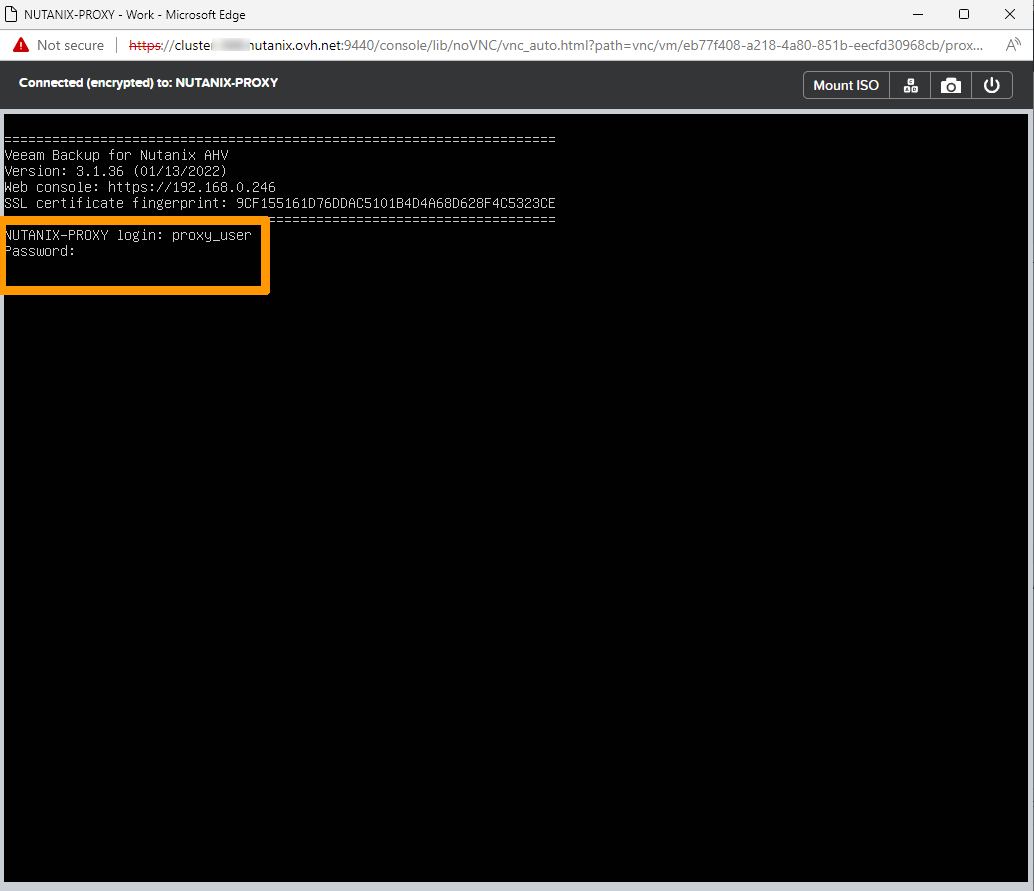
From the console, edit the `/etc/hosts` file:
```bash
proxy_user@NUTANIX-PROXY~$sudo nano /etc/hosts
[sudo] password for proxy_user:
```
Add this information, which corresponds to the IP address and name of the virtual machine where Veeam Backup is installed:
```bash
192.168.0.245 VEEAM-BACKUP
```
Save the file and run this command:
```bash
proxy_user@NUTANIX-PROXY~$sudo /etc/init.d/networking restart
[sudo] password for proxy_user:
```
### Add S3 Object Storage repository in Veeam Backup
You can store your backups in [OVHcloud Object Storage via S3](https://www.ovhcloud.com/en-gb/public-cloud/object-storage/) directly from Veeam Backup & Replication.
:::info
To configure the repository in Veeam, please follow this step-by-step guide:
[Using S3 Object Storage with Veeam Backup](/en/guides/storage-and-backup/object-storage/s3-veeam.md)
:::
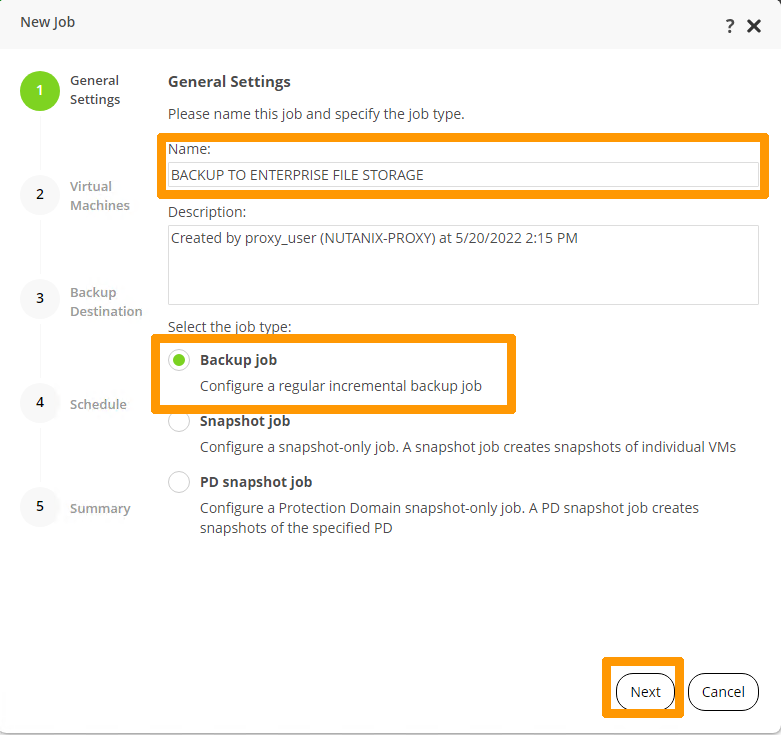
### Setting up an automated backup
In **Veeam backup**
, open the `Home
` menu (bottom left), then the `Backup Job
` menu and choose `Nutanix AHV
`.
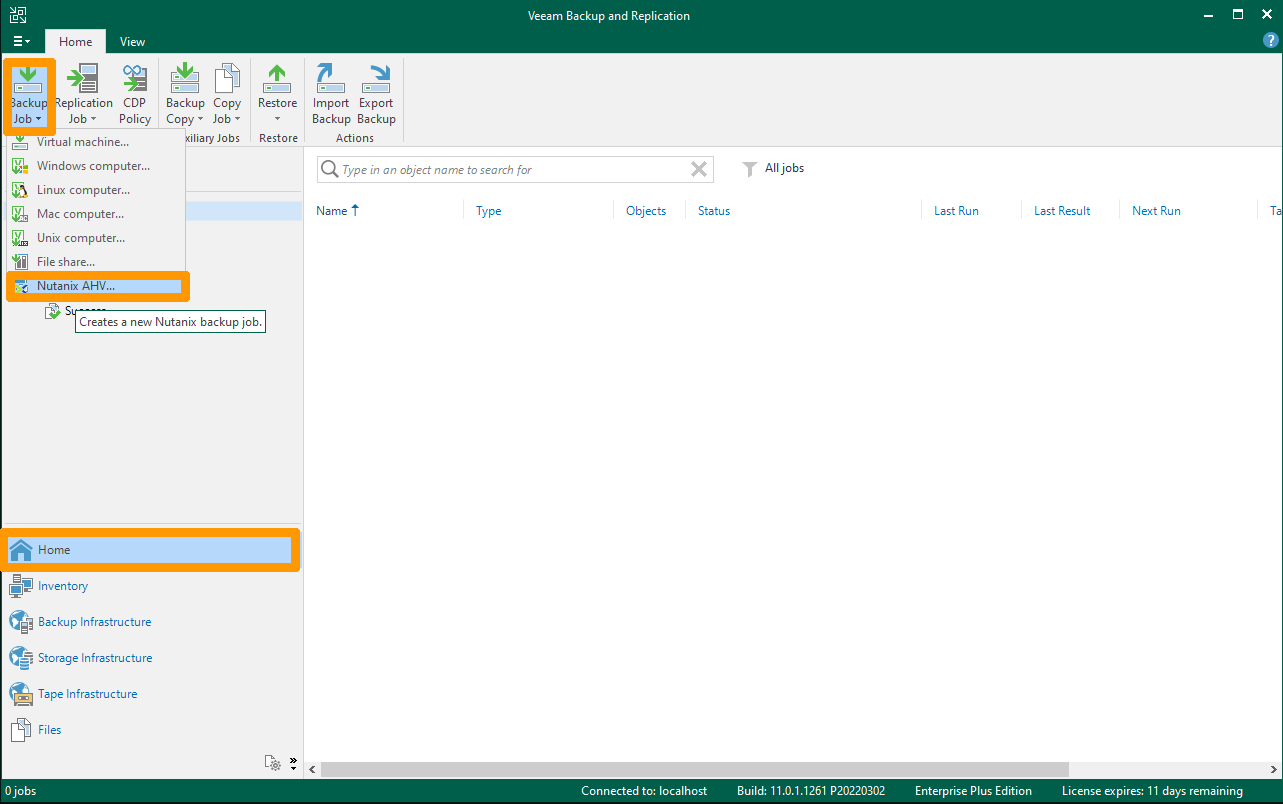
The **AHV Proxy** web interface opens.
Name the task you want to create, tick the `Backup job
` option, and click `Next
`.
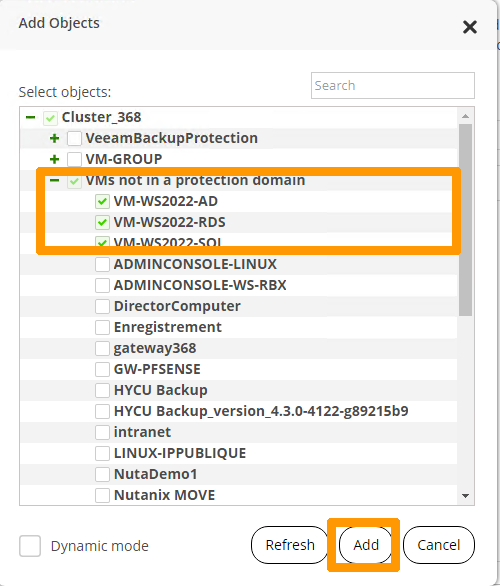
Click `Add
`.
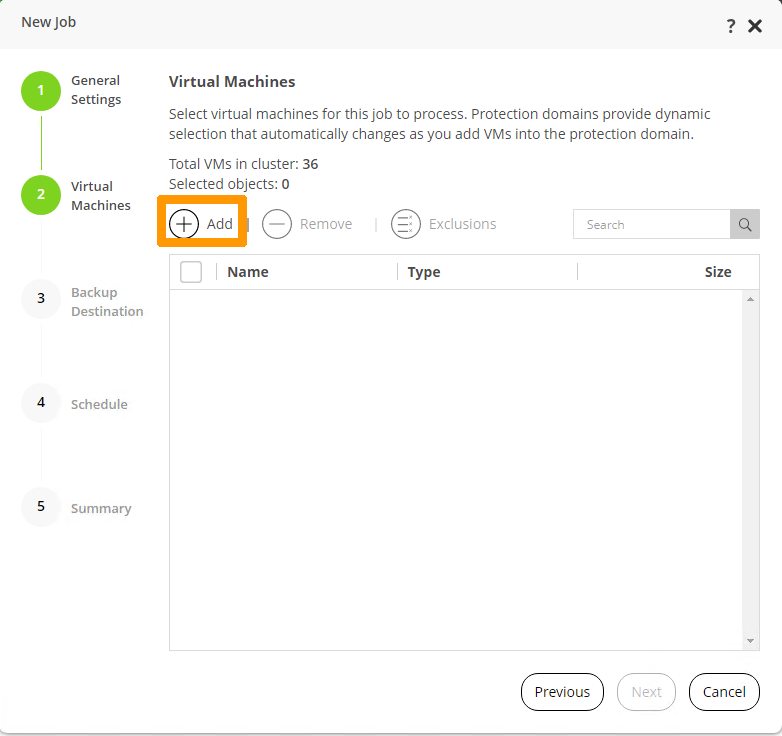
Select the virtual machines you want to back up and click `Add
`.
Click `Next
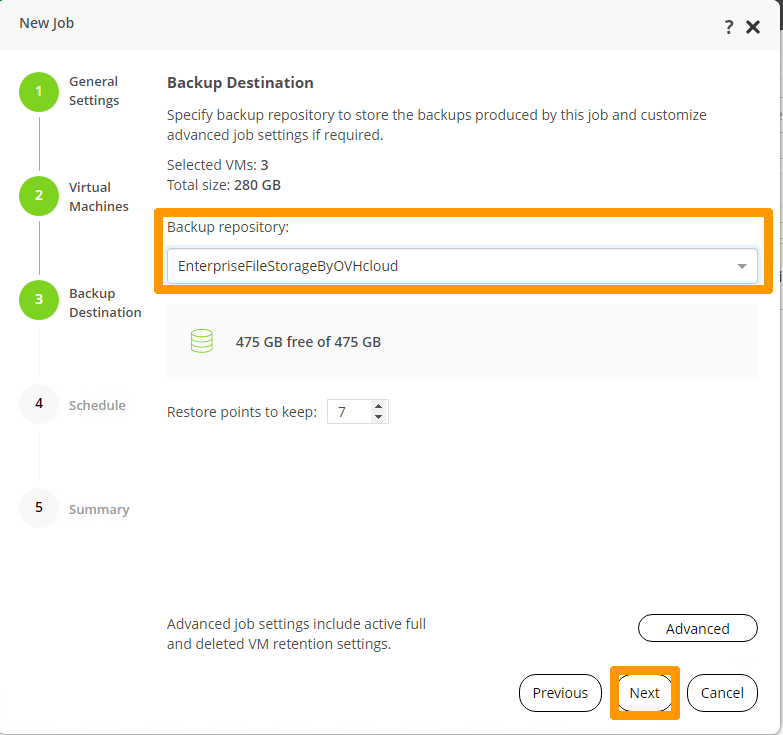
`.

Select the repository in `Backup repository
` and click `Next
`.
Select the `Run the job automatically
` check box, set the frequency, and click `Next
`.
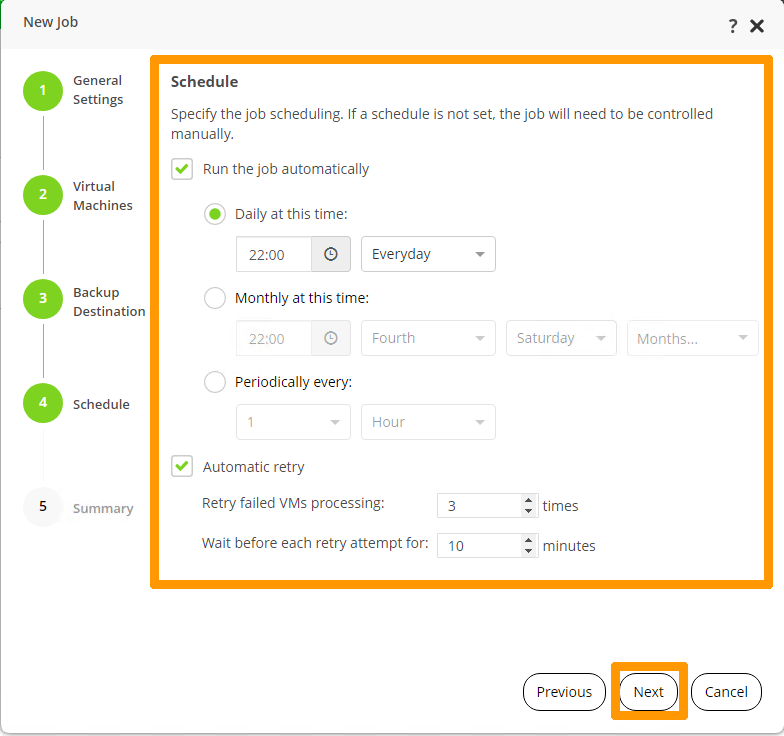
Click `Finish
` to save the backup job.

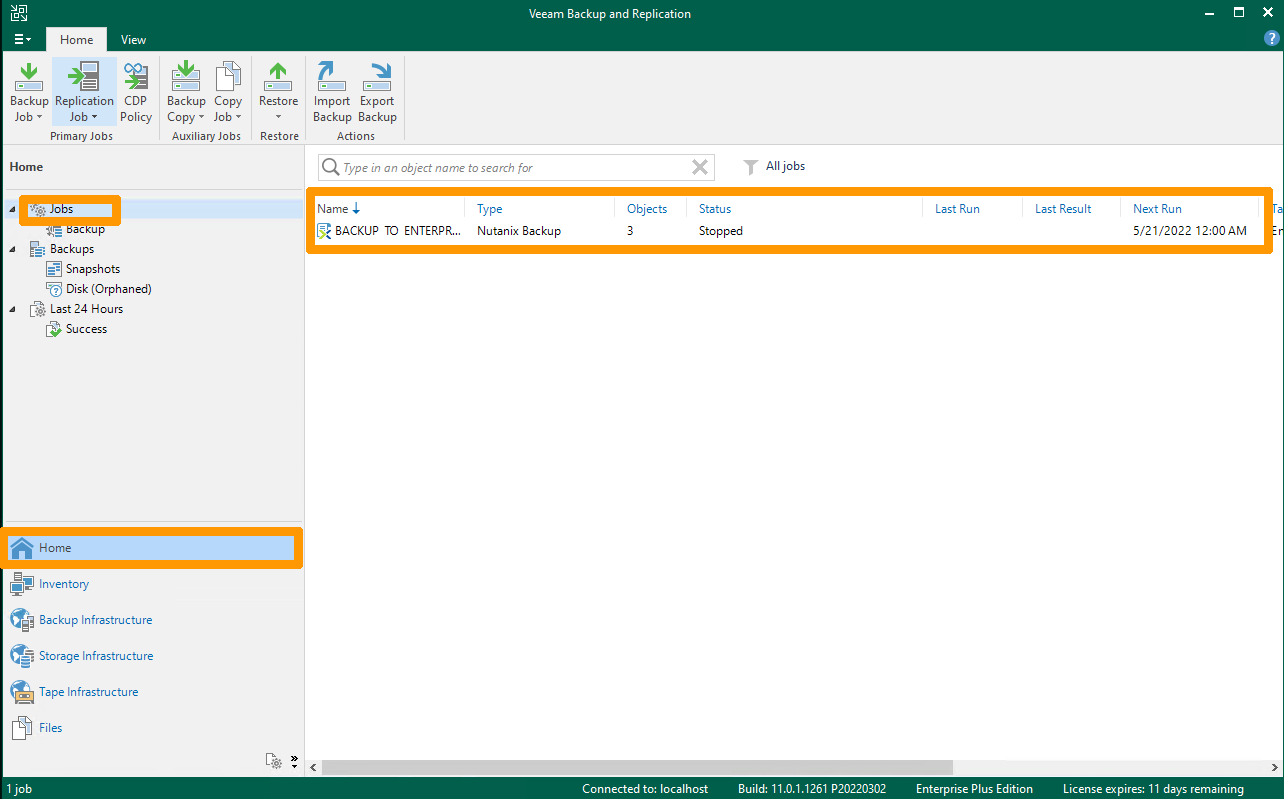
The backup is visible through the **AHV Proxy** web interface.
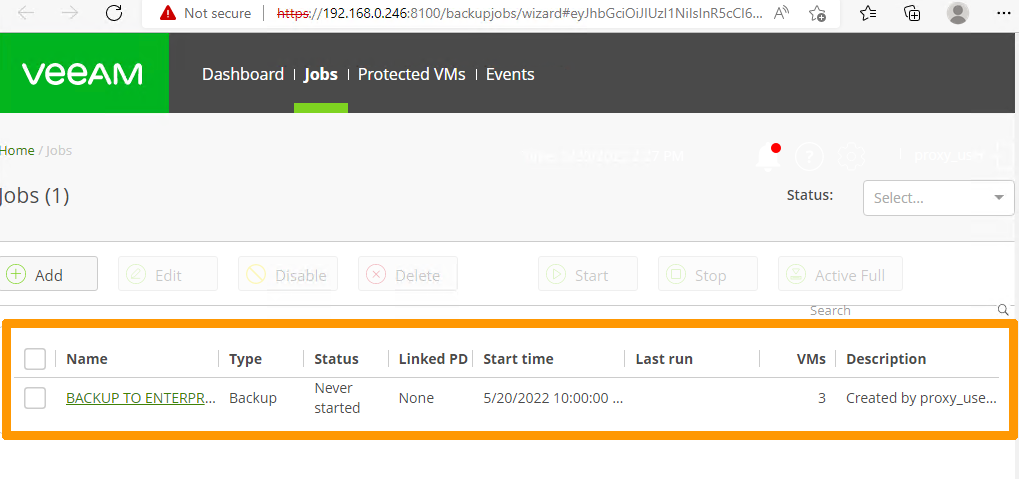
Return to the **Veeam Backup**
console via the `Home
` menu (at the bottom left). Click `Jobs
` to view the backup job you created.
### Restoring a Virtual Machine
To test that backups are working properly, we will run a recovery task.
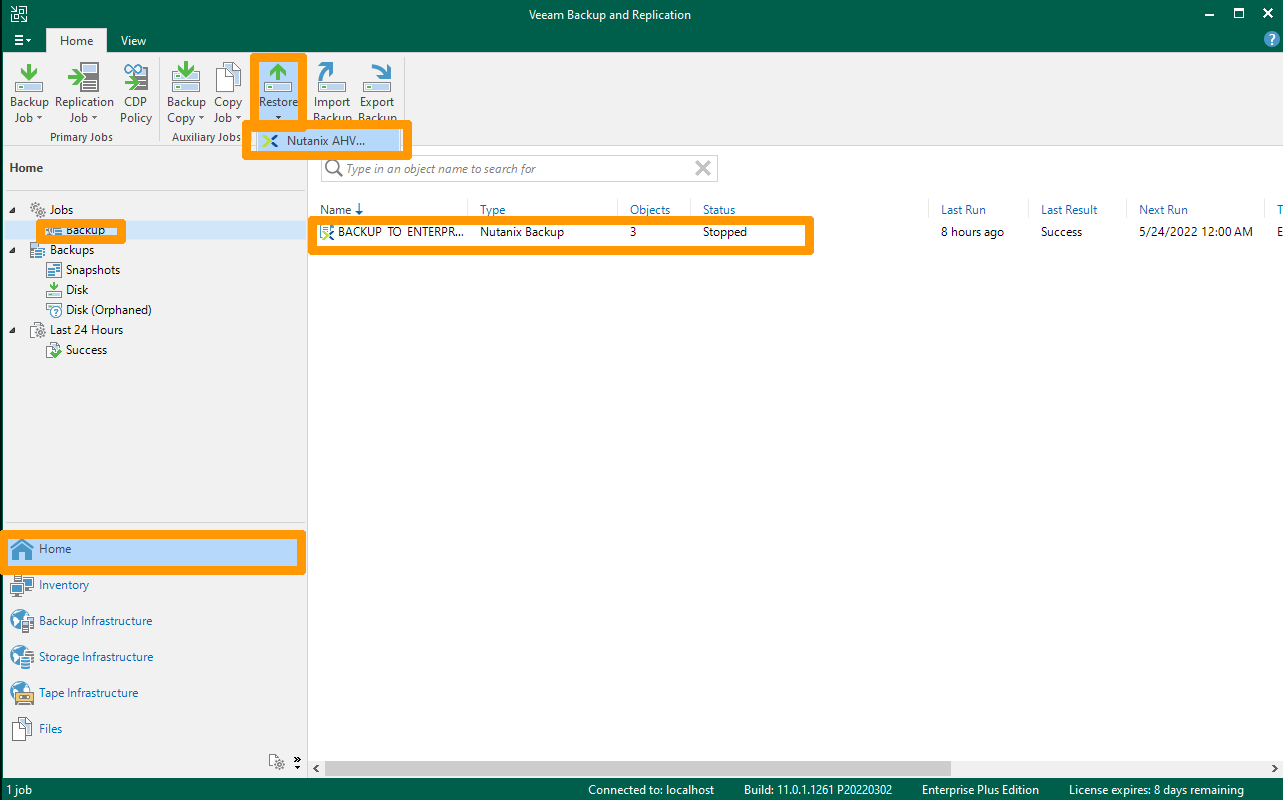
Click on `Home
` in the bottom left. In the `Restore
` option, select `Nutanix AHV
`.
Click `Restore from AHV backup
`.
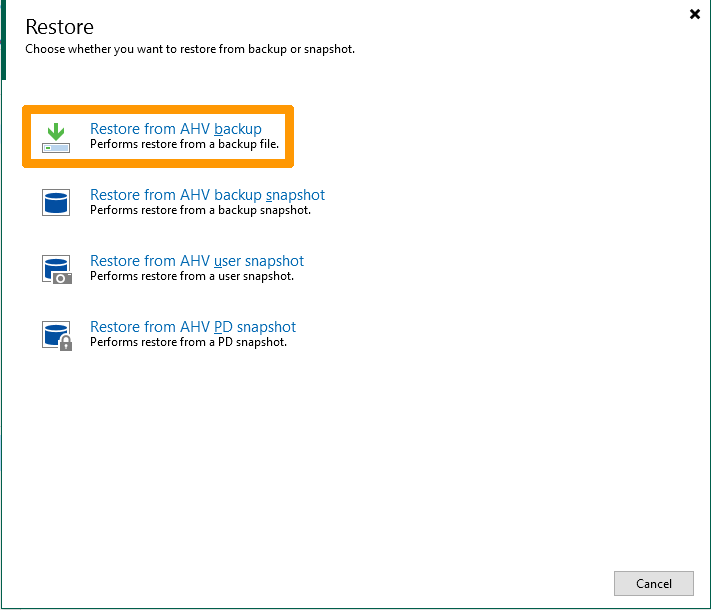
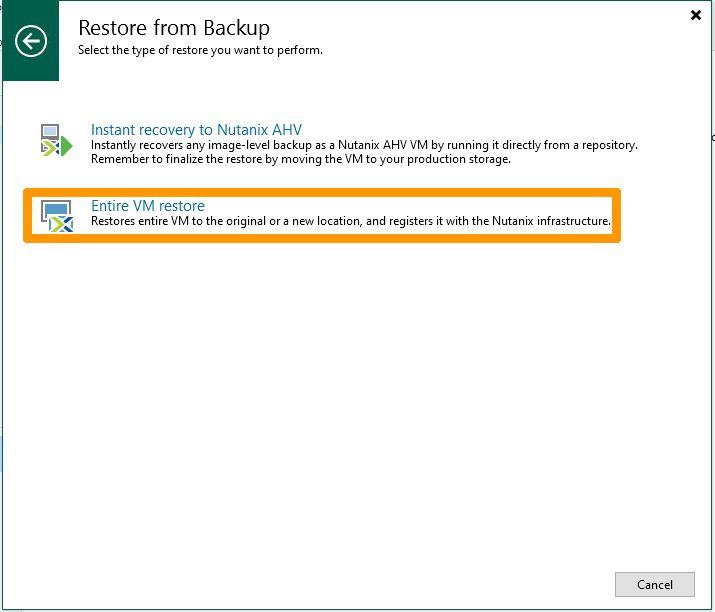
Click `Entire VM restore
`.
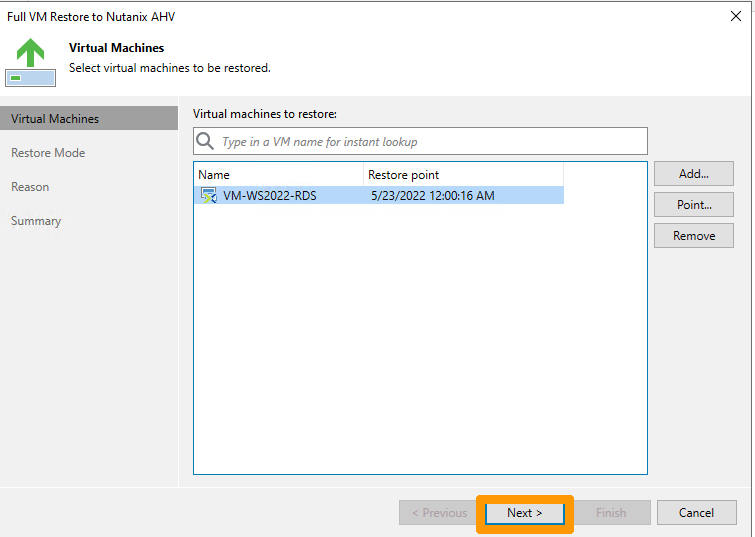
Click `Add
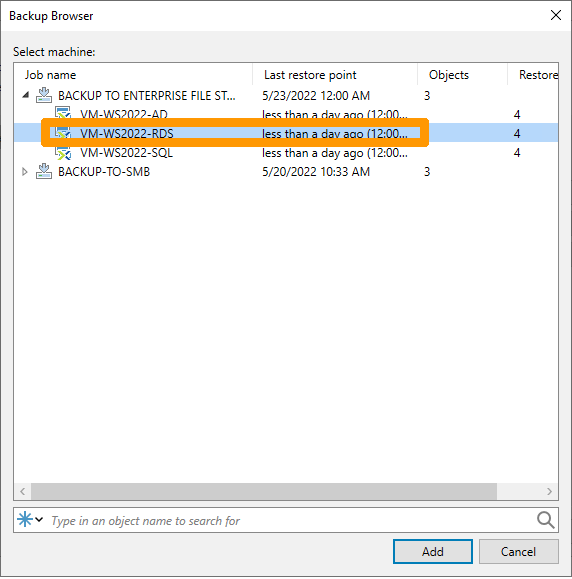
`.
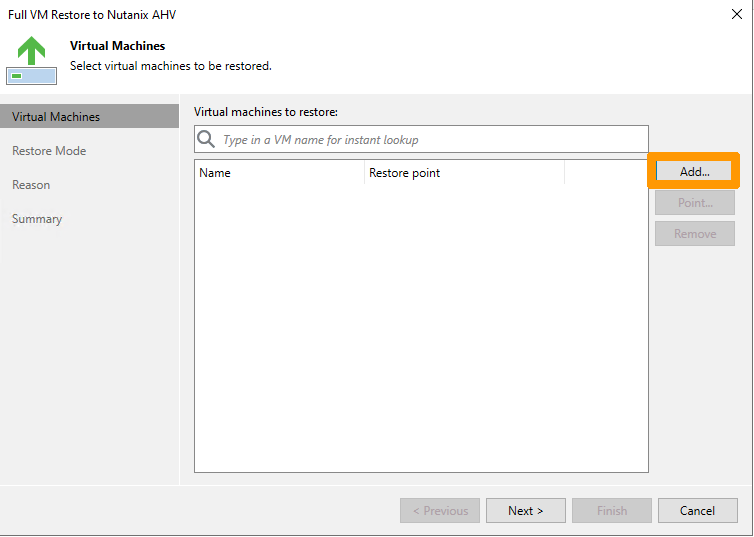
Select a virtual machine and click `Add
`.
Click `Next
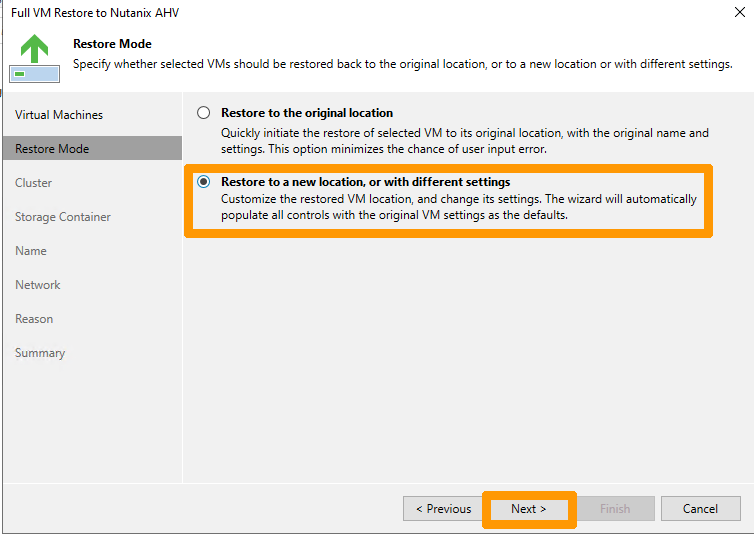
`.
Choose `Restore to a new location, or with different settings
` and click `Next
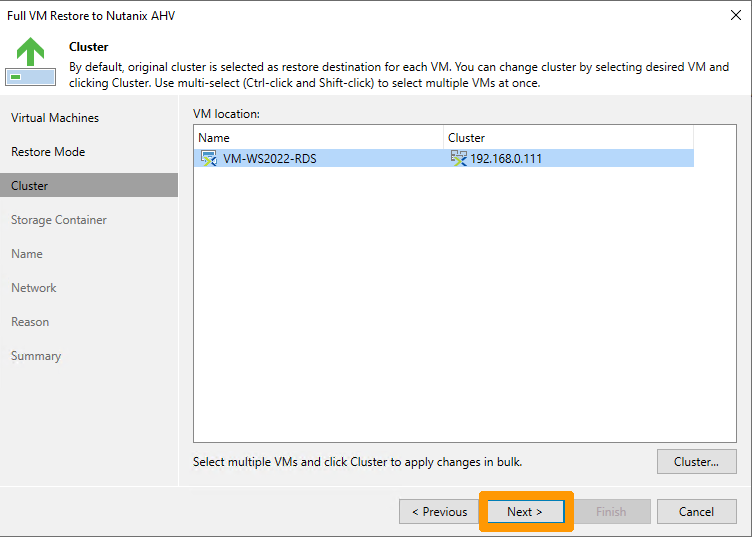
`.
Click `Next
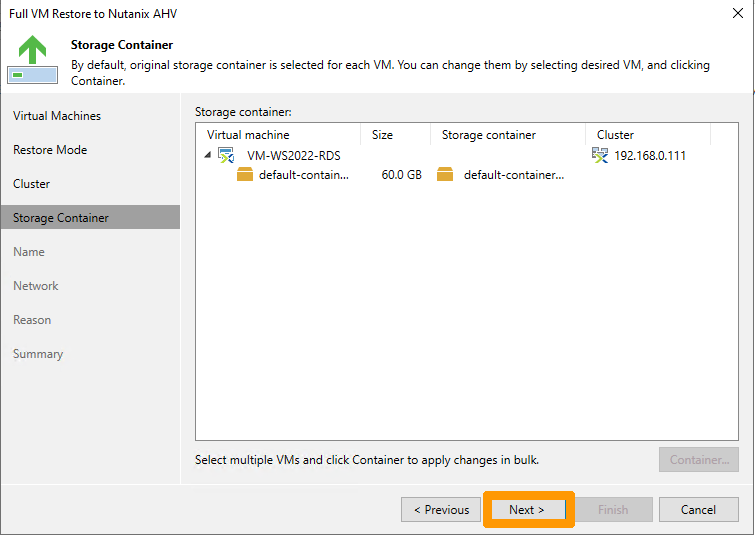
`.
Click `Next
`.
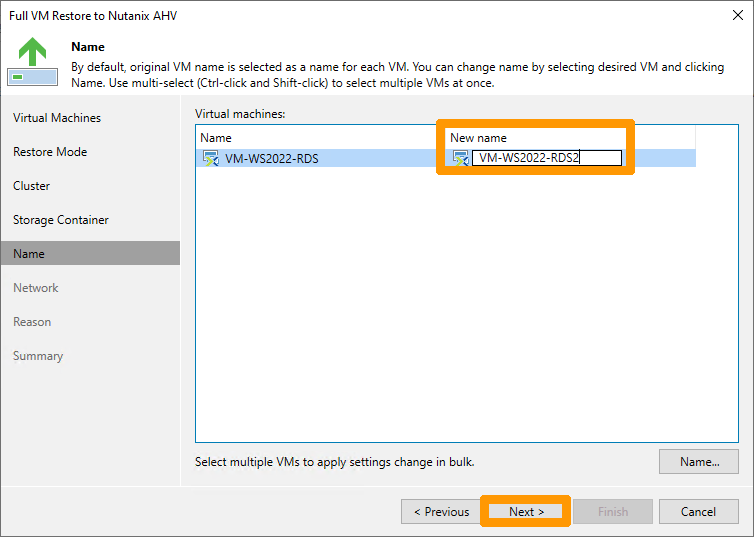
Rename the VM in `New name
` and click `Next
`.
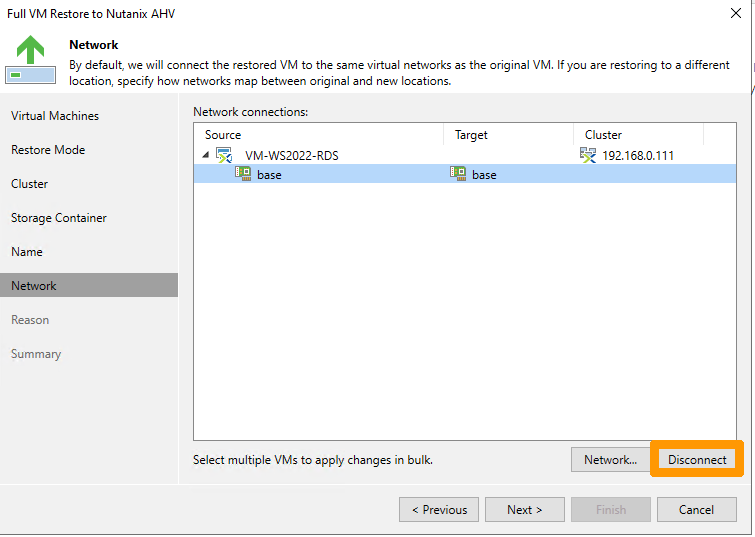
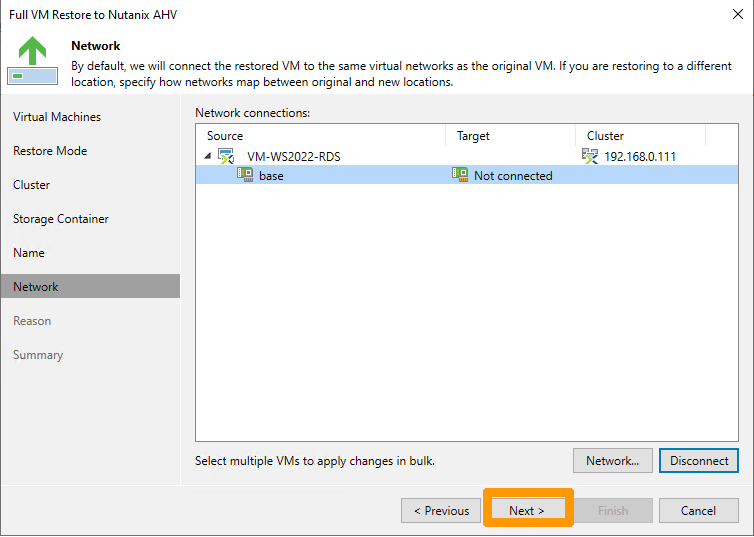
Click `Disconnect
` to isolate the restored VM from the network.
Click `Next
`.
Click `Next
`.
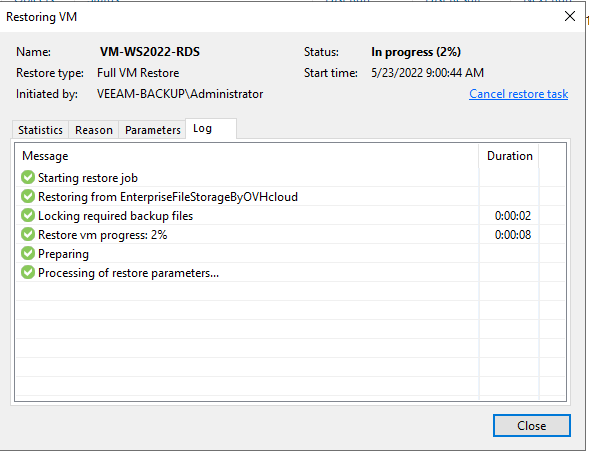
Click `Finish
`.
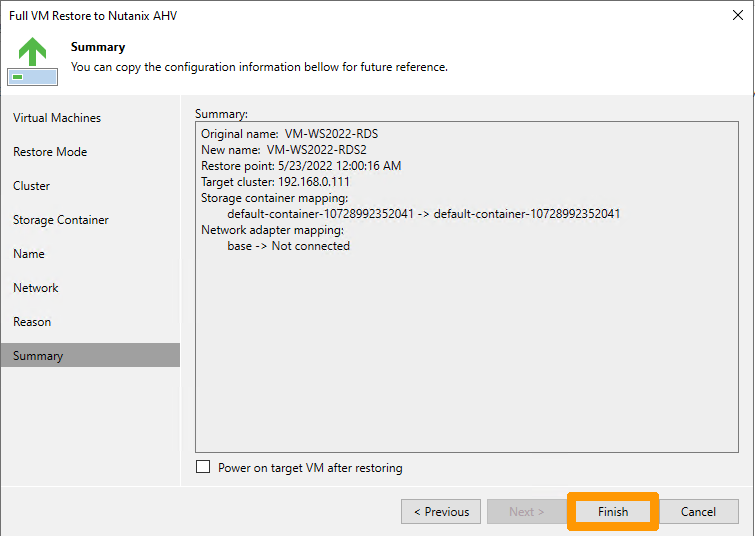
A preview of the status of the restoration is launched, it takes some time depending on the size of the virtual machine.
## Go further [](#)
[VEEAM documentation on installing VEEAM Backup for Nutanix AHV](https://helpcenter.veeam.com/docs/van/userguide/installing.html?ver=30)
OVHcloud storage solutions
If you need training or technical assistance to implement our solutions, contact your sales representative or click on [this link](https://www.ovhcloud.com/en-gb/professional-services/) to get a quote and ask our Professional Services experts for assisting you on your specific use case of your project.
Join our [community of users](https://community.ovhcloud.com/community/en).
_1: S3 is a trademark of Amazon Technologies, Inc. OVHcloud’s service is not sponsored by, endorsed by, or otherwise affiliated with Amazon Technologies, Inc._