---
title: "How to use snapshots on a VPS"
description: "Find out how to enable and use the Snapshot option in the OVHcloud Control Panel"
url: https://docs.ovhcloud.com/en/guides/bare-metal-cloud/virtual-private-servers/using-snapshots-on-a-vps
lang: en
lastUpdated: 2025-10-17
---
# How to use snapshots on a VPS
## Objective
Creating a snapshot is a fast and simple way to secure a functioning system before making changes that might have undesired or unforeseen consequences, for example testing a new configuration or software. It does not, however, constitute a complete system backup strategy.
**This guide explains the usage of snapshots for your OVHcloud VPS.**
:::info
Before applying backup options, we recommend consulting the [product pages and FAQ](https://www.ovhcloud.com/en-gb/vps/options/) for pricing comparisons and further details.
:::
## Requirements
- An active [Virtual Private Server](https://www.ovhcloud.com/en-gb/vps/) in your OVHcloud account
:::warning
This feature is currently unavailable for Virtual Private Servers in [Local Zones](https://www.ovhcloud.com/en-gb/lp/vps-localzone/).
:::
***
### OVHcloud Control Panel Access
- **Direct link:** VPS management
- **Navigation path:** Bare Metal Cloud > Virtual private servers > Select your VPS
***
## Instructions
### Step 1: Subscribing to the snapshot option
From the `Home
` tab, scroll down to the box labelled **Backup**
.\
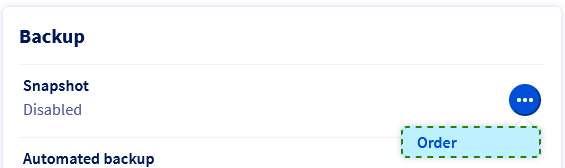
If "Snapshot" is already set to "Enabled", go directly to step 2. If "Snapshot" is not yet enabled, click on `...
` next to the option "Snapshot" and in the context menu click on `Order
`.
In the next step, note the pricing information, then click `Order
`. You will be guided through the order process and receive a confirmation email.
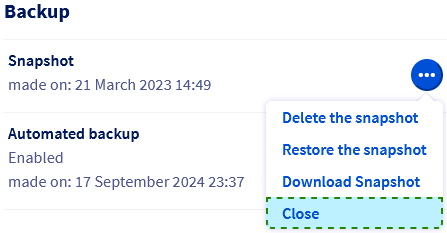
To cancel the service option, click on the button `...
` next to the option "Snapshot" and choose `Close
` from the context menu.
### Step 2: Taking a snapshot
Once the option is enabled, click on `...
` next to the option "Snapshot" and in the context menu click `Take a snapshot
`. You can write a description that will be attached to your snapshot. The time it takes to create the snapshot depends on the storage space in use. Afterwards, refresh your page to see the timestamp of the creation in the **Backup**
box.
### Step 3: Deleting or restoring a snapshot
Since you can only have one snapshot activated at a time, the existing snapshot has to be deleted before creating a new one. Simply choose `Delete the snapshot
` from the context menu.
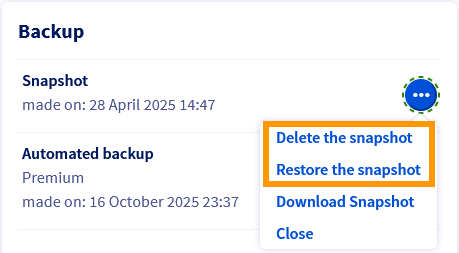
If you are sure that you would like to reset your VPS to the status of the snapshot, click `Restore the snapshot
` and confirm the restoration task in the popup window.
:::danger
Please note that when you restore a VPS from a snapshot, the snapshot will be deleted. If you wish to keep the same snapshot, you should take a new one before making changes to the restored system.
If the snapshot function is too limited for your project, consider switching to the option [Automated Backups](/en/guides/bare-metal-cloud/virtual-private-servers/using-automated-backups-on-a-vps.md).
:::
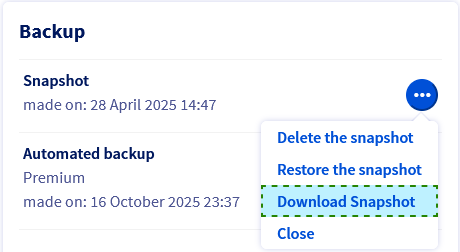
### Downloading a snapshot
The current snapshot can be retrieved via download link. Click on `...
` next to the option "Snapshot" and choose `Download the snapshot
` from the context menu.
:::info
If your VPS is of an older product range, you might receive an error message because the option is not available for a legacy VPS. These older services have the following naming scheme: _vpsXXXX.ovh.net_
(in which _X_
stands for a number). You can verify this server reference on the `Home
` tab in your OVHcloud Control Panel
.
:::
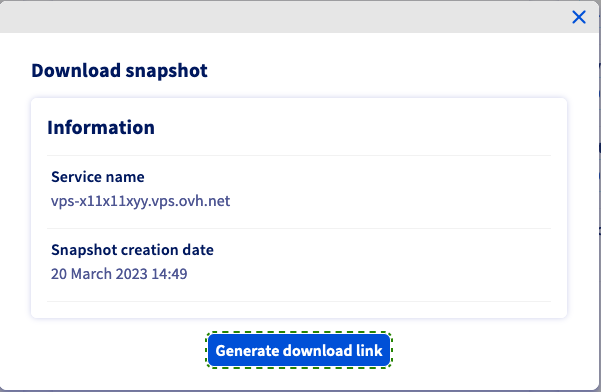
In the popup window, click on `Generate download link
`.
After a few seconds, a success message appears. Below it, you can copy the complete download command with one click.
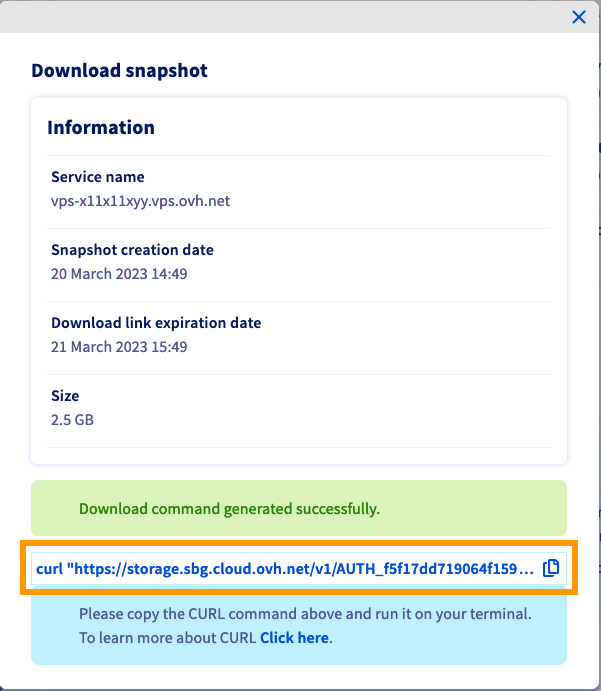
The size of the snapshot and the expiration date of the link will also be displayed.
Note that the download link will expire after **24 hours**.
The download command uses `curl`, in the following format:
```bash
curl "https://storage.sbg.cloud.ovh.net/v1/AUTH_f5fgh4674dd706f15f6ffgf4z667d3f4g5f05/glance/5ceg3f93-8b49-436b-aefe-4185f9fc3f78?
temp_url_sig=f508cacda60256d5f211ddddf3f81130e935f0e4&temp_url_expires=1678247579" --output vps-x11x11xyy.vps.ovh.net --fail
```
It should work from any command line terminal.
When using Windows _PowerShell_ however, you will need to adjust the command as follows:
```powershell
curl -Uri "https://storage.sbg.cloud.ovh.net/v1/AUTH_f5fgh4674dd706f15f6ffgf4z667d3f4g5f05/glance/5ceg3f93-8b49-436b-aefe-4185f9fc3f78?
temp_url_sig=f508cacda60256d5f211ddddf3f81130e935f0e4&temp_url_expires=1678247579" -OutFile vps-x11x11xyy.vps.ovh.net
```

:::info
We recommend not downloading snapshots directly to the VPS, to avoid using up the storage space.
The downloaded file can be imported into your Public Cloud Project as an image (QCOW2) via [OpenStack](/en/guides/public-cloud/compute/overview.md). (Find an example of use in [this guide](/en/guides/public-cloud/compute/upload-own-image.md).)
:::
### Best practice for using snapshots
#### Configuring the QEMU agent on a VPS
Snapshots are instantaneous images of your running system ("live snapshot"). To ensure the availability of your system when the snapshot is created, the QEMU agent is used to prepare the filesystem for the process.
The required _qemu-guest-agent_ is not installed by default on most distributions. Moreover, licensing restrictions may prevent OVHcloud from including it in the available OS images. Therefore, it is best practice to verify and install the agent if it is not activated on your VPS. Connect to your VPS via SSH and follow the instructions below, according to your operating system.
##### **Debian-based distributions (Debian, Ubuntu)**
Use the following command to check whether the system is properly set up for snapshots:
```bash
file /dev/virtio-ports/org.qemu.guest_agent.0
/dev/virtio-ports/org.qemu.guest_agent.0: symbolic link to ../vport2p1
```
If the output is different ("No such file or directory"), install the latest package:
```bash
sudo apt-get update
sudo apt-get install qemu-guest-agent
```
Reboot the VPS:
```bash
sudo reboot
```
Check the service to ensure it is running:
```bash
sudo service qemu-guest-agent status
```
##### **Redhat-based distributions (Centos, Fedora)**
Use the following command to check whether the system is properly set up for snapshots:
```bash
file /dev/virtio-ports/org.qemu.guest_agent.0
/dev/virtio-ports/org.qemu.guest_agent.0: symbolic link to ../vport2p1
```
If the output is different ("No such file or directory"), install and enable the agent:
```bash
sudo yum install qemu-guest-agent
sudo chkconfig qemu-guest-agent on
```
Reboot the VPS:
```bash
sudo reboot
```
Check the agent and verify that it is running:
```bash
sudo service qemu-guest-agent status
```
##### **Kernel issues on cPanel**
Consult our [cPanel auto backup](/en/guides/bare-metal-cloud/virtual-private-servers/cpanel-snapshot.md) guide to find out how to fix issues with cPanel servers getting stuck during an OVHcloud automated backup.
##### **Windows**
You can install the agent via MSI file, available from the Fedora project website: [https://fedorapeople.org/groups/virt/virtio-win/direct-downloads/latest-qemu-ga/](https://fedorapeople.org/groups/virt/virtio-win/direct-downloads/latest-qemu-ga/).
Verify that the service is running by using this _PowerShell_ command:
```powershell
PS C:\Users\Administrator> Get-Service QEMU-GA
Status Name DisplayName
------ ---- -----------
Running QEMU-GA QEMU Guest Agent
```
## Go further
[How to use automated backups on a VPS](/en/guides/bare-metal-cloud/virtual-private-servers/using-automated-backups-on-a-vps.md)
Join our [community of users](https://community.ovhcloud.com/).