---
title: "Deploy a TeamSpeak 3 server on the Game Panel"
description: "Deploy and configure a TeamSpeak 3 voice server in minutes on the Game Panel — no command line or system knowledge required."
url: https://docs.ovhcloud.com/en/guides/bare-metal-cloud/virtual-private-servers/game-panel-quick-start-teamspeak-3
lang: en
lastUpdated: 2026-06-30
---
# Deploy a TeamSpeak 3 server on the Game Panel
## Objective
The Game Panel lets you deploy and configure a TeamSpeak 3 voice server in a few minutes — no command line or system knowledge required.
**This guide explains how to deploy and connect to a TeamSpeak 3 server on the Game Panel.**
## Requirements
- A [VPS](https://www.ovhcloud.com/en-gb/vps/) or a [dedicated server](https://www.ovhcloud.com/en-gb/bare-metal/) in your OVHcloud account with the Game Panel feature enabled.
- Access to the Game Panel. Refer to [Log in to the Game Panel](/en/guides/bare-metal-cloud/virtual-private-servers/game-panel-log-in/index.md).
- A TeamSpeak 3 client installed on your machine to test the connection.
## Instructions
### Step 1 — Access the Game Panel
From your Game Panel dashboard, click `Add Game Server
`.
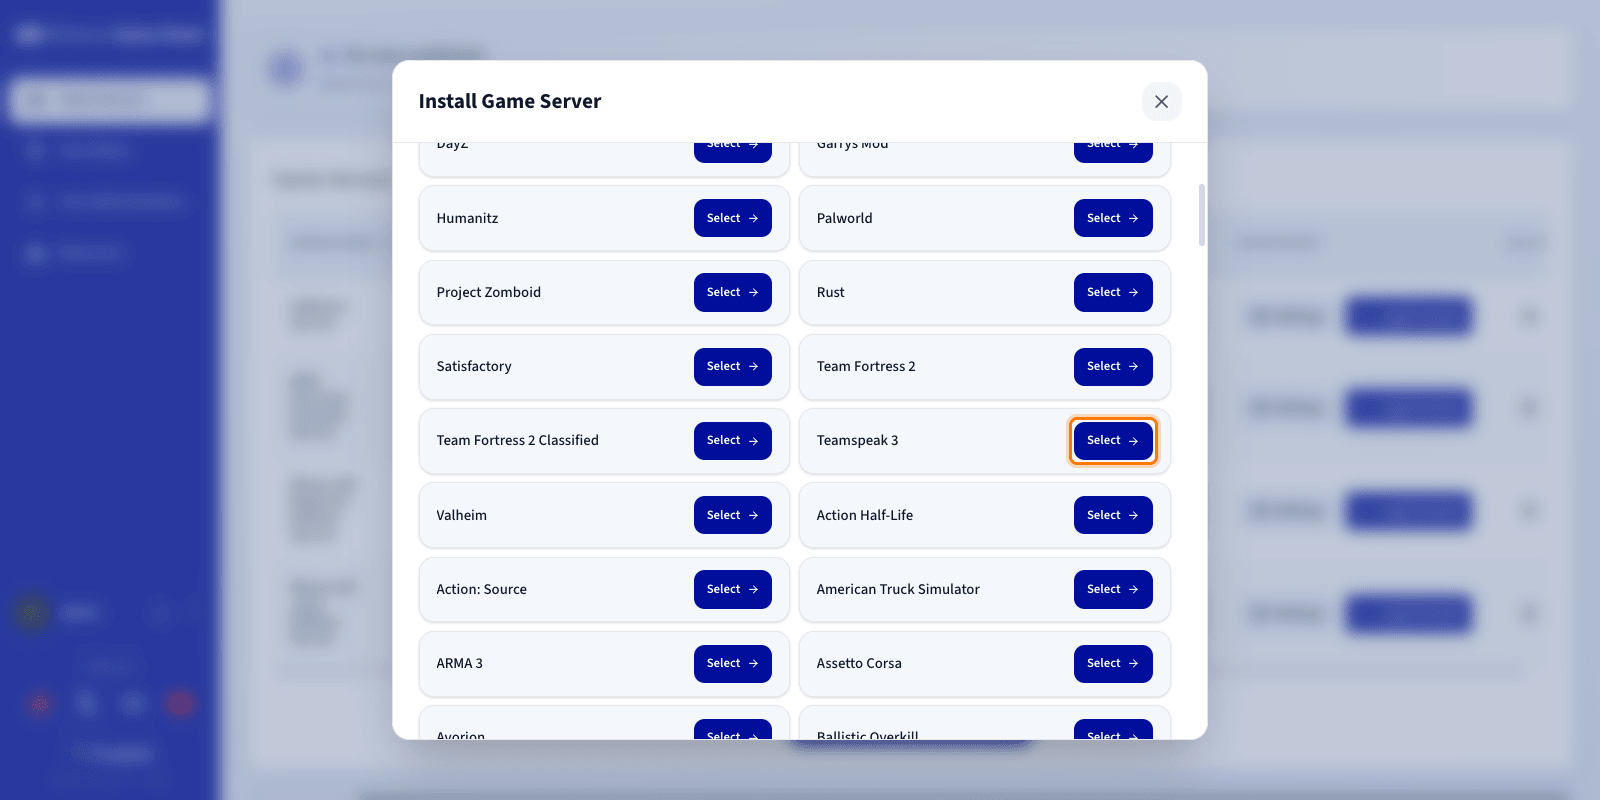
### Step 2 — Create a TeamSpeak 3 server
In the list of available games, search for and select **TeamSpeak 3**. A configuration window opens.
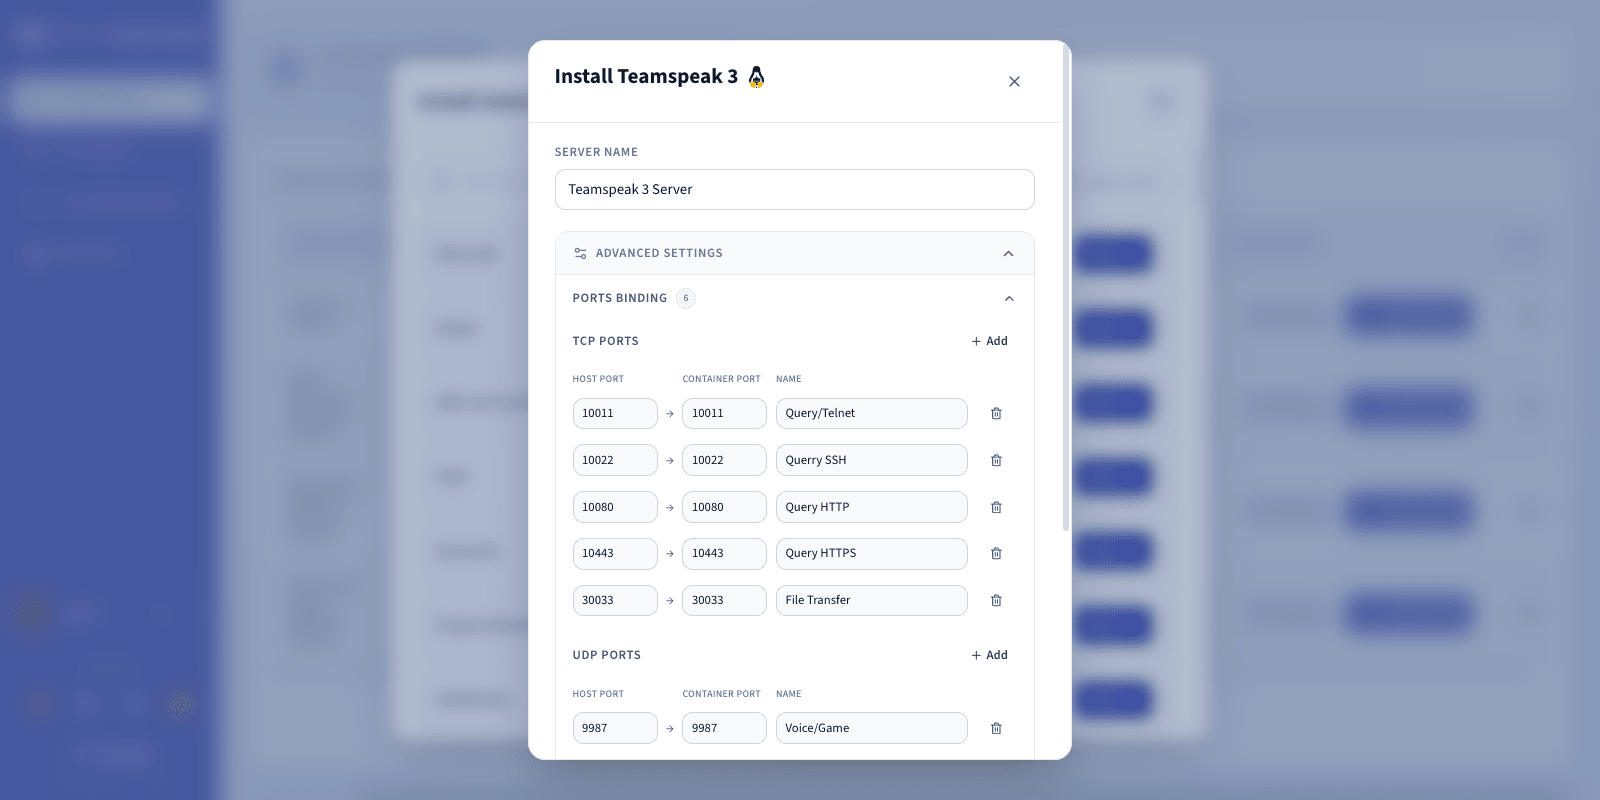
### Step 3 — Configure the TeamSpeak 3 server
A configuration page opens. Default values are ready to use for an immediate launch, but you can customise them to match your needs.
Among the available settings, you can modify:
- Server Name: Give your server an instance name (e.g., `My TS3 server`).
- Network Ports: Pre-configured automatically:
- `9987` (UDP) — voice
- `10011` (TCP) — ServerQuery
- `30033` (TCP) — file transfer
:::info
You can modify these settings, but they are not required to launch the server.
:::
You can expand `Advanced settings
` to adjust options such as ports binding and resource limits. The defaults are suitable for most game servers.
### Step 4 — Launch the installation
Once you have reviewed the configuration, click `Install
` to start the deployment.

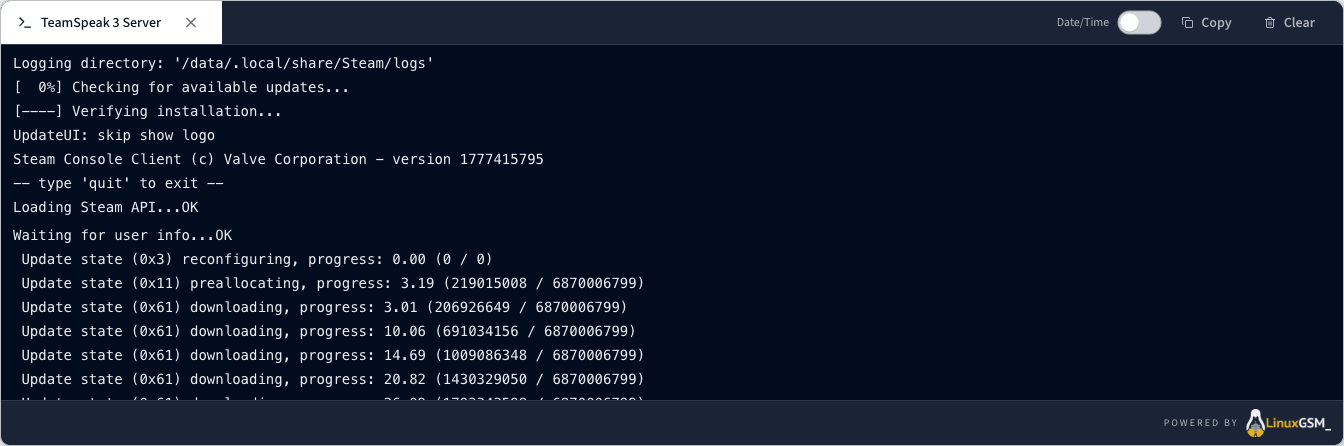
### Step 5 — Monitor the installation
The deployment starts automatically. Let the installation run without closing the page.
Track the process in real time by clicking `Log/Console
` to display the installation messages.
### Step 6 — Verify the server is running
Confirm that your server displays the **Running** status.

### Step 7 — Confirm installation is complete
Once installation finishes, the status changes to **Running**. Your server is live.
### Step 8 — Retrieve connection information
Retrieve the IP address and port from the `Connection
` column of the Game Servers list to connect from the TeamSpeak 3 client.
### Step 9 — Join your server in TeamSpeak 3
In the TeamSpeak 3 client:
1. Click Connections > Connect.
2. Enter the address shown in the **Connection** column of the Game Servers list.
## Go further
- [Getting started with the Game Panel](/en/guides/bare-metal-cloud/virtual-private-servers/game-panel-getting-started/index.md)
- [Manage users on the Game Panel](/en/guides/bare-metal-cloud/virtual-private-servers/game-panel-manage-users/index.md)
Join our [community of users](https://community.ovhcloud.com/).