---
title: "How to activate and use Windows rescue mode"
description: "Find out how to use the OVHcloud rescue system for Windows to troubleshoot your dedicated server"
url: https://docs.ovhcloud.com/en/guides/bare-metal-cloud/dedicated-servers/rescue-customer-windows
lang: en
lastUpdated: 2025-01-28
---
# How to activate and use Windows rescue mode
## Objective
Rescue mode is a tool provided by OVHcloud that allows you to boot into a temporary operating system for the purpose of diagnosing and resolving issues on your server.\
The functionality of rescue mode in general is described on our guide page:
[How to activate and use rescue mode](/en/guides/bare-metal-cloud/dedicated-servers/rescue-mode.md)
The option **Windows customer rescue system** is only available for dedicated servers that have a **Windows Server** operating system installed. The following conditions apply:
- The rescue system for Windows (`rescue-customer-windows`) runs in a virtual machine (VM) launched from the customer rescue system (`rescue-customer`, based on Debian GNU/Linux).
- The server disks are attached to the VM with _passthrough_, so it is possible to access them.
- Other server components will not be accessible (CPU, RAM, network card, RAID card).
- The network is mounted with _passthrough_ but without direct access to the network card. The VM carries the IP address and the MAC address of the _bare metal_ server.
:::warning
Backing up your data should be the first step in rescue mode if you do not already have recent backups available.
If you have any services still online, rescue mode will interrupt them as the machine is being rebooted into the auxiliary rescue environment.
:::
**This guide explains how to boot a server into the Windows customer rescue system.**
## Requirements
- Microsoft Windows installed on your [dedicated server](https://www.ovhcloud.com/en-gb/bare-metal/)
- At least 16 GB of RAM installed on the server
***
### OVHcloud Control Panel Access
- **Direct link:** Dedicated Servers
- **Navigation path:** Bare Metal Cloud > Dedicated servers > Select your server
***
## Instructions
### Activating rescue mode for Windows
Click on your server's name to open the `General information
` tab.
[](#)
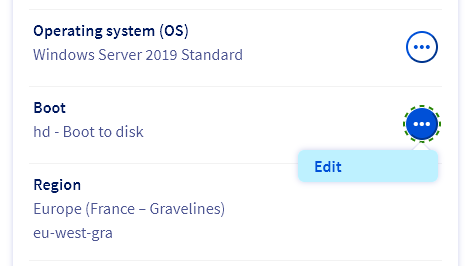
In the **General information**
box, click the button `...
` next to `Boot`
. Click on `Edit
` in the context menu.
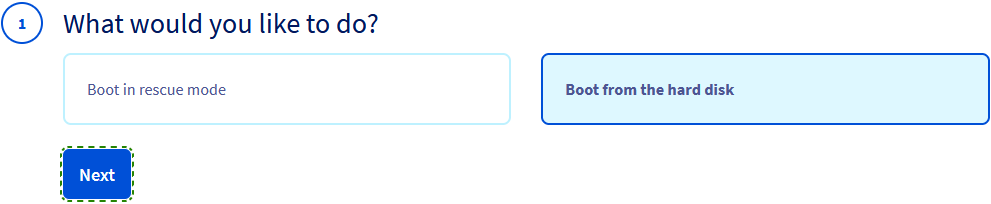
On the page **Change the netboot**
, select `Boot in rescue mode
`.
Select `Windows customer rescue system
` in the drop-down menu.
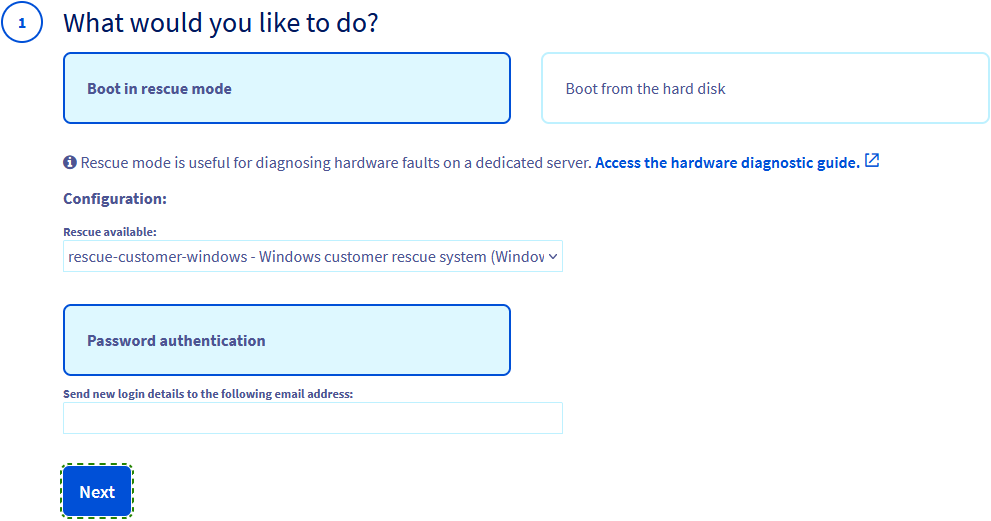
The rescue mode notification email including its login details will be sent to the contact email address of your OVHcloud account. To use a different email address, enter it in the field `Send new login details to the following email address`.
Click `Next
`.
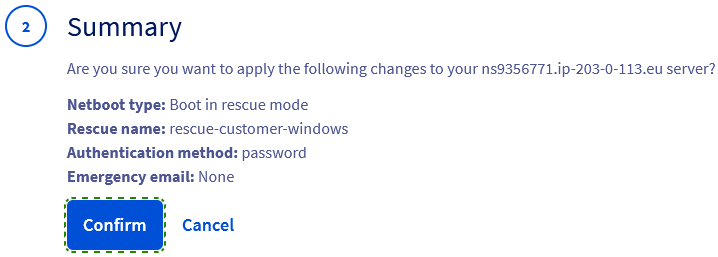
In the **Summary**
step, click `Confirm
`.
You should now have a notification regarding the `Netboot`
setting in the `General information
` tab.

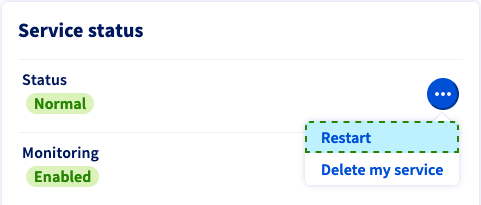
The final step is to restart the server. Click the button `...
` next to "Status" in the **Service status**
box, then click `Restart
`. Click `Confirm
` in the popup window.
This "hard reboot" will take a few minutes to complete. You can check the current status in the tab named `Tasks
`.
:::info
After you have finished your actions in rescue mode, remember to change the `Netboot`
setting back to `Boot from the hard disk
` before restarting the server.
:::
### Accessing your server in rescue mode
Once you have received the email informing you that rescue mode is enabled, you can log on to the Windows rescue mode system and access your server.\
This email is also available in your OVHcloud Control Panel
as soon as it is sent. Click on the name associated with your NIC handle (Customer ID) in the menu bar in the top right-hand corner, then select `Service emails
`.
To establish a remote session to the Windows rescue mode system, you will need these credentials:
- IP address of the server
- Username of the temporary admin account (`Administrator`)
- Password for the temporary admin account
You can use the following connections methods to access your server via the Windows rescue mode system:
- Remote Desktop Protocol (RDP)
- KVM over IP (if your server allows it)
- OpenSSH (official Windows Server component)
#### RDP
Unfold this section
To connect, use the `Remote Desktop Connection` client of Windows or any compatible application.

#### KVM
Unfold this section
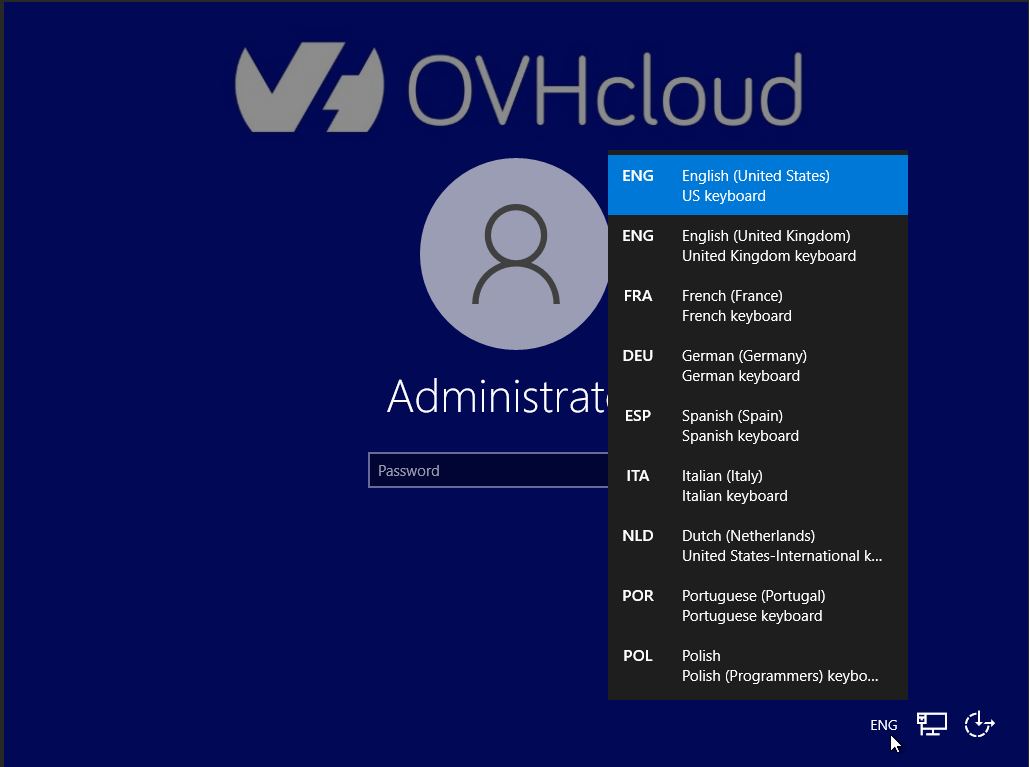
From the KVM login screen, you can select a different keyboard language.
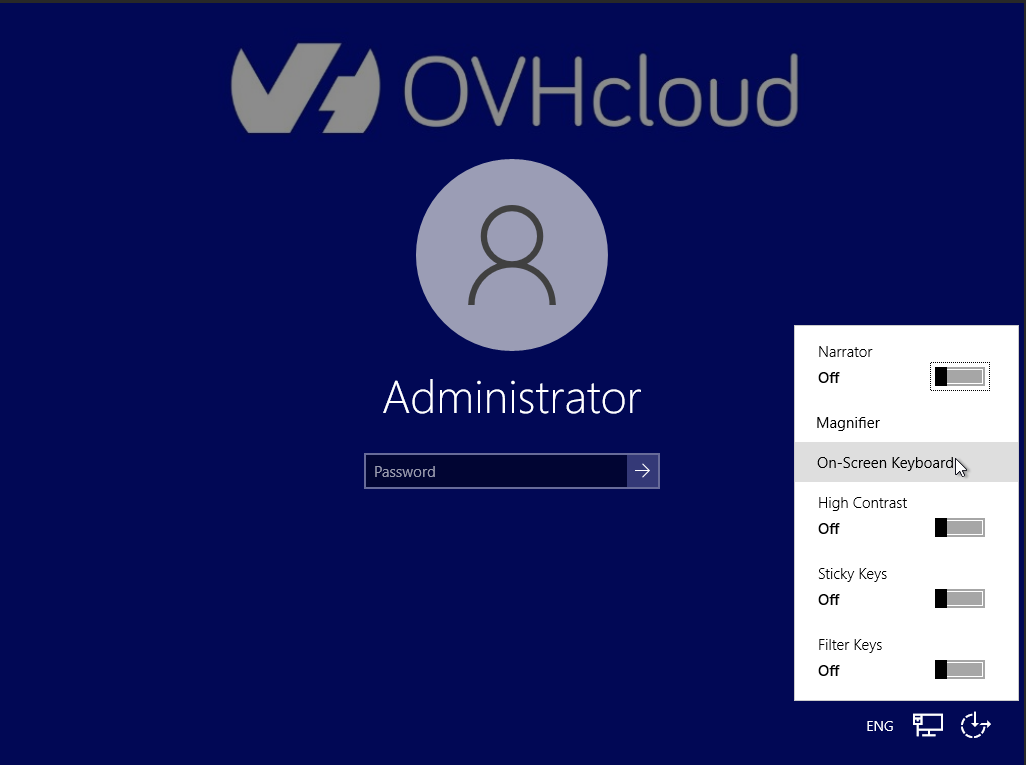
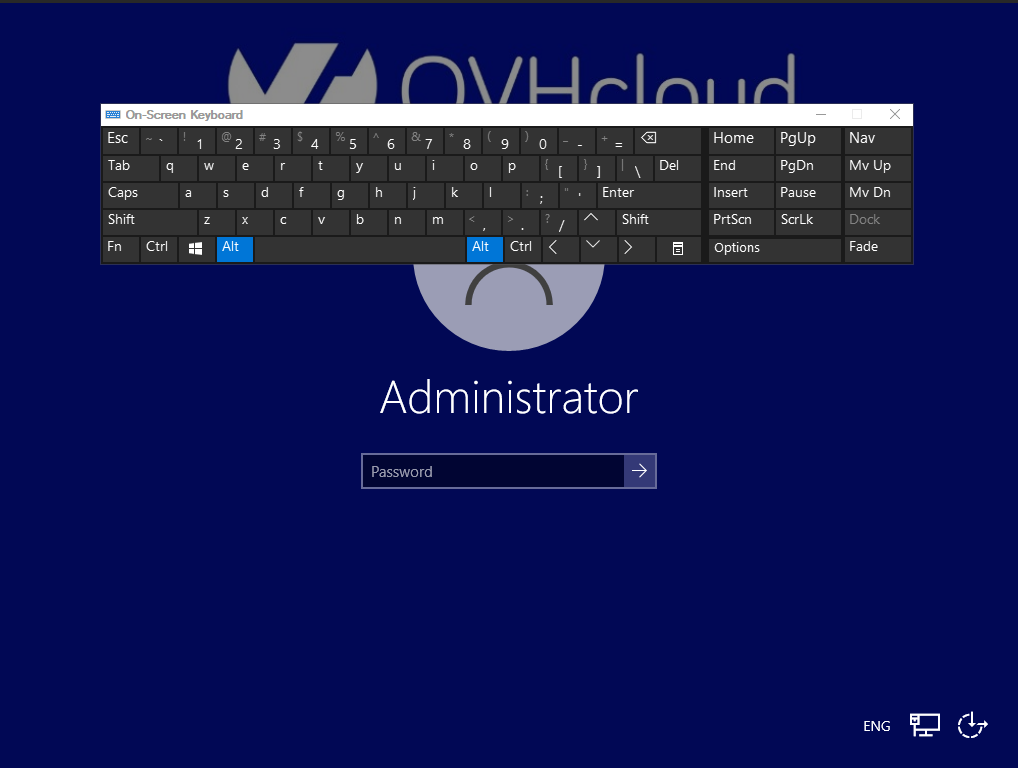
You can change the accessibility options and enable the virtual keyboard:
You can find further information in our guide: [How to use the IPMI console with a dedicated server](/en/guides/bare-metal-cloud/dedicated-servers/ipmi.md)
#### SSH
Unfold this section
Open the command line application on your local device and enter the following command:
```bash
ssh Administrator@SERVER_IP
```
Example:
```bash
ssh Administrator@203.0.113.100
```
Enter the temporary rescue mode password when prompted. Example:
```console
Administrator@ns9356771.ip-203-0-113.eu's password:
administrator@WINRESCUEOVH C:\Users\Administrator>
```
Find more information on SSH connections in our [SSH introduction guide](/en/guides/bare-metal-cloud/dedicated-servers/ssh-introduction.md).\
You can also use any SSH connection tool, such as [PuTTY](/en/guides/web-cloud/web-hosting/ssh-using-putty-on-windows.md).
### Importing disks to access your files
Once logged in to the Windows customer rescue system, you need to import (mount) the Windows server's disks before you can access the file system.
Unfold this section
:::warning
The following exemplary instructions and screenshots will illustrate the mounting process based on a server with two mirrored disks (RAID1). The details displayed by the Disk Management tool depend on your server's disk configuration.\
For additional information, consult the [official Microsoft documentation](https://learn.microsoft.com/en-us/windows-server/storage/disk-management/overview-of-disk-management).
If you require professional assistance with server administration, consider the details in the [Go further](#gofurther) section of this guide.
:::
|  |
| ------------------------------------------------------------------------------------------------------------------------------------------------------------------------- |
| Right-click on the
|
| ------------------------------------------------------------------------------------------------------------------------------------------------------------------------- |
| Right-click on the Start Menu button and open Disk Management. |
|  |
| ------------------------------------------------------------------------------------------------------------------------------------------------------------------------------------------------------- |
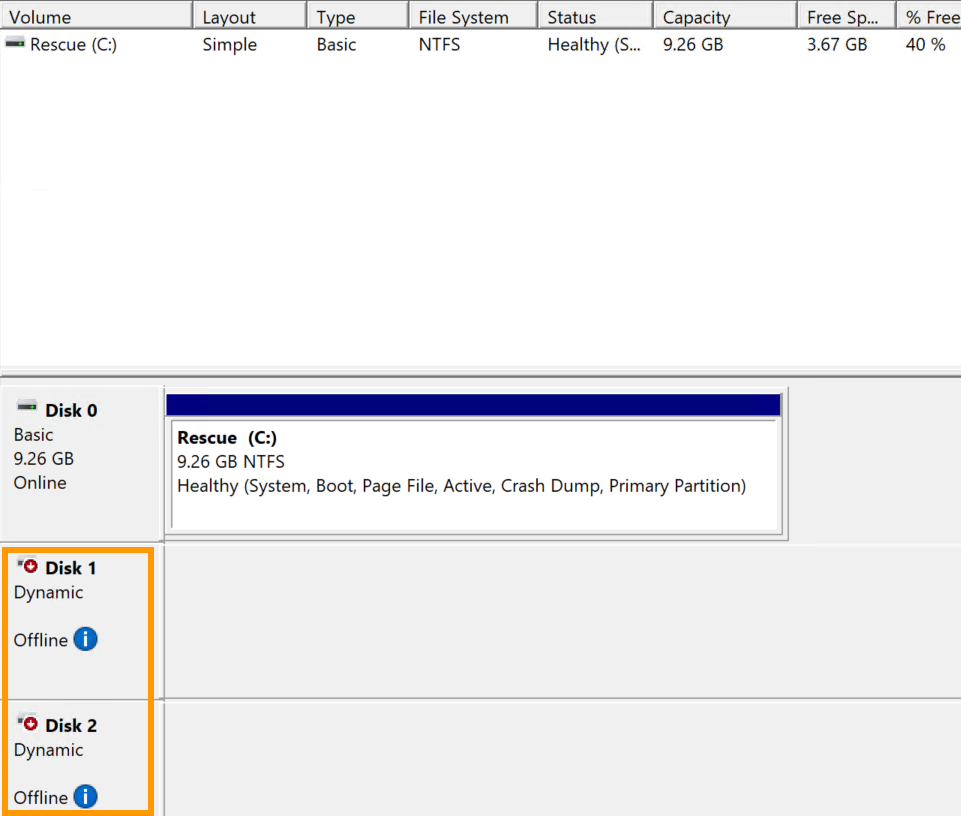
| `Disk 0` contains the rescue system (volume `C:`). The disks of your Windows server will be displayed as `Offline`. |
|
|
| ------------------------------------------------------------------------------------------------------------------------------------------------------------------------------------------------------- |
| `Disk 0` contains the rescue system (volume `C:`). The disks of your Windows server will be displayed as `Offline`. |
|  |
| ------------------------------------------------------------------------------------------------------------------------------------------------------------------------- |
| Right-click on each disk and select
|
| ------------------------------------------------------------------------------------------------------------------------------------------------------------------------- |
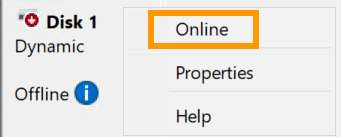
| Right-click on each disk and select Online from the context menu. |
|  |
| -------------------------------------------------------------------------------------------------------------------------------------------------------------------------------------------------------------------------------------------------------------------------------------------------------------------------- |
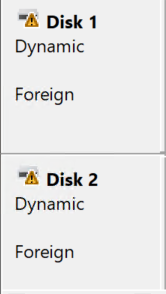
| The server disks are now [recognized by the rescue system as `Foreign`](https://learn.microsoft.com/en-us/troubleshoot/windows-server/backup-and-storage/troubleshoot-disk-management#a-dynamic-disks-status-is-foreign), a status indicating in this case that the attached disks belong to a different operating system. |
|
|
| -------------------------------------------------------------------------------------------------------------------------------------------------------------------------------------------------------------------------------------------------------------------------------------------------------------------------- |
| The server disks are now [recognized by the rescue system as `Foreign`](https://learn.microsoft.com/en-us/troubleshoot/windows-server/backup-and-storage/troubleshoot-disk-management#a-dynamic-disks-status-is-foreign), a status indicating in this case that the attached disks belong to a different operating system. |
|  |
| ------------------------------------------------------------------------------------------------------------------------------------------------------------------------- |
| Right-click on a disk and select
|
| ------------------------------------------------------------------------------------------------------------------------------------------------------------------------- |
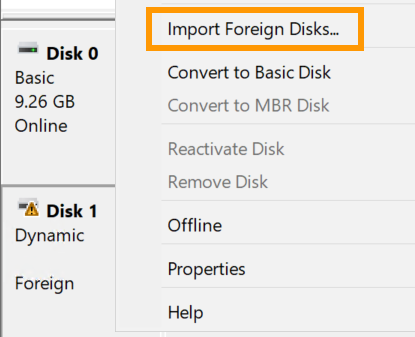
| Right-click on a disk and select Import Foreign Disks... from the context menu. |
|  |
| ------------------------------------------------------------------------------------------------------------------------------------------------------------------------- |
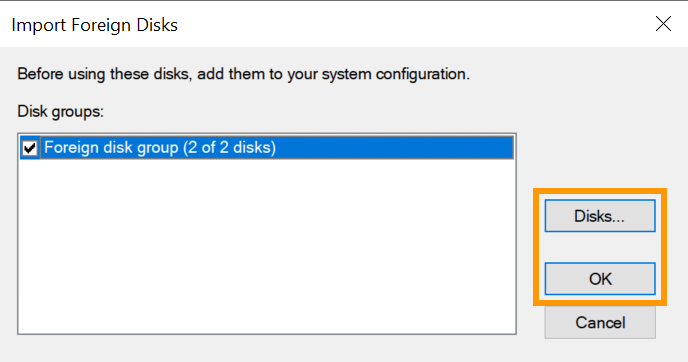
| If applicable, select the disks to import. Click
|
| ------------------------------------------------------------------------------------------------------------------------------------------------------------------------- |
| If applicable, select the disks to import. Click OK. |
|  |
| ------------------------------------------------------------------------------------------------------------------------------------------------------------------------- |
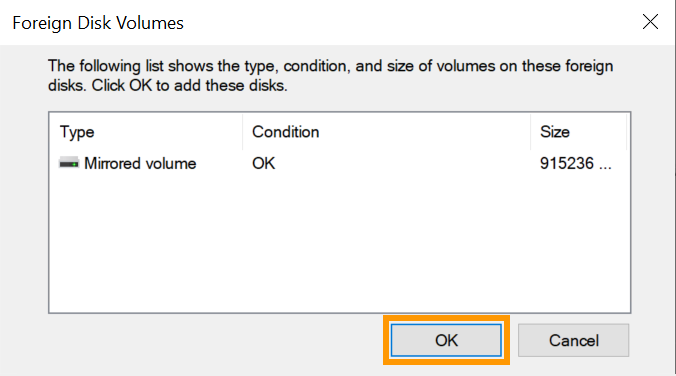
| Click
|
| ------------------------------------------------------------------------------------------------------------------------------------------------------------------------- |
| Click OK. |
|  |
| ---------------------------------------------------------------------------------------------------------------------------------------------------------------------------------------------------------------------------------- |
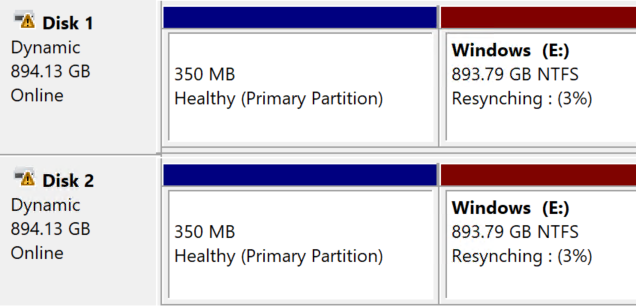
| In this example, the two disks of the server are mirrored, therefore the status `Resynching` will be displayed. This is the normal process; the resynchronisation will continue once the server is rebooted into its installed OS. |
|
|
| ---------------------------------------------------------------------------------------------------------------------------------------------------------------------------------------------------------------------------------- |
| In this example, the two disks of the server are mirrored, therefore the status `Resynching` will be displayed. This is the normal process; the resynchronisation will continue once the server is rebooted into its installed OS. |
|  |
| ------------------------------------------------------------------------------------------------------------------------------------------------------------------------- |
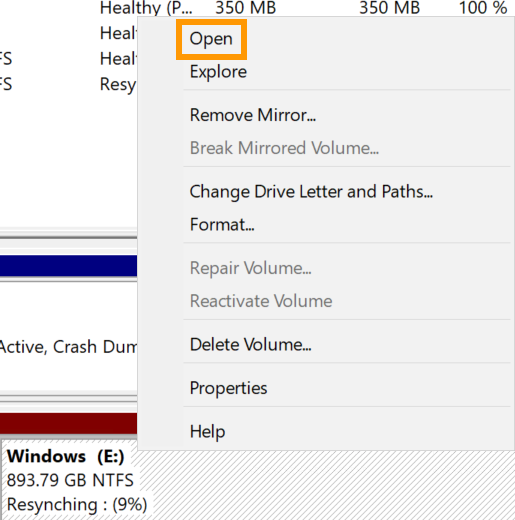
| To access your files, right-click on the Windows partition of your `Disk 1` and select
|
| ------------------------------------------------------------------------------------------------------------------------------------------------------------------------- |
| To access your files, right-click on the Windows partition of your `Disk 1` and select Open from the context menu. |
### Recommended utilities
:::info
Additional software is not preinstalled on the rescue mode system. Below is a list of recommended tools, available from the respective website of their developers.
:::
| Software | Description |
| --------------- | ----------------------- |
| CrystalDiskInfo | Disk diagnostics tool |
| 7-Zip | Archive management tool |
| FileZilla | FTP client |
### Exiting rescue mode
In the OVHcloud Control Panel
, [change the boot mode](#netboot)
back to `Boot from the hard disk
` and confirm.
Then use the `Restart
` function in your OVHcloud Control Panel.
[](#)
## Go further
[How to activate and use rescue mode](/en/guides/bare-metal-cloud/dedicated-servers/rescue-mode.md)
[How to change the admin password on a Windows dedicated server](/en/guides/bare-metal-cloud/dedicated-servers/rcw-changing-admin-password-on-windows.md)
For specialized services (SEO, development, etc.), contact [OVHcloud partners](https://partner.ovhcloud.com/en-gb/directory/).
If you would like assistance using and configuring your OVHcloud solutions, please refer to our [support offers](https://www.ovhcloud.com/en-gb/support-levels/).
Join our [community of users](https://community.ovhcloud.com/).