---
title: "How to Configure Your NIC for OVHcloud Link Aggregation in Windows Server 2019"
description: "Enable OVHcloud Link Aggregation in your \\"Windows Server 2019\\" server"
url: https://docs.ovhcloud.com/en/guides/bare-metal-cloud/dedicated-servers/ola-enable-w2k19
lang: en
lastUpdated: 2026-05-28
---
# How to Configure Your NIC for OVHcloud Link Aggregation in Windows Server 2019
## Objective
OVHcloud Link Aggregation (OLA) technology is designed by our teams to increase your server's availability, and boost the efficiency of your network connections. In just a few clicks, you can aggregate your network cards and make your network links redundant. This means that if one link goes down, traffic is automatically redirected to another available link. The available bandwidth is also doubled thanks to aggregation.
Aggregation is based on IEEE 802.3ad, Link Aggregation Control Protocol (LACP) technology.
**This guide explains how to configure NIC Teaming for OLA in Windows Server 2019.**
## Requirements
- [Configuring OVHcloud Link Aggregation in the OVHcloud Control Panel](/en/guides/bare-metal-cloud/dedicated-servers/ola-enable-manager.md)
***
### OVHcloud Control Panel Access
- **Direct link:** Dedicated Servers
- **Navigation path:** Bare Metal Cloud > Dedicated servers > Select your server
***
## Instructions
Because you have a private-private configuration for your NICs in OLA, you will be unable to SSH into the server. Thus, you will need to leverage the IPMI tool to access the server.
To do so, click the `IPMI
` tab (1).
Next, click the `From a Java applet (KVM)
` button (2).
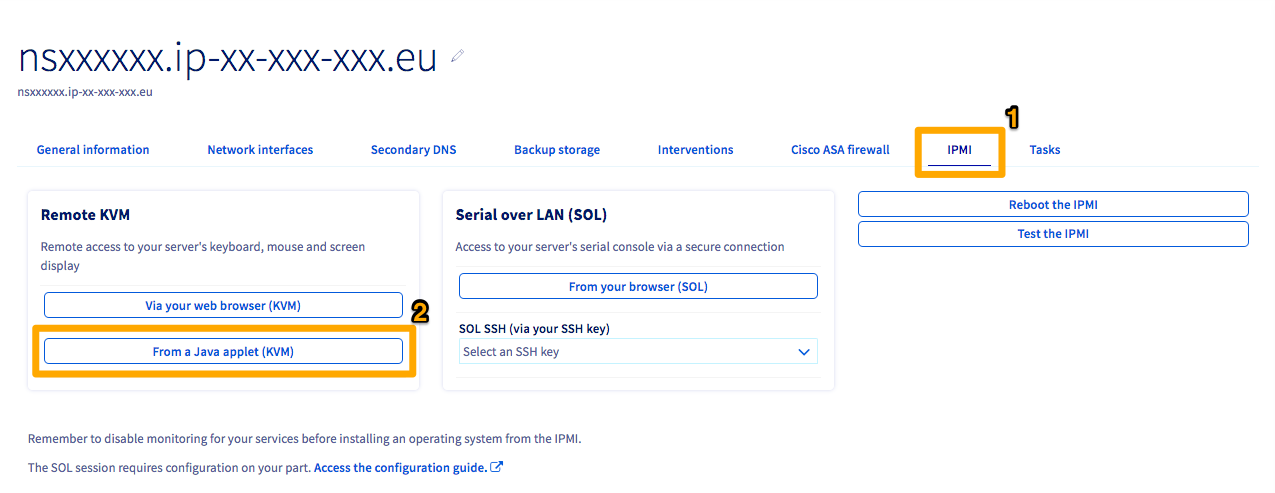
A JNLP program will download. Open the program once it is finished to enter the IPMI. Log in using valid credentials for the server.
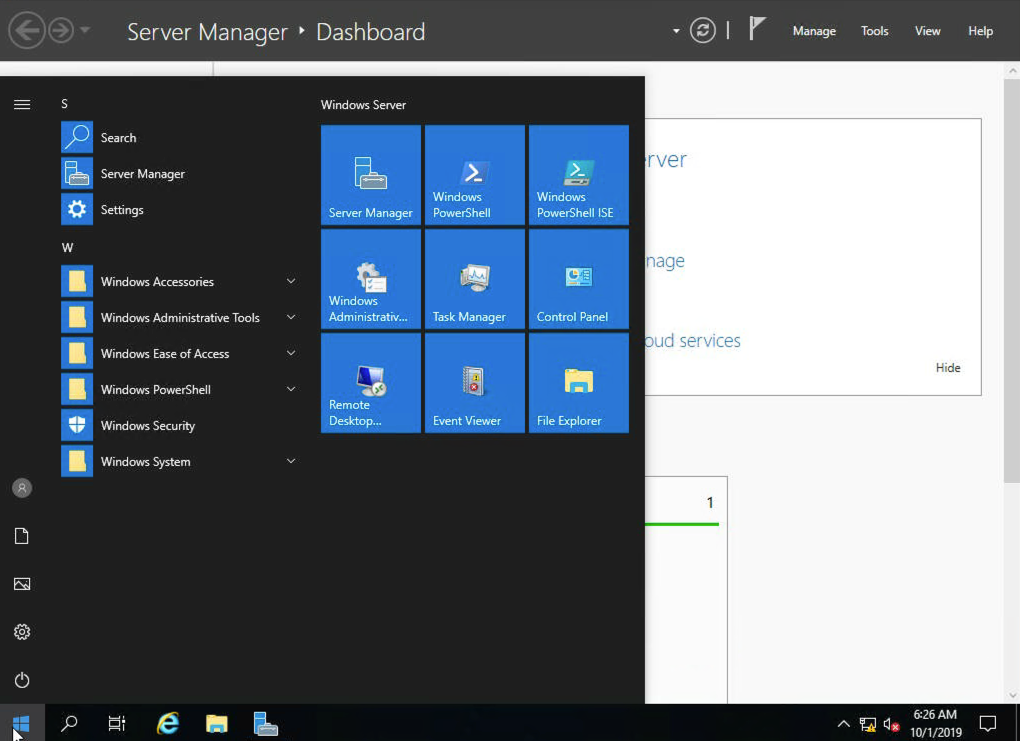
Once you are in the server, open Server Manager. If it is not already open by default, you will see it pinned to the Start menu.
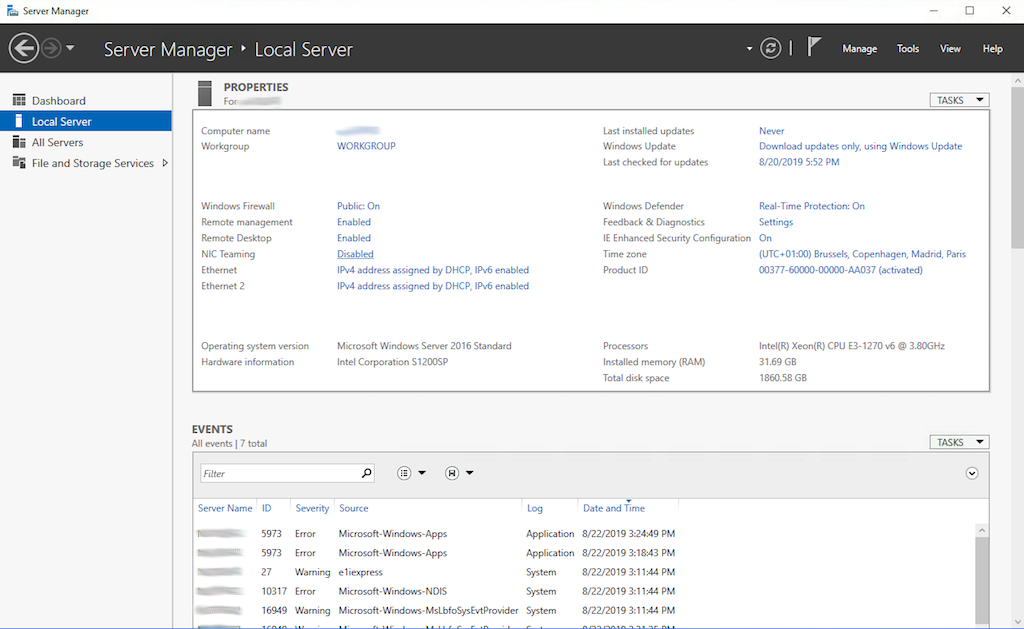
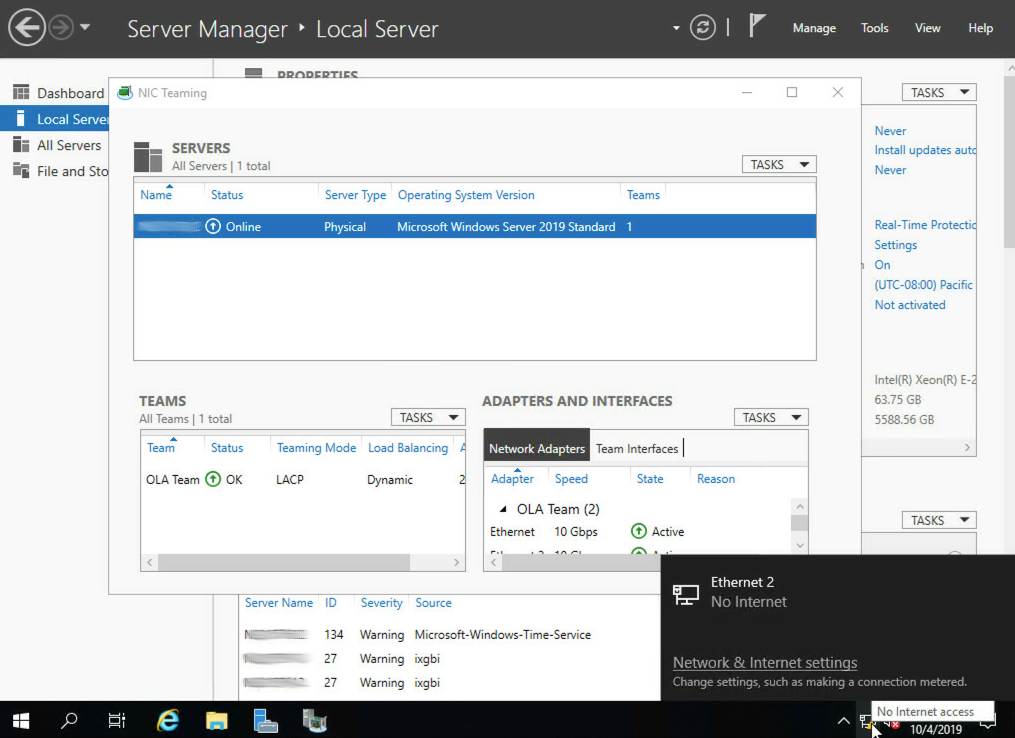
Once you have opened Server Manager, click the **Local Server** tab on the left-hand sidebar. Next, click the **Disabled** button next to "NIC Teaming."
In the NIC Teaming pop-up, click the **New Team** button from the **TASKS** dropdown menu under the "TEAMS" section.
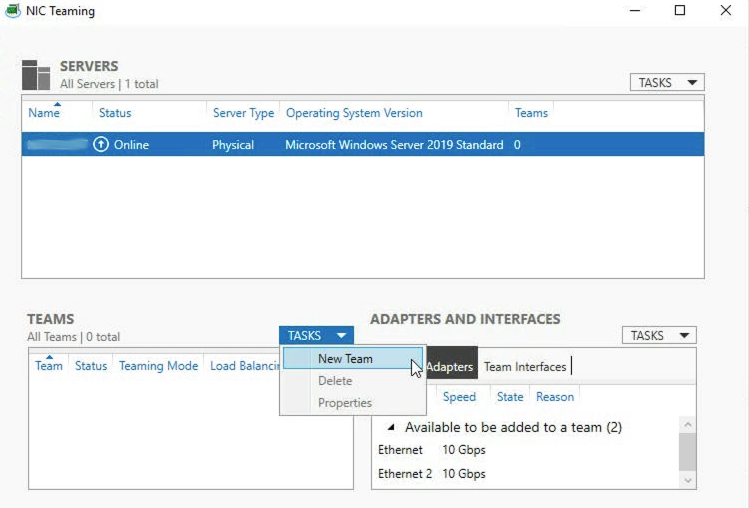
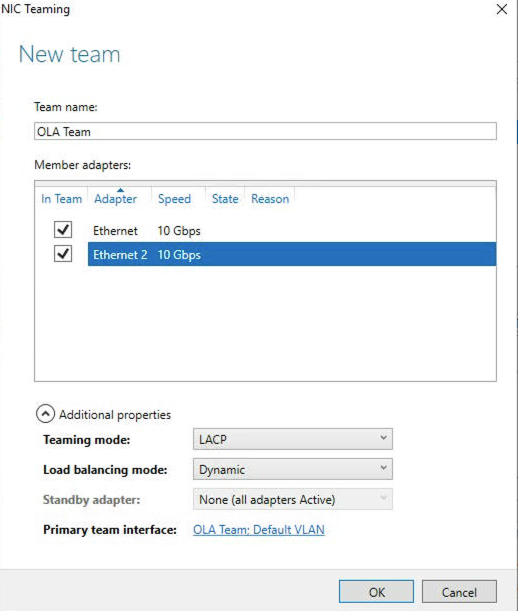
Give your team a name and check the NICs you wish to use with OLA. Click the dropdown arrow next to "Additional properties" and change the "Teaming mode" to LACP. Click **OK** once you have confirmed that the information is correct.
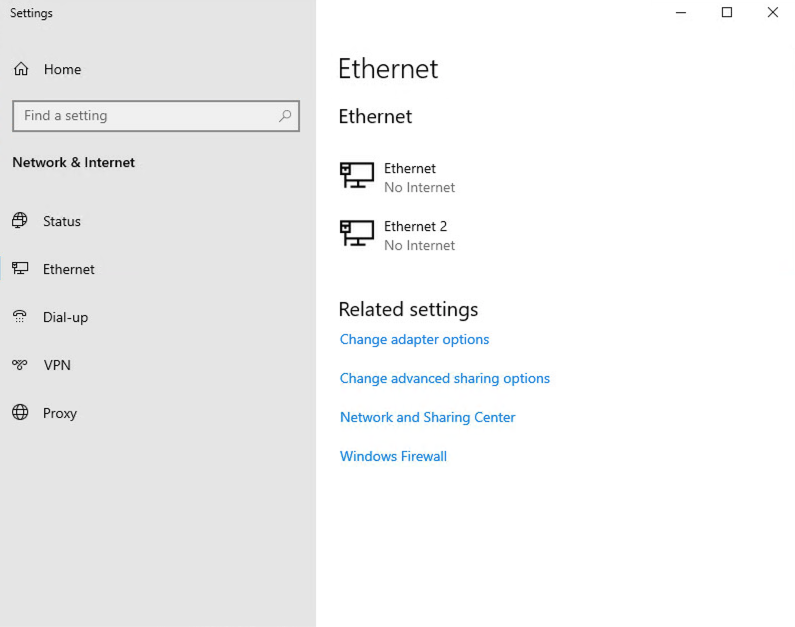
It could take up to a couple of minutes for the NIC team to come online. Once it is finished, click the network connection icon in the bottom-right corner. Next, click the **Network & Internet settings** button. Then click the **Ethernet** button on the left-hand sidebar of the ensuing popup.
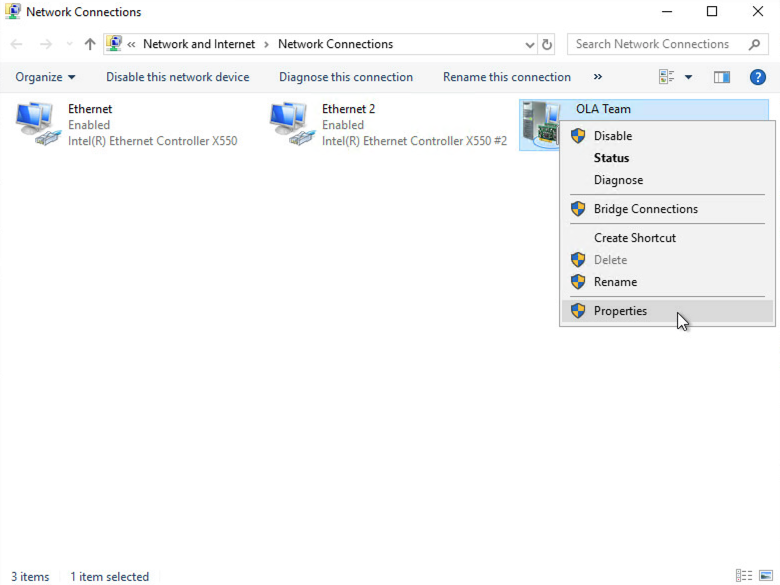
Click the **Change adapter options** button.
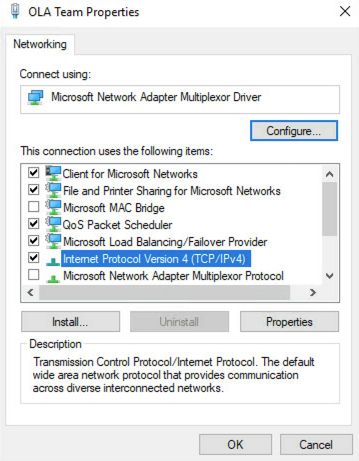
Next, right-click on your NIC team and select **Properties** from the drop-down menu.
On the ensuing pop-up window, double-click the **Internet Protocol Version 4 (TCP/IPv4)** button.
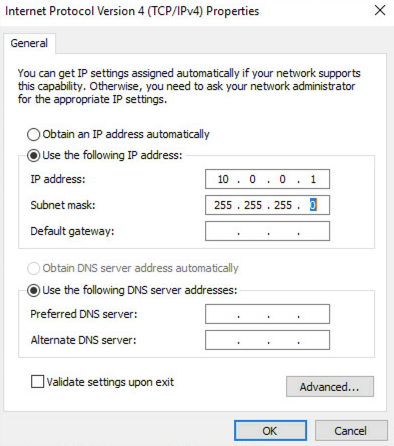
Click the button next to "Use the following IP address" and add your chosen private IP and subnet. Click the **OK** button once you have confirmed that your settings are correct.
To test that your NIC team is working, ping another server on the same vRack. If it works, you are all set. If it does not, double-check your configurations or try rebooting the server.
## Go further
[Configuring OVHcloud Link Aggregation in the OVHcloud Control Panel](/en/guides/bare-metal-cloud/dedicated-servers/ola-enable-manager.md)
[How to configure your NIC for OVHcloud Link Aggregation in Debian 12 or Ubuntu 24.04 using Netplan](/en/guides/bare-metal-cloud/dedicated-servers/lacp-enable-netplan.md)
[How to configure your NIC for OVHcloud Link Aggregation in Debian 9 to 11](/en/guides/bare-metal-cloud/dedicated-servers/ola-enable-debian9.md)
[How to Configure Your NIC for OVHcloud Link Aggregation in SLES 15](/en/guides/bare-metal-cloud/dedicated-servers/ola-enable-sles15.md)
Join our [community of users](https://community.ovhcloud.com/).