---
title: "Restrict IP access to the OVHcloud Control Panel"
description: "Find out how to secure your OVHcloud account by limiting the IP addresses authorised to access it"
url: https://docs.ovhcloud.com/en/guides/account-and-service-management/account-information/ovhcloud-control-panel-ip-restriction
lang: en
lastUpdated: 2025-04-28
---
# Restrict IP access to the OVHcloud Control Panel
## Objective
OVHcloud provides you with options to enhance the security of your OVHcloud Control Panel and your services.
You can restrict access to your OVHcloud Control Panel
to certain IP addresses.
By setting this option and securing your account with [two-factor authentication](/en/guides/account-and-service-management/account-information/secure-ovhcloud-account-with-2fa.md)
, you can optimally secure your OVHcloud Control Panel against intrusion attempts.
**This guide explains how to secure your OVHcloud account by limiting the IP addresses authorised to access it.**
:::warning
IP access restriction and/or two-factor authentication only secure access to the OVHcloud Control Panel from which you can order, manage, renew or delete your OVHcloud services. These options do not secure your services themselves, for which you must implement specific security measures.
:::
## Requirements
- Knowledge of the [password management recommendations for accessing your account](/en/guides/account-and-service-management/account-information/manage-ovh-password.md)
***
### OVHcloud Control Panel Access
- **Direct link:** Account security
- **Navigation path:** Click your name in the top right > Access my account > Security
***
## Instructions
### Step 1 - Retrieve public IP addresses authorised to access your OVHcloud Control Panel
There are two types of IP addresses:
- **Public IP addresses**: They are visible throughout the Internet. For example, they are used by your Internet access point/box to provide access to public networks (Internet).
- **Private IP addresses**: They are not visible on the Internet and can only be allocated in a local network. For example, your Internet box will assign a private IP address to each of the devices (computers, smartphones, tablets, etc.) connected to it. Your Internet access point/box allows these devices to use the public IP address to access the Internet. Private IP addresses are easy to recognise because they usually start with 10.X.X.X, 172.16.X.X or 192.168.X.X (where X stands for a value between 0 and 255).
To use the IP restriction option in the OVHcloud Control Panel, you will need to enter your public IP address(es) **only**.
To retrieve the public IP address of a device that will be authorised to access your OVHcloud Control Panel, go to [whatismyip.com](https://www.whatismyip.com/) (not managed by OVHcloud).
Take note of the IP address that appears, then repeat the operation for each device that will be authorised to access your OVHcloud Control Panel.
If you are using a 4G/5G network as an addition, remember to also retrieve the IP address of this network.
:::warning
Most Internet Service Providers (ISPs) allocate a **dynamic** IP address to your Internet access point/box. These dynamic IP addresses change when you reboot your box or every 24/48 hours. However, some ISPs may allocate **static** IP addresses to you on request.
For a 3G/4G/5G connection, IP addresses are systematically **dynamic**.
**Before** setting up an IP restriction on your OVHcloud Control Panel, check with your ISP to make sure that the IP addresses retrieved previously are **static** IP addresses. Otherwise, you risk losing access to your OVHcloud Control Panel by declaring a dynamic IP.
:::
### Step 2 - Set up access restriction by IP
On the Account security
page, find the **IP access restriction**
section.
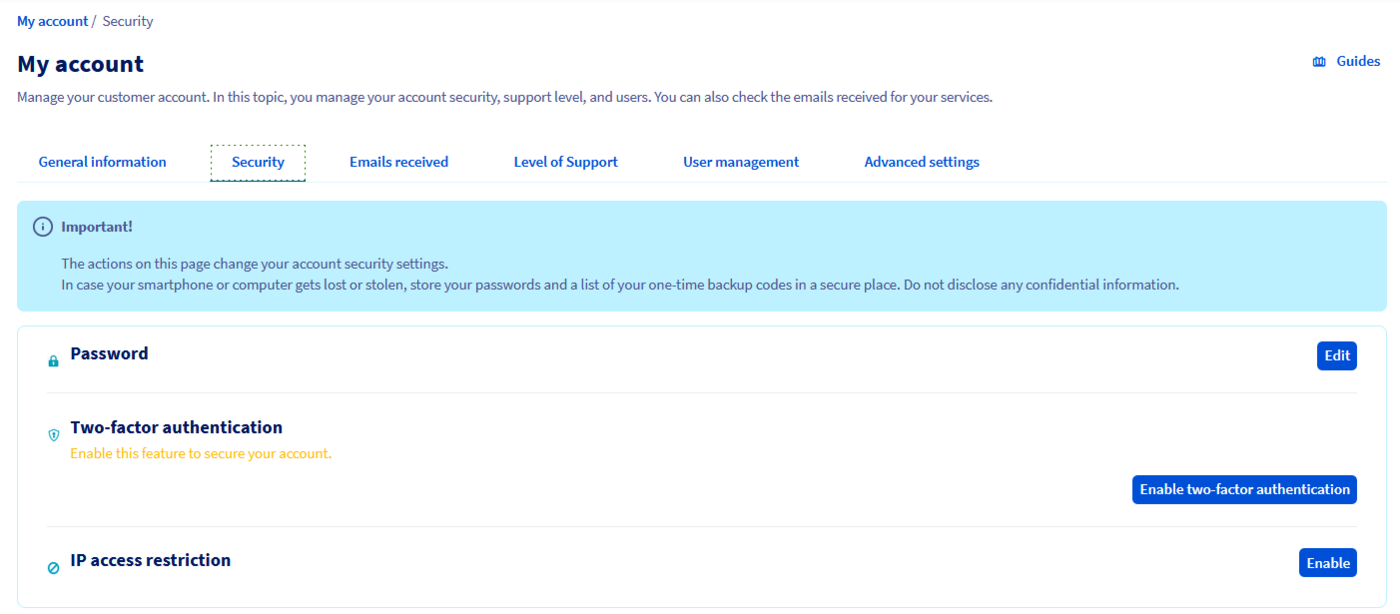
Click `Enable
` to the right of `IP access restriction`
.
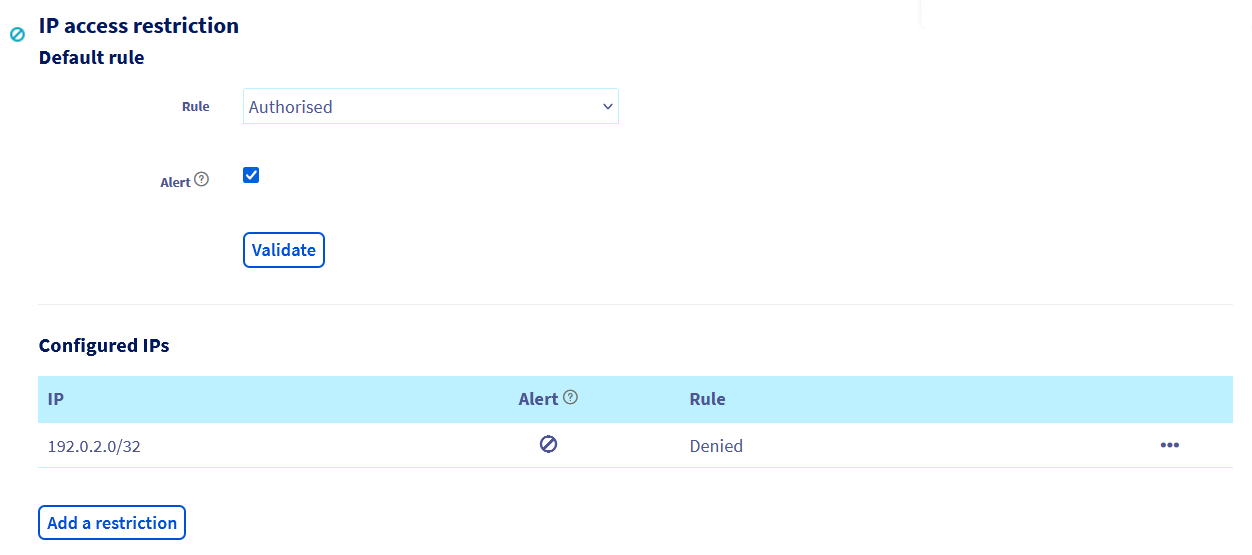
#### Interface Overview
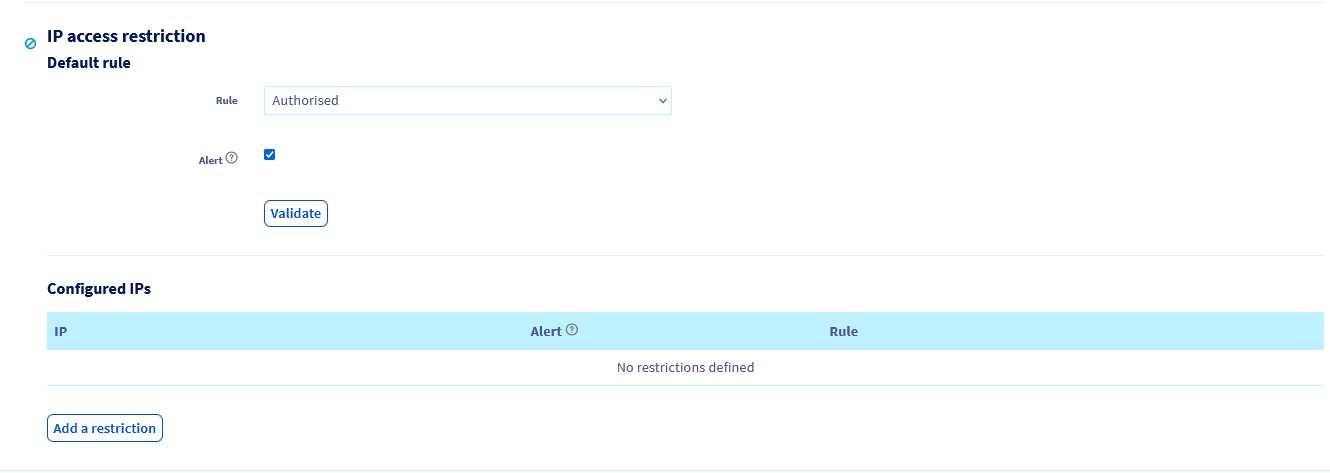
There are two sections for setting IP restrictions:
- **Default rule**. Use this field to:
- Deny access to all IP addresses except those previously declared as **authorised** in the second section _Configured IPs_.
- Allow access to all IP addresses except those previously declared as **denied** in the second section _Configured IPs_.
> Check the Alert box if you want to be notified on your contact email address whenever an unauthorised login attempt was made to access your Control Panel.
- **Configured IPs**. Use this field to declare IP addresses that will be restricted or authorised. You can also view the rules you have set up beforehand.
:::danger
Warning before continuing with your actions:
In the `Default rule
` section, **never**
validate the default rule in `Denied
` status **without first authorising**
at least one of your public IP addresses in the `Configured IPs`
section.
Otherwise, you will block **all public IPs (including yours)**
without any exceptions. Any login requests to your OVHcloud Control Panel
will be denied, and you will need to carry out an administrative procedure to unblock your access.
Be extremely vigilant on this point.
:::
#### Deny all IP addresses except legitimate addresses
To authorise access to the OVHcloud Control Panel only for one or more legitimate IP addresses, click the `Add a restriction
` button.
> The IP **192.0.2.0** used in the following screenshots needs to be replaced with one of your own IP addresses.
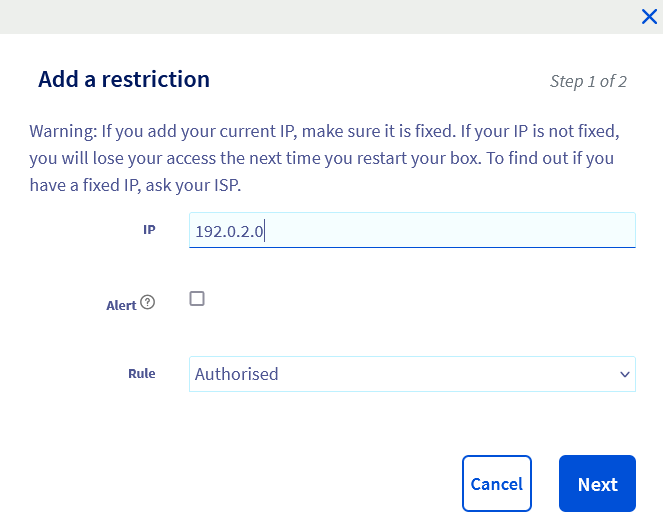
In the window that pops up, enter the public IP address you want to authorise into the `IP
` form. Check the `Alert
` box if you want to be notified by email of connection attempts via this IP address then leave the `Rule
` in the `Authorised
` status.
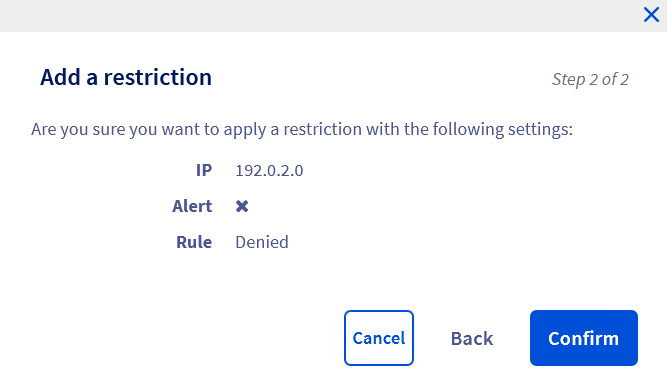
Click `Next
` and check your IP address and rule before clicking `Confirm
`.
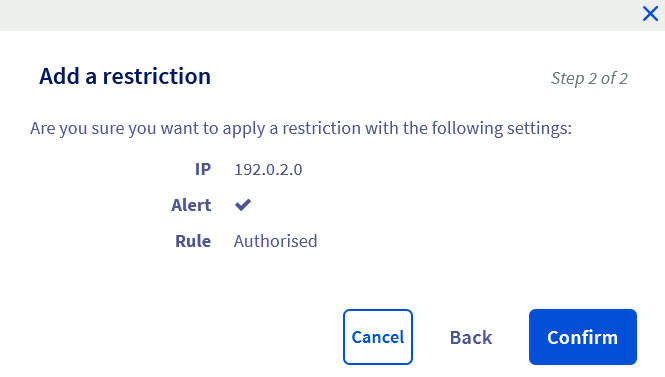
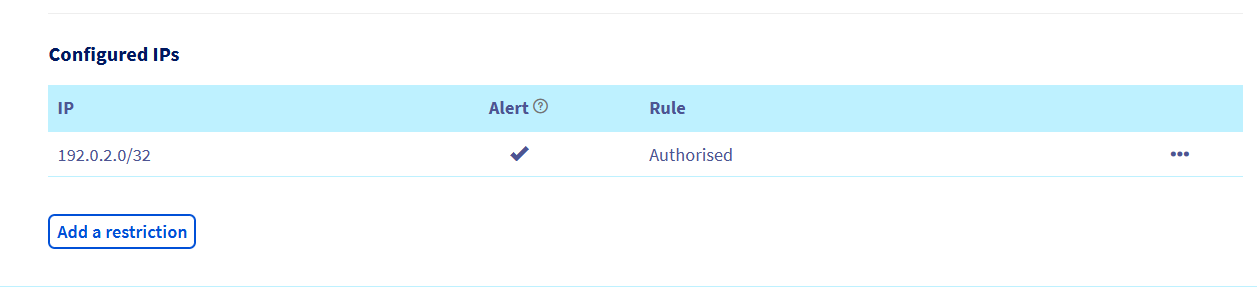
The rule should then appear in the `Configured IPs` section.
:::info
**Before** you continue with the actions described in this step, repeat the above operation for any other IP addresses you wish to authorise to access your OVHcloud Control Panel.
:::
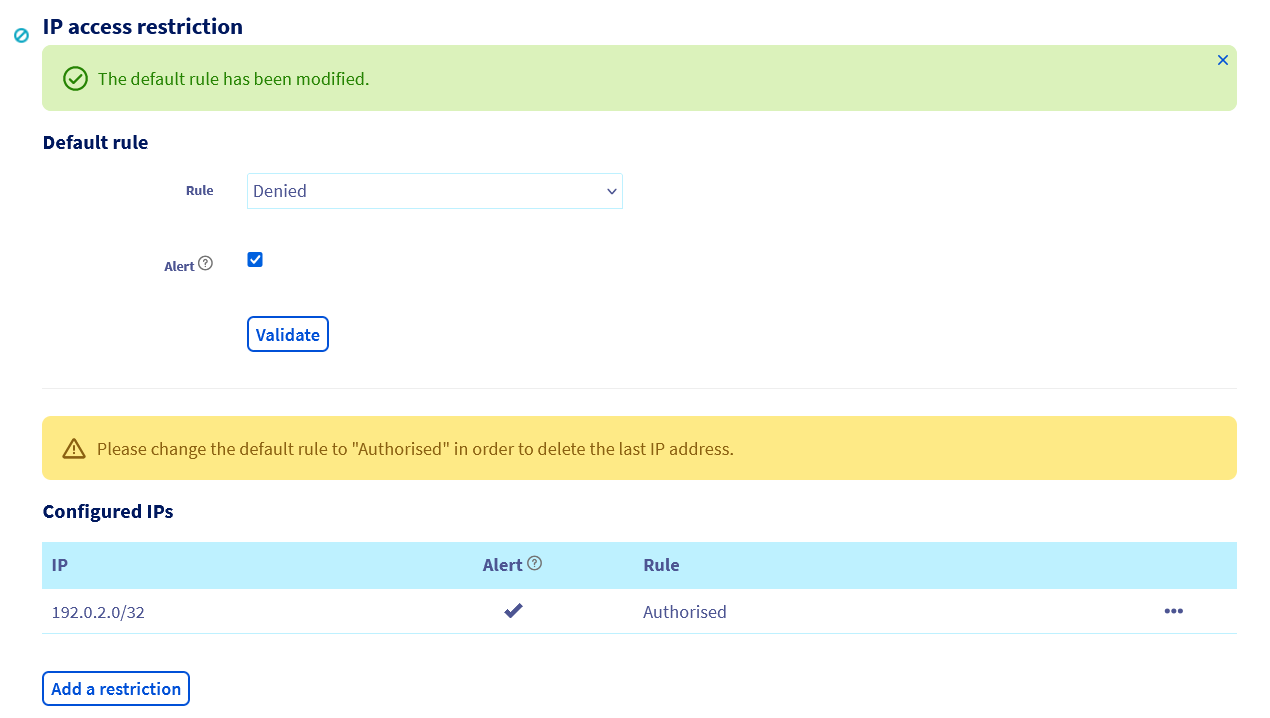
Once you have **set all**
of your public IP addresses in the `Configured IPs`
section, switch the rule to the `Denied`
status in the `Default rules`
section. Select the `Alert
` check box if you want to receive email notification of login attempts, then click `Validate
`.
> From now on, **only** public IP addresses previously authorised in the `Configured IPs` section can access your OVHcloud Control Panel.
#### Authorise all IP addresses except some addresses
With the IP access restriction option, you can also authorise all IP addresses to access your OVHcloud Control Panel, with the exception of a few that you have previously identified as illegitimate.
To block access to your OVHcloud Control Panel for one or more IP addresses, click on the `Add a restriction
` button in the `Configured IPs`
section.
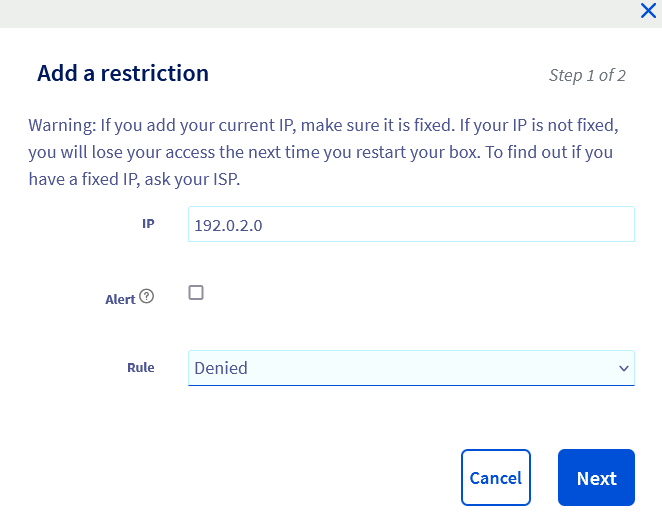
In the window that pops up, enter the public IP address you want to block in the `IP
` field. Check the `Alert
` box if you want to be notified by email of connection attempts via this IP address, then change the `Rule
` to `Denied
`.
Click `Next
`, check the IP address and rule before clicking `Confirm
`.
The rule should then appear in the `Configured IPs` section.
:::info
**Before** you continue with the actions described in this step, repeat the operation for any other IP addresses you wish to block from accessing your OVHcloud Control Panel.
:::
Once you have entered all of the public IP addresses in the `Configured IPs`
section, switch the rule to the `Authorised
` status in the `Default rules`
section. Select the `Alert
` check box if you want to be notified by email of connection attempts, then click `Validate
`.

> From now on, **all** public IP addresses can access your OVHcloud Control Panel, **with the exception of** those declared in the `Configured IPs` section.
## Go further
[Set up two-factor authentication on your OVHcloud Control Panel](/en/guides/account-and-service-management/account-information/secure-ovhcloud-account-with-2fa.md)
For specialised services (SEO, development, etc.), contact [OVHcloud partners](https://partner.ovhcloud.com/en-gb/directory/).
If you would like assistance using and configuring your OVHcloud solutions, please refer to our [support offers](https://www.ovhcloud.com/en-gb/support-levels/).
Join our [community of users](https://community.ovhcloud.com/).