---
title: "Using a custom gateway on an OVHcloud Managed Kubernetes cluster"
description: "Find out how to use a custom gateway on an OVHcloud Managed Kubernetes working with vRack private network."
url: https://docs.ovhcloud.com/de/guides/public-cloud/containers-orchestration/managed-kubernetes/vrack-custom-gateway
lang: de
lastUpdated: 2026-02-25
---
# Using a custom gateway on an OVHcloud Managed Kubernetes cluster
## Objectives
In this tutorial we are going to use a custom gateway deployed in vRack with a Managed Kubernetes cluster.
Why?
By default, in a Kubernetes cluster, the Pods you deploy take the Node's output IP.
So we have as many output IPs as Nodes. This can be a problem when you are in a situation where you need to manage a whitelist and you have a cluster with AutoScaling (creating and deleting Nodes on the fly).
One solution is to use a custom gateway which will allow you to have a single output IP (your gateway).
You will:
- create a private network
- create subnets
- create an OpenStack router (in every regions) and link them to the external provider network and the subnets
- create an OVHcloud Managed Kubernetes cluster with the private gateway
- test the Pod's output IP
At the end of this tutorial you should have the following flow:

:::info
In this tutorial we guide you on how to create the private network in two regions but you can use only one region if you want, GRA9 for example.
:::
## Pre-requisites
- A [Public Cloud project](/de/guides/public-cloud/cross-functional/create-a-public-cloud-project.md) in your OVHcloud account.
- The [OpenStack API CLI](/de/guides/public-cloud/cross-functional/compute-prepare-openstack-api-environment.md) installed.
- Being familiar with the [OVHcloud API](/de/guides/manage-and-operate/api/first-steps.md).
- Being familiar with [Terraform](/de/guides/public-cloud/cross-functional/how-to-use-terraform.md) if you wish to use it.
- The JSON parser tool [jq](https://stedolan.github.io/jq/) installed.
***
### OVHcloud Control Panel Access
- **Direct link:** Public Cloud Projects
- **Navigation path:** Public Cloud > Select your project
***
## Initialization
To setup a functional environment, you have to load the OpenStack and the OVHcloud API credentials.
To help you we also created for you several useful scripts and templates.
First, create a `utils` folder in your environment/local machine.
Then, download the [ovhAPI.sh](https://github.com/ovh/docs/blob/develop/pages/public_cloud/containers_orchestration/managed_kubernetes/vrack-k8s-custom-gateway/utils/ovhAPI.sh) script into it.
And then add execution rights to the `ovhAPI.sh` script:
```bash
chmod +x utils/ovhAPI.sh
```
You have to load the content of the given **utils/openrc** file, to manage OpenStack, and variables contained in the **utils/ovhAPI.properties** file to manage the OVHcloud API.
Create the **utils/openrc**, or download it from your Openstack provider. It must be like:
```bash
export OS_AUTH_URL=https://auth.cloud.ovh.net/v3
export OS_IDENTITY_API_VERSION=3
export OS_USER_DOMAIN_NAME=${OS_USER_DOMAIN_NAME:-"Default"}
export OS_PROJECT_DOMAIN_NAME=${OS_PROJECT_DOMAIN_NAME:-"Default"}
export OS_TENANT_ID=xxxxxxxxxxxxxxxxxxxxx
export OS_TENANT_NAME="xxxxxxxxxxxxxxxxxx"
export OS_USERNAME="user-xxxxxxxxxxxxx"
export OS_PASSWORD="xxxxxxxxxxxxxxxxxx"
export OS_REGION_NAME="xxxx"
if [ -z "$OS_REGION_NAME" ]; then unset OS_REGION_NAME; fi
```
Create the **utils/ovhAPI.properties** with your generated keys and secret:
```bash
OVH_API_URL="https://api.ovh.com/1.0"
OVH_ENDPOINT="ovh-eu"
OVH_APPLICATION_KEY="xxxxxxxxxxxxxxxxx"
OVH_APPLICATION_SECRET="xxxxxxxxxxxxxxxxx"
OVH_CONSUMER_KEY="xxxxxxxxxxxxxxxxxxxxx"
```
You should have a `utils` folder with three files:
```bash
.
└── utils
├── openrc
├── ovhAPI.properties
└── ovhAPI.sh
```
Load variables:
```bash
. utils/openrc
. utils/ovhAPI.properties
```
Get your OpenStack Tenant ID and store it into the serviceName variable.
**Bash**
```bash
export serviceName=$(utils/ovhAPI.sh GET /cloud/project/$OS_TENANT_ID | jq -r .description) && echo $serviceName
```
**API**
🇪🇺EU▾
[GET/cloud/project/{serviceName}](https://eu.api.ovh.com/console/?section=/cloud&branch=v1#get-/cloud/project/-serviceName-)
You should have a result like this:
```console
$ export serviceName=$(utils/ovhAPI.sh GET /cloud/project/$OS_TENANT_ID | jq -r .description) && echo $serviceName
EXAMPLE
```
## Create Private Network
> Important: Assuming that your PCI project is added to your [vRack](/de/guides/public-cloud/network-services/vrack.md).
We are using the OVHcloud API to create the private network. For this tutorial, we are using the two regions GRA9 and GRA11.
Create a folder `tpl` next to `utils` folder and create inside the **data-pvnw\.json** file with the following content:
```json
{
"name": "demo-pvnw",
"vlanId": 20,
"regions": ["GRA9","GRA11"]
}
```
Create the private network named `demo-pvnw` in `GRA9` and `GRA11` regions and get the VLAN ID.
**Bash**
```bash
export vlanId="$(utils/ovhAPI.sh POST /cloud/project/$OS_TENANT_ID/network/private "$(cat tpl/data-pvnw.json)" | jq -r .id)" && echo $vlanId
```
**API**
🇪🇺EU▾
[POST/cloud/project/{serviceName}/network/private](https://eu.api.ovh.com/console/?section=/cloud&branch=v1#post-/cloud/project/-serviceName-/network/private)
🇪🇺EU▾
[GET/cloud/project/{serviceName}/network/private](https://eu.api.ovh.com/console/?section=/cloud&branch=v1#get-/cloud/project/-serviceName-/network/private)
You should have a result like this:
```console
$ export vlanId="$(utils/ovhAPI.sh POST /cloud/project/$OS_TENANT_ID/network/private "$(cat tpl/data-pvnw.json)" | jq -r .id)" && echo $vlanId
pn-1083678_20
```
At this point, your private network is created and its ID is `pn-1083678_20`.
## Create subnets
For this tutorial, we are splitting a /24 subnet, to obtain two /25 subnets.
Ref: [https://www.davidc.net/sites/default/subnets/subnets.html](https://www.davidc.net/sites/default/subnets/subnets.html)
| Name | Region | CIDR Address | Gateway | DHCP Range | Broadcast |
| -------- | ------ | ---------------- | ------------- | --------------------------- | ------------- |
| Subnet 1 | GRA9 | 192.168.0.0/25 | 192.168.0.1 | 192.168.0.2-192.168.0.126 | 192.168.0.127 |
| Subnet 2 | GRA11 | 192.168.0.128/25 | 192.168.0.129 | 192.168.0.130-192.168.0.254 | 192.168.0.255 |
Create these two data files in the `tpl` folder:
**data-subnetGRA9.json** file:
```json
{
"start": "192.168.0.2",
"end": "192.168.0.126",
"region": "GRA9",
"dhcp": false,
"network": "192.168.0.0/25",
"noGateway": false
}
```
**data-subnetGRA11.json** file:
```json
{
"start": "192.168.0.130",
"end": "192.168.0.254",
"region": "GRA11",
"dhcp": false,
"network": "192.168.0.128/25",
"noGateway": false
}
```
> Note: To be clear, the parameter `"noGateway": false` means `"Gateway": true`. We want the subnet to explicitly use the first IP address of the CIDR range.
Then create subnets with appropriate routes, and finally get IDs (subnGRA9 & subnGRA11):
**Bash**
```bash
export subnGRA9="$(utils/ovhAPI.sh POST /cloud/project/$OS_TENANT_ID/network/private/$vlanId/subnet "$(cat tpl/data-subnetGRA9.json)" | jq -r .id)" && echo $subnGRA9
export subnGRA11="$(utils/ovhAPI.sh POST /cloud/project/$OS_TENANT_ID/network/private/$vlanId/subnet "$(cat tpl/data-subnetGRA11.json)" | jq -r .id)" && echo $subnGRA11
```
**API**
🇪🇺EU▾
[POST/cloud/project/{serviceName}/network/private/{networkId}/subnet](https://eu.api.ovh.com/console/?section=/cloud&branch=v1#post-/cloud/project/-serviceName-/network/private/-networkId-/subnet)
You should have a result like this:
```console
$ export subnGRA9="$(utils/ovhAPI.sh POST /cloud/project/$OS_TENANT_ID/network/private/$vlanId/subnet "$(cat tpl/data-subnetGRA9.json)" | jq -r .id)" && echo $subnGRA9
668fd889-5477-445b-b4e1-b30432e39045
$ export subnGRA11="$(utils/ovhAPI.sh POST /cloud/project/$OS_TENANT_ID/network/private/$vlanId/subnet "$(cat tpl/data-subnetGRA11.json)" | jq -r .id)" && echo $subnGRA11
e76f2b49-2b9f-4248-98ae-179d596d6e45
```
> For now, it's not possible to add routes to the subnet via the API, so we must use the OpenStack CLI instead.
**Bash**
```bash
openstack --os-region-name=GRA9 subnet set ${subnGRA9} --host-route destination=192.168.0.0/25,gateway=192.168.0.1
openstack --os-region-name=GRA11 subnet set ${subnGRA11} --host-route destination=192.168.0.128/25,gateway=192.168.0.129
```
## OpenStack router
### Create the routers
We have the ability to create OpenStack virtual routers. To do this, we need to use the OpenStack CLI.
Create routers and get their IDs (rtrGRA9Id & rtrGRA11Id):
**Bash**
```bash
export rtrGRA9Id="$(openstack --os-region-name=GRA9 router create rtr-GRA9 -f json | jq -r .id)" && echo $rtrGRA9Id
export rtrGRA11Id="$(openstack --os-region-name=GRA11 router create rtr-GRA11 -f json | jq -r .id)" && echo $rtrGRA11Id
```
You should have a result like this:
```console
$ export rtrGRA9Id="$(openstack --os-region-name=GRA9 router create rtr-GRA9 -f json | jq -r .id)" && echo $rtrGRA9Id
26bf99c8-d6fa-4c5a-9d42-1358776ee0a2
$ export rtrGRA11Id="$(openstack --os-region-name=GRA11 router create rtr-GRA11 -f json | jq -r .id)" && echo $rtrGRA11Id
ResourceNotFound: 404: Client Error for url: https://network.compute.gra11.cloud.ovh.net/v2.0/routers, The resource could not be found.
```
:::info
For the moment you can only create a virtual router in the GRA9 and GRA11 regions, but this feature will be released in other regions in the coming weeks and months.
:::
Now, you can display the information of your new virtual router on GRA9 in order to display its IP:
```console
$ openstack --os-region-name=GRA9 router show $rtrGRA9Id -c id -c name -c status -c created_at -c external_gateway_info
+-----------------------+-------------------------------------------------------------------------------------------------------------------------------------------------------------------------------------------------------------------------------------------------------------------------------------------+
| Field | Value |
+-----------------------+-------------------------------------------------------------------------------------------------------------------------------------------------------------------------------------------------------------------------------------------------------------------------------------------+
| created_at | 2022-07-25T07:32:06Z |
| external_gateway_info | {"network_id": "b2c02fdc-ffdf-40f6-9722-533bd7058c06", "external_fixed_ips": [{"subnet_id": "0f11270c-1113-4d4f-98de-eba83445d962", "ip_address": "141.94.209.244"}, {"subnet_id": "4aa6cac1-d5cd-4e25-b14b-7573aeabcab1", "ip_address": "2001:41d0:304:400::917"}], "enable_snat": true} |
| id | 26bf99c8-d6fa-4c5a-9d42-1358776ee0a2 |
| name | rtr-GRA9 |
| status | ACTIVE |
+-----------------------+-------------------------------------------------------------------------------------------------------------------------------------------------------------------------------------------------------------------------------------------------------------------------------------------+
```
As you can see, in this example, the IP of the gateway will be `141.94.209.244`.
### Link the router to the external provider network
First, get the regional external network ID (extNwGRA9Id & extNwGRA11Id), then link the router to it:
**Bash**
```bash
# GRA9
export extNwGRA9Id="$(openstack --os-region-name=GRA9 network list -f json | jq -r '.[] | select(.Name=="Ext-Net") | .ID')" && echo $extNwGRA9Id
openstack --os-region-name=GRA9 router set $rtrGRA9Id --external-gateway $extNwGRA9Id
# GRA11
export extNwGRA11Id="$(openstack --os-region-name=GRA11 network list -f json | jq -r '.[] | select(.Name=="Ext-Net") | .ID')" && echo $extNwGRA11Id
openstack --os-region-name=GRA11 router set $rtrGRA11Id --external-gateway $extNwGRA11Id
```
You should have a result like this:
```console
$ export extNwGRA9Id="$(openstack --os-region-name=GRA9 network list -f json | jq -r '.[] | select(.Name=="Ext-Net") | .ID')" && echo $extNwGRA9Id
b2c02fdc-ffdf-40f6-9722-533bd7058c06
$ openstack --os-region-name=GRA9 router set $rtrGRA9Id --external-gateway $extNwGRA9Id
$ export extNwGRA11Id="$(openstack --os-region-name=GRA11 network list -f json | jq -r '.[] | select(.Name=="Ext-Net") | .ID')" && echo $extNwGRA11Id
bcf59eb2-9d83-41cc-b4f5-0435ed594833
$ openstack --os-region-name=GRA11 router set $rtrGRA11Id --external-gateway $extNwGRA11Id
```
### Link the router to the subnet
Do the same with the regional subnets:
**Bash**
```bash
# GRA9
openstack --os-region-name=GRA9 router add subnet $rtrGRA9Id $subnGRA9
# GRA11
openstack --os-region-name=GRA11 router add subnet $rtrGRA11Id $subnGRA11
```
## Create a Kubernetes cluster with private gateway
Now the network is ready. Create an OVHcloud Managed Kubernetes cluster, specifying the use of the gateway defined on each subnet.
> Note: until the end of this tutorial, we are only using the `GRA9` region, but you can repeat the exact same steps to create a cluster on the `GRA11` region.
:::info
In this guide we defined `1.34` version for the Kubernetes cluster but you can use another supported version.
:::
First, get the private network IDs (pvnwGRA9Id & pvnwGRA11Id), then create the OVHcloud Managed Kubernetes Cluster, and finally get the cluster ID (kubeId):
**Bash**
Create a **tpl/data-kube.json.tpl** file as data and add the right parameters. The files should be like:
```json
{
"region": "GRA9",
"name": "demo",
"version": "1.34",
"nodepool": {
"flavorName": "b2-7",
"antiAffinity": false,
"monthlyBilled": false,
"autoscale": false,
"desiredNodes": 3
},
"privateNetworkId": "@privateNetworkId@",
"privateNetworkConfiguration" :{
"privateNetworkRoutingAsDefault": true,
"defaultVrackGateway": "192.168.0.1"
}
}
```
```bash
# Get the GRA9 private network Id
export pvnwGRA9Id="$(utils/ovhAPI.sh GET `/cloud/project`/$OS_TENANT_ID/network/private/${vlanId} | jq '.regions[] | select(.region=="GRA9")' | jq -r .openstackId)" && echo $pvnwGRA9Id
# Create the kube payload file
cat tpl/data-kube.json.tpl | sed -e "s|@privateNetworkId@|$pvnwGRA9Id|g" > tpl/data-kube.json
# Create the kube cluster
export kubeId="$(utils/ovhAPI.sh POST /cloud/project/$OS_TENANT_ID/kube "$(cat tpl/data-kube.json)" | jq -r .id)" && echo $kubeId
```
You should have a result like this:
```console
$ export pvnwGRA9Id="$(utils/ovhAPI.sh GET `/cloud/project`/$OS_TENANT_ID/network/private/${vlanId} | jq '.regions[] | select(.region=="GRA9")' | jq -r .openstackId)" && echo >> $pvnwGRA9Id
d9775b7c-c267-44b4-b758-6e827b0a69bb
$ cat tpl/data-kube.json.tpl | sed -e "s|@privateNetworkId@|$pvnwGRA9Id|g" > tpl/data-kube.json
$ cat tpl/data-kube.json
{
"region": "GRA9",
"name": "demo",
"version": "1.34",
"nodepool": {
"flavorName": "b2-7",
"antiAffinity": false,
"monthlyBilled": false,
"autoscale": false,
"desiredNodes": 3
},
"privateNetworkId": "d9775b7c-c267-44b4-b758-6e827b0a69bb",
"privateNetworkConfiguration" :{
"privateNetworkRoutingAsDefault": true,
"defaultVrackGateway": "192.168.0.1"
}
}
$ export kubeId="$(utils/ovhAPI.sh POST /cloud/project/$OS_TENANT_ID/kube "$(cat tpl/data-kube.json)" | jq -r .id)" && echo $kubeId
6bc9c71a-e570-4ed6-848b-de212fbab7da
```
**API**
🇪🇺EU▾
[GET/cloud/project/{serviceName}/network/private/{networkId}](https://eu.api.ovh.com/console/?section=/cloud&branch=v1#get-/cloud/project/-serviceName-/network/private/-networkId-)
🇪🇺EU▾
[POST/cloud/project/{serviceName}/kube](https://eu.api.ovh.com/console/?section=/cloud&branch=v1#post-/cloud/project/-serviceName-/kube)
🇪🇺EU▾
[GET/cloud/project/{serviceName}/kube](https://eu.api.ovh.com/console/?section=/cloud&branch=v1#get-/cloud/project/-serviceName-/kube)
**OVHcloud Control Panel**
Access the administration UI for your OVHcloud Managed Kubernetes clusters by clicking on Managed Kubernetes Service in the left-hand menu:

**Terraform**
:::info
You can create your networks and subnets using Terraform by following [this guide](/de/guides/public-cloud/network-services/create-private-network-gateway.md).
:::
You need to create a file, let's name it `kubernetes-cluster-test.tf` with this content:
```python
# Create your Kubernetes cluster
resource "ovh_cloud_project_kube" "cluster_terraform" {
service_name = "my_service_name" # Replace with your OVHcloud project ID
name = "cluster_terraform"
region = "GRA9"
private_network_id = "my_private_network_id" # Replace with your private network id
private_network_configuration {
private_network_routing_as_default = true
default_vrack_gateway = "192.168.0.1"
}
}
# Create your node pool and assign it to your cluster
resource "ovh_cloud_project_kube_nodepool" "node_pool" {
service_name = "my_service_name" # Replace with your OVHcloud project ID
kube_id = ovh_cloud_project_kube.cluster_terraform.id
name = "node-pool-terraform"
flavor_name = "b3-8" # Replace with the desired instance flavour
desired_nodes = 3
max_nodes = 3
min_nodes = 3
}
```
You can create your resources by entering the following command:
```console
terraform apply
```
Now wait until your OVHcloud Managed Kubernetes cluster is READY.
For that, you can check its status in the OVHcloud Control Panel:
Access the administration UI for your OVHcloud Managed Kubernetes clusters by clicking on `Managed Kubernetes Service
` in the left-hand menu:

As you can see, your new cluster is attached to `demo-pvnw` network.
And now click in your `demo` created Kubernetes cluster in order to see its status:
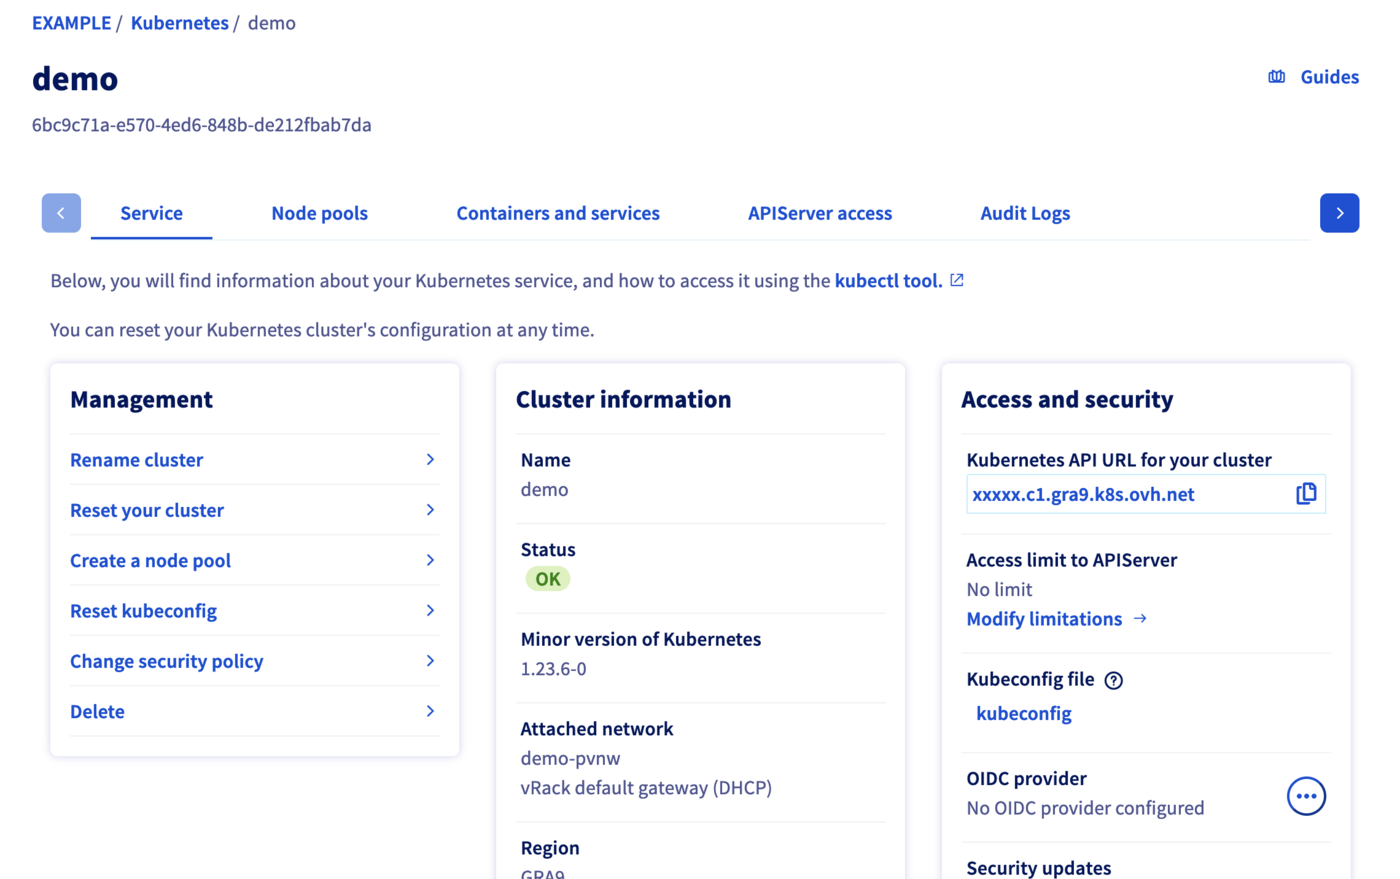
When your cluster's status is `OK`, you can go to the next section.
## Get Kubeconfig file
To proceed with the freshly created Kubernetes cluster, you must get the Kubeconfig file.
**Bash**
```bash
utils/ovhAPI.sh POST /cloud/project/$OS_TENANT_ID/kube/$kubeId/kubeconfig | jq -r .content > kubeconfig-demo
```
**API**
🇪🇺EU▾
[POST/cloud/project/{serviceName}/kube/{kubeId}/kubeconfig](https://eu.api.ovh.com/console/?section=/cloud&branch=v1#post-/cloud/project/-serviceName-/kube/-kubeId-/kubeconfig)
To use this kubeconfig file and access to your cluster, you can follow our [configuring kubectl](/de/guides/public-cloud/containers-orchestration/managed-kubernetes/configure-kubectl.md) tutorial, or simply add the `--kubeconfig` flag in your `kubectl` commands.
## Test
List the running nodes in your cluster:
```bash
kubectl --kubeconfig=kubeconfig-demo get no -o wide
```
You should obtain a result like this:
```console
$ kubectl --kubeconfig=kubeconfig-demo get no -o wide
NAME STATUS ROLES AGE VERSION INTERNAL-IP EXTERNAL-IP OS-IMAGE KERNEL-VERSION CONTAINER-RUNTIME
nodepool-8f0b4d98-874a-4cfd-b8-node-c74f26 Ready 56m v1.34.0 192.168.0.71 141.94.215.23 Ubuntu 18.04.6 LTS 4.15.0-189-generic containerd://1.4.6
nodepool-8f0b4d98-874a-4cfd-b8-node-c9bf60 Ready 57m v1.34.0 192.168.0.96 141.94.208.78 Ubuntu 18.04.6 LTS 4.15.0-189-generic containerd://1.4.6
nodepool-8f0b4d98-874a-4cfd-b8-node-e666f5 Ready 56m v1.34.0 192.168.0.31 141.94.212.214 Ubuntu 18.04.6 LTS 4.15.0-189-generic containerd://1.4.6
```
Now test the cluster by running a simple container that requests its published IP address.
```bash
kubectl --kubeconfig=kubeconfig-demo run --image=debian debian -it -- bash
apt update
apt install -y curl
curl ifconfig.me
```
You should obtain a result like this:
```console
$ kubectl --kubeconfig=kubeconfig-demo run --image=debian debian -it -- bash
If you don't see a command prompt, try pressing enter.
root@debian:/# apt update
Get:1 http://deb.debian.org/debian bullseye InRelease [116 kB]
Get:2 http://deb.debian.org/debian-security bullseye-security InRelease [48.4 kB]
Get:3 http://deb.debian.org/debian bullseye-updates InRelease [44.1 kB]
Get:4 http://deb.debian.org/debian bullseye/main amd64 Packages [8182 kB]
Get:5 http://deb.debian.org/debian-security bullseye-security/main amd64 Packages [167 kB]
Get:6 http://deb.debian.org/debian bullseye-updates/main amd64 Packages [2592 B]
...
root@debian:/# apt install -y curl
Reading package lists... Done
Building dependency tree... Done
Reading state information... Done
The following additional packages will be installed:
ca-certificates libbrotli1 libcurl4 libldap-2.4-2 libldap-common libnghttp2-14 libpsl5 librtmp1 libsasl2-2 libsasl2-modules libsasl2-modules-db libssh2-1 openssl publicsuffix
Suggested packages:
...
root@debian:/# curl ifconfig.me
141.94.209.244
```
The IP address of our Pod is indeed that of our gateway!
## Cleanup
To delete created resources, please follow these instructions:
### Kubernetes cluster
**Bash**
```bash
utils/ovhAPI.sh DELETE /cloud/project/$OS_TENANT_ID/kube/$kubeId
```
**API**
🇪🇺EU▾
[DELETE/cloud/project/{serviceName}/kube/{kubeId}](https://eu.api.ovh.com/console/?section=/cloud&branch=v1#delete-/cloud/project/-serviceName-/kube/-kubeId-)
### Routers
To delete an Openstack router, you must first remove the linked ports.
**Bash**
```bash
# Get the routers subnets attached ports Ids
export portIdGRA9="$(openstack --os-region-name=GRA9 port list | grep -w "192.168.0.1" | awk '{print $2}')" && echo $portIdGRA9
export portIdGRA11="$(openstack --os-region-name=GRA11 port list | grep -w "192.168.0.129" | awk '{print $2}')" && echo $portIdGRA11
# Get the routers Ids
export rtrIdGRA9="$(openstack --os-region-name=GRA9 router list -f json | jq -r '.[] | select(.Name=="rtr-GRA9") | .ID')" && echo $rtrIdGRA9
export rtrIdGRA11="$(openstack --os-region-name=GRA11 router list -f json | jq -r '.[] | select(.Name=="rtr-GRA11") | .ID')" && echo $rtrIdGRA11
# Remove ports from routers
openstack --os-region-name=GRA9 router remove port $rtrIdGRA9 $portIdGRA9
openstack --os-region-name=GRA11 router remove port $rtrIdGRA11 $portIdGRA11
# Delete routers
openstack router delete rtr-GRA9
openstack router delete rtr-GRA11
```
### Subnets
**Bash**
```bash
utils/ovhAPI.sh DELETE /cloud/project/$OS_TENANT_ID/network/private/$vlanId/subnet/$subnGRA9
utils/ovhAPI.sh DELETE /cloud/project/$OS_TENANT_ID/network/private/$vlanId/subnet/$subnGRA11
```
**API**
🇪🇺EU▾
[DELETE/cloud/project/{serviceName}/network/private/{networkId}/subnet/{subnetId}](https://eu.api.ovh.com/console/?section=/cloud&branch=v1#delete-/cloud/project/-serviceName-/network/private/-networkId-/subnet/-subnetId-)
### Private Network
**Bash**
```bash
utils/ovhAPI.sh DELETE /cloud/project/$OS_TENANT_ID/network/private/$vlanId
```
**API**
🇪🇺EU▾
[DELETE/cloud/project/{serviceName}/network/private/{networkId}/region/{region}](https://eu.api.ovh.com/console/?section=/cloud&branch=v1#delete-/cloud/project/-serviceName-/network/private/-networkId-/region/-region-)
## Go further
- If you need training or technical assistance to implement our solutions, contact your sales representative or click on [this link](https://www.ovhcloud.com/de/professional-services/) to get a quote and ask our Professional Services experts for assisting you on your specific use case of your project.
Join our [community of users](https://community.ovhcloud.com/).