---
title: "AI Deploy - Tutorial - Deploy an app for sentiment analysis with Hugging Face and Flask"
description: "How to deploy an app to analyse text sentiment with Hugging Face and Flask"
url: https://docs.ovhcloud.com/de/guides/public-cloud/ai-machine-learning/ai-deploy-flask-hugging-face-sentiment-analysis
lang: de
lastUpdated: 2025-06-27
---
# AI Deploy - Tutorial - Deploy an app for sentiment analysis with Hugging Face and Flask
:::info
AI Deploy is covered by **[OVHcloud Public Cloud Special Conditions](https://storage.gra.cloud.ovh.net/v1/AUTH_325716a587c64897acbef9a4a4726e38/contracts/d2a208c-Conditions_particulieres_OVH_Stack-WE-9.0.pdf)**.
:::
## Objective
The purpose of this tutorial is to show you how to deploy a web service for sentiment analysis on text using Hugging Face pretrained models.
In order to do this, you will use Flask, an open-source micro framework for web development in Python. You will also learn how to build and use a custom Docker image for a Flask application.
Overview of the app:
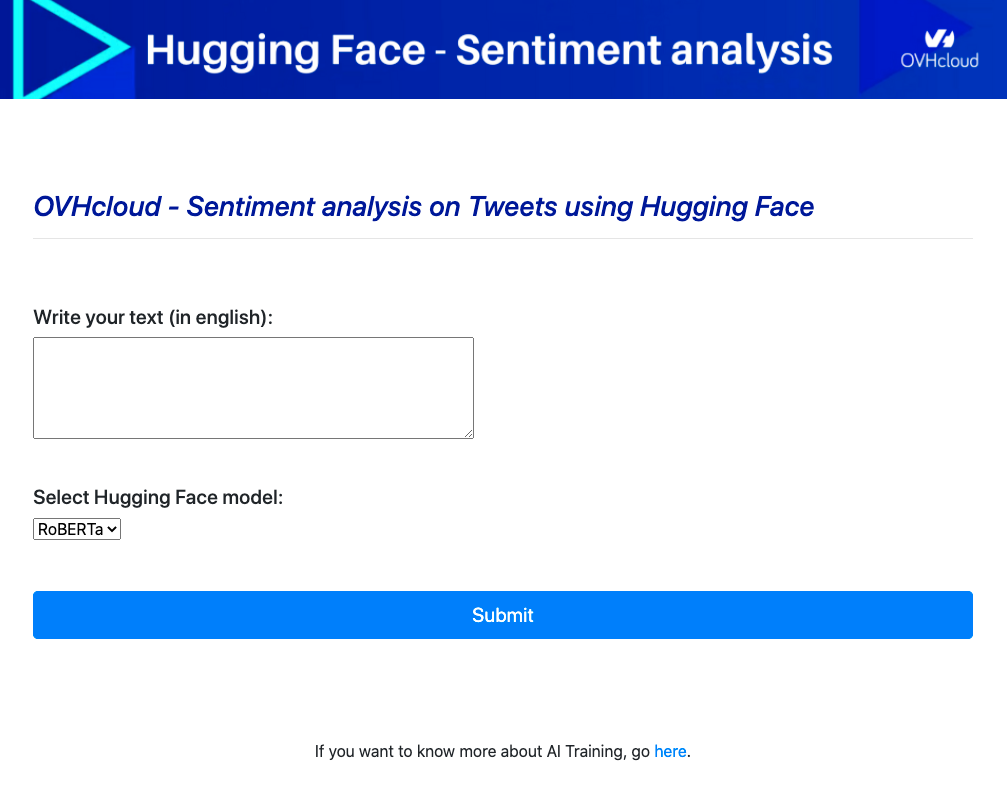
For more information about Hugging Face, please visit [https://huggingface.co/](https://huggingface.co/).
## Requirements
- Access to the OVHcloud Control Panel;
- An AI Deploy project created inside a [Public Cloud project](https://www.ovhcloud.com/de/public-cloud/) in your OVHcloud account;
- A [user for AI Deploy](/de/guides/public-cloud/ai-machine-learning/ai-users.md);
- [Docker](https://www.docker.com/get-started) installed on your local computer;
- Some knowledge about building image and [Dockerfile](https://docs.docker.com/engine/reference/builder/);
We also suggest you do some tests to find out which [Hugging Face model](https://huggingface.co/models) is right for your use case. Find examples on our [GitHub repository](https://github.com/ovh/ai-training-examples/tree/main/notebooks/natural-language-processing/text-classification/hugging-face/sentiment-analysis-twitter).
## Instructions
First, the tree structure of your folder should be as follows:
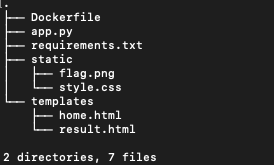
Find more information about the Flask application [here](https://flask.palletsprojects.com/en/2.0.x/quickstart/#a-minimal-application) to get ready to use it.
### Write the Flask application
Create a Python file named `app.py`.
Inside that file, import your required modules:
```python
from flask import Flask, jsonify, render_template, request, make_response
import transformers
```
Create Flask app:
```python
app = Flask(__name__)
```
Load Hugging Face models:
```python
# create a python dictionary for your models d = {: , : , ..., : }
dictOfModels = {"BERT" : transformers.pipeline('sentiment-analysis', model="nlptown/bert-base-multilingual-uncased-sentiment")}
# create a list of keys to use them in the select part of the html code
listOfKeys = []
for key in dictOfModels :
listOfKeys.append(key)
```
Write the inference function:
```python
def get_prediction(message,model):
# inference
results = model(message)
return results
```
Define the GET method:
```python
@app.route('/', methods=['GET'])
def get():
# in the select we will have each key of the list in option
return render_template("home.html", len = len(listOfKeys), listOfKeys = listOfKeys)
```
Define the POST method:
```python
@app.route('/', methods=['POST'])
def predict():
message = request.form['message']
# choice of the model
results = get_prediction(message, dictOfModels[request.form.get("model_choice")])
print(f'User selected model : {request.form.get("model_choice")}')
my_prediction = f'The feeling of this text is {results[0]["label"]} with probability of {results[0]["score"]*100}%.'
return render_template('result.html', text = f'{message}', prediction = my_prediction)
```
Start your app:
```python
if __name__ == '__main__':
# starting app
app.run(debug=True,host='0.0.0.0')
```
### Write the requirements.txt file for the application
The `requirements.txt` file will allow us to write all the modules needed to make our application work. This file will be useful when writing the `Dockerfile`.
```console
Flask==2.1.0
transformers==4.4.2
torch==1.6.0
```
Here we will mainly discuss how to write the `app.py` code, the `requirements.txt` file and the `Dockerfile`. If you want to see the whole code, please refer to the [GitHub repository](https://github.com/ovh/ai-training-examples/tree/main/apps/flask/sentiment-analysis-hugging-face-app).
### Write the Dockerfile for the application
Your `Dockerfile` should start with the `FROM` instruction indicating the parent image to use. In our case we choose to start from a Python image:
```console
FROM python:3.8
```
Create the home directory and add your files to it:
```console
WORKDIR /workspace
ADD . /workspace
```
Install the `requirements.txt` file which contains your needed Python modules using a `pip install ...` command:
```console
RUN pip install -r requirements.txt
```
Define your default launching command to start the application:
```console
CMD [ "python" , "/workspace/app.py" ]
```
Give correct access rights to **ovhcloud user** (`42420:42420`):
```console
RUN chown -R 42420:42420 /workspace
ENV HOME=/workspace
```
### Build the Docker image from the Dockerfile
From the directory containing your **Dockerfile**, run one of the following commands to build your application image:
```console
# Build the image using your machine's default architecture
docker build . -t sentiment_analysis_app:latest
# Build image targeting the linux/amd64 architecture
docker buildx build --platform linux/amd64 -t sentiment_analysis_app:latest .
```
- The **first command** builds the image using your system’s default architecture. This may work if your machine already uses the `linux/amd64` architecture, which is required to run containers with our AI products. However, on systems with a different architecture (e.g. `ARM64` on `Apple Silicon`), the resulting image will not be compatible and cannot be deployed.
- The **second command** explicitly targets the `linux/AMD64` architecture to ensure compatibility with our AI services. This requires `buildx`, which is not installed by default. If you haven’t used `buildx` before, you can install it by running: `docker buildx install`
:::info
The dot `.` argument indicates that your build context (place of the **Dockerfile** and other needed files) is the current directory.
The `-t` argument allows you to choose the identifier to give to your image. Usually image identifiers are composed of a **name** and a **version tag** `:`. For this example we chose **sentiment\_analysis\_app:latest**.
:::
### Test it locally (optional)
Launch the following **Docker command** to launch your application locally on your computer:
```console
docker run --rm -it -p 5000:5000 --user=42420:42420 sentiment_analysis_app:latest
```
:::info
The `-p 5000:5000` argument indicates that you want to execute a port redirection from the port **5000** of your local machine into the port **5000** of the Docker container. The port **5000** is the default port used by **Flask** applications.
:::
:::warning
Don't forget the `--user=42420:42420` argument if you want to simulate the exact same behaviour that will occur on **AI Deploy apps**. It executes the Docker container as the specific OVHcloud user (user **42420:42420**).
:::
Once started, your application should be available on `http://localhost:5000`.
### Push the image into the shared registry
:::warning
The shared registry should only be used for testing purposes. Please consider creating and attaching your own registry. More information about this can be found [here](/de/guides/public-cloud/ai-machine-learning/ai-manage-registries.md). The images pushed to this registry are for AI Tools workloads only, and will not be accessible for external uses.
:::
Find the address of your shared registry by launching this command:
```console
ovhai registry list
```
Login on the shared registry with your usual AI Platform user credentials:
```console
docker login -u -p
```
Push the compiled image into the shared registry:
```console
docker tag sentiment_analysis_app:latest /sentiment_analysis_app:latest
docker push /sentiment_analysis_app:latest
```
### Launch the AI Deploy app
The following command starts a new app running your Flask application:
```console
ovhai app run --default-http-port 5000 --cpu 4 /sentiment_analysis_app:latest
```
:::info
`--default-http-port 5000` indicates that the port to reach on the app URL is the `5000`.
`--cpu 4` indicates that we request 4 CPUs for that app.
Consider adding the `--unsecure-http` attribute if you want your application to be reachable without any authentication.
:::
## Go further
- You can also imagine deploying an Object Detection model with **Flask** in this [tutorial](/de/guides/public-cloud/ai-machine-learning/ai-deploy-web-service-yolov5.md).
- Discover an other tool to deploy easily AI models: **Gradio**. Refer to this [documentation](/de/guides/public-cloud/ai-machine-learning/ai-deploy-gradio-sketch-recognition.md).
If you need training or technical assistance to implement our solutions, contact your sales representative or click on [this link](https://www.ovhcloud.com/de/professional-services/) to get a quote and ask our Professional Services experts for a custom analysis of your project.
## Feedback
Please send us your questions, feedback and suggestions to improve the service:
- On the OVHcloud [Discord server](https://discord.gg/ovhcloud)