---
title: "Public VCF as-a-Service Migration with VCDA - Getting Started"
description: "Find out how to prepare the migration of your VMware workloads to your Public VCF as-a-Service organisation using VMware Cloud Director Availability (VCDA)"
url: https://docs.ovhcloud.com/de/guides/hosted-private-cloud/powered-by-vmware/vcda-getting-started
lang: de
lastUpdated: 2026-06-09
---
# Public VCF as-a-Service Migration with VCDA - Getting Started
## Objective
OVHcloud offers a migration feature for the Public VCF as-a-Service product based on **VMware Cloud Director Availability (VCDA)**. This solution lets VMware customers running an on-premises vSphere or VMware Cloud Director environment migrate their virtual machines to their Public VCF as-a-Service organisation at OVHcloud.
**This guide introduces the feature, its architecture and the preparation steps: downloading the VCDA appliance, deploying it locally and running the initial setup.**
:::info
Once you have completed this guide, refer to [Trigger your first VCDA migration to Public VCF as-a-Service](/de/guides/hosted-private-cloud/powered-by-vmware/vcda-trigger-migration.md) to start your first migration.
:::
## Requirements
- An active [Public VCF as-a-Service](https://www.ovhcloud.com/de/lp/vmware-vcd-evolution/) organisation.
- The VCDA migration option enabled on the organisation from your OVHcloud Control Panel. If needed, refer to [Enable the VCDA migration option on your Public VCF as-a-Service organisation](/de/guides/hosted-private-cloud/powered-by-vmware/vcda-enable-offer.md).
- A source environment running VMware vSphere or VMware Cloud Director on-premises.
- An account on the [Broadcom Support](https://support.broadcom.com/) portal to download the **VMware Cloud Director Availability** appliance.
- Administrator credentials on your source vCenter (SSO user).
## Instructions
### Understanding the Public VCF as-a-Service migration feature
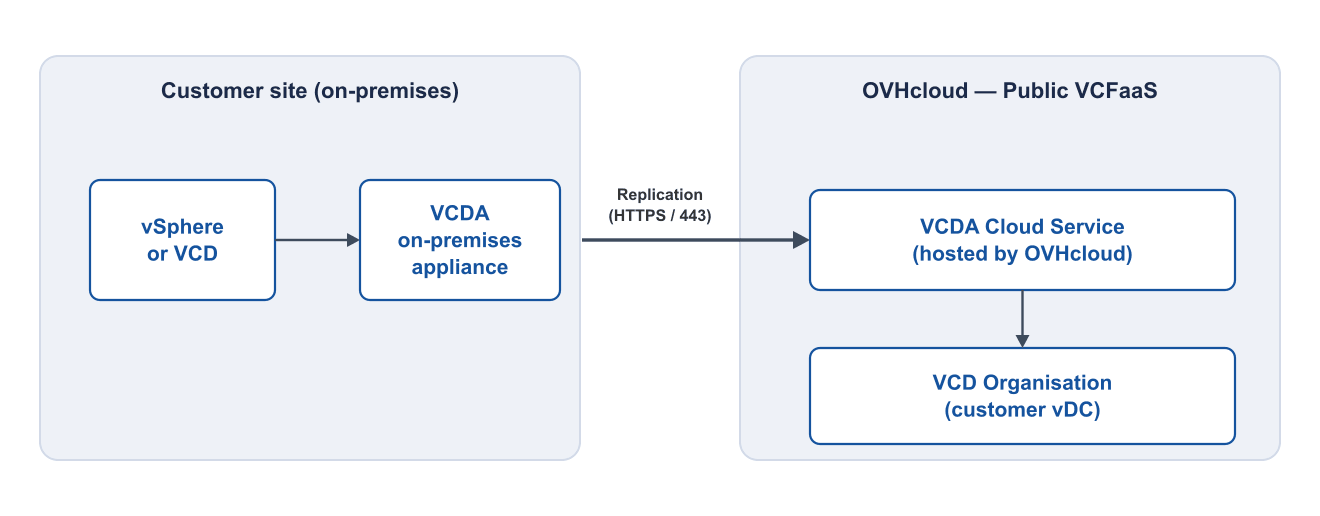
The Public VCF as-a-Service migration feature is based on **VMware Cloud Director Availability (VCDA)**, a VMware solution dedicated to replicating and migrating virtual machines between vSphere and Cloud Director environments.
In practice, you deploy a **VCDA on-premises appliance** in your source infrastructure. This appliance is responsible for:
- establishing a secure channel (tunnel) to the VCDA service hosted by OVHcloud on the Public VCF as-a-Service side;
- replicating the disks of the selected VMs to your organisation;
- performing the cutover (migration) once replication is complete.
#### Solution architecture
The diagram below shows the data flows between your source site and your Public VCF as-a-Service organisation:
:::info
The VCDA on-premises appliance is **free** and provided by Broadcom. No additional licence is required on the OVHcloud side to use the Public VCF as-a-Service migration feature.
:::
### Step 1: Download the VCDA on-premises appliance
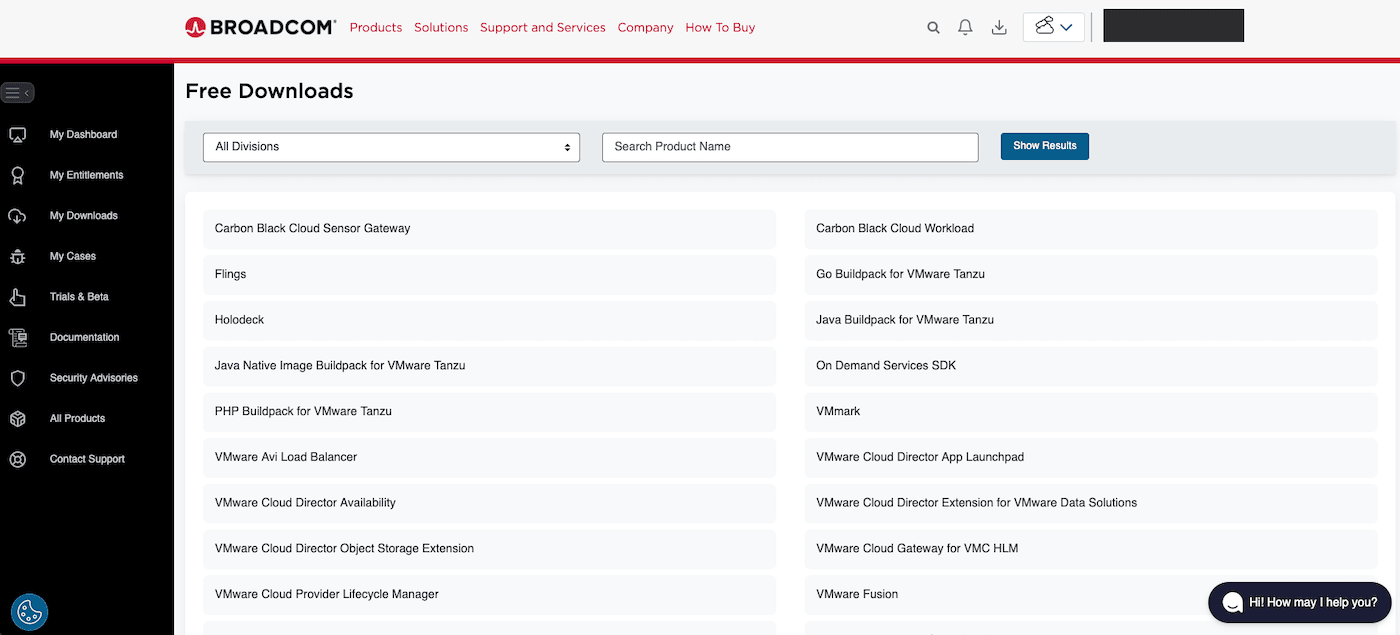
Log in to the [Broadcom Support](https://support.broadcom.com/group/ecx/free-downloads) portal with your account.
On the **Free Downloads** page, locate the **VMware Cloud Director Availability** entry.
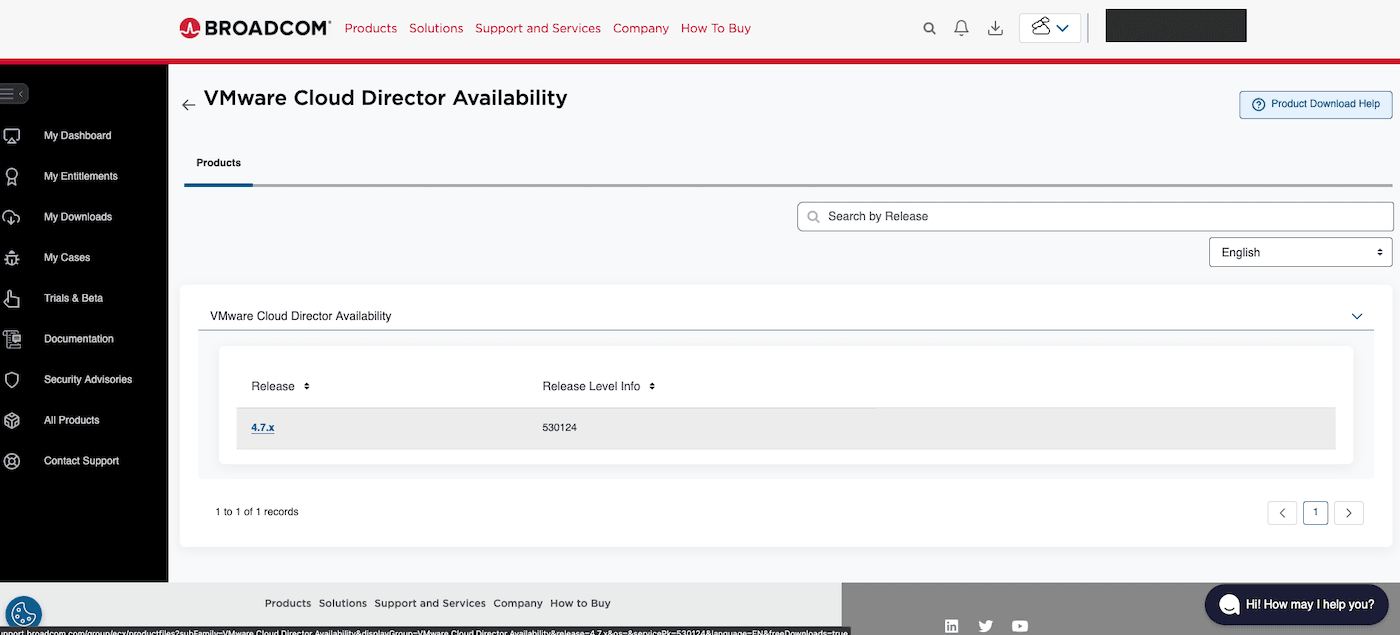
Select the latest available version (`4.7.x` at the time of writing).
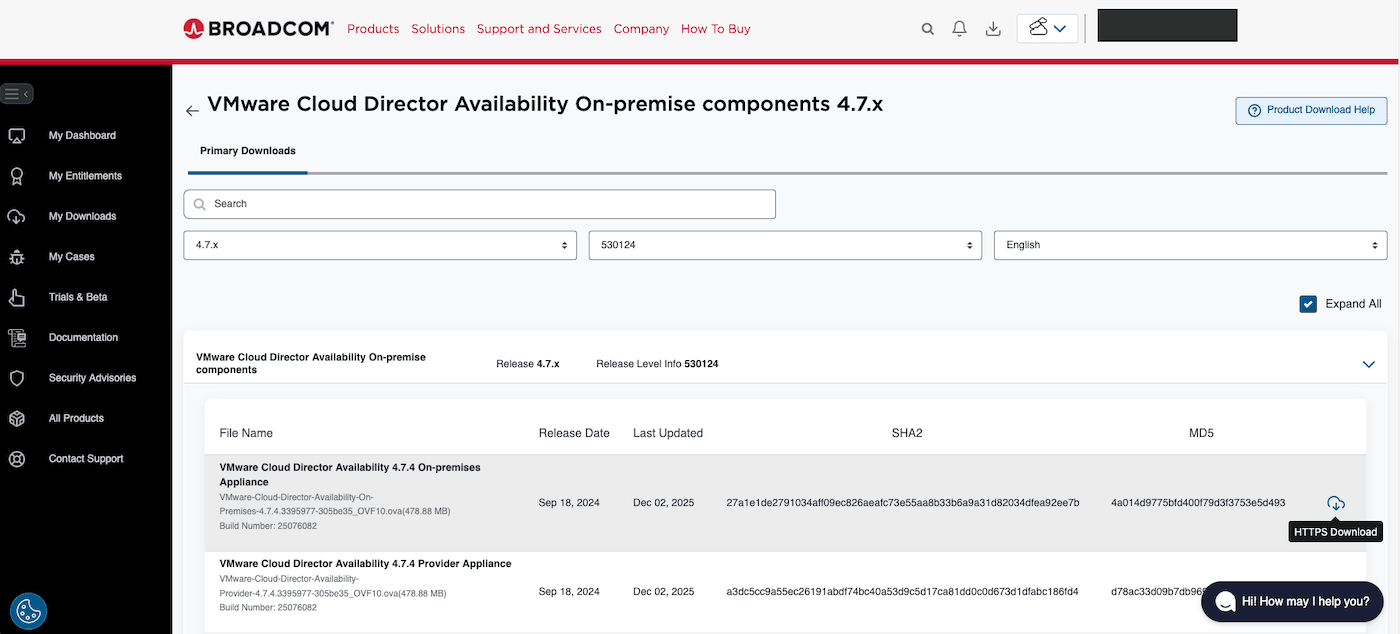
Then download the **VMware Cloud Director Availability On-premises Appliance** (OVA file). Keep this file — you will use it in the next step.
### Step 2: Deploy the appliance in your source infrastructure
Once the OVA file is downloaded, deploy it in your source environment.
:::info
For detailed instructions on deploying an OVF template on vSphere, refer to the guide [Deploying an OVF template](/de/guides/hosted-private-cloud/powered-by-vmware/ovf-template.md).
For the official Broadcom documentation describing the VCDA on-premises appliance installation (prerequisites, deployment options, initial configuration), refer to [Deploying the On-Premises to Cloud Director Replication Appliance](https://techdocs.broadcom.com/us/en/vmware-cis/live-recovery/cloud-director-availability/4-7/on-prem-availability-install-config-and-upgrade-guide-4-7/installing-and-configuring-vcav-on-premises/deploying-the-vcda-on-prem-appliance.html).
:::
During the deployment, pay attention to the following parameters:
- **Network**: select a network that allows the appliance to reach:
- your source vCenter / VCD (Lookup Service);
- the OVHcloud VCDA service on the Internet (HTTPS / port 443).
- **IP configuration**: assign a static IP address to the appliance for easier access.
- **Root password**: set a strong password following security best practices.
### Step 3: Connect to the appliance administration portal
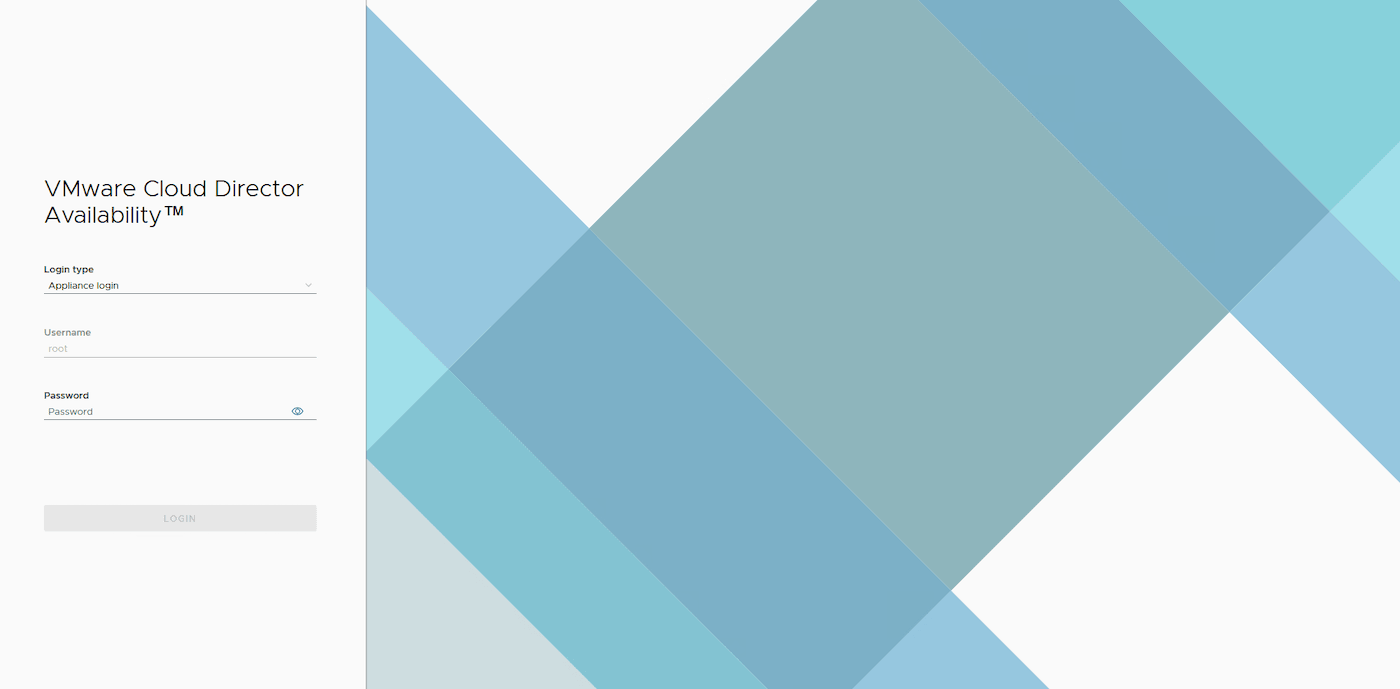
Once the appliance is deployed and powered on, access its web interface from a browser:
```
https://
```
Log in with the **root** account and the password defined during deployment.
### Step 4: Initialise the appliance
Once logged in, the VMware Cloud Director Availability interface is displayed. In the **Getting Started**
section, click `Run the initial setup wizard
` to start the initialisation wizard.
In the **Initial Setup** window, fill in the following fields:
| Field | Description | Example |
| -------------------------- | --------------------------------------------- | ------------------------------------------------ |
| **Site name** | Descriptive name identifying your source site | `my-onprem-site` |
| **Lookup Service Address** | URL of your vCenter Lookup Service | `https:///lookupservice/sdk` |
| **SSO Admin Username** | User with SSO administrator rights | `administrator@vsphere.local` |
| **Password** | Password of the SSO account | _(your password)_ |
Click `Apply
`, then accept the server certificate when prompted.
The initial setup completes automatically. The main dashboard of the appliance is then displayed:
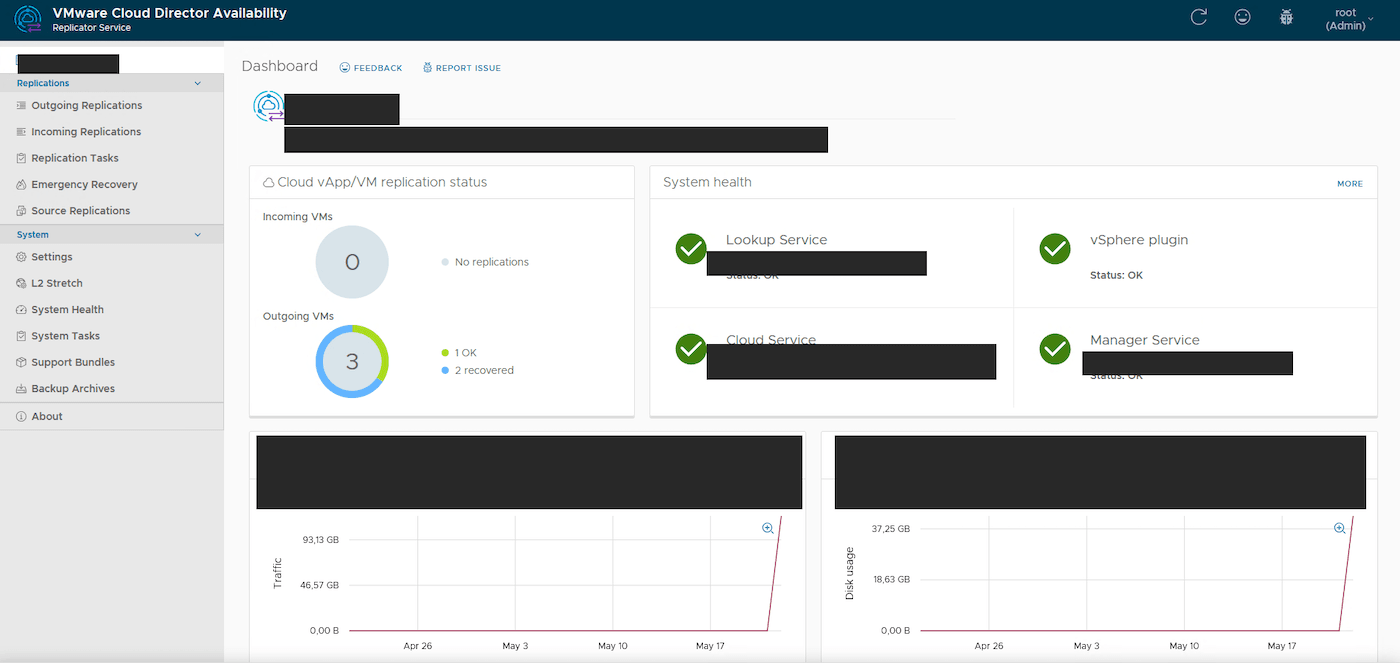
In the **System health** section, check that the following services have the **OK** status:
- Lookup Service
- vSphere plugin
- Cloud Service
- Manager Service
:::warning
If one of the services is in error, check:
- the network connectivity between the appliance and your vCenter;
- the validity of the SSO credentials;
- that the appliance has Internet access on port `443`.
:::
### Step 5: Pair the appliance with your Public VCF as-a-Service organisation
Pairing means declaring the OVHcloud VCDA cloud service as a remote site of your on-premises appliance. Perform it from the VCDA on-premises UI through a guided wizard.
From the left menu, click `Settings
`. In the remote sites list, click `New Cloud Pairing
` to open the wizard.
#### Step 5.1: Site Details
Enter the information identifying your site to the cloud provider:
| Field | Description | Example |
| --------------- | -------------------------------------------------- | ---------------- |
| **Site name** | Descriptive name for your on-premises vSphere site | `my-onprem-site` |
| **Description** | Free-form description of the site | _(optional)_ |
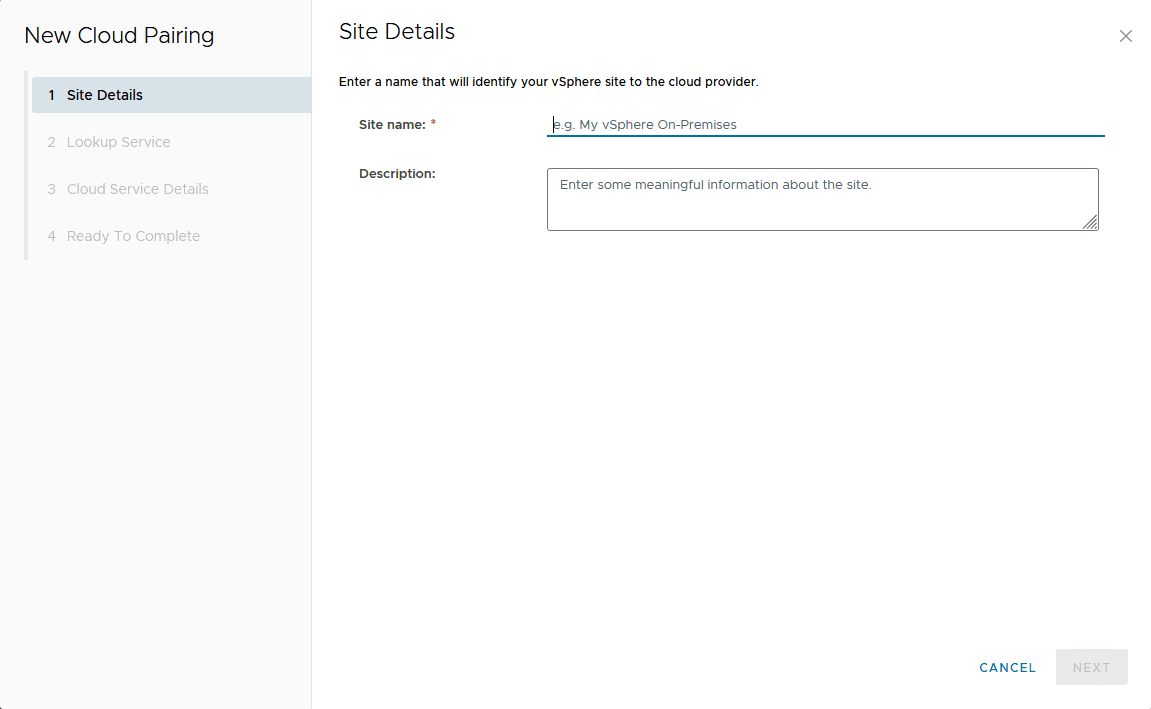
Click `Next
`.
#### Step 5.2: Lookup Service
Enter the connection details for your source vCenter **Lookup Service**:
| Field | Description | Example |
| -------------------------- | ---------------------------------- | ---------------------------------------------------- |
| **Lookup Service Address** | URL of your vCenter Lookup Service | `https://:443/lookupservice/sdk` |
| **SSO Admin Username** | User with SSO administrator rights | `administrator@vsphere.local` |
| **Password** | Password of the SSO account | _(your password)_ |
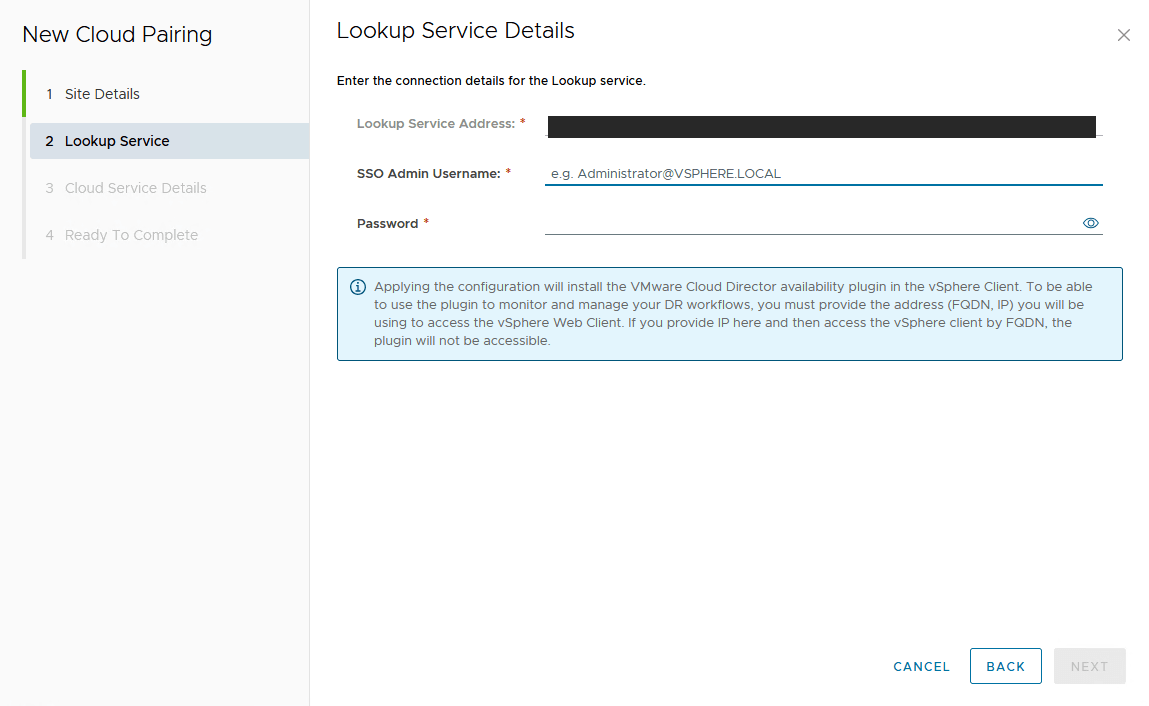
:::warning
Applying the configuration installs the **VMware Cloud Director Availability** plugin in your vSphere Client. To be able to use the plugin, the address you enter (FQDN or IP) must match the one you will use to access the vSphere Web Client.
:::
Click `Next
`.
#### Step 5.3: Cloud Service Details
Enter the connection details for the OVHcloud VCDA service associated with your Public VCF as-a-Service organisation:
| Field | Description | Value |
| ----------------------------------- | --------------------------------------------------------------- | ---------------------------------------------- |
| **Public Service Endpoint address** | Public URL of the OVHcloud VCDA service | _Provided by OVHcloud at activation_ |
| **Authorization type** | Authentication type to use | VCD Local User |
| **Organization Admin** | Administrator user of your Public VCF as-a-Service organisation | `@` |
| **Organization Password** | Password of the account | _(your password)_ |
You can also enable the following options:
- **Allow access from Cloud**: allows OVHcloud to modify existing replications and perform migrate/failover operations from the Cloud Director portal;
- **Allow log collection from Cloud**: allows OVHcloud to collect on-premises appliance logs for support purposes.
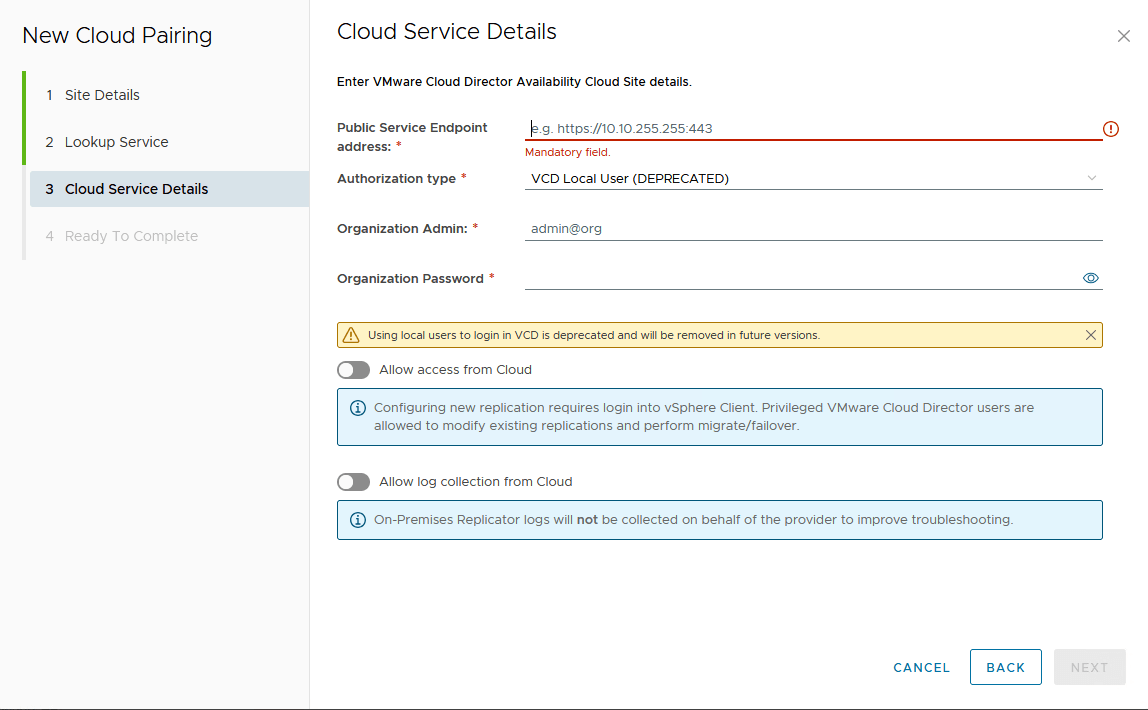
Click `Next
`.
#### Step 5.4: Ready To Complete
Review the pairing summary and click `Finish
` to complete the configuration.
Once paired, the OVHcloud cloud site appears in the remote sites list of your appliance. You can now start your first migration by following the [Trigger your first VCDA migration to Public VCF as-a-Service](/de/guides/hosted-private-cloud/powered-by-vmware/vcda-trigger-migration.md) guide.
## Go further
- [Enable the VCDA migration option on your Public VCF as-a-Service organisation](/de/guides/hosted-private-cloud/powered-by-vmware/vcda-enable-offer.md)
- [Trigger your first VCDA migration to Public VCF as-a-Service](/de/guides/hosted-private-cloud/powered-by-vmware/vcda-trigger-migration.md)
- [How to use the Public VCF as-a-Service user interface](/de/guides/hosted-private-cloud/powered-by-vmware/vcd-getting-started-dashboard-overview.md)
- [Official VMware Cloud Director Availability documentation](https://techdocs.broadcom.com/us/en/vmware-cis/cloud-director/vmware-cloud-director-availability.html)
For training or technical assistance implementing our solutions, contact your sales representative or visit our [Professional Services](https://www.ovhcloud.com/de/professional-services/) page to request a quote and have your project analysed by our experts.
Join our [community of users](https://community.ovhcloud.com/).