---
title: "Enabling NSX-T in a Hosted Private Cloud VMware on OVHcloud"
description: "Find out how to add the rights to a user and to the Datacentres for NSX-T"
url: https://docs.ovhcloud.com/de/guides/hosted-private-cloud/powered-by-vmware/nsx-add-user-rights
lang: de
lastUpdated: 2026-06-11
---
# Enabling NSX-T in a Hosted Private Cloud VMware on OVHcloud
## Objective
This guide explains how to add read rights to a user so they can access the NSX-T web console of your Hosted Private Cloud - VMware on OVHcloud.
These rights are granted from the OVHcloud Control Panel
.
***
### OVHcloud Control Panel Access
- **Direct link:** [VMware vSphere](https://manager.eu.ovhcloud.com/#/dedicated/dedicated_cloud)
- **Navigation path:** Hosted Private Cloud > Managed VMware vSphere > Select your vSphere service
***
## Requirements
- A subscription to a [Hosted Private Cloud](https://www.ovhcloud.com/de/hosted-private-cloud/vmware/) plan with the **"Network Security Virtualization"** or **"Software-Defined Datacenter"** options
- You must be the administrator contact of the VMware infrastructure on OVHcloud, as this contact receives the login credentials.
- You must have completed the steps in this documentation: [Getting started with NSX](/de/guides/hosted-private-cloud/powered-by-vmware/nsx-first-steps.md)
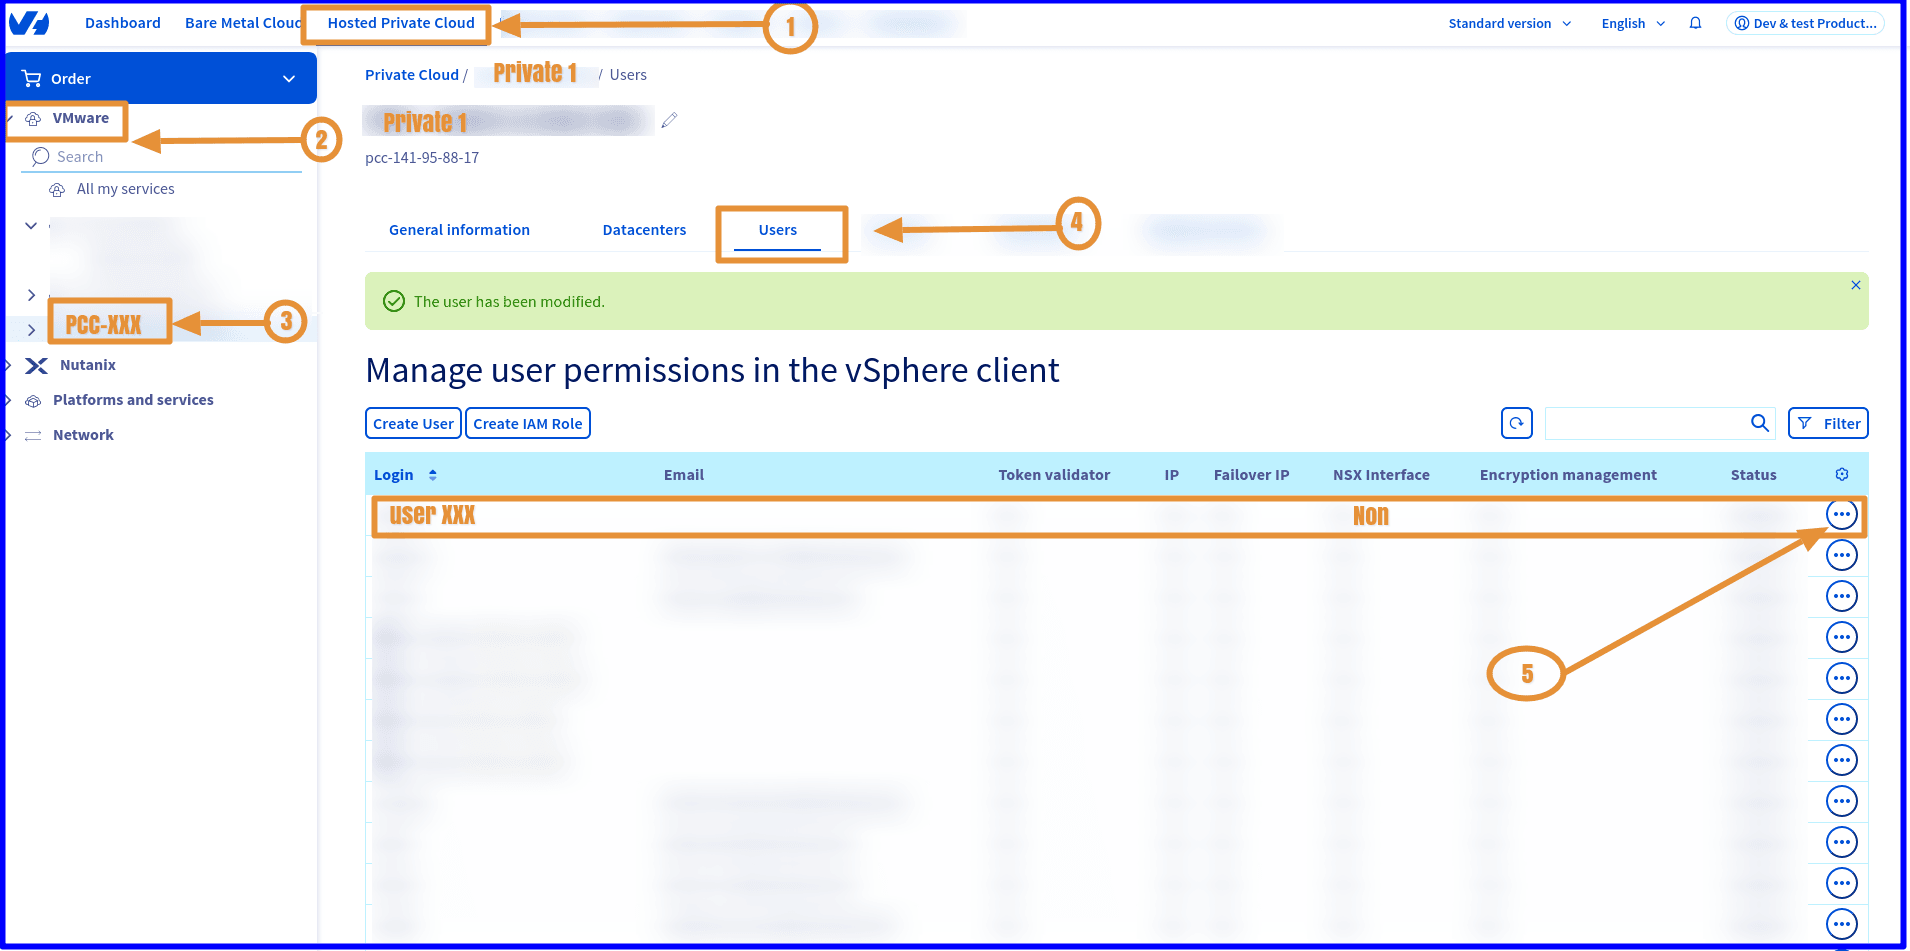
## Instructions
### Step 1 - Enabling NSX-T
How do I enable the NSX-T interface for my user?
Edit the user with whom you want to access the NSX-T web interface:
VMware > PCC-XXX.XXX.XXX.XXX > Users > Modify then enable the NSX Interface button.

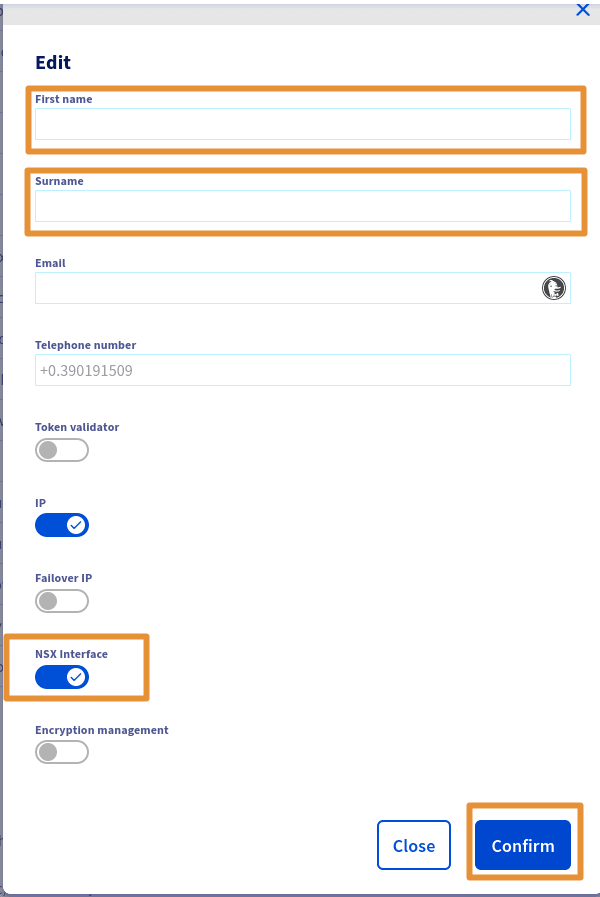
### Step 2 - Adding NSX-T rights
How do I add the rights for my user?
Click: VMware > PCC-XXX-XXX-XXX-XXX > Users > Modify.
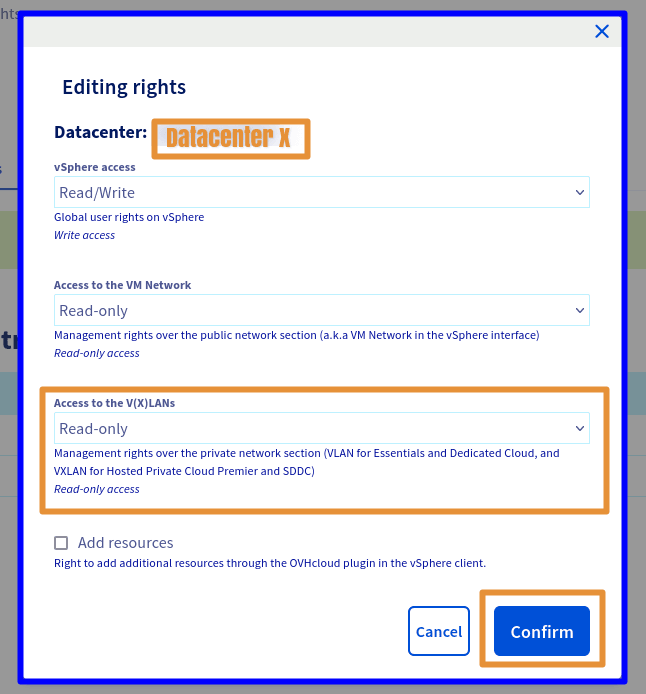
### Step 3 - Adding NSX-T rights to the Datacentres
How do I add the rights to the Datacentres?
All that is left to do is modify the rights for each desired Datacenter by clicking: VMware > PCC-XXX-XXX-XXX-XXX > Users > View/Edit the rights for each DC > Modify.
A window then opens. Choose the necessary rights from the 3 main sections > vSphere access / Access to the VM Network / Access to V(X)LANs.
The following rights are available: Operator / Administrator / None / Read-only
Only Read-only access to the V(X)LANs is required to access the NSX-T web interface.
Choose Read-only.
If you want to make changes in the NSX-T web interface, additional rights will then be required, such as Operator or Administrator.
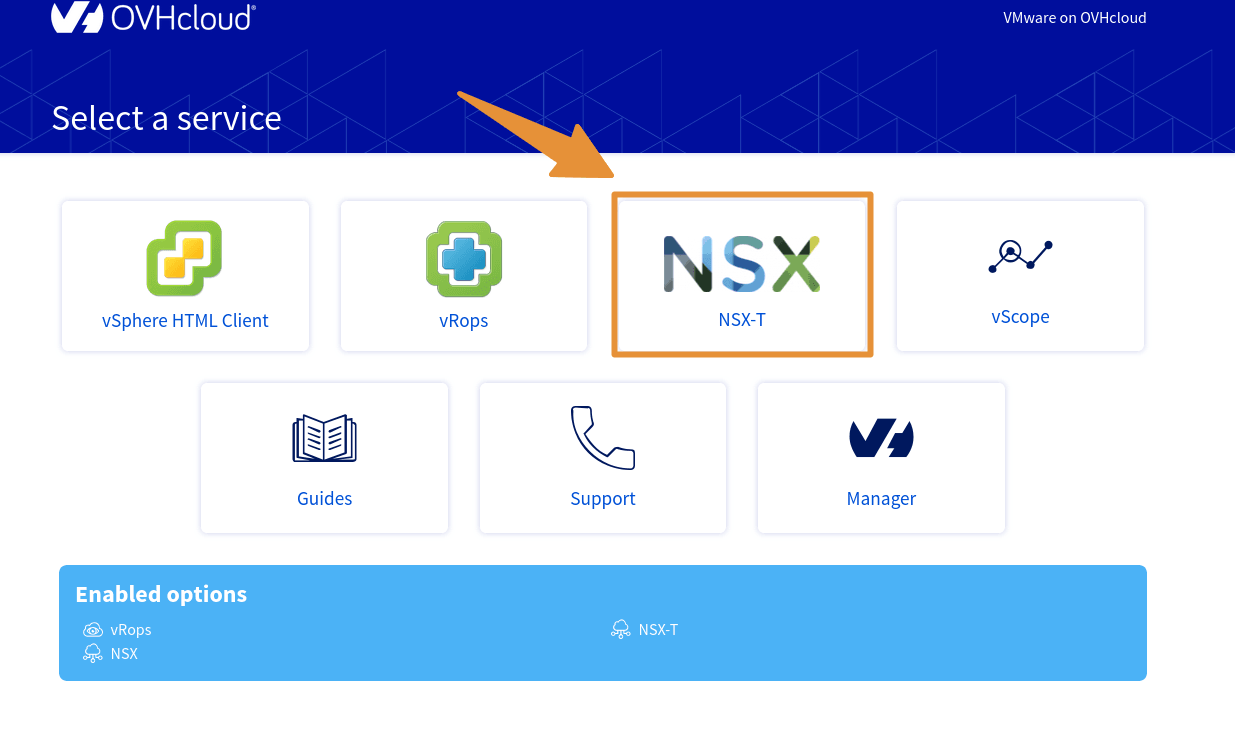
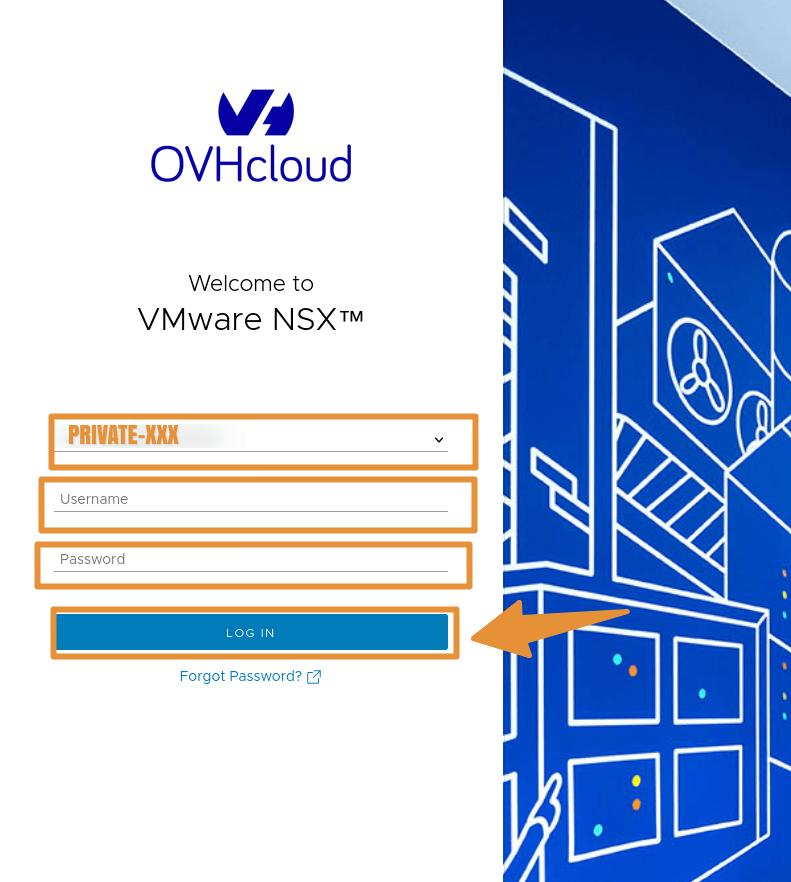
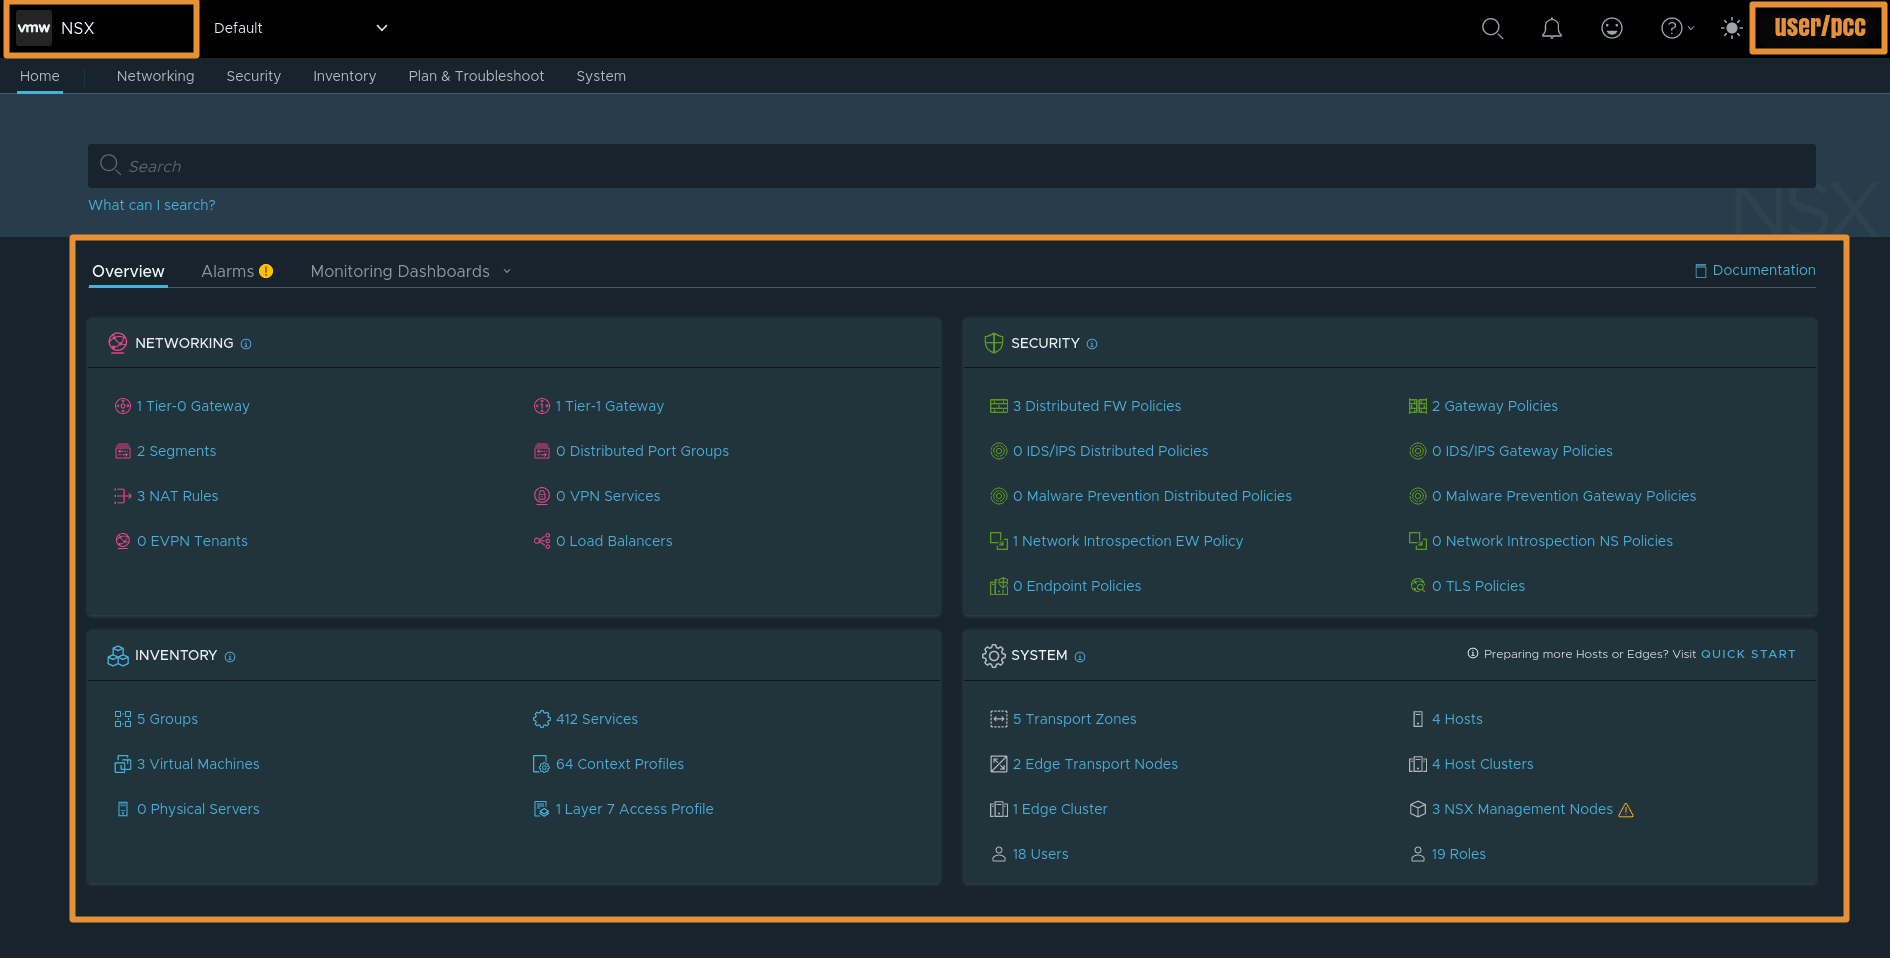
### Step 4 - Accessing the NSX-T interface
How do I access the NSX-T web interface?
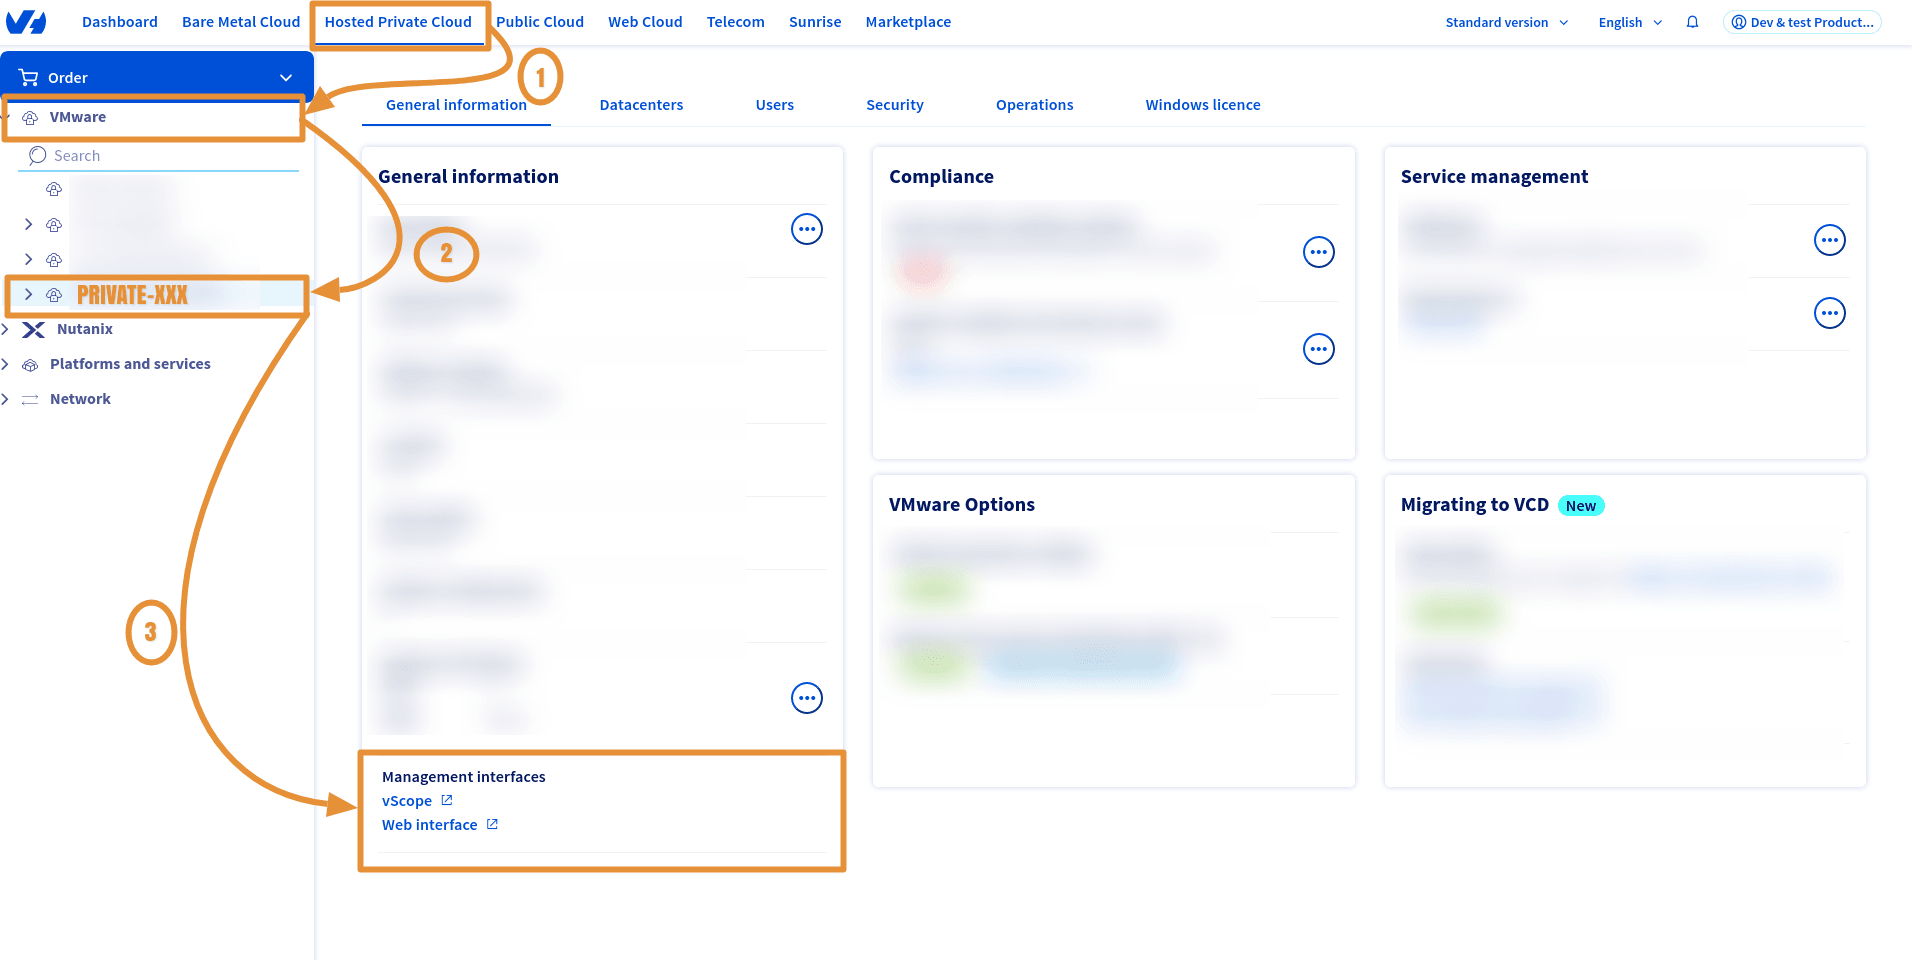
Still from your Hosted Private Cloud tree, click VMware > PCC-XXX-XXX-XXX-XXX.
- OVHcloud link: `https://www.ovh.com/manager/#/dedicated/dedicated_cloud/PCC-XXX-XXX-XXX-XXX` > Replace PCC-XXX-XXX-XXX-XXX with the name of your PCC service.
### Step 5 - Useful information
You can check whether NSX-T is enabled on your Datacenter. You can also find your NSX-T URL and its version:
#### Via the OVHcloud API
🇪🇺EU▾
[GET/dedicatedCloud/{serviceName}/nsxt](https://eu.api.ovh.com/console/?section=/dedicatedCloud&branch=v1#get-/dedicatedCloud/-serviceName-/nsxt)
> **Parameters:**
>
> serviceName: The reference of your PCC in the form `pcc-XX-XX-XX-XX`.
Example response:
```shell
{
"version": "4.1.1.0.0-22224312",
"state": "enabled",
"url": "https://nsxt.pcc-XX-X-X-X.ovh.X",
"datacentersState": [
{
"id": 1542,
"state": "disabled"
},
{
"state": "enabled",
"id": 1345
}
]
}
```
:::info
Find out more about the OVHcloud API in our guide "[Getting started with the OVHcloud API](/de/guides/manage-and-operate/api/first-steps.md)".
:::
## Go further
- [Managing segments in NSX](/de/guides/hosted-private-cloud/powered-by-vmware/nsx-segment-management.md)
- [NSX FAQ](/de/guides/hosted-private-cloud/powered-by-vmware/nsx-faq.md)
If you need training or technical assistance to implement our solutions, please contact your sales representative or click [this link](https://www.ovhcloud.com/de/professional-services/) to get a quote and request a personalised analysis of your project from our Professional Services team.
Join our [community of users](https://community.ovhcloud.com/).